- In Photoshop, you can combine vector graphics with photos to create unique compositions.
- In After Effects, you can animate your designs or overlay them onto video footage.
- In Dreamweaver, you can paste graphics directly into a web page you're working on. You don't even have to save your Illustrator file.
- In Dimension, apply your design to photorealistic 3D objects such as coffee cups, shopping bags, boxes, and more. Quite useful for selling a concept to a client.
- In XD, insert your work into a user experience prototype that you can view on your phone and share with others.
Almost every creative software application from Adobe accommodates graphics from Illustrator. The possibilities of what you can imagine and create are endless.
Learning Objectives
In this lecture, you can expect to:
- Explore the Illustrator user interface.
- Become familiar with creating and saving new Illustrator documents properly.
- Learn how to work with various view modes and magnification settings.
- Learn a number of drawing tools and means of selecting and arranging shapes.
- Learn how to apply fill color, stroke colors, and gradients to objects.
What Are Vector Graphics?
Just by reading the introduction, you've encountered the word "vector" a few times. It's important, before we explore Illustrator further, to understand what it means.
Vector graphics are objects you create in Illustrator and they differ from graphics you create in, say, Photoshop. Vector graphics are resolution independent which means you can scale up your artwork to any size imaginable and there would be no pixelation or blurring; the quality of the work appears just as good on a postage stamp as it would on a massive billboard.
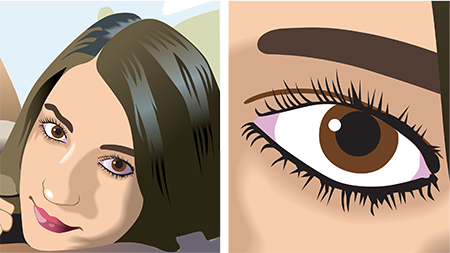
What you're looking at are vector graphics. When zooming in on the model's eye, you can see that the quality of the graphics are maintained. Keep zooming in and the quality never diminishes.
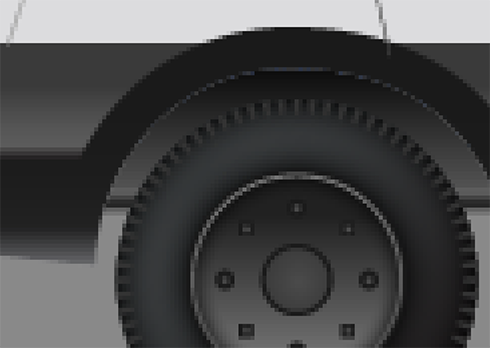
By comparison, Photoshop creates what are called raster graphics which are made up of pixels. Photoshop locks in artwork at a screen resolution you're asked to specify when creating a file. In Illustrator, you're not asked to specify a resolution. Again, it's resolution independent. In Photoshop, if you scale your artwork up, the quality diminishes and that blurriness and pixelation creeps in.
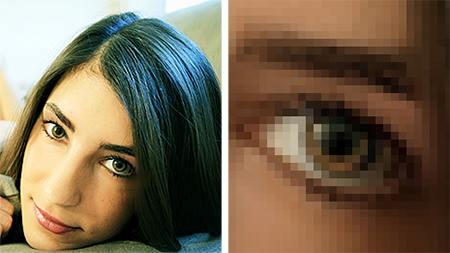
Scale up the model's eye in this raster image to the same ratio as in the vector file, you see that there can be a significant loss in the quality of the enlarged image.
With the quality of vector graphics maintained at any size, it's the go-to application for those working on logos, designs or illustrations that will be viewed on various size screens or printed onto different templates from a business card to, oh, I don't know, the side of a blimp!
The Interface
The Home Screen
If you haven't yet started Illustrator, now's the time to do just that. After seeing the splash screen—there's a new one with every major release—you'll be presented with the Home screen. From here, you can create a new document, choose from a preset document size, learn about Illustrator through tutorials (which you really should check out) as well as see files you've recently worked on.
Note
The Illustrator New Document screen lets you create a new document from scratch or from a template.
To dismiss this screen when launching Illustrator, go to Preferences > General and uncheck the Show The Home Screen When No Documents Are Open option.
New Documents
Choose Create New to launch the New Document screen where you set the parameters of your file. On the right, name your file and change the unit of measurement to Pixels. Don't worry, you will still be making vector graphics! Apply the width and height dimensions shown. Leave the Artboards setting as is. I'll discuss that a little later in the lesson.
Note
If you choose the wrong color mode when you create your new document, you can change it by going to File > Document Color Mode.
The New Document dialog features a number of preset document sizes to work with to help you on your way if you don't wish to specify your own settings.
Next, specify what color mode your document will use. Expand the Advanced Options link, to see a Color Mode menu. Designing artwork intended for screens? Choose RGB, which stands for Red, Green and Blue, colors that make up displays on TV's, tablets, smartphones and computer screens. Designing for print? Choose CMYK. Those letters represent Cyan, Magenta, Yellow and, oddly enough, Black, which correspond to ink colors on commercial printing presses. Colors in RGB and CYMK will look slightly different so to avoid any wonkiness, choose what works best for your project.
You can change the color mode in a document by going to File > Document Color Mode.
Before you commit to creating your file, note that Illustrator includes a generous amount of templates to get your project off the ground quickly. These can be found under the Mobile, Web, Print, Film & Video and Art & Illustration tabs along the top of the New Document window.

Use Adobe Bridge to manage Illustrator files and other Creative Cloud artwork.

The templates available under the Print tab.
Once you've got the document settings sorted out, click Create New... to open your file.
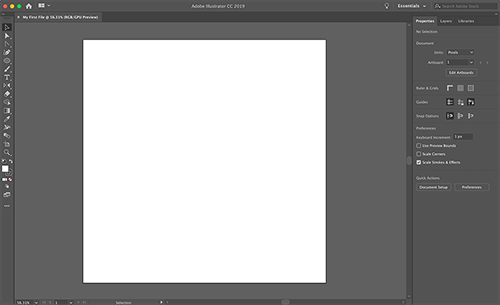
You now have a blank document to work in and a lot of tools and features. It can be intimidating, much like being led into a cockpit of a commercial jet and being told to take off. I remember fumbling about perplexed and frustrated before closing the app, which happened dozens of times before I finally committed myself to truly learning the software that I knew could elevate my ideas. From here to the end of the course material, I'll be alongside showing and explaining the features you need to know.
In your document, the white outlined rectangle is the Artboard. It represents the dimensions you defined in the New Document window.
Important
Artwork outside the Artboard boundaries will not print.
Ultimately, you want to create your artwork within the boundaries of the Artboard but you can also have artwork outside of it. However, if you print your document, only artwork within the Artboard will show up. The same applies if you save your artwork to a web friendly format such as GIF, PNG or JPEG.
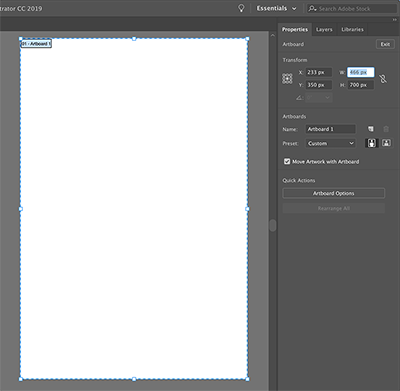
Okay, you've got your Artboard all set up but then, holy monkey nuggets, you need to change its dimensions! To the rescue comes the Artboard Tool. Press down the Shift key, then the O (the letter, not the number) key, and you'll select it in the toolbar. Draggable handles appear around the Artboard when this tool is selected. Drag them outward or inward to change the dimensions of the Artboard. For number specific precision, change the Artboard dimension values in the Properties Panel.
Note
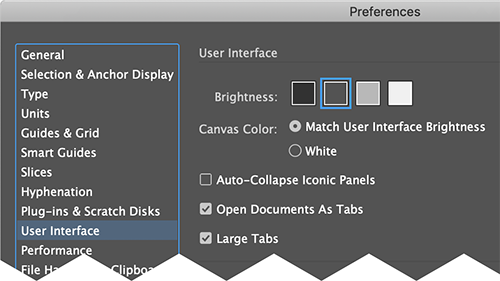
The default interface in Illustrator is rather dark. You can adjust its brightness in Preferences > User Interface.
An essential tool to help you navigate through your document and workspace is the Zoom Tool (keyboard shortcut of Z) which allows you to zoom in or out on your artwork. Click in your document to zoom in. Press and hold down the Option key (Mac) or the Alt key (Windows) with the Zoom Tool selected and click to zoom out.
If you're ever lost with whatever you're looking at, double-click the Zoom Tool in the toolbar to quickly zoom to the standard 100% view.
If you have a powerful enough GPU (Graphics Processing Unit), you can use animated zoom. Zooming in or out is smooth when you click and hold in the workspace.
Note
Multiple Artboards can be created in the New Document dialog and allow you to create multi-page documents.
Choose View > View using GPU to enable animated zoom. If you don't see this option, go to Illustrator > Preferences > Performance and enable GPU Performance and Animated Zoom. Windows users, Preferences is under the Edit menu. If these options aren't available, Illustrator has determined the GPU in your computer isn't supported.
Once enabled, you can switch back and forth between GPU and CPU (Central Processing Unit) in the View menu. CPU mode does not support animated zoom.
Outside of GPU mode, you can use the Zoom Tool to click and drag out a selection marquee around a part of your design that you want to zoom in to.
Holding down the Option key (Mac) / Alt key (Windows) as you drag a selection marquee will zoom out.
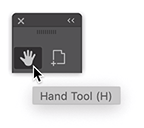
Pun alert! Another handy tool to navigate your workspace is the Hand Tool (keyboard shortcut of H). It allows you to pan around the workspace. Double-clicking the tool will fit the active artboard into your workspace. In most situations, you can also access the pan feature by holding down the Spacebar key as you drag around the workspace. This functionality is mirrored in a variety of other applications and not just Adobe products.
Note
Illustrator includes an Artboards Panel for easier management of multiple Artboards.
Workspaces
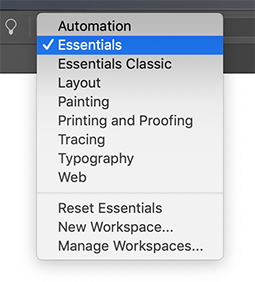
At the top of the application window is the Applications bar. Here you can launch Bridge, Adobe Stock, or access the Workspace switcher. Workspaces are the various layouts of panels and windows in Illustrator depending on the type of work that you are doing, whether it be creating an illustration (Essentials), designing a print product (Layout), or designing a web page (Web).
The default Workspace is Essentials which is what the course material will reflect. This wide-ranging setup is convenient for the majority of digital artists. However, I encourage you to check out the other options to see what's suitable for your needs.
As you work on projects, you'll invariably move panels around or close them altogether. To restore the original configuration, go to Window > Workspace > Reset. You can also save a custom configuration by going to Window > Workspace > New Workspace and entering a meaningful name. Lastly, to delete a custom workspace, go to Window > Workspace > Manage Workspace, select the Workspace name and click on the trashcan icon.
Night or Day?
Illustrator offers the ability to customize the color of the interface elements in Preferences (Mac Users: Illustrator > Preferences > User Interface / Windows Users: Edit > Preferences > User Interface). I prefer a darker mode as I feel it allows me to focus more on my work rather than the interface components.
"Tear off" the toolbar menus that you plan to use for a while, then close them when done to keep your screen organized.
Large or Small?
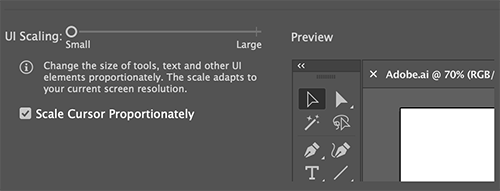
If you need tools, icons, menus, and panels to be a little larger, you can scale the user interface in Illustrator 2019. Go to Preferences > User Interface and adjust the UI Scaling slider. Depending on your screen resolution capabilities, you may have a number of options to slide to. On my MacBook Pro, I only have the two options shown.
The Toolbar
Many Adobe apps feature a toolbar as you see on the left in Illustrator. For those familiar with Photoshop, some of the tools look similar but, in most instances, the resemblance is merely cosmetic. By the way, if you don't see the toolbar, go to Window > Toolbars > Basic.
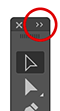
By default, there is one vertical column of tools. Expand to two columns by clicking the double-arrow icon at the top of the toolbar. You can also navigate to Window > Toolbars > Advanced.
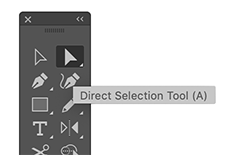
Hovering over a tool will display its name and keyboard shortcut key, if available. Look for keyboard shortcuts next to the first mention of tools throughout this course.
Use the Window menu at the top of the screen to show or hide Illustrator's various panels.
Shortcut keys will make working in Illustrator easier. I resisted learning them for too long. Once learned, my productivity increased as I didn't have to keep going back to the toolbar to change tools. For a complete list of shortcut keys, select Edit > Keyboard Shortcuts. There, you can manage shortcuts as well as print them.
Tools that display a small arrow hint at hidden tools beneath. Click and hold down on a tool until a submenu appears with the additional tools. To separate the menu from the toolbar, continue to hold down and drag the cursor over to the thin bar on the right. Release and you'll have a mini panel of those tools to move closer to your artwork. Go ahead and do this with the Rectangle Tool (M). It will display a panel of basic shapes.
Select the Ellipse Tool (L) and click and drag within the Artboard to create a circle. To make a perfect circle, hold down the Shift key as you click and drag. Release your click before you release the Shift key. If the circle isn't to your liking, undo the shape (Mac: Command + Z / Windows: Ctrl + Z) and draw a new one.
Introduced in Illustrator 2019 is a toolbar that you can configure with the tools most important to you. What's more, you can create multiple toolbars to choose from depending on the project.
Toward the bottom of the toolbar is the Edit Toolbar button. You're presented with a list of all the tools that can be crammed into the toolbar. If a tool name appears muted, it means the tool is already in the toolbar. Active appearing names of tools are not represented in the toolbar. However, you can drag the tool from the list onto the bar in one of two ways.
The first way is to drag the tool on top of another. It will be associated with that tool group.
The second way is to drag the tool in-between or next to an existing tool. This will create a space for the tool that is unassociated with any other tools. If you have a single vertical column of tools, drag in-between, above or below. For two columns, drag in-between or to a side.
At the end of the list, you can show or hide other components of the toolbar. At this time, I advise against doing so as I'll be discussing these options further in this lesson.
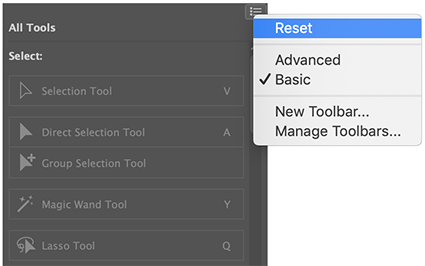
If you've made changes to the standard toolbar, reset it to its original configuration selecting Reset from the side menu of the toolbar list.
That same menu allows you to choose between a Basic or Advanced toolbar. The difference is the Advanced option shows more tools in the bar.
From the menu, choose New Toolbar to create a custom toolbar. You will be prompted to name your toolbar. Use a name that's meaningful to you and click OK. A small toolbar appears waiting to be customized. Click the Edit Toolbar option on this toolbar and start dragging tools from the list onto it.
You can select your toolbar (if you don't see it in another document) by going to Window > Toolbars.
To delete a custom toolbar, go to Window > Toolbars > Manage Toolbars, select the toolbar name and click on the trashcan icon. Click OK.
A Panopoly of Panels
On the right side of Illustrator is a configuration of panels with the Properties Panel being displayed by default. As you engage with your tools, artboards and artwork, this panel will change to only show commands and options relevant to what you're trying to accomplish.

The Properties Panel when nothing is selected.
The Properties Panel when a rectangle is selected.
In previous versions of Illustrator, the Property Panel was a horizontal bar just below the Applications bar. In the Essentials Classic Workspace (Window > Workspace > Essentials Classic), you can see this in action. It mirrors the tools in the Properties Panel so, if it suits you, close the Properties Panel altogether.
Panels can be grouped together by dragging them on top of one another. Tabs will appear above the panels that you can navigate through.
Panels not visible can be accessed via the Window menu. If you see a checkmark next to a panel name, it indicates the panel is active within the Workspace. Although the Properties, Layers and Libraries Panels are all in the Workspace, only the active panel displaying will show a checkmark in the Window menu.
Shape Drawing
Basic Shapes
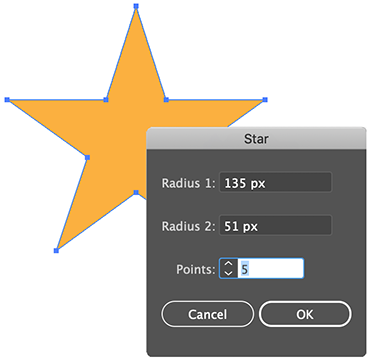
Besides the Ellipse Tool from earlier, Illustrator offers additional basic shape tools that share common functionality. For example, click the Star Tool from the tear-off menu and click once in the Artboard. Additional options appear that allow you to precisely control the dimensions of the star as well as how many points it has. Click OK and the star appears.
Of course, you can click and drag to create the shape, just like the other basic shape tools. The true power of this method comes with the use of modifier keys. As with the Ellipse Tool, you can also hold the Shift key down while clicking and dragging with the Star Tool. This will constrain the dimensions of the star.
Important
An object in Illustrator must be selected before you can make any changes to it.
To modify the number of points on the star as you click and drag, press the Up or Down key on your keyboard. The least amount of points is 3; pressing the Down key any further won't make any changes. Incidentally, this is one way to draw a triangle. The other approach, which is more suitable, is to use the Polygon Tool.
If you hold down the Command key (Mac) / Ctrl key (Windows) as you drag, you can control the length of the points on the star.
To create a perfect looking star, configure it with 5 points and then hold down the Shift key and the Option key (Mac) / Alt key (Windows) as you drag. Release the click first, then the modifier keys.
If you're in the middle of dragging out a shape and want to move it within the Artboard, hold down the Spacebar. When it's positioned where you wish, release the Spacebar and you can keep dragging to modify the shape.
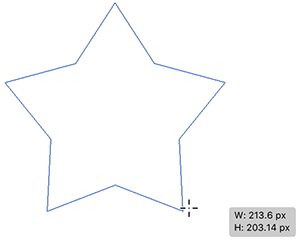
If you find the Star Tool stuck making thin and spindly stars as you click and drag, as shown below, you can "reset" the tool by using the 1-click method to enter new Radius values in the options pop-up.
Take a moment to explore the other basic shape tools as you'll rely on them to create a robot in Exercise 1. Try both methods of creating shapes: specifying values with one click in the Artboard or by clicking and dragging out shapes. Not all modifier keys discussed above will work with other shape tools.
If you have access to the tilde key (~) on your keyboard, hold it down as you click and drag out shapes to make instant.
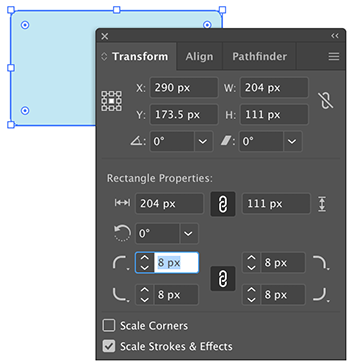
After you have drawn shapes, you can use controls on the shape to modify it. For instance, corner widgets on rectangles, stars and polygons allow you to round sharp corners. Click and drag on a corner widget to adjust corner roundness.
To change just one corner, double-click a corner widget, then click/drag the corner handle.
For more precision over these changes, open the Transform Panel (Window > Transform) and adjust the values and controls shown. These controls change depending on what shape is selected, much like the Properties Panel.
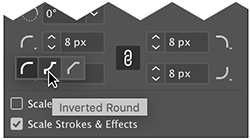
Corners don't need to just be rounded. Click on the Corner Type button and choose another style.
Note
Use drawing modes for easier management of stacking order.
To create a quick Pac-Man like shape, use the Ellipse Tool and draw a perfect circle; hold down the Shift key if using the click and drag method. Next, click and drag the pie widget. Modify the second pie widget's position as well. Keep an eye on the Transform Panel for additional options.
When you draw a shape with the Polygon Tool, a diamond symbol appears that, when dragged, changes the number of sides.
To see additional basic shape tools in the toolbar, change your Workspace to Essentials Classic (Window > Workspace > Essentials Classic).
You can perform math functions in numeric text fields. If you need to make a shape three times its current size, enter *3 after the width value and then hit the Tab key on your keyboard. Addition uses the + sign, subtraction uses the - sign, and division uses the forward slash /. Besides adjusting shape sizes, you can also move shapes using the X/Y coordinates in the Properties Panel.
At this point, you may have been dabbling with various tools and wish to save your work. The quickest way is to hold down the Command key (Mac) / Ctrl key (Windows) plus the S key. A window prompting you for a file name and save location appears. Set the file name and location and click OK. Alternatively, navigate to File > Save.
As you work, use the keyboard shortcut to save your work frequently, particularly if you make significant changes to your work.
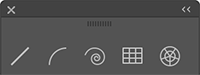
Line Shapes
The line shapes are useful for creating simple line segments (straight or curved), spirals, and grids (rectangular and circular). To view all of these tools, a change of workspace is needed. Go to Essential Classics via Window > Workspace > Essential Classics. Click and hold down on the Line Segment Tool (\) and detach the menu that appears.
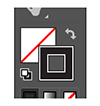
Before we get started, I want to make sure the line shapes you draw will be visible. Near the bottom of the toolbar, look for the Fill Stroke controls. They should look as they do below. If not, click the highlighted icon to reset the controls to this view.
Immediately following this topic, you'll learn more about these controls.
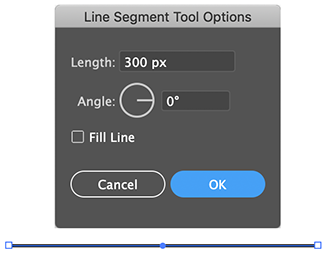
The Line Segment Tool is useful for creating a single line at any angle. You can click and drag with this tool or, for more precision, click once in the Artboard to display its options. From here, set the length and angle of the line. The Fill Line option will override the line color if you have a color applied to the solid box in the Fill Stroke controls.
If you drew any lines, you may want to reset the Fill Stroke controls again.
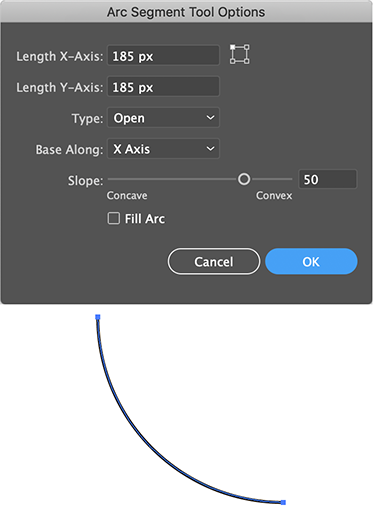
Similar to the Line Segment Tool, the Arc Segment Tool also creates single lines but these are curved. Select this tool and click the Artboard to see its options.
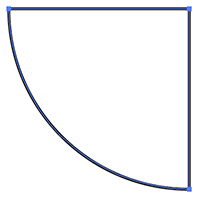
The length options set the width and height of an arc. The 4 handled icon is clickable and determines the point where the arc is drawn. I recommend setting the Type option to closed. This will create a shape with closed boundaries just like basic shapes.
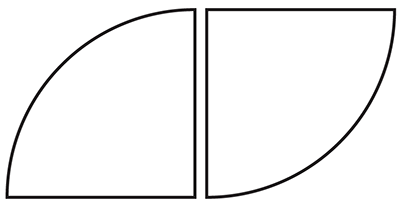
The Base Along option determines what axis the arc will be drawn around. Here's an example of a Y Axis and X Axis arc.
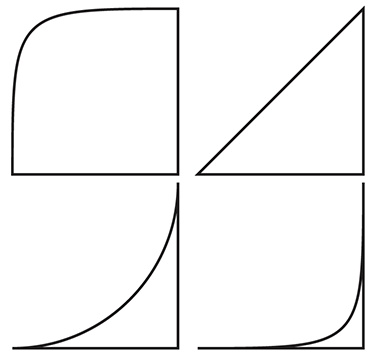
The Slope slider is where you really influence how the arc looks. Here's a sample of what shapes you can achieve by adjusting this slider.
Reset the Fill Stroke controls, if necessary. Select the Spiral Tool and, this time, click and drag within the Artboard to draw. Keep the click held down and then press the Up key to add additional segments to the spiral. The Down key will reduce the number of segments.
Bear in mind that you can hold down the Spacebar key as you drag to reposition the location of your shape.
Again, click and drag with the Spiral Tool. Keep the click held down and press and hold the Command key (Mac) / Ctrl key (Windows) as you drag to wind or unwind the spiral.
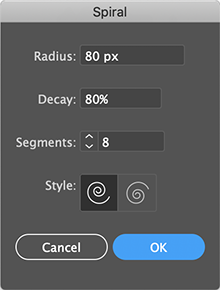
To reset the tool back to shapes that look like true spirals, remember 3 numbers: 80, 80, and 8. Click once in the Artboard with the Spiral Tool and enter those values as shown. You're encouraged to experiment with other values to see what spiral shapes you can create.
Real quick: The Style option determines what direction your spiral is drawn in.
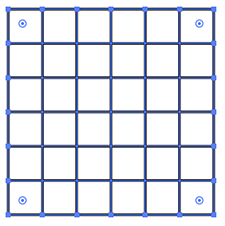
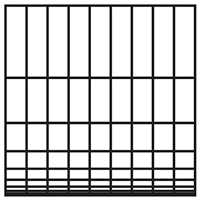
Let's look at the Grid tools. First is the Rectangular Grid Tool. Select the tool and hold down the Shift key, then click and drag to create a perfect square with smaller squares within. Release the click first, then the Shift key.
Now try the following. Drag out another rectangle and keep the click held down. Use the Up, Down and side arrow keys to control how many squares appear within the grid. Once you have the number of grids you want, press the Shift key to create a perfect square, then release the click to create the shape.
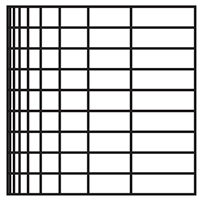
There are a few more modifier keys you can use when dragging out a grid. Pressing the X or C keys on your keyboard will move the vertical lines that form the grid to one side or the other.
Pressing the F or V keys will raise or lower the horizontal lines in the grid.
As with the other tools, you can click once in the Artboard to bring up the Rectangular Grid options, most of which can be controlled with the modifier keys I mentioned above.
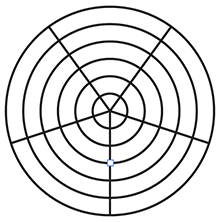
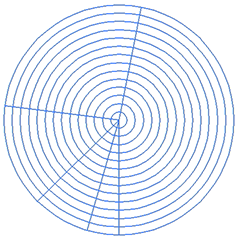
Good news! These modifier keys also work with the Polar Grid Tool. Click the tool and click and drag a grid out. Hold that Shift key down to create a perfect circle. Remember, release the click first then the Shift key.
With this tool, the Up and Down arrow keys on your keyboard control how many concentric rings appear in the grid. The Left and Right arrow keys control how many radial dividers show up.
The X and C keys will either move the concentric rings inward or outward.
Lastly, the F and V keys move the radial dividers in one direction or the other.
Be sure to check out the options of this grid tool as well by clicking once on the Artboard when it's selected.

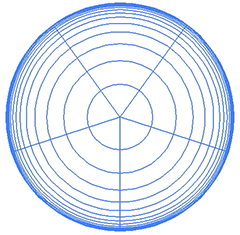
This vector lollipop (by Philip Christie) shows off what you can do with line tools such as the Spiral Tool. View the tutorial.
Global Editing
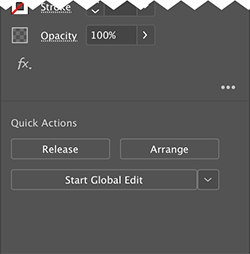
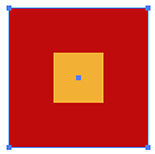
New in Illustrator 2019 is Global Editing which lets you edit an object and Illustrator will update all copies of it within your document.
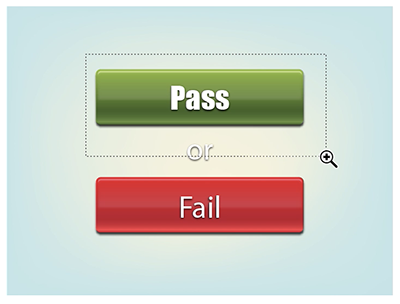
To enter this editing mode, select an object and click on Start Global Edit in the Properties Panel.
When in this mode, all but the object you are editing will be enclosed by a colored box as seen in the image above.
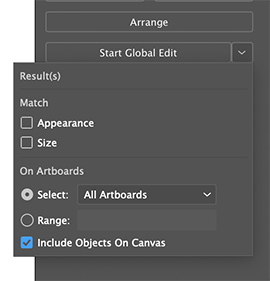
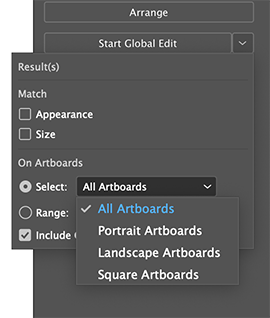
Specify what Illustrator selects and edits via the Global Edit options menu.
Under the Match options, choose Appearance to select objects that share the exact fill and/or stroke colors. Size will select similar objects that are the exact same size.
For the On Artboards section, you can tell Illustrator to select similar objects on all artboards. You can also specify landscape, portrait or square artboards from the menu.
Additional options allow you to pick a range of artboards in your document.
Lastly, Include Objects On Canvas (on by default) will select similar objects not in an artboard.
Drawing Modes
Along the bottom of the toolbar are 3 drawing modes worth taking a close look at. By default is Draw Normal. You will work in this mode more than the others.
Draw Behind gives you the ability to draw objects behind other existing objects.
Draw Inside is a mode that you can only choose when you have an object in your workspace selected. When enabled, you can draw other shapes or even type text within the selected shape. The dashed corners around the shape indicate you are in the Draw Inside mode. Once in this mode, deselect the selected shape and choose other shape tools or type tools to start creating.
Double-click an empty area of your workspace to exit or choose another drawing mode.
Double-click a shape within a shape to edit it. While in this edit mode, a status bar appears along the top of your document and other artwork becomes opaque and you can move or delete objects. Again, double-click an empty area to exit.
A Change Of Color
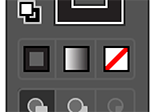
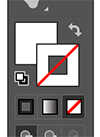
Fill Stroke Controls
All vector shapes in Illustrator are made up of two parts: the Fill and the Stroke.
The Fill is the color within the boundary of a shape. The Stroke is the border on the shape's boundary. One or the other, or both, can be visible or invisible. Basic shapes, by default, feature a white fill and a black stroke. Line shapes, by default, only feature a black stroke. There is no fill.
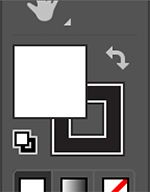
To edit, add or remove colors from either of these components, look to the Fill Stroke controls near the bottom of the toolbar. Here's a default view of these controls showing a white fill and a black stroke.
The double-arrow icon can swap the color for the fill and stroke.
The black and white icon in the lower left provides a quick reset to the default fill and stroke colors regardless of what colors are showing. You can also reset the colors by pressing the D key on your keyboard.
Coloring Controls
Below the Fill Stroke controls are the Coloring controls. These control what kind of color appears in the fill or stroke. The default is a solid color. The second option applies a gradient color. The third option sets the color to nothing or none.
The Coloring controls will only affect the control that is overlapping the other. Click either to toggle change the overlap. This configuration shows I've applied no color to the stroke since it's overlapping the fill box.
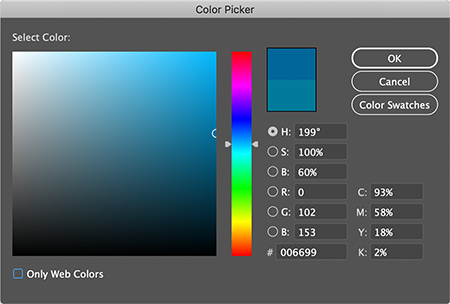
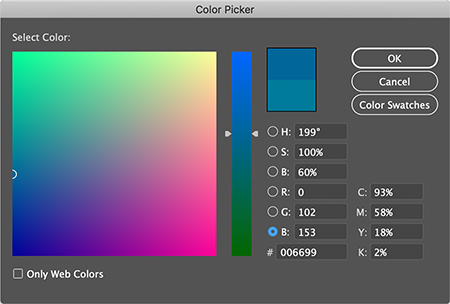
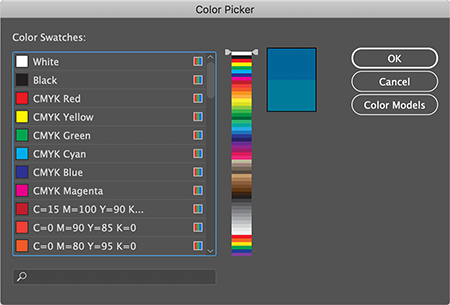
The Color Picker
Double-clicking either the fill or stroke will display the Color Picker. It will only choose solid colors even if you have either box set to a gradient color or no color. Modifying gradients will be discussed a little further down in the lesson.
Change the color spectrum view by clicking an option on the right.
Hitting Color Swatches will provide a list of colors you can navigate.
For the line shapes, other than the Rectangular and Polar Grid Tools, I don't recommend applying a fill. First, you won't even see a fill on a line segment. Second, applied to either an arc or a spiral, the fill will look incomplete.
As you can see, these two shapes have open boundaries. You mainly want to fill shapes that have closed boundaries to avoid any visual funkiness.
Different Strokes For Different Folks
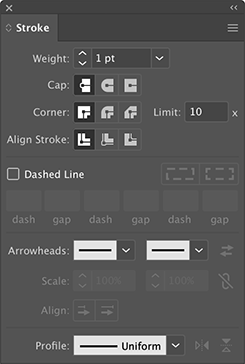
You now have a better grasp of what makes up a shape. Let's dial our focus in on tools to modify the size, shape and style of the stroke using the Stroke Panel (Window > Stroke). Double-click the panel's tab until you see all of the controls.
Stroke Weight
The Weight option controls how thick the stroke on a shape will be. Increment the weight value by 1 using the arrows, enter values manually, or choose from presets in the associated menu. The lowest value you can enter is 0.001 pt. The highest is any value you want it to be.
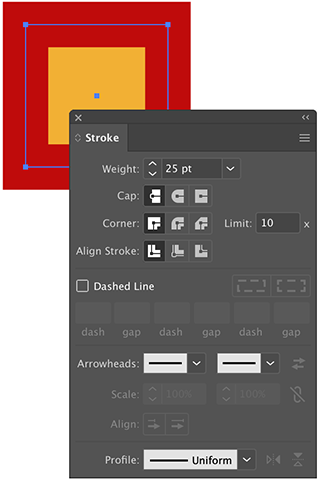
Stroke Alignment
If you set a really thick stroke on a shape, it can start to cover the fill as seen above. The Align Stroke controls can help manage how a stroke is positioned on a shape. If you select Align Stroke to Outside, the stroke is moved to outside of the shape's boundary, allowing you to see all of the fill. Note how this increases the overall size of your shape.
Consequently, Align Stroke to Inside moves the stroke width within the boundaries of a shape maintaining your shape dimensions.
The default Align Stroke to Center has the stroke equally distributed in and out of the shape boundary.
But wait, there's more!
Stroke Caps
The Cap controls style how the ends of strokes look, such as on a line segment. The default style is shown at top in the image below. Round Cap adds a rounded end to the stroke while Projecting Cap adds additional length to a stroke. This length is based on the Weight value. A value of 20, for instance, adds 10 pixels to the ends of a line.
Stroke Corners
The Corner controls determine how corners are styled. Default style is on the left. Round Join creates rounded corners while Bevel Join creates angled corners.
The Limit option sets styling on sharp angles or corners that are mitered. As an angle gets close to 180 degrees, it can create some unexpected results. To counter this, alter the Limit value. This will then crop the sharp point to something more manageable. To avoid this altogether, use rounded corners. Lowering the Limit value dismisses the sharp corners on this text.
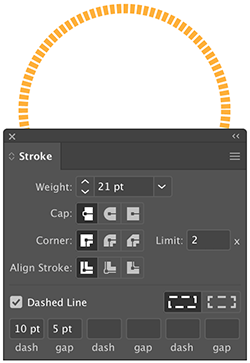
Dashed Strokes
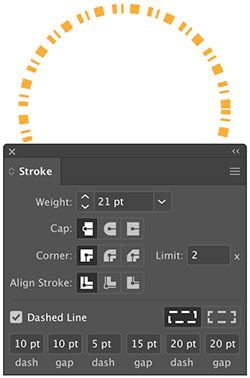
Not all strokes need to be solid. By selecting the Dashed Line options, additional controls become available. To create the simplest of dashed lines, set a width value for the dash and then a value for how wide the gap will be.
Adding additional values for the remaining dash/gap values can create unique looking dashes. Don't forget that you can adjust the stroke weight as well!
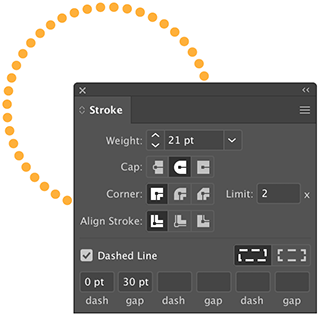
To create dashes that are made up of perfect circles, enable the Round Cap option, set the first dash value to 0 and ensure you have a gap value.
Take some time working with different values and adjusting stroke weights to see what unique looks you can achieve for strokes.
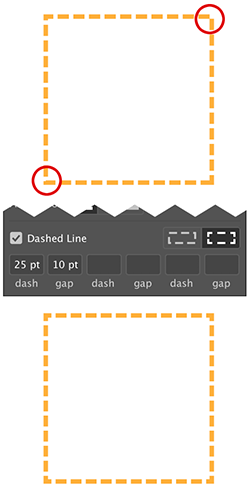
If you ever get any weird spacing issues with dashes and spacing, such as shown below, use the align dash controls. Most issues can be ironed out by selecting the second align control.
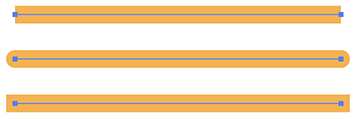
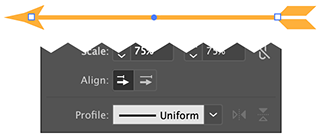
Stroke Arrowheads
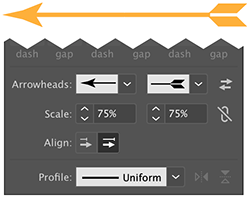
On open boundary shapes, you can further style strokes with arrowheads. Use the Line Segment Tool to draw a straight line. Choose a head style for one end and a tail style for the other. If the ends are too big, adjust the sizes with the Scale controls.
Reverse the ends with the click of the swap button.
The Align controls can extend the head and tail beyond the established start and stop point of your line segment.
Last stop on this panel is a mention of the Profile menu. It can alter the width of a line along its length. Try it out and have fun for now, particularly with dashed lines. I'll go into more detail in Lesson 2.
Selecting and Arranging Shapes
The Selection Tool & Bounding Boxes (Scale & Rotate)
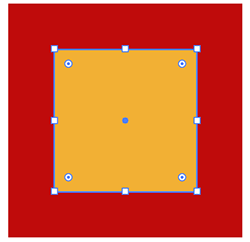
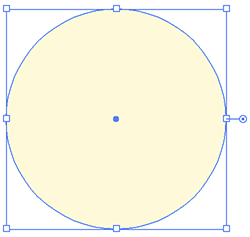
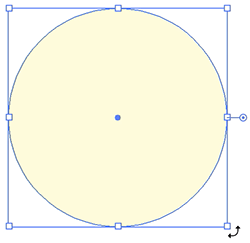
In Illustrator, objects MUST be selected before you can make changes to them. This is where the Selection Tool (keyboard shortcut of V) comes in. If you ever try something and it doesn't seem to make a difference, check that an object is selected. When a shape is selected a box with eight handles appears around it. If you don't see the box, go to View > Show Bounding Box.
This bounding box allows you to scale the size of the object. Position your cursor over a handle until you see a double-arrow cursor. Click and then drag in or out to resize the shape.
Hold down the Shift key as you drag to maintain the proportions of the shape. If you also hold down the Option key (Mac) / Alt key (Windows) with the Shift key, you will resize the object based on its center point.
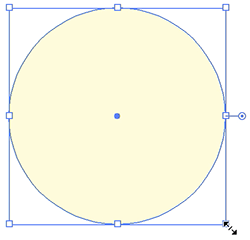
To rotate an object, position your cursor just outside of a handle until you see a curved double-arrow cursor. Click and drag to rotate. Holding down the Shift key as you drag constrains rotation to 45-degree angles.
After rotating, an object's bounding box may be at an angle. Reset the box by going to Object > Transform > Reset Bounding Box. This can make additional object editing easier for you.
To select more than one object, hold down the Shift key and click additional objects with the Selection Tool.
Make Quick Copies
Make a copy of a shape by holding down the Option key (Mac) / Alt key (Windows) as you click and drag to a side. If the shape has no fill color, you will need to drag on the edge of it.
Selection Marquee
As seen above, you can also drag out a selection marquee on objects. The marquee only needs to touch part of an object in order to select it.
The bounding box also gives you the ability to drag an object within your document. Click an object and simply drag it. If the object has a stroke but no fill color, you will need to click on the center point or the stroke in order to drag.
Deselect an object by clicking an empty area of your workspace.
Need more practice with selecting and arranging objects?
Build a Burger
Arranging Objects
You may be familiar with layers. In Photoshop, for instance, each time you draw a new object, it creates its own layer. However, in Illustrator, objects you draw remain on a single layer unless you create additional layers.
In Photoshop, you rearrange the order of the layers by dragging them above or below one another in the Layers Panel. This affects which shape is on top of another. Within Illustrator, there are a few methods to move objects above or below one another within a similar layer.
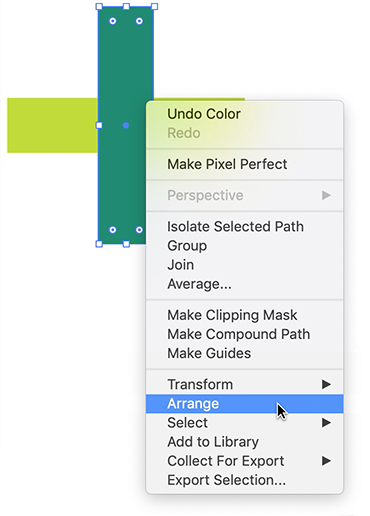
With the first method, right click on a shape and use the commands under the Arrange menu. The same commands can be found via Object > Arrange.
Bring to Front moves a selected object to the top of all other shapes. Consequently, Send to Back, moves an object below all other shapes. Bring Forward moves an object above the shape it's under. And, Send Backward, moves an object below the shape it's above.
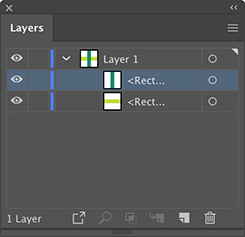
The second method is to expand the layer in the Layers Panel (Window > Layers). Open the layer by clicking the arrow to the left of the layer thumbnail image. You're presented with a list of each object on the layer. Drag these list items above or below one another just as you would layers in Photoshop.
Grouping Objects
To make moving and manipulating multiple objects easier, group them. Hold down the Shift key on your keyboard and click and object one at a time then go to Object > Group or Command (Mac) / Ctrl (Windows) plus G.
You can also use the Selection Tool to click and drag out a selection marquee onto the shapes you want to group.
When grouped, you can rotate, resize, stretch and squeeze multiple objects at once using the grouped bounding box around the shapes. Many, many other tools and controls will treat grouped objects as one.
Ungrouping is as simple as selecting grouped objects and going to Object > Ungroup.
Note that if there are multiple groups of objects grouped together, you will need to apply the Ungroup commands a number of times until it is no longer clickable in the menu bar.
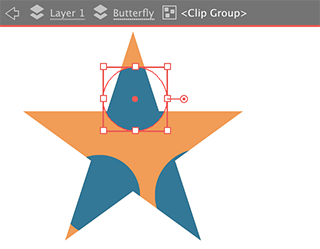
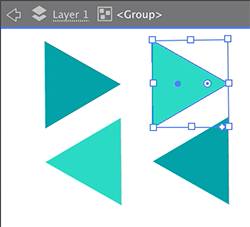
There will be a number of times where you need a modify a shape within a group. Rather than ungrouping everything, you can double-click on the group to make changes. The top of the document will display a gray bar displaying the layer and group name. Objects outside of the group will appear dimmer.
Once you're done making changes, double-click an empty area of the top bar to return to standard view.
When you insert your cursor into any form field that accepts numeric values, you can use the Up or Down arrow keys on your keyboard to quickly increase or decrease values. You don't need to highlight the number to change it.
Note
Panels with arrows next to their names can be expanded or contracted.
More Colorful Language
Earlier, I discussed how to change the color of a shape's fill and stroke using the Color Picker that you summon by double clicking a Fill Stroke control. Now, we'll explore another type of fill as well as other useful ways of applying colors to shapes.
Pattern Fills
Besides the solid color and gradient fills, patterns can be applied to both a shape's fill and stroke. There are a handful of pattern libraries available in Illustrator by navigating to Window > Swatch Libraries > Patterns. Select a shape, click a pattern and, voila, cool visuals.

The Illustrator Advanced course offers a more in-depth look at patterns as well as how to create your own.
The Swatches Panel
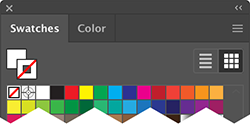
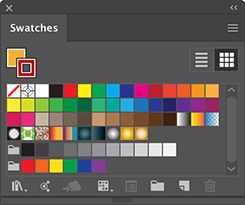
To quickly change a shape's color without using the Color Picker mentioned earlier, turn to the Swatches Panel via Window > Swatches. It features a number of swatch presets you can choose from. Not only does it feature solid colors but it has several gradient and pattern fills as well.
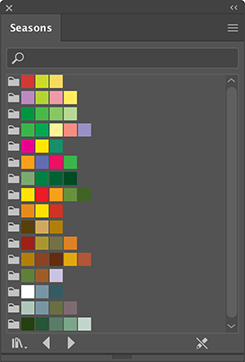
Illustrator has a large amount of pre-made themed color palettes that you can also use in your work. Click the Swatch Libraries menu icon in the lower-left to view the extensive main menu and sub-menus. Below is the Seasons palette (found under the Nature theme). Hovering over a palette's folder, a name will appear for the group.
Note
A stroke is simply an object's outline, but the powerful tools at your disposal can make this outline thin, thick, dashed, rounded, beveled, and so on.
The side menu of the Swatches Panel allows you to change the presentation of swatches. Choose from a list view or choose larger swatches to display.
Color Themes
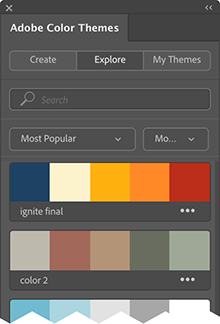
Another super-useful feature of this panel is its access to Color Themes (also available via Window > Color Themes). Upon opening, click the Explore tab. Here, you have access to hundreds of user generated themes.
The companion web site, Adobe Color CC, displays the same tab options and color themes but in a larger display area.
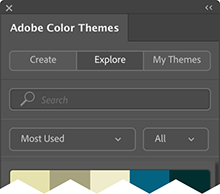
In the Color Themes Panel, you can filter themes by popularity and time. This view of the panel shows themes filtered by Most Used of All Time.
If you have an object selected, you can click a color in a theme to see how it looks.
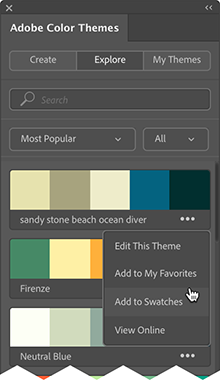
Found a theme you want to keep? Open the theme's menu and choose Add to Swatches. It will appear within the Swatches Panel.
In addition to using, modifying and creating patterns, the Illustrator II class takes a much more intensive look at color, themes and how to create your own library of colors and themes.
In addition to using, modifying and creating patterns, the Illustrator II class takes a much more intensive look at color, themes and how to create your own library of colors and themes.
Sampling Color
To sample colors from other objects or images, use the Eyedropper Tool (keyboard shortcut of I). If you have a shape selected, it will take on the sampled color as shown below. In addition, either the Fill or Stroke box (toolbar) will update as well.
Gradients
What Are Gradients?
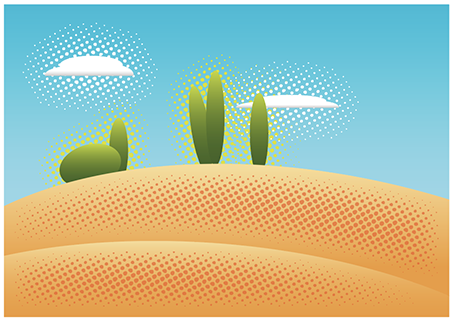
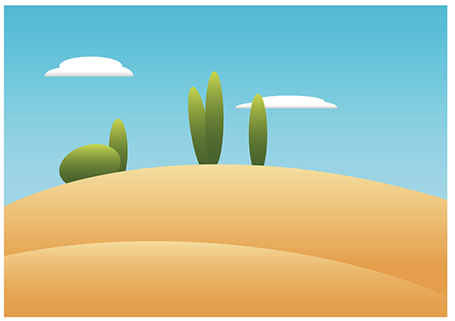
Gradients are pretty much the celebrities of fills in the world of Illustrator. They can take a simple shape and give it immediate visual impact and depth. This is a type of fill with one or more colors transitioning into other colors in a straight line, in a radiating fashion or in a freeform manner. As such, there are three fill types in Illustrator. Linear applies a gradient on a shape from top to bottom or side to side or any angle you define.
This illustration uses linear gradients to give depth to the sky, trees, and hills.
Taking away the texture offers a clearer view of the gradients.
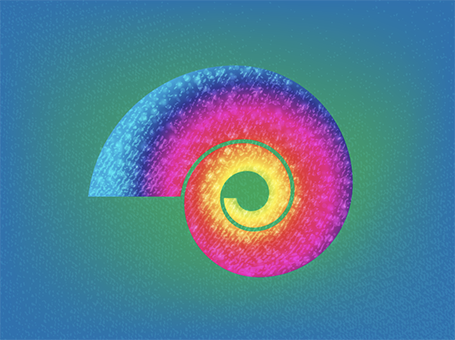
Radial gradients show colors originating from a central point outward. This stylized spiral shape uses a colorful radial gradient as its fill.
Removing all of the fancy textures and transparency reveals its simplicity.
The third fill type is a freeform gradient. It creates color transitions that would be difficult to achieve otherwise. You can apply the colors for this gradient to any part of a shape's fill. This type of fill is new in Illustrator 2019.
Applying a Gradient
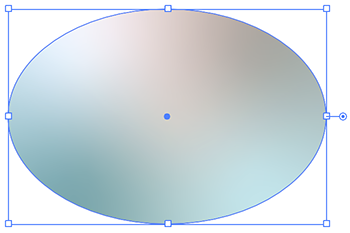
You are no doubt eager to get started using gradients. To do that, draw a basic shape with no stroke color in your artboard and click on the Gradient swatch just below the Fill & Stroke boxes. By default, a black and white linear gradient is applied to the shape.
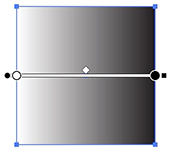
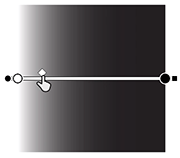
To modify this gradient, select the Gradient Tool (keyboard shortcut of G). Controls will appear over the gradient fill.
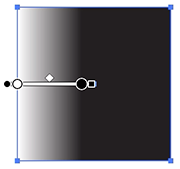
The bar is draggable and can be used to change how the fill looks on the shape. Drag to the right and more of the white part of the gradient will be shown. Drag left and you have more black.
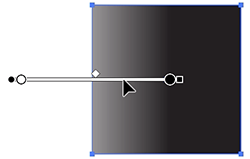
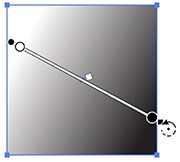
Aside from dragging the bar in a straight line, you can also rotate it further affecting the gradient. Hover on the far right of the bar over the small square until you see a rotate icon appear. Click and then drag.
If you click and drag on that small square, you can shorten or lengthen the gradient.
The diamond marker in the middle can also be dragged. This marker appears exactly within the middle of the two circles that control the gradient's fill colors. Moving this marker can affect how the two colors transition into one another.
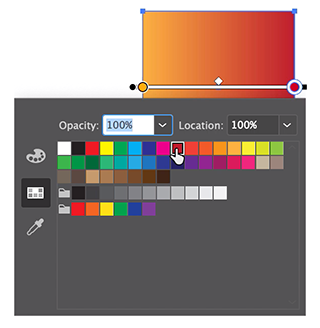
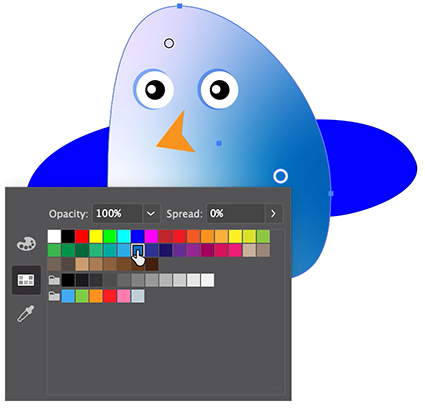
As you have seen in the example images earlier, colors are more than just black and white. Double-click either of the circles on the gradient control. This will display a color panel to change the color. Click the Swatches icon on the left to display different colors. Select a color to modify the fill. Repeat this with the other circle on the control.
If you want to add another color to your gradient, select one of the circles, hold down the Option key (Mac) / Alt key (Windows) and drag toward the other circle. A copy of the color, along with a diamond marker, appears. As with the other circles, this color can be modified as well.
To remove a color, drag it off of the bar. You can remove all but two colors since a gradient fill relies on the remaining colors to transition into one another.
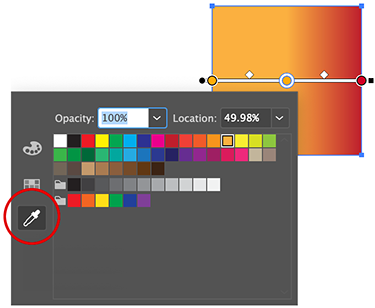
Note that you can sample colors from other shapes in your workspace by double-clicking the circle and selecting the Eyedropper icon on the left. From there, click on a shape whose color you wish to use in your gradient.
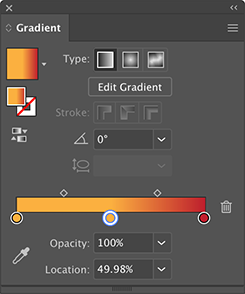
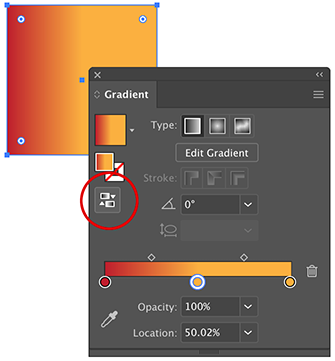
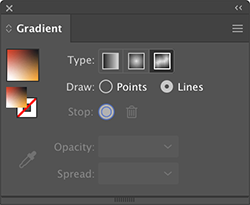
The Gradient Panel
I did mention there were other types of gradients, however, you can't change over to those with the Gradient Tool. Rather, you do this via the Gradient Panel (Window > Gradient). As with the Gradient Tool's control bar, this panel features a similar element in the form of the gradient bar. It has the color circles as well as the diamond marker. All three are draggable. The gradient bar corresponds to the gradient on a shape.
Add a color by clicking just below the bar. Remove a color by dragging it away from the bar or by selecting it and clicking on the trashcan icon. Again, you can delete all but two colors in a gradient fill.
You can make the gradient bar larger by clicking and dragging the panel itself. This becomes super useful when you're working on a gradient fill that uses a lot of colors.
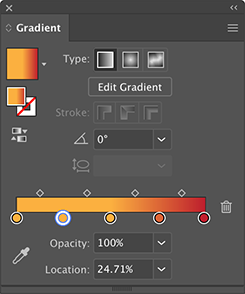
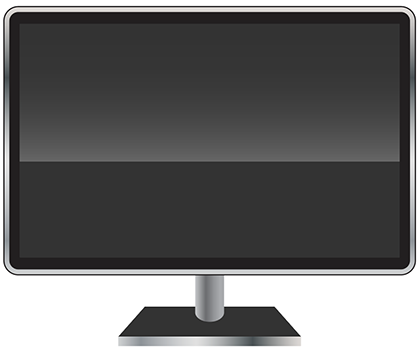
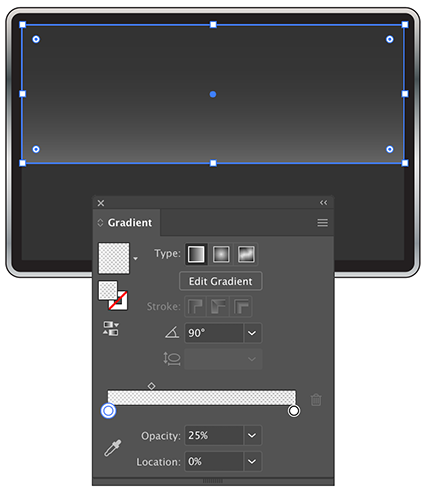
When you select a colored circle below the gradient bar, the Opacity and Location options become active. You can reduce the opacity value down to zero to achieve interesting effects on shapes. In this illustration, there are several gradients applied. The one that's used to create a glossy look to the screen uses opacity.
The fill is made up of two white colors. The one on the left has opacity set to 25%, the other is set at 0%. The Angle is at 90 degrees and the diamond marker was repositioned. This simple technique may prove useful to you for Exercise 1 where you will be building a robot.
The location option will move the color circles along the gradient bar with numerical precision. This option also controls the position of the midpoint markers between circles when it's selected.
The Angle option gives you precise control over a gradient's direction as opposed to what the Gradient Tool offers. Near this option is the Reverse Gradient option. It's a nice timesaver for both linear and radial gradients.
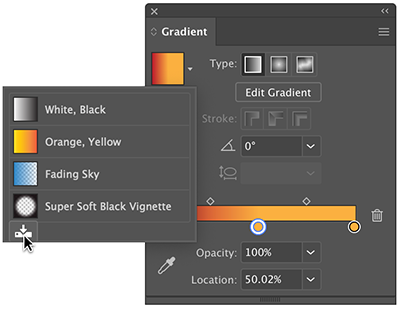
The gradient thumbnail gives access to a menu of a few preset gradients to help get you on your way. In addition, if you've spent time creating a custom gradient, save it to the Swatches Panel by clicking on Add to Swatches.
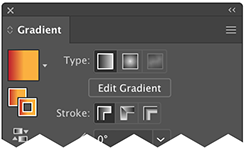
Below the menu is a familiar, but smaller looking, representation of the Fill and Stroke controls. If you click on the Stroke box, it will overlap the Fill box. You can then click on the thumbnail above to apply a gradient fill to the stroke. Doing so will activate the gradient stroke controls.
The first option applies the gradient within the stroke much like how a gradient is applied to a fill. The second option applies a gradient fill along a stroke's path. It has a definite beginning and ending. Lastly, the third option applies a gradient across a stroke. The Reverse Gradient control is useful with these gradients as well.
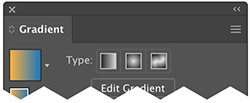
To change a shape's gradient type, use the controls at the top of the panel. Radial is in the middle and Freeform is on the right.
Both Linear and Gradient share the same interface on the panel. When Freeform is selected, the gradient bar is removed along with several controls not needed.
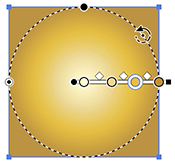
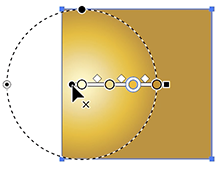
Select a gradient filled shaped in your workspace and click on the Radial Gradient option. The same control bar used for the linear gradient will appear over the fill. However, when you hover over the shape with the Gradient tool, a dashed circle appears along with the bar. This circle gives you control over how big or small the gradient applied is.
You can also click and drag on your shape to change the position of the gradient's center point.
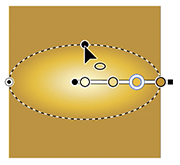
Use the dark circle at the top to modify the dimensions of the gradient. You can take it from a perfect circle to a thin oval. The Aspect Ratio option on the Gradient Panel gives you numerical precision over the shape.
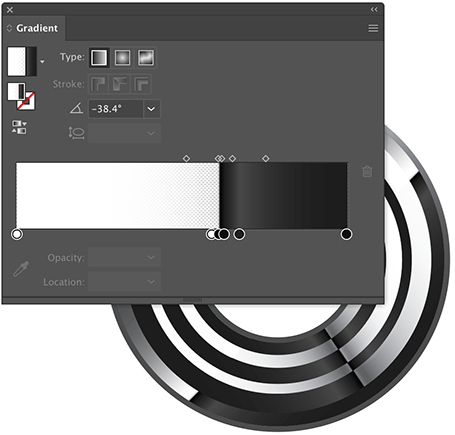
The gradient stroke controls also function with radial gradients. You can achieve a neon look to strokes by applying the gradient across the stroke and making a few adjustments to colors.
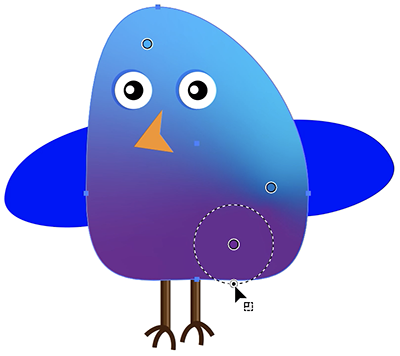
The last type of gradient to explore is Freeform Gradients. With it, you get complete control over where colors appear on a shape as well as how they flow into one another. When you select a shape and apply this type of gradient, the color of the shape will change. Allegedly, it picks up colors from around it. This circle started off white in an empty document.
The color change is rather odd behavior and, hopefully, it will be addressed in a future update. If you have a shape with a color in it that you want to use in a freeform gradient, I recommend creating a small shape nearby with this fill to sample once you start modifying the gradient.
On the shape with this gradient, you will see a circle or circles similar to what you've used with the linear and radial gradients. It represents the color of the object. Click elsewhere on the shape to add more of these color reference points.
Double-click the circles to modify the colors or click the Eyedropper icon on the Gradient Panel to sample nearby colors.
You can drag the circles around in the shape to modify the gradient.
Dragging a circle off of the shape will remove it from the gradient. You can also select a circle and click the trashcan on the Gradient Panel to delete it or hit the Delete key on your keyboard.
In addition to repositioning the circles, you can also increase the size of them to further modify how colors flow into one another.
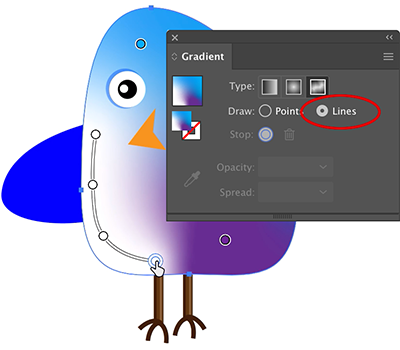
A second method for adding color is available on the Gradient panel. Select Lines under the Draw options and you can click within a shape to draw a series of circles connected by a line. This can be useful for following the contours of a shape. Hold down the Option key (Mac) / Alt key (Windows) to create straight lines between the circles.
In the end, here's a very colorful bird.
A few end notes on freeform gradients: They cannot be applied to strokes. Clicking the Stroke box in the Gradient panel will give options only for Linear and Radial Gradients. Opacity works with these gradients so take advantage of that to achieve some unique designs.
Watch gradient creation in action with this video tutorial:
Note: While the videos in this course were created in a previous version of Illustrator, the tools demonstrated continue to function the same way.
Other Points Of View
One of the last topics of this lesson is a look at the different ways you can preview (and present) your artwork in Illustrator. The following can all be found in the View menu.
Preview is the default view in Illustrator.
Outline View presents a barebones view of artwork. It's simply the outlines of all of the objects in your workspace.
Pixel Preview displays your artwork as a pixelated image. It can give you a good idea of what your design will look like in a web browser if saved as a GIF, PNG or JPEG.
Trim View is new to Illustrator 2019 and will hide any stray objects you have outside of the Artboard.
Presentation Mode, also new to Illustrator 2019, is useful for presenting ideas without any interface clutter. The active Artboard's contents will be displayed. If you have multiple artboards (see Lesson 2), the left and right arrow keys navigate between them. To exit, press the Esc (Escape) key.
Actual Size View (new in Illustrator 2019) will display your artwork at its actual size regardless of your monitor's resolution. If you have an Artboard that's 1” x 1” or 70mm x 70mm, you could take a physical ruler to your screen and it will match those dimensions.
Toward the bottom of the toolbar is the Change Screen Mode button. Not only can you enter Presentation Mode from here but also Full Screen Mode with Menu Bar and Full Screen Mode. In this last mode, press the Esc key to return to the standard Normal Screen Mode.
More Ways To Save
By now, you should know how to save your file using the keyboard shortcut of Command (Mac) / Ctrl (Windows) + S or File > Save. That method saves your file in the Illustrator file format.
How do you share your work with those that don't have Illustrator?
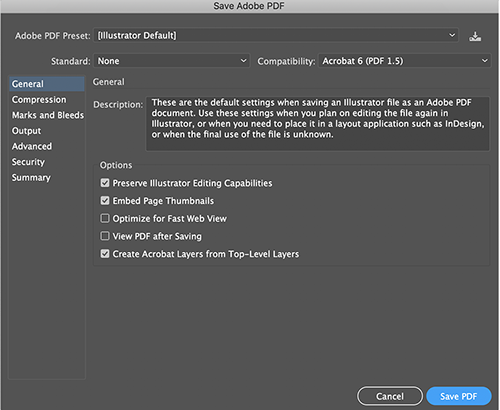
Save your artwork in a PDF file that practically any computer/tablet/phone can open by selecting the Adobe PDF (pdf) option from the Format menu that appears when using the keyboard shortcut. Click Save and a second window appears. It has a lot of options which you can confidently ignore. Click Save PDF.
If you work with colleagues that use vector applications other than Illustrator, save your work in the EPS file format. EPS stands for Encapsulated PostScript. It's a non-proprietary vector file format. Choose Illustrator EPS (eps) from the Format menu when saving a file. Blissfully ignore the options window that appears once you click Save. Click OK to save your file.
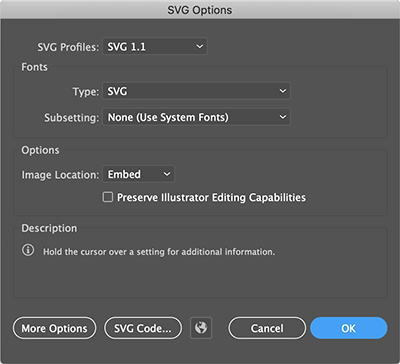
The last vector friendly file format is SVG (Scalable Vector Graphics). This is a file format that has been increasingly used in web pages because it maintains vector quality within a browser regardless of size. Plus, the saved file is fairly small making it a great fit for the web. Choose SVG (svg) from the aforementioned Format menu. Once you click Save, the window below appears.
Preview your vector artwork in a web browser by clicking the globe button. To get the code that you can insert in a web page, select SVG Code. To save the actual file, click OK.
There will be plenty of times you will need to save your work in a pixel based file format such as GIF, PNG or JPEG. I'll discuss this toward the end of Exercise 1. You can skip down to that if you have a need for such formats right now.
Now that you have a feel for the interface and basic tools in Illustrator, you will put your skills to use by building a robot in Exercise 1.