Design Scenario
You're working in a game development team on an exciting game title.
In the game, a SWAT team is up against aliens who
are wreaking havoc on a city. The aliens can
morph to look similar to the SWAT (special weapons
and tactics) team members, making the humans' job
that much more difficult.
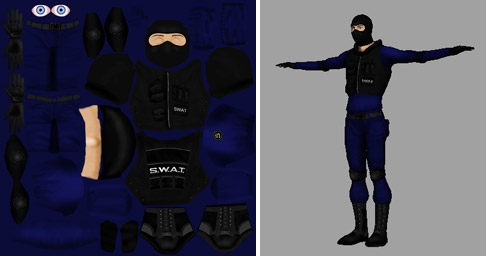
Your lead artist has painted an excellent
texture map for a 3D model built by another
artist on the team. This first SWAT team member
has been completed and is now
in the game, but at least one more SWAT team member
needs to be created before things
can really get moving.
You can choose to create a human SWAT team member with a different
uniform and accessories than the first, or you
can create one of the aliens who has morphed to
look like a SWAT team member. For the latter, consider
ways that the figure can be somewhat recognizable
as an alien bad guy, like an alien federation logo
on the chest or creepy eyes behind the mask.
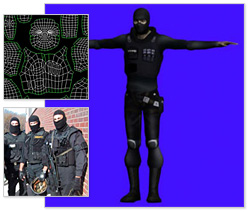
We have provided the SWAT model for you which you will use for either
a human or alien character. Download the SWAT
model here.
 |
This
should give you a sense of the art style
and functional requirements for your character map, but your map should look different and reflect your creative
concepts and research. Download and example
above courtesy of TurboSquid.com and
Dave Gibbons. |
Do
your best to make sure that the texture you paint
makes the 3D model look like a unique individual
character—not
like the other character created by the lead artist—but in
a similar artistic style.
Start your project by compiling reference textures for the character,
whether it's the human SWAT team member or the
alien impostor. For example, you may want to look
for close ups of tool compartments, logos, and
masks.
Exploring Your UV Template
With your research complete, you'll want to become familiar with
your UV template and model.
Each model download above comes with a Maya file
that is linked to a JPEG map, just like your minegun
in Lesson Five.
You may recognize right away that your model has many more
polygons than the soldier in the lesson. But you
probably also recognize most of the major shapes
of the model in the UV template as well.
 |
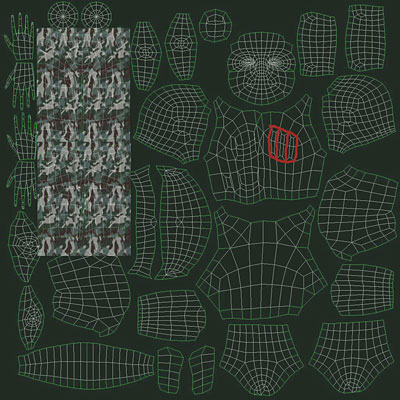
This
scaled down version of the SWAT template
shows that there are many polygons,
but just a handful of simple basic shapes to
worry about. |
Marking
the various parts to identify them can be a good
way to start. The torso is pretty easy to identify,
for example, and you can probably find the pockets on the character's
left
upper chest. You can easily test that theory and
see if you're right...
Testing Your Texture in Maya
Load your model into Maya and select it by clicking on it. Press
6 to display the texture on the model if it is
not already displayed. If the texture still does
not display, we'll remedy that in a moment.
Click the lambert1
option, and then click that option. (If you do not see the tabs and side panel at all, press Ctrl-A.) This accesses
the details of the texture.
 |
Click the arrow in the upper
right tab to access the lambert1 tab. |
Next, click the button beside Color which will give
us access to the file attributes of the texture.
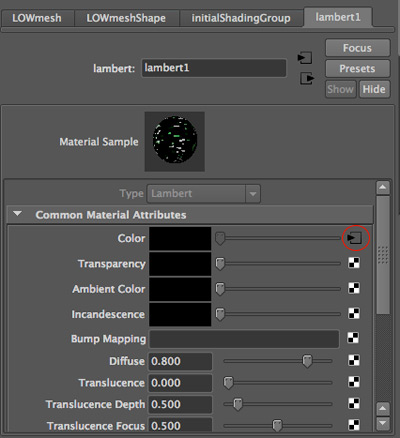 |
The
button next to the Color slider lets us access
the file attributes that tell Maya to display
this texture. |
If you weren't able to see the UV template texture
when you pressed 6 earlier, click the folder icon
next to Image Name and browse to your
downloaded JPEG texture.
As
you work on your own texture for the character,
save it using the same name and format as the original
texture provided. When you have updated the texture,
and want to see how it looks on the model, simply click the
Reload button, circled in red in the image below.
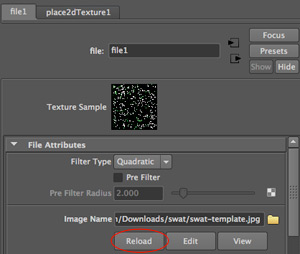 |
Reload the file to show your
latest saved version
on the model. |
Reload as many times as needed to test your texture.
Using the Checkerboard Method
Another approach that can help you
become familiar with the various parts of the UV
template is to apply a checkerboard.
You can download and try
this file.
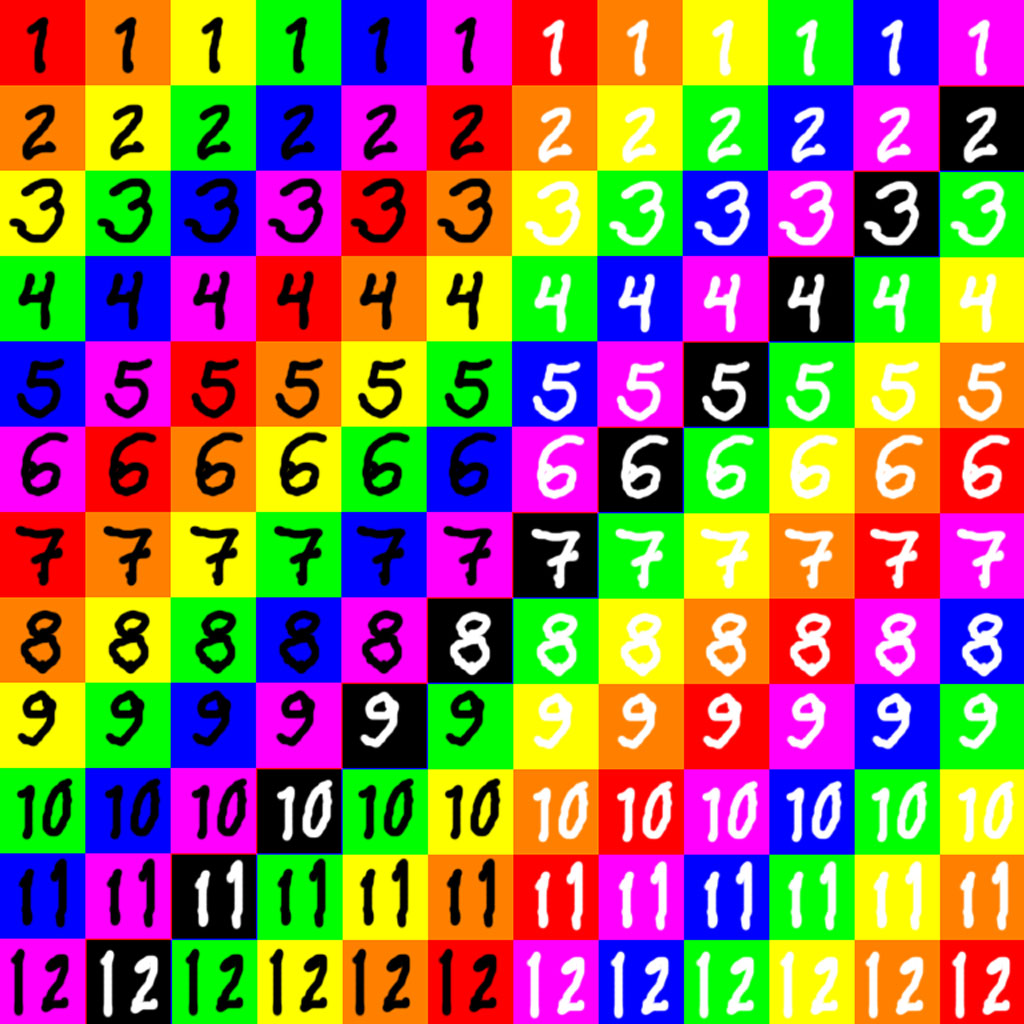
This checkerboard
is designed so that each square has a unique combination
in the color of the square and the color of the
number—there is only one red square with a black "1" for
example.
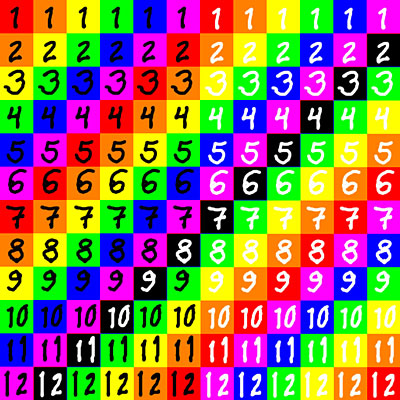 |
Click
here or on the image above to download the
full size version. |
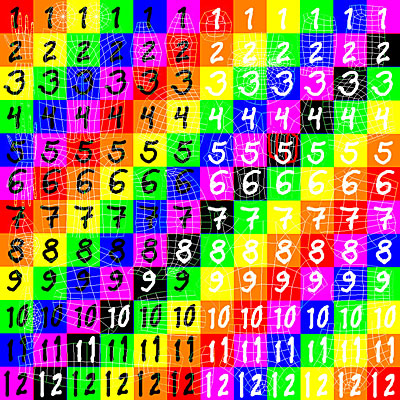
I placed the UV template over the checkerboard pattern for easy
reference.
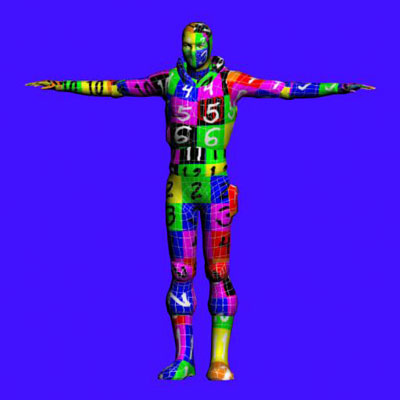
Here is the model with the checkerboard applied:
Painting the Map
Once you're comfortable that you
know your way around the UV template, you can
begin creating the texture map.
In the example below, I started by adding
a layer of green, partially transparent so that
I can see the template, and a layer of camouflage,
also partially transparent.
Combine the processes you learned in Lesson Five and Lesson Six
to work through the entire map, testing on your
model as you go.
Student Hadil Rahim created a solid texture, shown below. It has good color and contrast and nice, sharp detail. It also registers well with the details of the model.
 |
Click here to view the student's reference images and other views of the soldier. |
Saving Your Files
You should have created your texture map in PSD format using multiple
layers. Flatten that image and save it in JPEG
format.
Apply the texture map to the provided model in Maya, and render
a JPEG with dimensions of 1024x1024. To do this, click the Render button in
Maya  . When the scene is finished
rendering, chose File > Save Image and
choose JPEG as the output. Name it swat-render.jpg.
If you have trouble rendering in Maya, take a simple
screenshot of your Maya view instead and save as
a JPEG in Photoshop.
. When the scene is finished
rendering, chose File > Save Image and
choose JPEG as the output. Name it swat-render.jpg.
If you have trouble rendering in Maya, take a simple
screenshot of your Maya view instead and save as
a JPEG in Photoshop.
And now for our final
installment on actions...
Your
art director uses a particular approach to make textures that
tile. Within that approach are a series of tasks that your art
director believes can be automated. She has asked you to create
that action. She doesn't need to show you her entire way of working,
just the part she wants you to automate. You will need to duplicate
the results of the steps she shows you, but you don't need to repeat
exactly the same steps to get there.
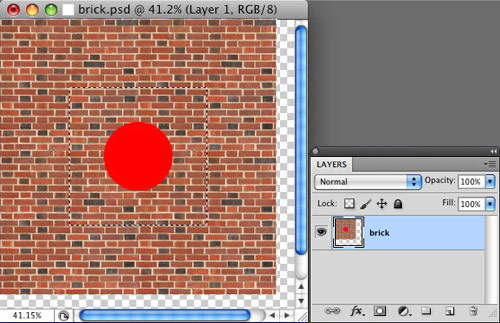
She
demonstrates using a file named "brick.psd", and you
are given a copy to take away with you. You can assume that the
user has selected the portion of the image that he wants to tile.
The region selected should be 512x512 pixels for the action to
work correctly with this image. An example is shown below. But,
your script should do its job no matter what the resolution of
the selection. She gives you another file, "brick256.psd",
to try with a selection of 256x256.
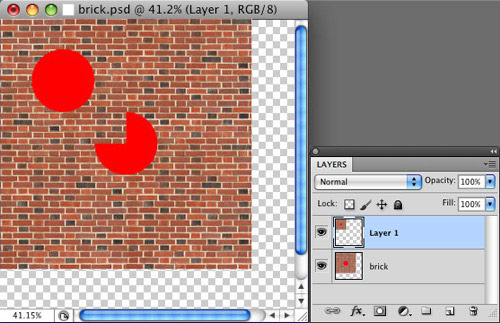
So, with the situation shown above as a starting
point, she presses Ctrl/Command-C to copy the selection, then Ctrl/Command-V to
paste it into a new layer. She moves that layer to the upper left
corner of the window. See below.
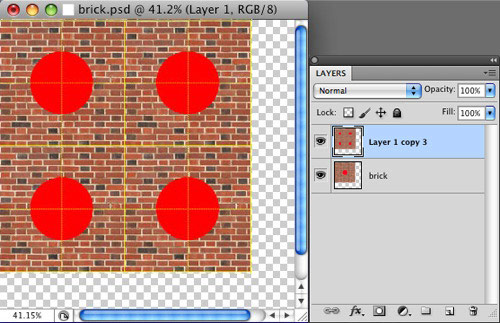
She now creates three duplicates of the top layer,
and, using the grid as an aid, arranges the four total new
layers two-by-two in the upper left corner of the image window,
as shown below.
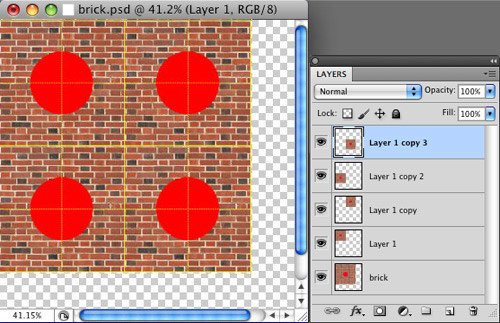
She then merges the four new layers into a single layer. The
screenshot below shows the results that your art director wants
from the action you are to create.
Remember, you don't have to arrive at this result the same way
she showed you; actions sometimes need to do things in a different
way than you would manually, as the action "tile uwt 1024
UR" from Lesson Six demonstrates.
Name this action "tile 4x4".
You have all of the insights and strategies required to accomplish
this task. You'll just need to put them together in the right
way to solve the problem. Think through the process, write down
the steps. There will be steps that you know how to accomplish
with an action, and other steps that you don't. You'll have to
solve the problem presented by the ones you don't. Often these will be
the things that you can do easily, but an action can't do in
the same way.
The way you find to do that task may change the
way you do other things in the action. On the other hand, if
you are getting stuck with this approach, actions are quick and
easy to generate, and just as easy to throw away and start over,
so jump in and try it! When you take this approach, really remember
to treat it as a learning experience, and be ready to throw away
your action and start over several times—this will be a long
one, and it is easy to lose track of what is in there. It is
often good to re-record your action one last time after you have
come to understand how the whole things works. You can often
be more methodical this way.
Remember to test your action with a texture image
and a selection of 256x256.
Saving Your Files
OK, now I want to see all of the actions you made during this course!
That includes:
 |
|
 |
| |
- F12 flatten from Exercise One
- Null
from Exercise Two
- Darken 50% and Save
from Exercise Three
- Cut image into tiles from Exercise Four
- Save minegun texture
from Exercise Five
- Tile uwt 1024 UR
from Exercise Five
- Tile uwt 1024 UL
- Tile uwt 1024 LR
- Tile uwt 1024 LR
- Tile uwt 1024 UR +
- Add corner tabs
from Exercise Five
- Tile 4x4 from Exercise Six
|
|
 |
|
 |
Save your set of actions using your name—for example "Todds
Actions.atn".
Check back the Exercise Three's section on Working with Actions if you're rusty on how to do this.