Project Brief
Unless you've been living under a rock for the past 100 years, you are most likely familiar with what a robot looks like. Some are blocky, some are curved, some are a hybrid of both. The basic shapes and line shapes in Illustrator are well suited for creating such mechanical beings. As you work, think of Illustrator as a construction tool that builds your design from squares, circles, lines, polygons and so on.
Need inspiration? Google's Image Search is a great resource to see what's out there as far as robots go.
Note
Exercises will be evaluated for understanding of course concepts.

Illustration by Sessions student Ashley Deer.
Want to save some time and frustration? I strongly encourage you to grab some paper and sketch out some ideas either from what you see on the web or what you conjure up on your own. This puts your creativity into immediate action without having to stare at an empty workspace in Illustrator.
As you sketch, think of the shapes you've learned about. How can they be used to represent the various parts of your robot? You can achieve a lot of detail by just using simple shapes.
By default, the basic shapes have a black stroke but you don't have to keep them. Try to avoid using strokes on most of your shapes for a cleaner, more professional look. If, however, you feel the strokes contribute to the style of your robot, then feel free to put them to use.
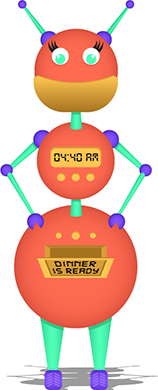
Illustration by Sessions student Rocio Rodriguez.
As for color, you are encouraged to make use of gradient fills along with the solid color fills. The gradients will bring more life and visual impact to your robot.
Here is a sampling of robots created by students previously in this course. Some are more complex than you might be ready for, while others were done by students with no previous exposure to Illustrator.
The video below shows the creation of a robot. The robot you create does not have to be as complex as this one but it should still be detailed enough to get you comfortable with the tools.
You can find another method of the robot process by clicking here.
Also, take a moment to recap the fundamental Illustrator tools you learned in the lecture with the following Review Kit:
Questions?
If you have questions before uploading your work for grading, use the Inbox feature to get in touch with your instructor.
Creating Your File
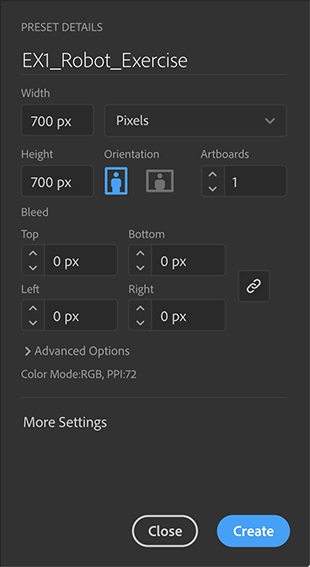
When you're ready to start working in Illustrator, create a new document (File > New) that uses pixel as the unit of measurement. Use the width and height dimensions shown. Be sure to name your file here or when you save it.
Important: In all Sessions courses, plagiarism is not tolerated. Plagiarism is the act of taking someone else's work and passing it off as your own even if it's only part of a larger design you are working on. Your ideas, inspiration, and creativity should be the primary focus of your work.
You are free to take inspiration from the work of others and create a design based off of that but copying directly from another source or designer is strictly prohibited. It should be understood that any plagiarized work will receive a grade of zero and you may be subject to disciplinary action as detailed in the Student Handbook.
Please consult with your advisor if you have any questions as to what constitutes plagiarism.
Back to Top
Checklist

Grading Criteria
What your instructor is looking for:
- Create a robot using basic shapes and line shapes.
- Create smaller shapes on larger shapes for added details.
- Use solid color fills, gradients, patterns or a mix to provide depth, impact, and dimension.
- Provide brief comments on how you approached this project. Was sketching helpful? Do you prefer one way of drawing (dragging or numerically) over the other?
- Save your work in the PNG file format (see below).
Note: You are welcome to modify and resubmit your work up to two times after initial review.
Posting Directions
- If you've yet to do so, save your file by going to File > Save or use the keyboard shortcut keys of Command (Mac) / Ctrl (Windows) + S. In the panel that appears, name your file and choose Adobe Illustrator (ai) from the Format menu. Click Save. This ensures you will always have an editable Illustrator file on hand in the event you wish to make modifications.
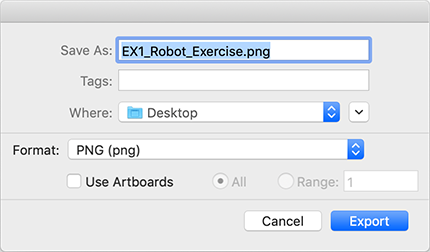
- When ready to upload your work to Sessions, choose File > Export > Export As. Name your file and choose PNG (png) from the Format menu. If you have artwork on multiple artboards that you wish to save, enable Use Artboards. Click Export.
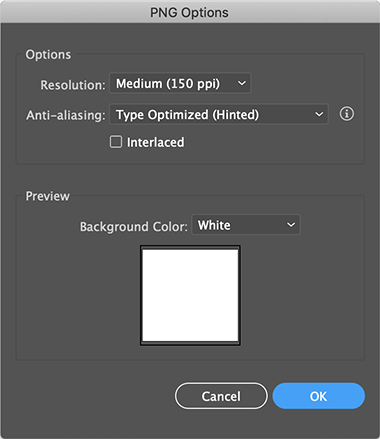
- In the panel that follows, set the Resolution menu to Medium (150 ppi). Change the Background Color to White. Click OK.
- Go to the Exercise 1 Dropbox and attach your PNG file(s) with brief comments on how you approached this project. File uploads without comments are subject to automatic reduction in grade.
- Again, if you have questions before uploading your work for grading, use the Inbox feature to get in touch with your instructor.
If you have a question before sending your completed exercise for grading, send a message through Canvas to contact your instructor.
Back to Top
I look forward to seeing your work!