You're ready to build your new Web site using flexbox—but is the world ready for it? I would say yes! Browser support for flexbox is very good. As of June 2018, flexbox is supported by all major browsers.
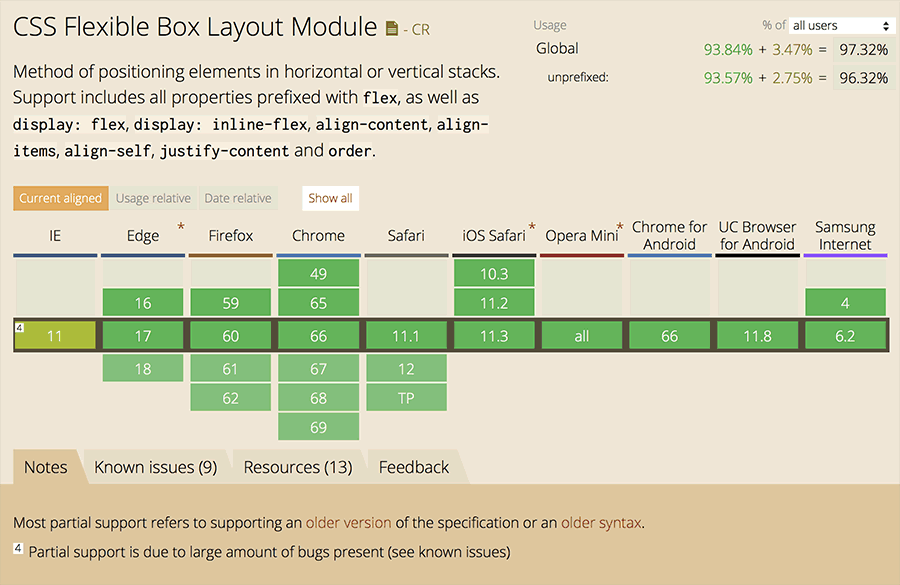 |
| Green means go! The browser usage statistics from caniuse.com for flexbox look very positive. |
Current data from caniuse.com show good support for flexbox, but you'll notice a few footnotes. Older versions of iOS safari and Android 4.3 only support flexbox with a -webkit- prefix. IE 10 requires an -ms- prefix. In fact, global support for flexbox is at 97.32% (prefixed), but only 96.32% (unprefixed). Not a huge difference, but you'll want to prefix your flexbox properties to reach the maximum possible audience.
Browser prefixes are written as "-webkit-flex" or "-ms-flexbox".

Before adding prefixes, my flexbox styles were ignored by Safari 8.03. The layout defaulted to a single column.

After adding prefixes, the flexbox styles were rendered correctly by the same browser.

You can add prefixes manually to your CSS, but the good news is that you don't have to. It is much more efficient to have an automated tool like Autoprefixer do the job for you. We'll be trying that out shortly. But first, let's decide what to do about IE8 and IE9. These versions offer no support for flexbox, even with prefixes.
According to current browser stats, IE8 usage is at 0.18% and IE9 usage is at 0.13%. That's about 3 people in every 1000 visitors. You'll have to analyze the demographics for your Web site to decide whether supporting IE8 and IE9 is worth it. Here are some facts to keep in mind as you evaluate your decision:
If your client absolutely requires support of IE 8 and IE 9, you can add alternate styles for these browsers using Modernizr. Choose "Flexbox" from the list of browser features and click "Build".
 |
| Modernizr will automatically detect browser support for flexbox in your user's browser. |
Download the "Build" version of the modernizr.js file to your computer and add it to your product folder.

Add a link to the modernizr.js file in your HTML file.

The Modernizr script detects whether the browser supports flexbox. If flexbox is supported, Modernizr adds a class of "flexbox" to the <html> tag. If flexbox is not supported, Modernizr adds a class of "no-flexbox". You can use the "no-flexbox" selector to create alternate styles for older browsers.

In this example, the links display horizontally thanks to flexbox's "display: flex" property. I'll add a backup style setting the list items to "display: inline-block", creating the same layout in older browsers.

Of course, duplicating layout styles for older browsers is no one's cup of tea. If you must support IE 8, my advice is NOT to use flexbox for the overall page layout. Save flexbox for small page components (where you can easily add a few alternate styles) or as progressive enhancement (where flexbox improves the page design in compliant browsers, but doesn't cause problems in older browsers).
Hopefully, you won't have to provide fallbacks for IE 8 in every project. I'm sure there are a million other things you'd rather do, like reorganize your sock collection or take your dog for a walk.
Browser support for SVG images is even stronger than it is for flexbox. You can sleep soundly at night using SVG.
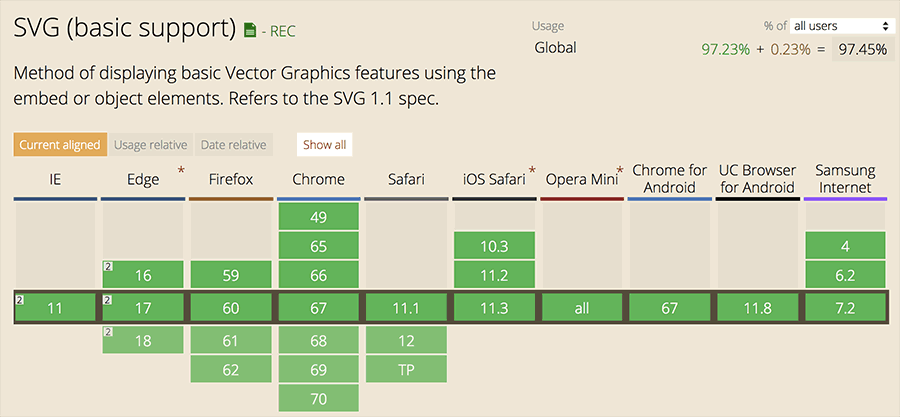 |
| SVG images are supported by every major browser except for IE8. |
If you are concerned about IE 8 in this case, I'd recommend adding a text description of each inline SVG image. In the worst case scenario, the description text will appear in place of the image. The <desc> text should go directly after the <title> tag. Note that the <title> tag is already embedded in the image—it is the same title as your Illustrator file. Using a clear, descriptive file name in Illustrator will create a clear, descriptive title for your SVG.

Your <title> and <desc> text will be readable by screen readers. To further improve accessibility, you'll also want to add the aria-labelledby attribute to ensure that screen readers recognize the <title> and <desc> as accessible labels for the SVG content.

Before you launch a website, you'll likely need to perform several tasks to optimize your site performance:
 |
|
 |
| |
- Minify the CSS files
- Add prefixes for older browsers
- Optimize GIF, JPEG, and PNG images
|
|
 |
|
 |
Grunt is a task runner than can execute all of these tasks (and many more) with a single command. Prepare to be amazed!
 |
| Grunt is free and gives you access to a zillion free open-source plugins. |
Install Node.js
Before you can use Grunt, you'll need to install Node.js. Head to https://nodejs.org/ and download the installer for your operating system. Choose the version that is "Recommended For Most Users".
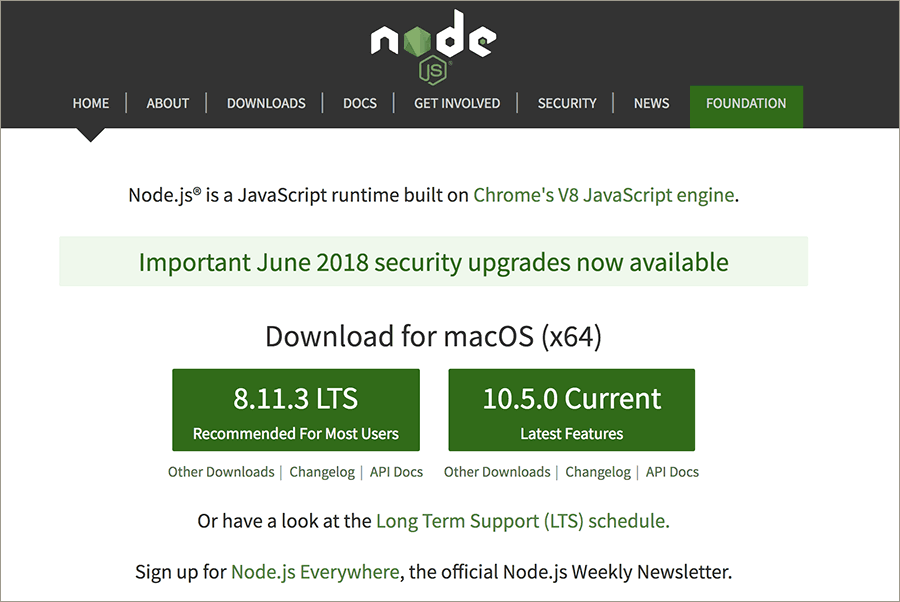 |
| Node.js includes npm, which you'll use to install your Grunt plugins. |
Double-click the installer icon and you're good to go! Node.js includes npm, a popular package manager. However, npm is a separate project from Node.js, and tends to update more frequently. As a result, you’ll probably need to update your npm using the command line.
What's the command line? If you are as old as I am, you might remember running a computer by typing in commands. You booted up your computer and saw a prompt. You had to type commands to launch programs, run utilities, or change directories.

In the 1980s, people started wearing leg warmers and computers got dressed up with Graphical User Interfaces. These days, you open programs by clicking graphic icons. However, the command line is still used for system administration, computer programming, and batch processing.
If you haven't used the command line before, I understand why you might be hesitant. It seems like something better left to programmers—you're more of a designer type. However, many design utilities are run using the command line. If you want to customize your build of Bootstrap, you'll need to use the command line. If you want to use a preprocessor like Sass, you'll need to use the command line. If you want to set up a local server for testing and development, you'll need to use the command line. The command line is an important skill for designers to learn.
So, let's try it out! On Macs, the program used to work with the command line is called "Terminal". On Windows, it's called "Command Prompt".
Mac Users: Search for "Terminal" using your Launchpad.

Windows Users: Click Start, click All Programs (All apps in Windows 10), and then click Accessories (Windows System on Windows 10). You may need to right-click Command prompt, and then click Run as administrator depending on your user setting. If the User Account Control dialog box appears, confirm that the action it displays is what you want, and then click Continue.
Your terminal will look something like the screenshot below. No bells and whistles here, just plain text.
The text on the left displays your current location in the file system. I'm currently at the top level of my home directory (represented as "~").
The input area on the right with the blinking cursor is "the prompt". On Macs, the prompt is marked by a $ sign. On Windows, you'll see a > sign.

Enter the following command after the prompt and hit your Return key.
sudo npm install npm@latest -g
You are asking the terminal to update npm globally on your computer (the -g flag means "global"). Global updates require administrator privilege, so you started your command with "sudo" (super user do). Windows users: you do not need to type the "sudo" command. Simply type npm install npm@latest -g
After typing a sudo command, the terminal will spin its wheels for a second (it's a little slow on my computer anyway) then prompt you for a password. Enter your administrator password (the same password that you use to log into your computer and perform software updates) and hit Return.

The terminal will take a second to accept your password and process the results. A copy of npm will be installed in your local library. Done!

To wrap up, the terminal presents a new prompt, ready for your next command.
Install Grunt (Globally)
You're ready to install Grunt's command line interface (CLI) globally on your computer. Enter the following command after the prompt and hit your Return key.
sudo npm install -g grunt-cli
This is a global installation and you are using the "sudo" command, so you'll need to enter your administrator password.
Windows users: type npm install -g grunt-cli
Project Set-Up
Follow along as we try out Grunt on an actual project. Download the grunt-boilerplate folder. Unzip the file and drag it to the desktop of your computer. The folder contains an HTML file, a custom.css file, a few image files, and a few SVG files.
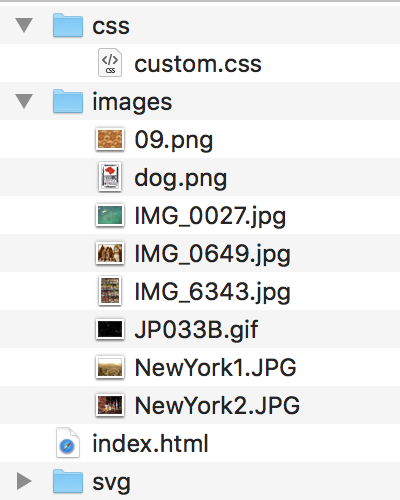
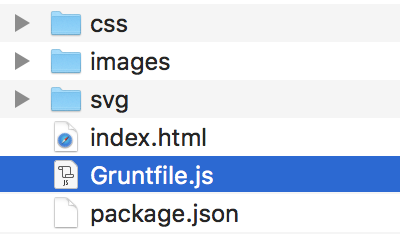
We'll need two additional files in order to run Grunt in this project.
 |
|
 |
| |
- package.json is a manifest file that contains information about the project and a list of all the plugins that it uses (aka "dependencies").
- Gruntfile.js is used to configure tasks and load Grunt plugins. It tells Grunt what it needs to do.
|
|
 |
|
 |
Create a package.json
Open your code editor and create a new document. Choose JSON from the list of file types. In Dreamweaver, the New Document window looks like this:
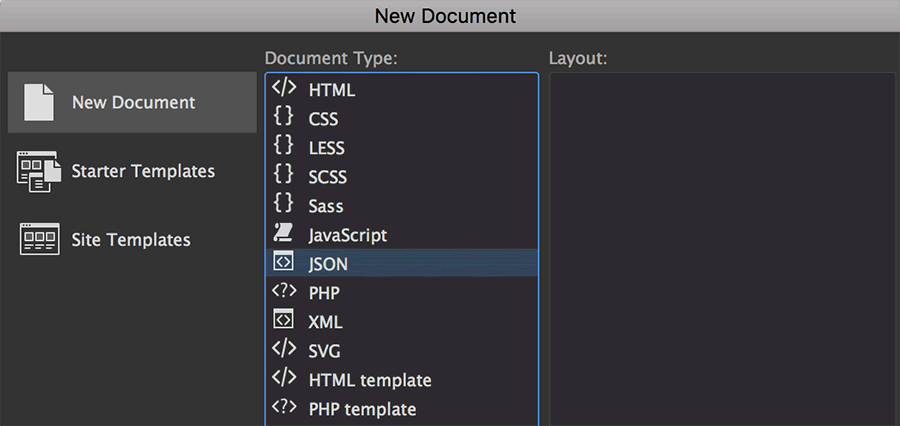
If you are using Dreamweaver, delete the //JSON Document comment. It will cause an error when you run Grunt.

Copy and paste the following code into your JSON file. This is the standard configuration from the "Getting Started" page at gruntjs.com.
{
  "name": "my-project-name",
  "version": "0.1.0",
  "devDependencies": {
    "grunt": "~0.4.5",
    "grunt-contrib-jshint": "~0.10.0",
    "grunt-contrib-nodeunit": "~0.4.1",
    "grunt-contrib-uglify": "~0.5.0"
  }
}
Change the name of the project to "grunt-boilerplate". Delete all of the dependencies — we will be using a different set of plug-ins for our project. Your file will look like this when you're done.
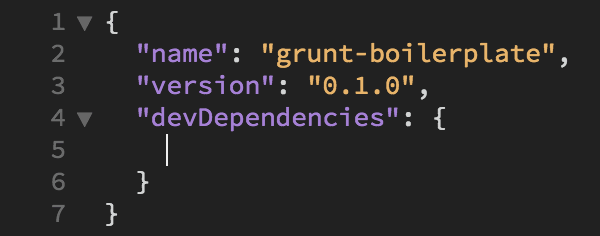
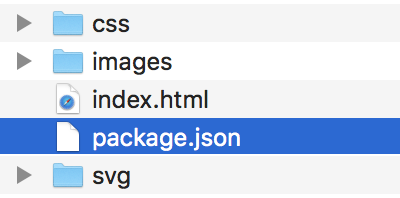
Save your file as "package.json" at the root level of the grunt-boilerplate folder.
Create a Grunt.js
We need one more file to set up our project: the Gruntfile. Create a new document using your code editor. Choose the JavaScript file type.
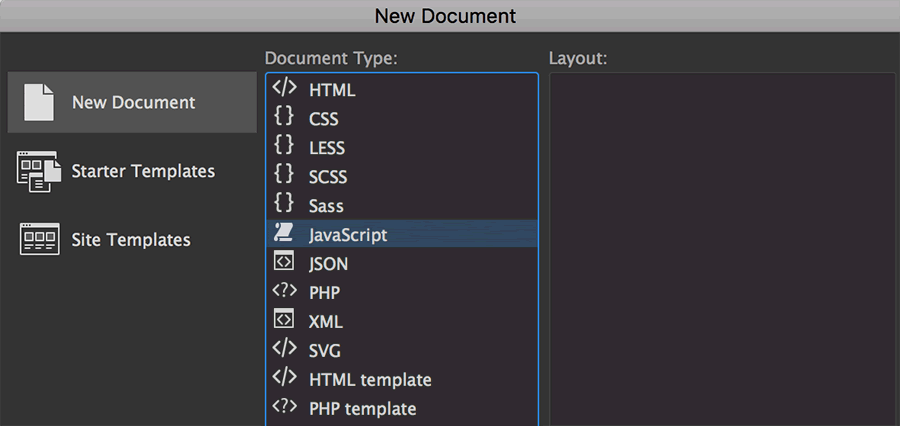
Delete the // JavaScript Document comment (if there is one).

Copy and paste the following code into your file. This code is provided on the "Getting Started" page at gruntjs.com (an example Gruntfile).
module.exports = function(grunt) {
grunt.initConfig({
pkg: grunt.file.readJSON('package.json'),
uglify: {
options: {
banner: '/*! <%= pkg.name %>
<%= grunt.template.today("yyyy-mm-dd") %> */\n'
},
build: {
src: 'src/<%= pkg.name %>.js',
dest: 'build/<%= pkg.name %>.min.js'
}
}
});
grunt.loadNpmTasks('grunt-contrib-uglify');
grunt.registerTask('default', ['uglify']);
};
Your file should look like this:
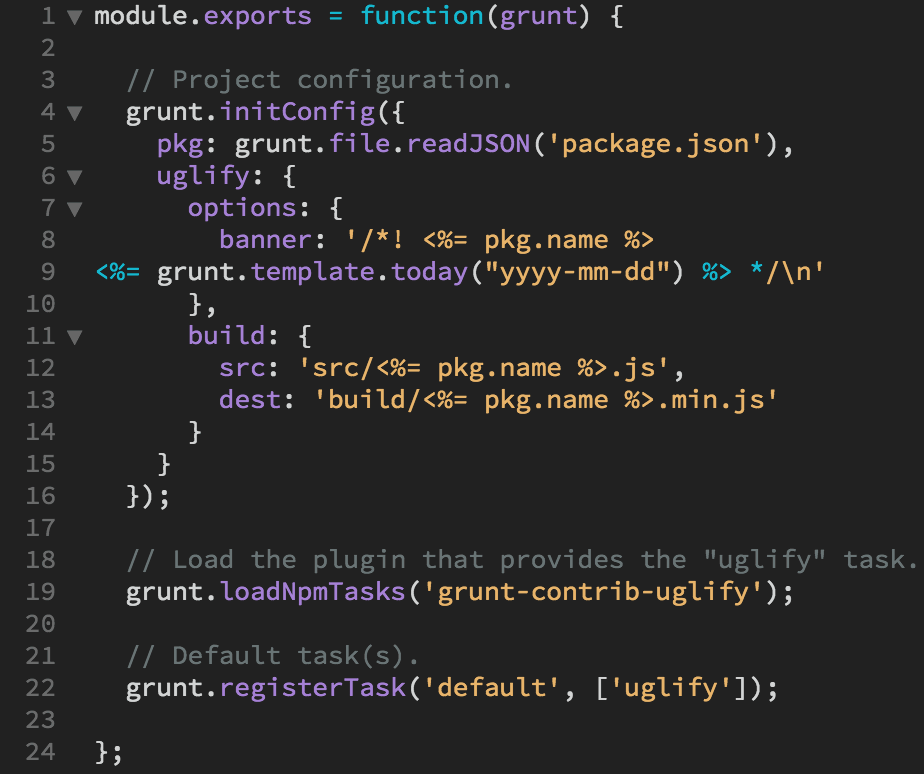
Save your file as "Gruntfile.js" at the root level of the grunt-boilerplate folder.
Install Grunt (Locally)
You've installed the Grunt command line globally, which is a one-time deal—you won't need to do that again. However, each time you set up a project, you'll need to install Grunt locally in the project folder.
Open your terminal and navigate to your project folder. Navigating folders using the terminal can be a bit tricky, but here's how I do it. Type "cd" (change directory) into the terminal and hit your Return key.
cd
This brings you up to the top level of your user directory. Even if you were already there, it's good to know where you are starting from.

Now type "cd desktop/grunt-boilerplate" and hit Return.
cd desktop/grunt-boilerplate
This will navigate to the grunt-boilerplate folder on your desktop.

If you have trouble finding your folder in the directory structure, a cool trick is to type "cd" and a space mark, then drag and drop the folder from your desktop into the prompt. Hit Return, and the terminal will write the path to the folder.
OK! Now that you are in the right place (make sure the path in your terminal says "grunt-boilerplate"), type the following command and hit Return.
npm install grunt --save-dev
Wait for the terminal to process the request. You might get a few warnings about missing fields in the JSON document, but don't worry, these fields aren't really necessary.
When the terminal is finished, you'll have a new node_modules folder inside your grunt-practice folder.
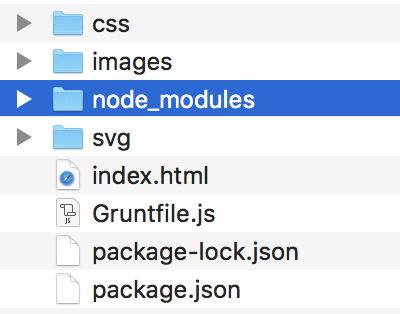
The terminal has installed Grunt and saved it as a dependency. Open your package.json file to check—there it is!
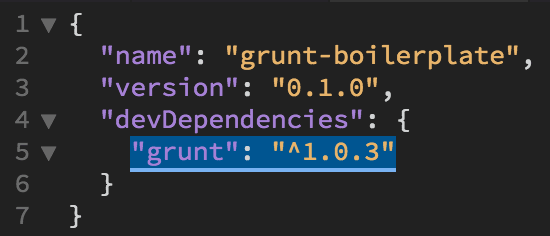
Grunt Task #1: postcss
The grunt-postcss plugin is a package deal. It generates pixel fallbacks for rem units, adds browser prefixes (we will need prefixes for our flexbox styles and CSS transitions) and minifies the CSS file so it is faster to load. Excellent!
Reference grunt-postcss on npm to customize the set-up.
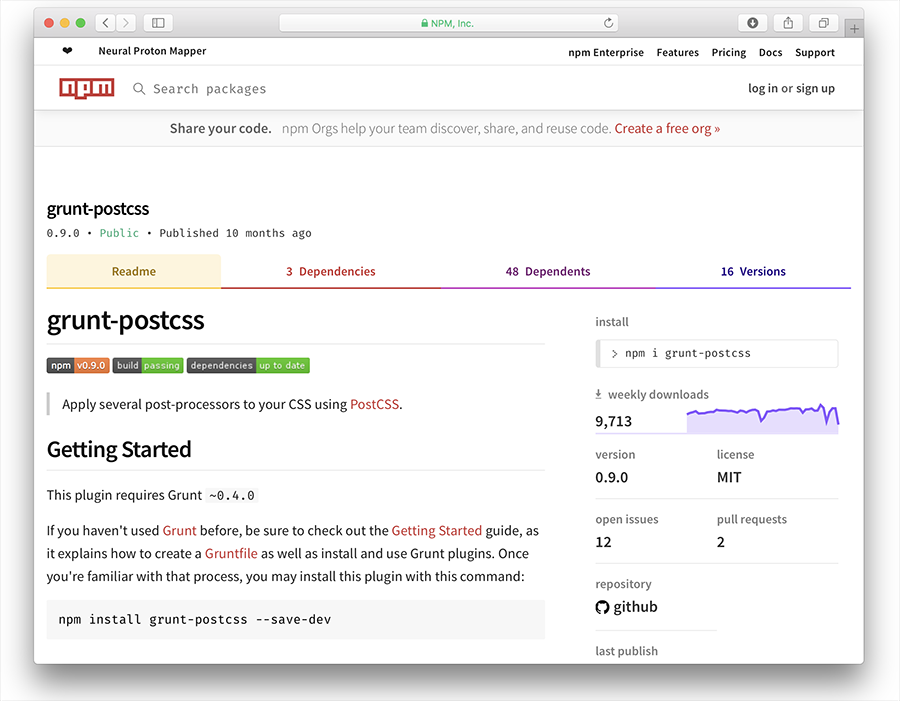 |
| grunt-postcss has its own npm page with information on how to install and customize the plugin. |
Follow this 5-step process:
1. Install the plugin.
Type the following command into your terminal and hit Return.
npm install grunt-postcss --save-dev
One more to go. Type the following command and hit Return.
npm install pixrem autoprefixer cssnano --save-dev
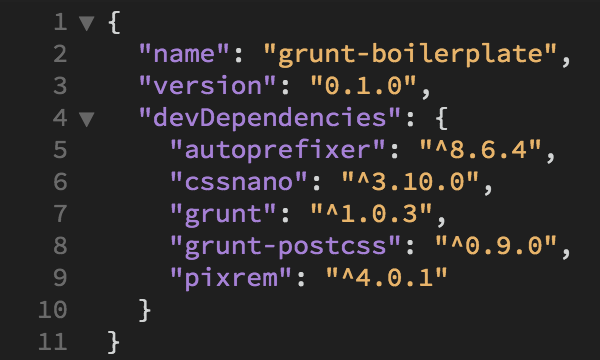
The new dependencies will be added automatically to your package.json.
2. Enable the plugin in your Gruntfile.
Open your Gruntfile.js file. Look for the // Load the plugin that provides the "uglify" task comment.

Add this line of JavaScript:
grunt.loadNpmTasks('grunt-postcss');

Select the uglify plugin and hit Delete.

Your code should look like this:

3. Configure the plugin in your Gruntfile.
Take a look at the code under "Project configuration". Hit your Return key to create an empty space before "uglify". Add another space after uglify's closing bracket }.
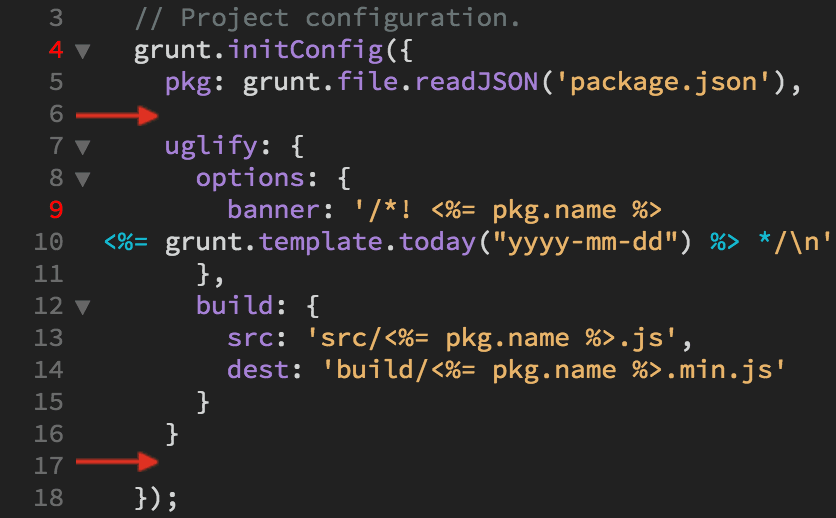
Here's how the code is structured. This code outlined in red is the configuration code for the uglify plugin. The code highlighted in blue wraps around the configuration code for all the plugins that we insert into the document.
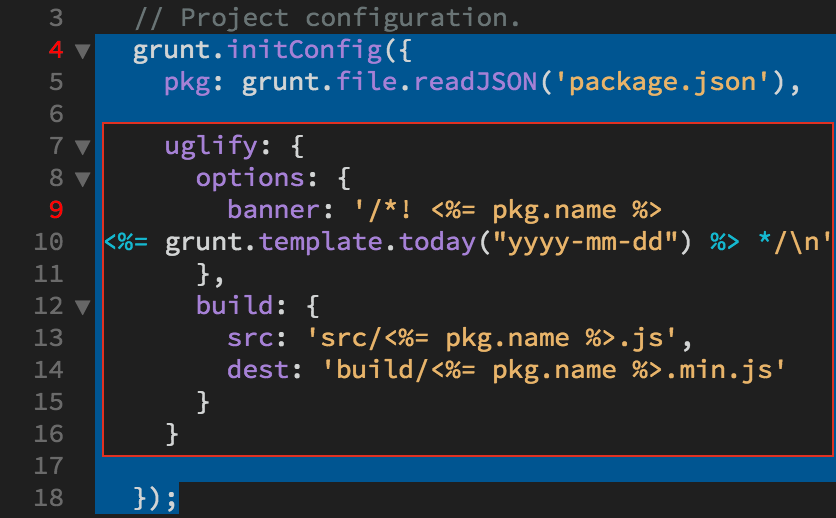
The uglify plugin is used to minify JavaScript files, but we are not using JavaScript in this project. Select the uglify configuration code and hit Delete.

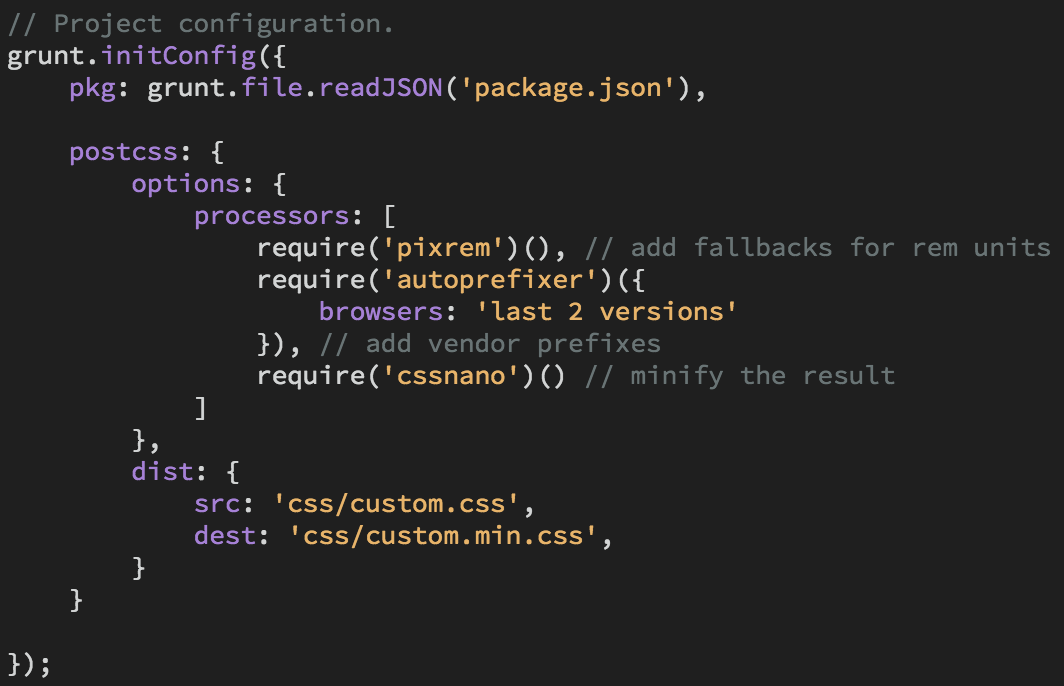
Copy the following postcss configuration code:
postcss: {
	options: {
		processors: [
			require('pixrem')(), // add fallbacks for rem units
			require('autoprefixer')({
				browsers: 'last 2 versions'
			}), // add vendor prefixes
			require('cssnano')() // minify the result
		]
	},
	dist: {
		src: 'css/custom.css',
		dest: 'css/custom.min.css',
	}
}
Edit > Paste the postcss configuration code:
4. Add the plugin to the task list.
Change the task list to 'postcss' rather than 'uglify'.

5. Run Grunt!
Save your Gruntfile.js and open your terminal. Type the command "grunt".
grunt
After a short delay, the terminal should tell you "1 processed stylesheet created. Done."
Grunt has created a new custom.min.css file in the css folder.
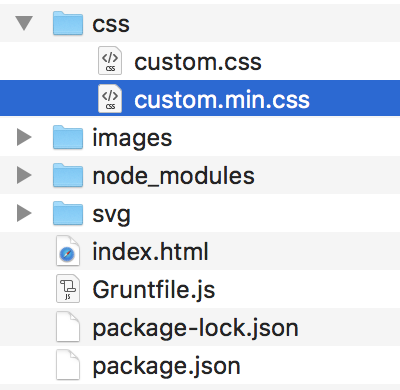
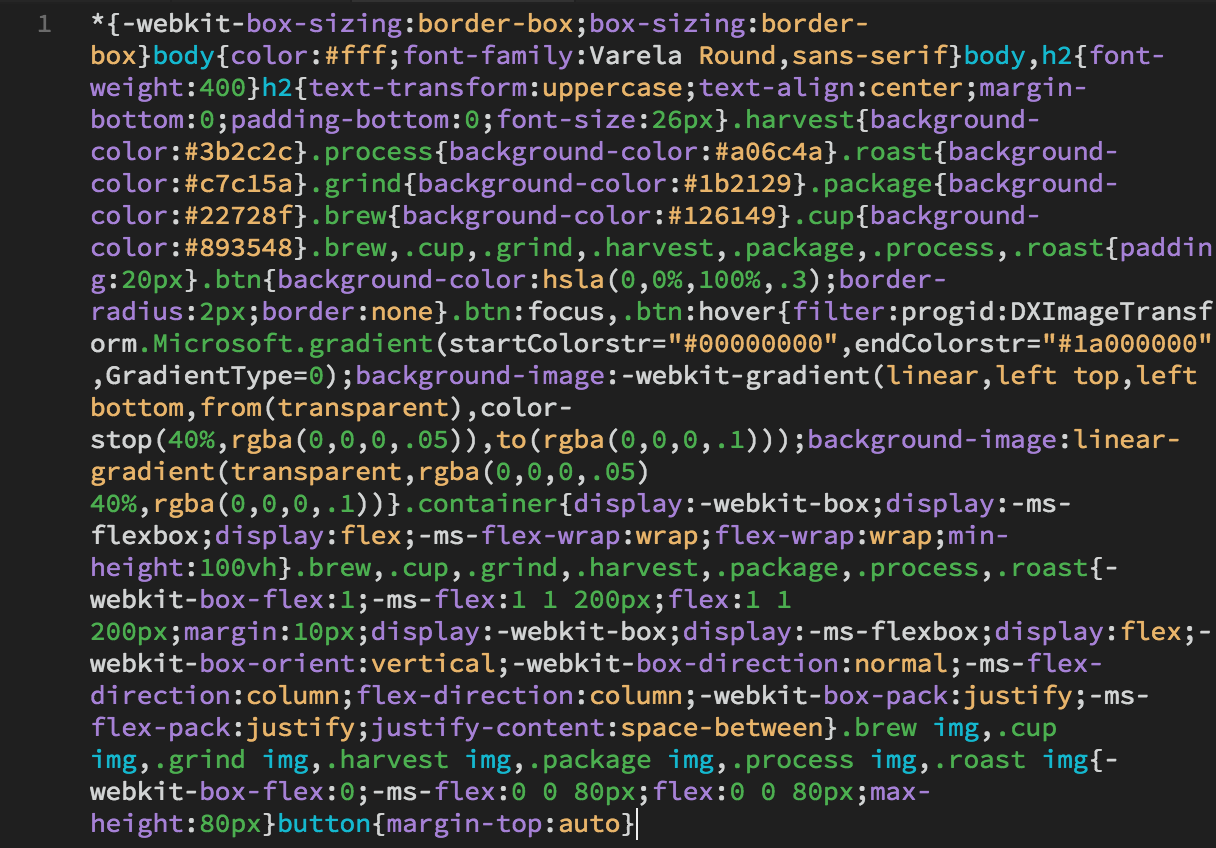
The custom.min.css file is minified, so all the styles are on a single line. If you look closely, you'll see the browser prefixes.
To load the minified style sheet, open the index.html file and change the custom.css link to custom.min.css.

Grunt Task #2: imagemin
Images are often the largest assets in a website. Optimizing your images will greatly improve your page load time. The grunt-contrib-imagemin plugin will optimize PNG, JPG, and GIF images in an instant.
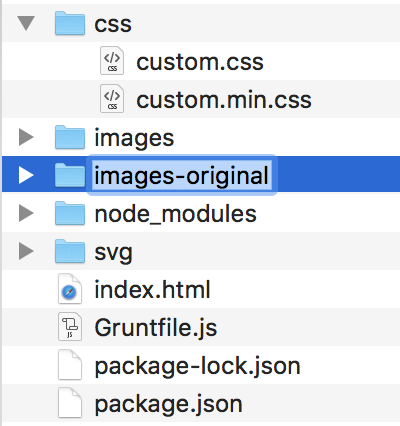
There are a few sample images in the images folder in the grunt-boilerplate folder. Duplicate the images folder so you have a back-up in case anything goes wrong with the optimization process. You can call the duplicate folder "images-original".
1. Install the plugin.
With your terminal pointed at the "grunt-boilerplate" directory (you should be there already) type the following command and hit Return.
npm install grunt-contrib-imagemin --save-dev
2. Enable the plugin in your Gruntfile.
Open your Gruntfile.js file. Look for the comment that says // Load the plugin that provides the "uglify" task.
Add this line of JavaScript after the grunt-postcss JavaScript:
grunt.loadNpmTasks('grunt-contrib-imagemin');
Your code should look like this:

3. Configure the plugin in your Gruntfile.
Copy the following imagemin configuration code:
imagemin: {
	dynamic: {
		files: [{
			expand: true,
			cwd: 'images/',
			src: ['**/*.{png,jpg,gif}'],
			dest: 'images/'
		}]
	}
}
Add a comma after the postcss configuration code (I've outlined the comma in green so you can see where it should go). This is an important detail – without the comma it won't work!
Hit Return to create an empty space, then paste the imagemin configuration code. It should look like this:

4. Add the plugin to the task list.
Add 'imagemin' to the Default task(s) array, separated by a comma.

5. Run Grunt!
Save your Gruntfile.js. Open your terminal and type the command "grunt".
grunt
The terminal will inform you that it minified 5 images (saving 704 kB - 7.7%). Not bad!
I hope your Grunt project was a success. If it didn't work, don't be frustrated, I couldn't get Grunt to process my first attempts either. Start over from the beginning, making sure that you've installed all the plugins correctly. Check your Gruntfile.js and package.json files against my files for accuracy. If you are still stuck, contact your instructor for help.
Leveling Up with Grunt
We've installed two Grunt plugins, which is awesome! We've added browser prefixes, minified our CSS file, and optimized our images. You should perform these basic tasks before going into production on any project. However, there are many, many more plugins that you can add to your Gruntfile.
 |
| To date, there are 6,411 plugins in the Grunt directory. Which ones will come in handy in your projects? |
Learning Grunt is a challenge at first, but once you understand the theory of how plugins work, it's a snap to set up. Here's a list of resources to review what you know and fill in the gaps of what you don't know.

