What is a Deck?
A deck is a structured, visual presentation of your work and your creative process. Usually delivered as a PDF, a deck is a way of explaining your project, and the process you used in designing it. A good deck will not only help you explain your process, it may even help you see it! And when you can see your own process clearly, you can then modify, improve, or just go with it as is. But knowing how you do things is a large part of doing things well.
We create decks in order to sell our ideas to others. So that is our primary focus. A deck is in itself a design project. So hopefully, by creating a simple clean deck template, we can hone our ideas, focus our intent, and show evidence of critical thinking and good design choices. All this because we set up our project through a process, and we present it in a cogent way.
So why is called a "deck"? Because, just as we might have a deck on a ship, or a deck on our multimillion-dollar house overlooking our sprawling gardens (in our imagination), a deck is something to stand on and see the landscape of our project with clarity and intelligence.
Back to TopPart 1: Mechanicals
Setting up the Deck in InDesign
The easiest way to go about this is to set up a template format that you will be able to use in all your courses. Think of it as your "process folder." As you build your projects, use it as a scrapboard, a storyboard, and a presentation frame. Once you have created your template, you can use it in all your course presentations, and in your future client presentations too.
The following guide explains my process for creating a deck using Adobe InDesign. As any good designer should, I begin by considering how this deck will be read, on which sort of device, in what context. So, with this in mind, we will start with a horizontal, wide, or landscape aspect ratio. Think tablet, desktop or even phone (sideways) as the ideal reading scenario.
1. Launch InDesign, and select File > New > Document and choose the Print format. (Not necessarily because you will print the deck, but because the preset of Letter-Half is convenient.)
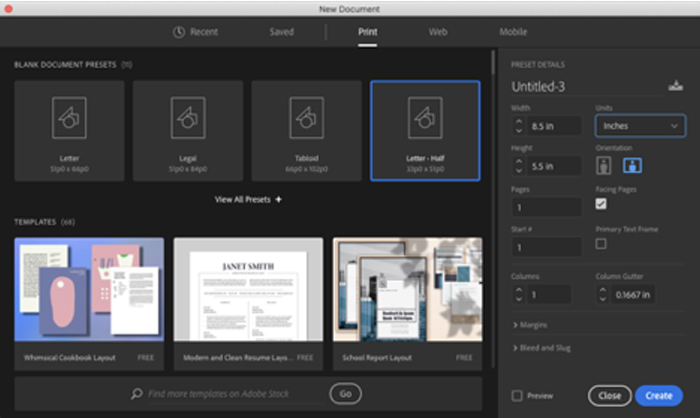
2. Set the Orientation to Wide and Deselect Facing Pages. You will note that I have the units as Inches. That's because I happen to be in North America. (If you're elsewhere, feel free to change the units to whatever format works best for your pre-frontal cortex and the place you happen to be.) You can leave the rest at their default settings. It's always possible to adjust and reset these preferences once you have created the document.
3. Create the document. Now we can start creating the particulars for the deck. I'm not going to dictate typography, other than to say, make it clean, somewhat neutral and easy to read. Sans Serif, humanist faces are a good place to start.
4. Open the Pages panel. Within the Pages Panel, find and select the A-Master Page icon.
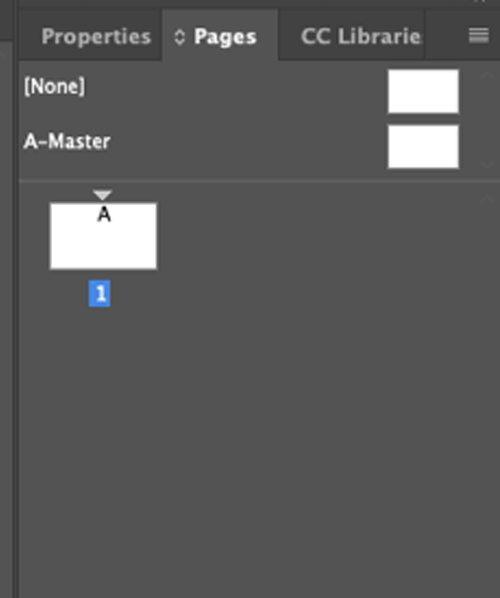
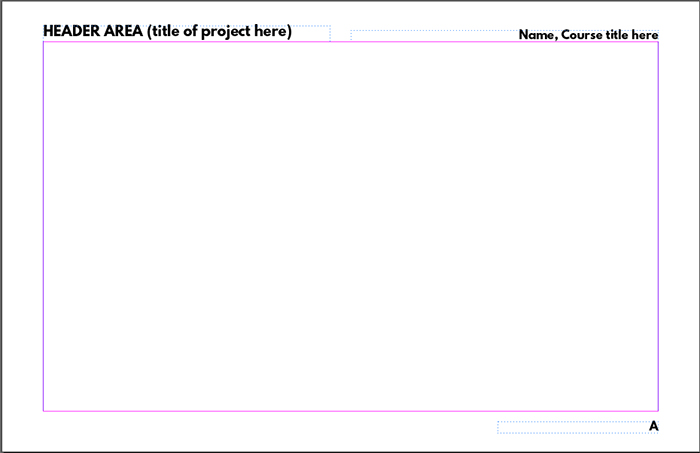
We'll work on the Master Page first, setting up the boilerplate elements (those parts that run consistently through the whole piece). Any guides, recurring text, or automatic page numbering should be done here. It will ensure consistency and uniformity throughout the document.
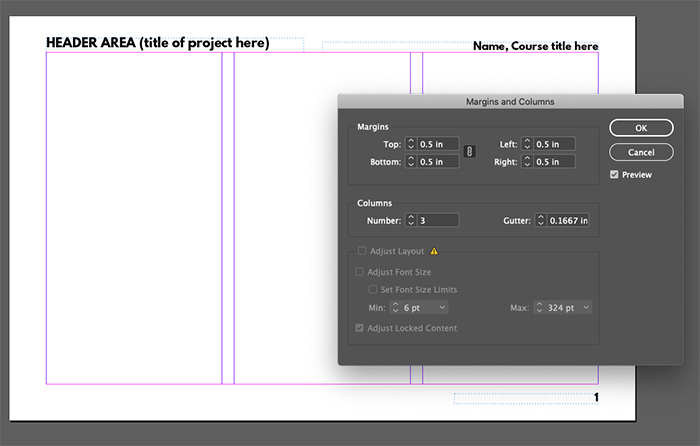
5. I'd suggest a simple format using a header and a footer, leaving the main area open for content. Since this is mainly going to be transmitted and delivered digitally, and not as a print, we can work pretty close to the top and bottom edges. I've outlined a visual sample below. Remember, these are all on a Master Page, so for each new project you'll want to fill out the parts differently in respect to the class and project.
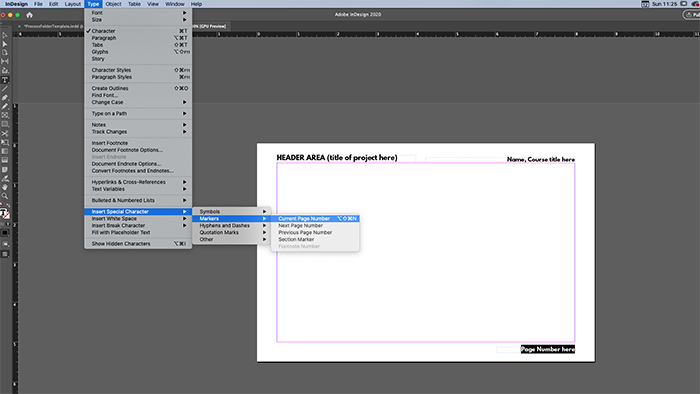
6. The "current page number" can be found by selecting Type > Special Characters > Markers > Current Page Number (see below).
7. The page layout for individual pages can vary, and that depends on the subject and sections of the process that you will be showing for each page. I like to start a page with either two or three columns.
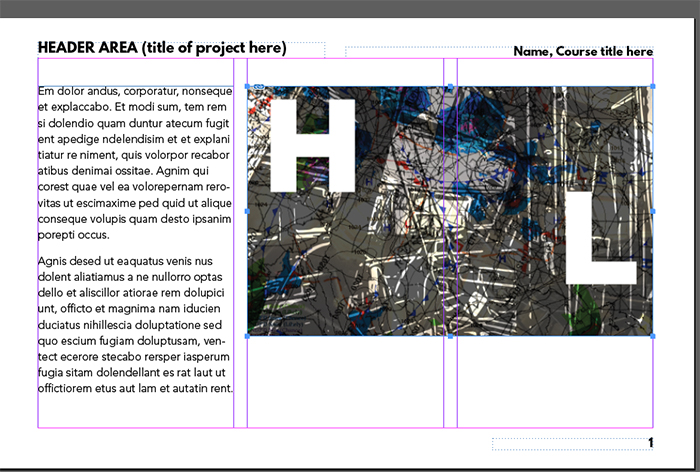
8. Drag out the Text tool. Fill the text frame with Place Holder Text (Type > Fill with Placeholder Text). Here is where you can set up your Paragraph Styles. Choose a basic setup for your body style, with size and leading and typeface. Then create a new Paragraph Style (Window > Paragraph Styles). Name the new style something like Basic Body. Keep it simple and recognizable. You can always refine the settings by double-clicking on the name of the style in the Paragraph Styles Panel.
9. Place a dummy image on the page. Align it with the column grids. This will help you set up a basic layout.
10. Save your document as an InDesign Template. Using File > Save As from the dropdown menu, select InDesign Template.
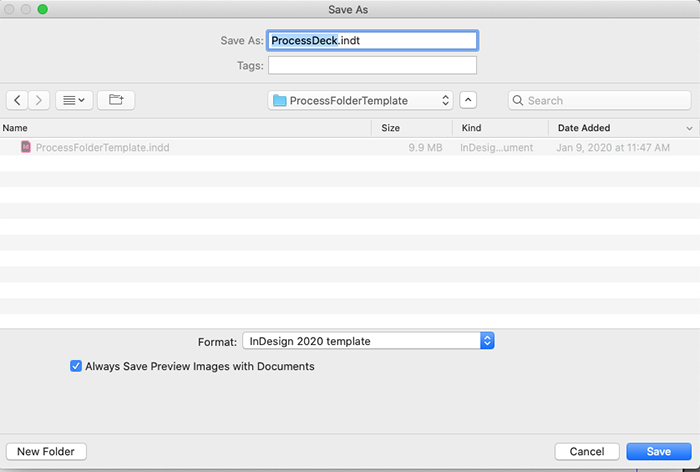
11. Each time you start a new project deck, choose the ProcessDeck.indt. It will then open a new "untitled" InDesign document. The parts you've saved in the template will be there for you to modify for your particular new deck.
With the basic mechanical setup designed and saved we can move on to considerations of what goes into the deck itself.
Back to TopPart 2: Deck Content, Process, and Delivery
So what goes into the deck, and how do we make it make sense? The deck is, simply put, a presentation platform. So while the form of the deck is important, that should be simple a frame within to put the art. The content needs to make sense in terms of what your intent for the piece might be. In the case of design or creative projects, we want to see a context for the final piece. That should include:
- Design Statement/Brief: A description of the project, its challenges, and its intended results. Show the context of the project, the history, and the need for it.
- Ideation/exploration: Show evidence of the thinking process that you went through as you evolved your project solutions.
- Sketches/mood boards: Related to ideation, this could be a part of the previous section as well.
- Process and implementation: Research (show evidence of testing, research, evaluations)
- Results: Show your final piece, and present it to its advantage.
Each project you work through will have its own particulars, and the deck should reflect that individual aspect. The deck is just a way of keeping order; order of thoughts, of process, of adaptation and innovation. What I'm giving you here are just guidelines, not rules. Like a good soccer game, the field may be the regular, but the ball is round, the plays are fluid, and the results are beautiful. That's what tahe deck is.
Below is an example of a simple deck with only four sections (Brief, Ideation, Prototyping, Results). Note that the pages use different columnar layouts depending on the content they show. The design is all fluid, but it's always up to you.
This is a deck for a design project to create an Egg Mailer. Eggs are hard to send in the mail—so fragile! I used this deck to present my design process.
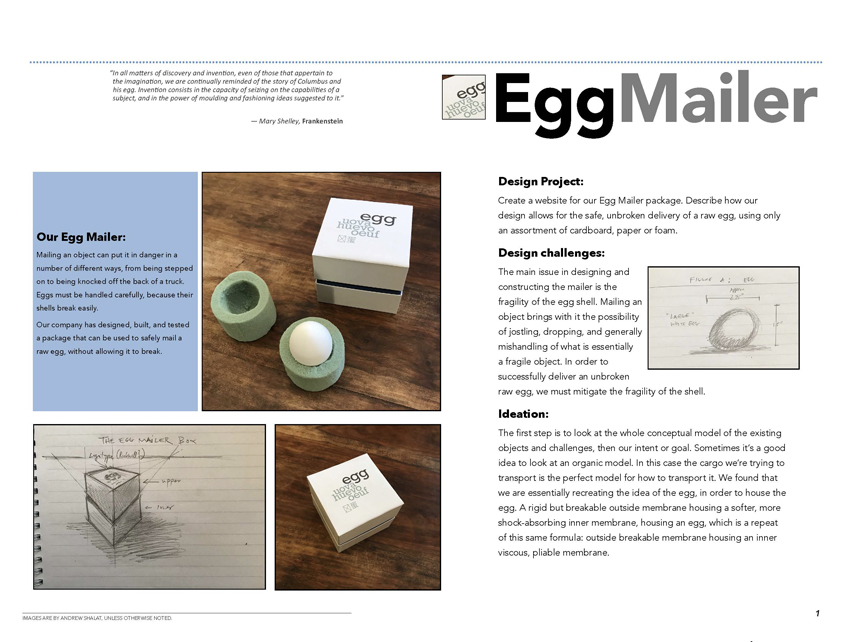
The Brief: A summary of the project and the challenge. On the left you can see snapshots of each stage, including the final product.
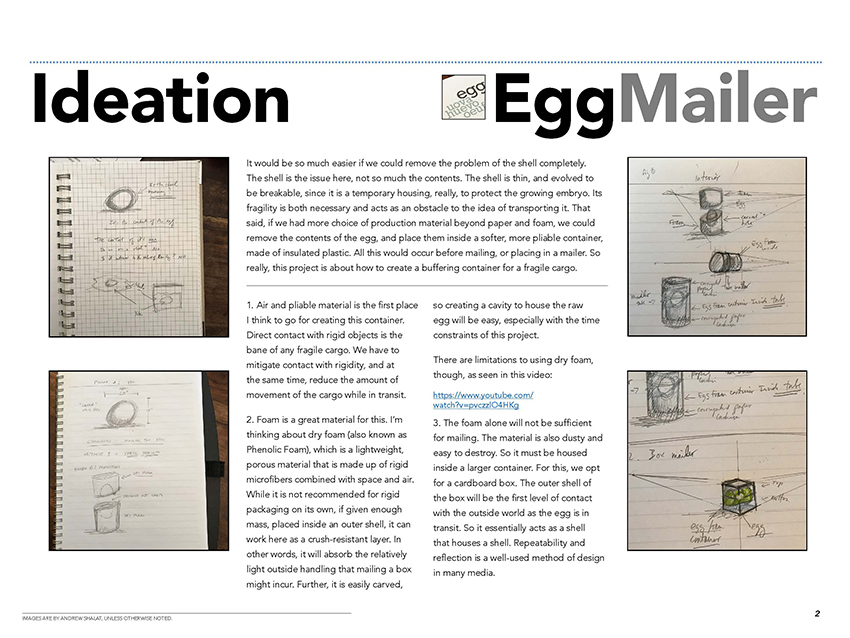
Ideation: A narrative and sketches help me communicate my thought process as I explore various aspects of the design challenge.
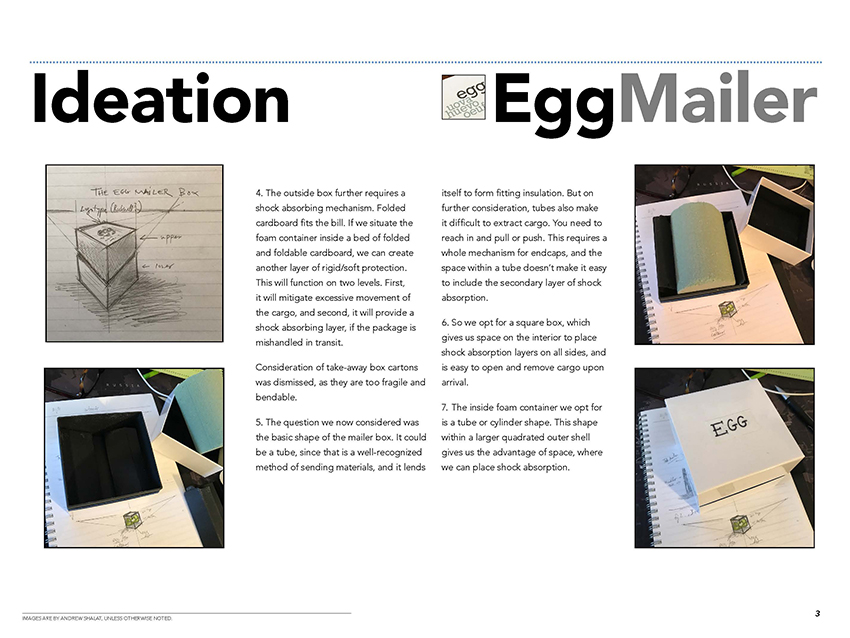
Ideation: Here I explain my process in exploring different kinds of container.
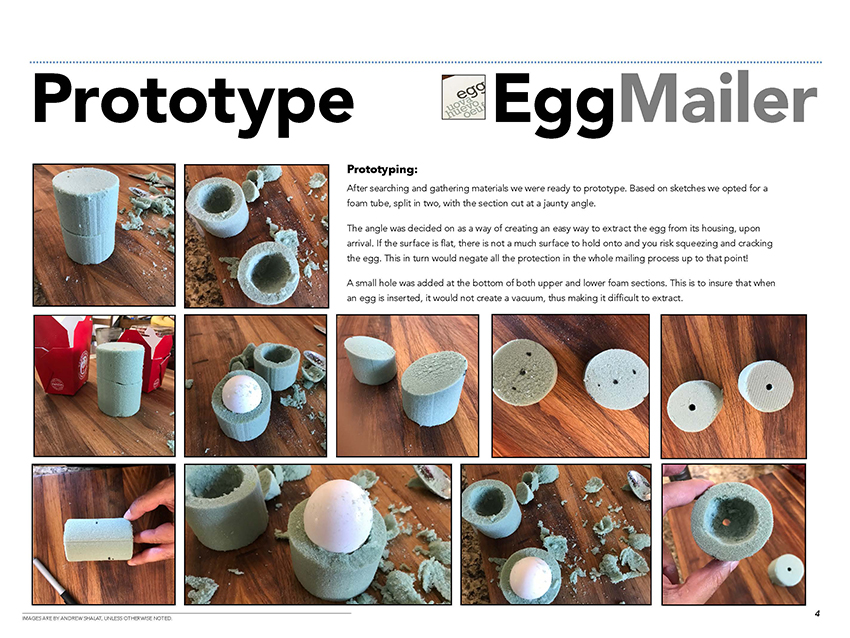
Prototype: How the Egg Mailer housing was made.
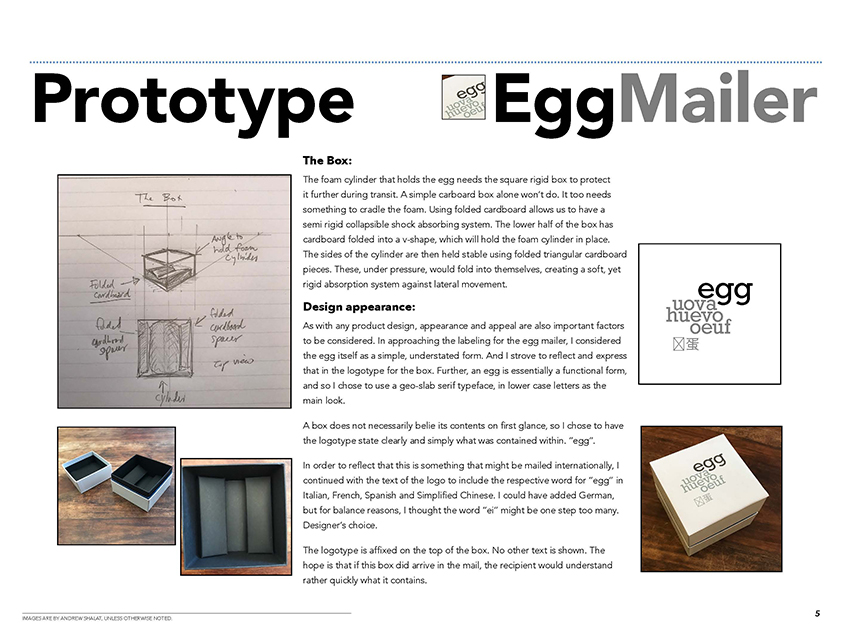
Prototype: How the Egg Mailer packaging was designed.
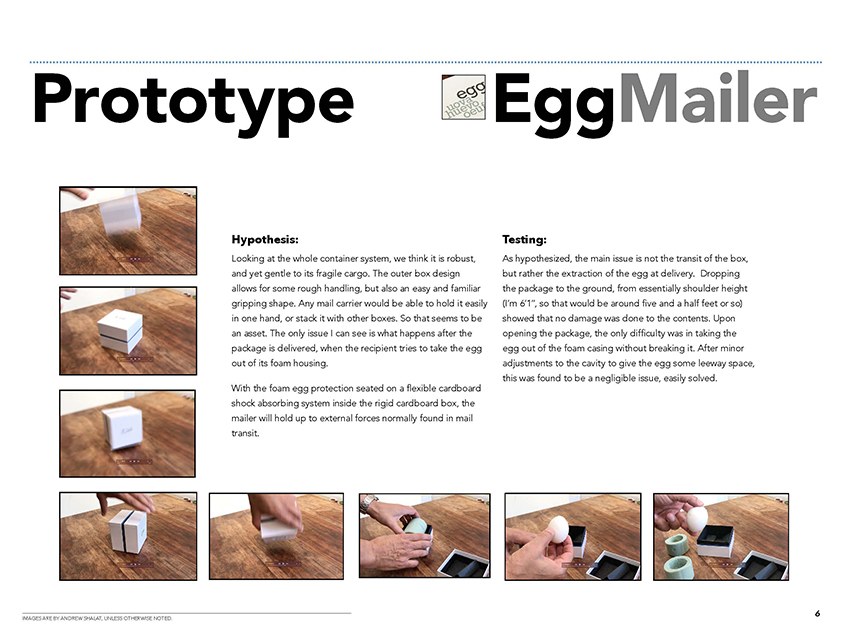
Prototype: Testing the final product.
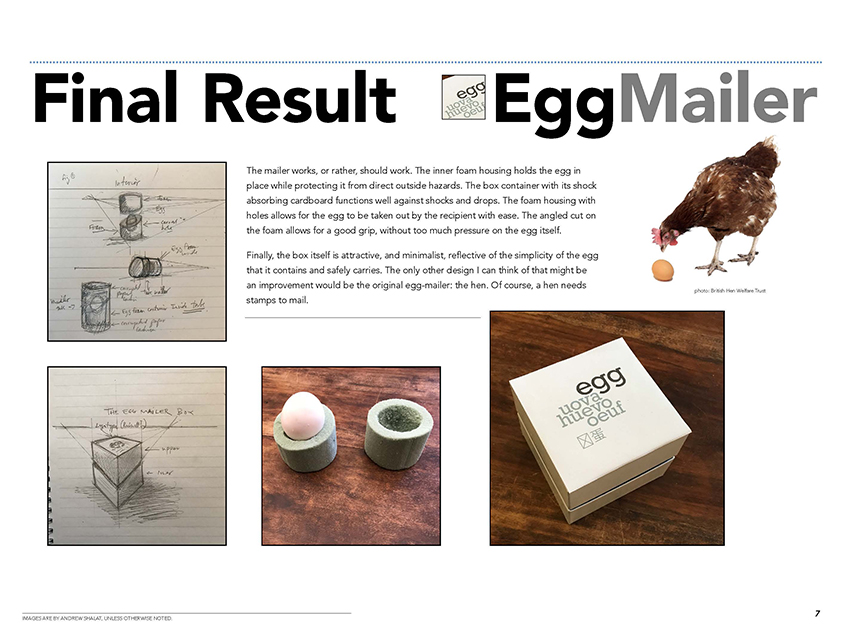
Result: A showcase of the final design, showing the product in context. Chicken not included.
Summary
I trust you've found this guide helpful for creating presentations of your research and your creative work. Here's a summary of how to apply this approach in your in-class presentations.
- Use InDesign to create a deck template for presenting your work.
- As you do your research or creative work, develop the habit of documenting the different stages in your process:
- Write a creative brief for the project
- Capture your sketches and ideation activities
- As your design becomes more polished, save versions of important stages
- Once your design is final, make sure to present it to full advantage: nicely photographed, in context and perspective, either printed or mocked up in 3D, just like the client or customer would see it.
- All of the above assets can be combined in your presentation, as you wow us with your Brief, Ideation, Prototyping, and Results.
I can't wait to see your presentations! Back to Top

