Let's begin by examining the question of what is essential in a portfolio. Designers who create their own portfolio sites often include "goodies" with their online portfolios, such as custom navigation schemes, blogs, or downloadable items.
While these are great to include (and may draw potential clients to your site), you ultimately only need three things in an online portfolio: samples of your work, contact information and social media links, and a professional summary. All of these items are easy to build or add with a portfolio site service.
1. Samples of Your Work
This is a no-brainer; it's the very reason you create an online portfolio. As a Web designer, you can include screenshots of the sites you've created, as well as links to those sites, so your audience can explore your work in more detail.
Include a description of your work. State who the client was (including the business/industry), the purpose of the site (whether it was intended to sell products, provide information, or persuade the audience of an idea, for example).
If your role in developing the site was limited to one aspect of the project (for example, coding all page HTML) be sure to make this clear. If your project is a fictional project such a school assignment, be sure to make that clear.
2. Contact Information
A potential client may love your designs, but can't give you any work if the company can't get in touch with you!
Include as much contact information as possible, including an email address and a phone number throughout the site. Different people have different preferences regarding methods of contact, and you don't want to give a potential client any reason to pass you by. For example, you should include some social media accounts where you keep artwork as well as phone number and email address.
3. Professional Summary
Include resume-style information as well, including information on your education, professional focus, and skill sets. While you may want to spice it up by giving some personal information, your site isn't an autobiography, so keep it focused on relevant information.
If you want to maintain a professional tone, write about yourself and your services in the third person: "Jane Bloom is a Web designer focused on developing sites for creative artists."
Use best practices. Your online portfolio not only showcases your work, but the portfolio site is itself an example of your work. So if you choose to build your own portfolio site, demonstrate that you can create a professional site that includes standards-compliant, semantic, valid, and well-crafted code. This is not the place to be lazy or shoddy!
Use your own domain name. While there are some great sites that specialize in publishing online portfolios for designers and artists, you may decide to use your own. Combined registration of a domain name and Web hosting services is relatively cheap these days, so cost is no impediment to investing in a professional Web presence.
Demonstrate your skills and creativity with your portfolio design. Your portfolio is the first sample of your work that a potential client sees when she visits your site. So feel free to show off your mad skills! Just be sure that in your effort to impress, you don't create a site that is gaudy or difficult to use (see the "don'ts" below).
Present a comprehensive list of services. The more added value you can offer a potential client, the more likely you are to be hired. So, don't skimp on your list of provided services.
If you can design logos, or take great photographs, don't be afraid to include this in your list. You might even want to invest a small amount of time in learning the basics of some marketable skills related to Web design—such as copywriting—so that you can offer that to your clients as well.
Finally, if you have contacts that specialize in related areas, you can feature them in an "Ask me about..." list of services.
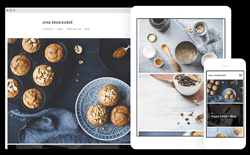
Want to see some of these dos in action? Check out an attractive and well-structured portfolio site by student Nissa Otero in this Quick Crit:
The Don'ts
Make the Web site difficult to use and hard to navigate. You have a very short time to make an good impression. No matter how slick and visually impressive your Web site is, a potential client will quickly go elsewhere if she has to figure out how to decipher your navigation system.
If a user has to spend more than a few seconds fiddling with sliders, pressing unlabeled buttons, or interpreting cryptic navigation items, he will most likely get frustrated and simply take his business elsewhere.
Bottom line: Don't sacrifice usability for aesthetics. You can make your site creative and visually stunning without resorting to pretentious and alienating artistic gimmicks.
Make important information difficult to find. This goes hand-in-hand with the previous point. Don't make the potential client jump through hoops to find basic information such as samples of your work or contact information. Organize your work by category so that a potential client can find projects similar to the project she needs tackled.
Include substandard work or faux Web site designs. Even if you only have a few designs that you are proud of, it is better to have a handful of excellent pieces than a mess of uneven work.
And while you may want to gain some good experience by designing a few fictional business Web sites, clients ultimately want evidence of professional experience. If you can't land paying clients right away, offer to do some pro bono work to build your portfolio and gain experience dealing with clients. The sooner your portfolio is stocked with fully functioning, live-on-the-Web sites, the better.
Today, many designers are using hosted portfolio site services to upload their work. Social media has made it easier for people to share these sites and connect with customers. Working from a common platform can also help you get you more page views as the software provider may promote your site.
Let's take a look at some popular portfolio builder websites.
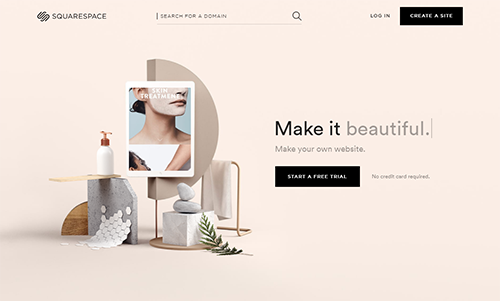
Square Space
Square Space is a popular software-as-service site builder. Square Space is designed to make site building a simple and intuitive experience for a wide range of web users. The focus of Square Space is ease of use, and some of its cleaner responsive templates may lend themselves to creating portfolios.
The flexibility of Square Space allows you to easily set up a site while offering some advanced controls for users who are comfortable with coding.
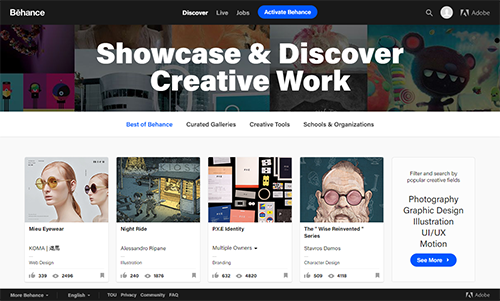
Behance
Behance is a portfolio site service that has been in existence for more than 10 years and is owned by Adobe.
Behance is set up like a typical social media site. It allows you to connect and follow other Behance users, and gives all site visitors the option to appreciate projects. It has a strong user base, so your work can get seen by other artists and possible clients. Behance is a great place to post finished work and share ongoing projects. It is available for free.
Adobe Portfolio
|
Adobe Portfolio home page |
Adobe Portfolio is a great new tool for building an online portfolio to share with others, and like Behance it is provided with your Creative Cloud subscription.
Adobe Portfolio offers simplicity and customization. You can create and individualize a simple, responsive portfolio site with ease. However, you cannot access or modify the source HTML and CSS files to fully customize your site.
If you already have a Behance account, Adobe Portfolio will pull your projects from Behance. (If you do not want your Behance projects as part of your portfolio, you can hide projects.)
Of the three services, Adobe Portfolio may be the optimum solution for a starter portfolio site, so let's explore how it's done.
User Interface
Go to www.myportfolio.com and sign in with your Adobe ID.
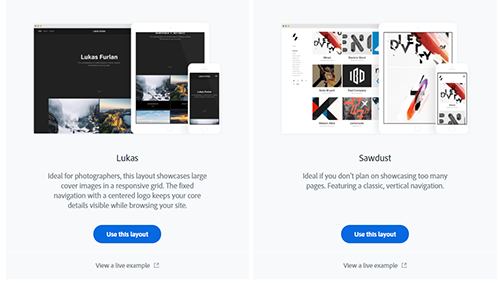
The first thing you will be asked to do is to pick a theme. While there are currently only a handful of themes, Adobe Portfolio gives you a lot of flexibility when it comes to customization. The themes are designed to put your artwork in the spotlight. In the end you will have a portfolio that reflects your personality.
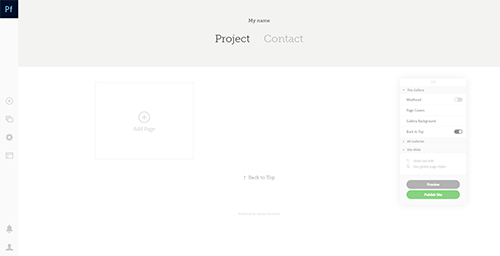
When you select a theme you will be taken to the home page of your portfolio. If you already have artwork in Behance, Adobe Portfolio will bring all that content over including the text. If this is your first time uploading anything to Behance or Adobe Portfolio then everything will be blank.
|
Don't worry, your artwork and customization will soon breathe life into this page. |
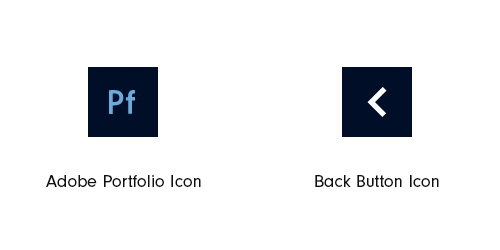
Let's explore the different areas in the Adobe Portfolio interface. On the left is a sidebar. Near the top is the Adobe Portfolio icon which will act as a back button as you navigate to other pages in the edit mode. This icon only appears in edit mode.
|
The Adobe Portfolio icon changes to a back button whenever you move from the landing page. |
Closer to the bottom of the sidebar are icons that only appear in edit mode. There are multiple controls here that you will be using when creating your site.
|
From the top down there is Add Content, Manage Content, Edit your Settings, and Switch Layouts |
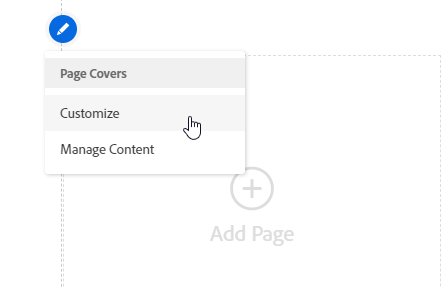
Hovering over the different areas or containers of your portfolio will reveal a small pencil icon. The icon opens menus to edit some aspect of the container it is linked to. Be aware that some containers may be nested in other containers. You'll find most of your customization controls hiding behind the edit icons.
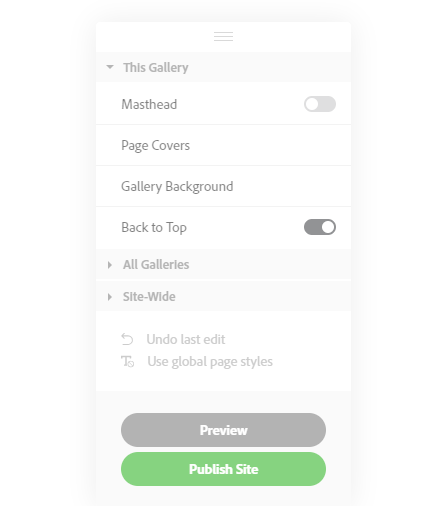
There is a floating panel generally found on the right side called the Floating Remote. This panel will also change options depending on what page you're on. Here you can make changes to the page/gallery, all pages/galleries, or site wide changes. Also, you can preview your page and publish it when ready. You can move this panel around the page to prevent it from obstructing your view.
Finally, when previewing your site you will see a small set of controls near the bottom. Clicking on the icons will adjust your page to act as if it's being displayed on a mobile device. This is helpful when you want to see how the portfolio will appear for others. At this point, you can continue editing or publish the page.
|
This UI is straightforward. Select the icon of the device you would like to simulate. |
Adding Content
Adobe Portfolio offers a lot of control to the designer when it comes to customization. Let's take a look at how we add some content to the portfolio to prepare it for your artwork and designs.
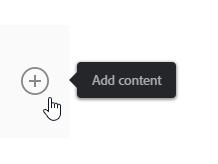
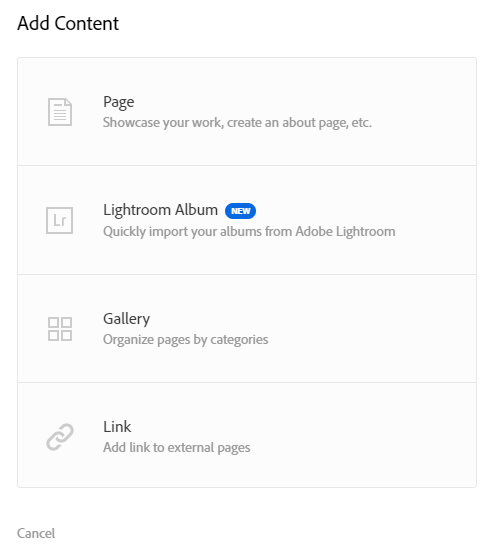
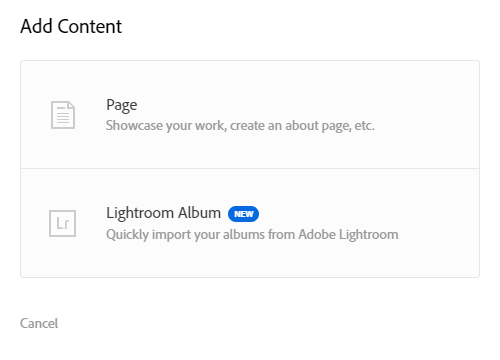
On the left sidebar, the first icon is the "Add Content" button. Here you can add pages, Lightroom CC albums, galleries, and links to external pages.
|
The Add Content icon can be found on the sidebar to the left of the page. |
|
Content refers to elements of your portfolio and not uploaded files. |
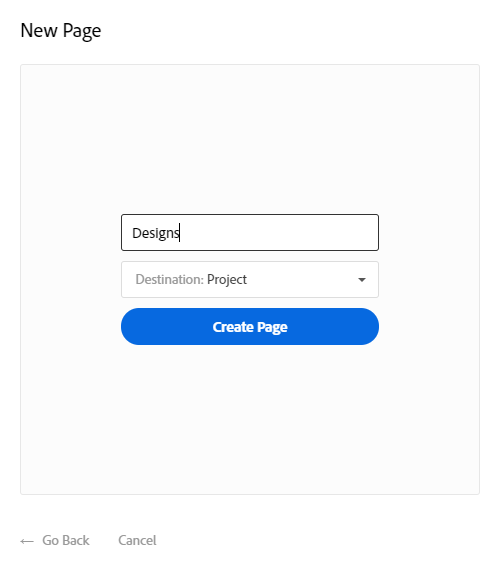
Pages are where your artwork will be displayed. Pages can exist inside galleries or as part of the navigation. When adding a page, a small window will appear where you can give the page a title and also specify where the page is going to be placed. If you want to put it in a gallery that does not yet exist you can create a new gallery.
|
I named my page "Designs" and it will live in the Projects gallery. In the destination drop down menu I could have chosen to have the page on the main navigation. |
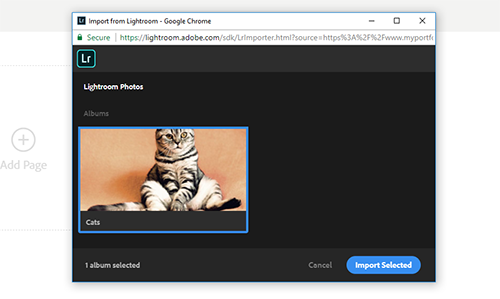
To place a Lightroom CC album, make sure you have some photos in Lightroom CC. Adobe Portfolio can pull any album you've created in Lightroom CC and place it in your portfolio.
|
Adobe Portfolio will open a small browser window and let you select an album from Lightroom CC. I only have 1 album available. |
Adobe Portfolio will automatically arrange and resize photos to fit in a grid. If the sequence of images is out of order, you can arrange the photos in the grid inside Adobe Portfolio without needing to go back to Lightroom CC.
|
The photos are all nicely arranged and you don't need to do any crazy math to figure out how to get them all to fit evenly. I grabbed the kitty pics from Pixabay.com for this example. |
Note: At the time this course was written, Adobe Portfolio will not automatically sync up with Lightroom CC. If you make changes to your Lightroom CC album you will need to manually reset the album in Adobe Portfolio. This will remove the album from Adobe Portfolio and pull the data from Lightroom.
A gallery is a collection of pages with each page containing its own content. When you add a gallery you can give it a title.
|
All you can do when creating a gallery is give it a title. |
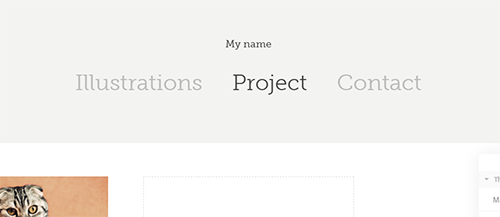
When you create the gallery, it will automatically become part of the navigation. The difference between a page and a gallery is that a page will hold artwork and can exist inside a gallery or on its own as part of the navigation whereas a gallery contains pages and is always part of the navigation.
|
Now the "Illustrations" gallery is part of the navigation. |
Finally, you can add a link as part of the navigation. You will need to give it a title and then link to an external URL. I would avoid using too many external links because you don't want to send your visitor on a long journey away from your portfolio but the option is there if you need it. (Of course, if you are showcasing built client sites, external links may be necessary and valuable.)
Uploading Artwork to a Gallery
By default, a gallery will already be created when you upload artwork. This default gallery will act as your landing page. For now, we will leave that gallery alone and make our own. I'm going to create a gallery and call it "Design". (I removed the "Illustrations" gallery.)
Once the "Design" gallery is created, you will be in that gallery and the Manage Content flyout window will appear.
|
The icons near the title show what type of content it is. The four squares is a gallery icon while the paper graphic is a page icon. |
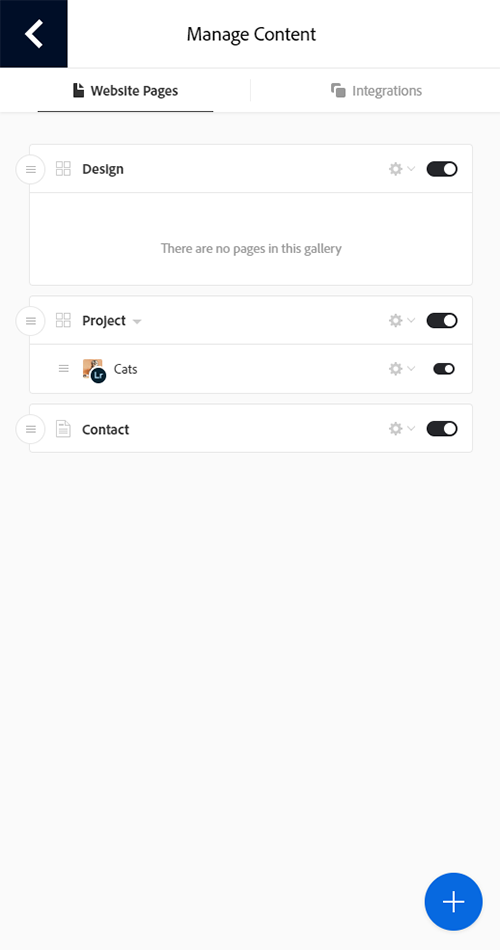
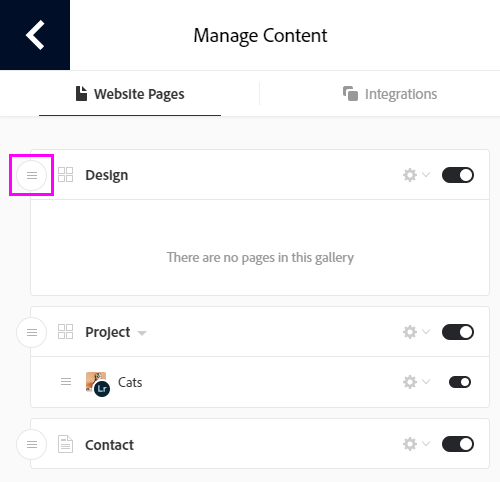
In this menu you can see where the gallery and all other content exists. Right now it is shown on the top which will be the far left in the navigation. I can move the gallery around if I wish to change the navigation. My gallery displays a message letting me know I have no pages in the gallery.
Looking further down the flyout menu you can see my default gallery called "Project". You can see in that gallery I do have a page and it is the page of cats that I made earlier. There is a small Lightroom CC badge on the page icon letting me know that the collection of photos is a Lightroom CC album.
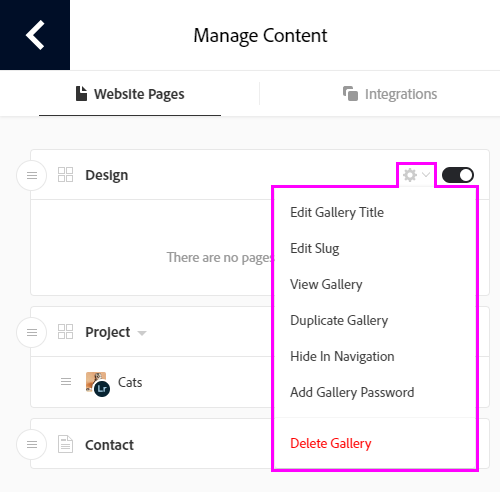
To the far right of each title you will see a gear icon. This icon lets you access options for that content. If you made a typo in your title or even just thought of a better title then you can access this menu to edit your content titles.
|
There are many options in the menu. Tip: Press enter to submit the title change. |
Another useful item in the content options is the "Edit Slug" option. This lets you rename the gallery in the url. If the gallery was named 'Web Design" then the url would end with /Web-Design but you might not want the hyphen in the url. You can change it to /webdesign or /web_design or just simply /web. The choice is yours but I would recommend you keep the slugs simple to remember and short in length, and avoid using special characters.
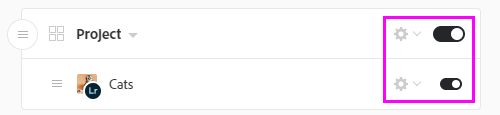
There are many options available in the content options menu such as adding a password to the gallery and the option to delete that specific content. Next to the gear icon is a toggle switch. This will just toggle the content's visibility in the portfolio.
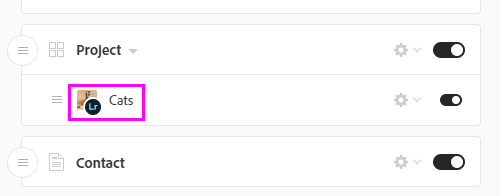
Back to the Project gallery, you can see my page on cats listed under the gallery area. As the gallery becomes populated with more pages, they will appear in their own group beneath the gallery title. Each content will have its own gear icon and toggle switch.
You can rearrange the pages and galleries by using the small handle found to the far left of each content title. Moving the galleries around will affect the order of your navigation. You can also rearrange the pages inside galleries.
|
The order of your galleries and pages are important. Make sure your best work is on the top of the page. Create an experience that gets the user excited from the start. |
Click outside the flyout menu to close it. If you need to access it again, it is the second icon labeled "Manage Content" on the sidebar.
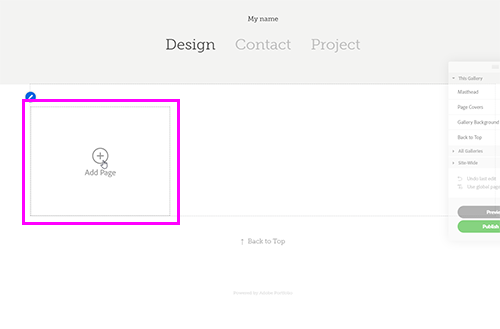
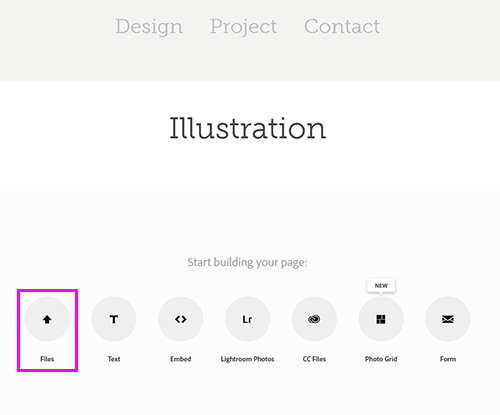
With the flyout menu closed, you should see an icon to add a page in your gallery. Click on the icon.
|
I've highlighted the area in the image above. |
You will have two options. You can add a page or a Lightroom CC album. Let's focus on adding a page first. Go ahead and select page from the menu. In the window that appears, give your page a title.
In the dropdown menu you can specify a location for this new page. If you open the menu you will see you have a few options and one of those option is Navigation. For this example the page will be placed inside a gallery. Select the new gallery you created and click on "create page".
Now that we have the page created we have gone down one more level in the new gallery. There is where we will start uploading some artwork. It is pretty straightforward. Adobe Portfolio gives you a menu on the page to select what kind of file you will upload.
Let's upload a file from your computer. Click on the icon labeled "Files" and browse to some artwork you have prepared and add it to the page.
|
After navigating through my files I have placed my artwork into the portfolio. |
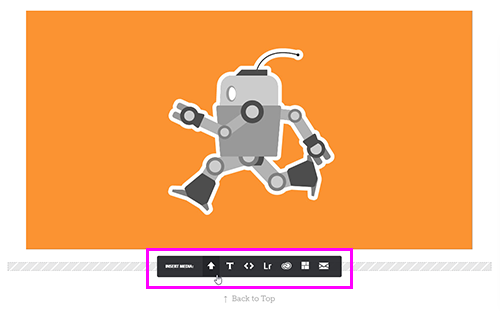
Now we're moving along! You may have noticed that the menu you used to add the artwork suddenly disappeared! Fear not, the menu is still available. It hid because you were adding artwork. If you hover your mouse just under the artwork you should see the menu appear again. It will look a little different but will contain all the same options. You'll also find the controls in the Floating Remote panel.
|
The upload tools have been minimized to give you more viewing space. |
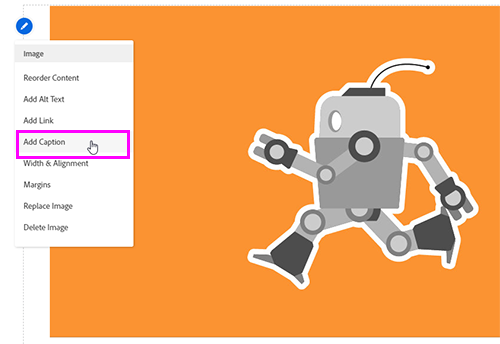
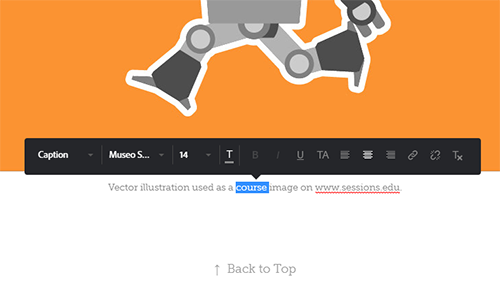
Go ahead and add another image to your gallery. Once you have it added, you can hover over the image to reveal the pencil icon in the top left. Click the icon to reveal a menu where you can make adjustments to that content. Let's add a caption to the new picture. Click on the icon and select "Add Caption".
You can now type a caption under your image. There are many other options in the menu that should be familiar to you and that you can explore on your own.
|
When you highlight a word you will be given some styling options for caption text. |
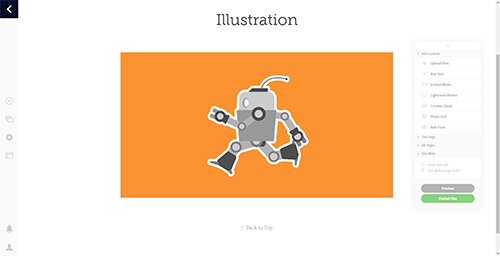
When you are finished you can either click the arrow icon in the top left to go back or just click on the gallery name in the navigation. Now you'll see your page is part of the gallery. The cover photo for the page is usually the first image of that page. If no cover photo appears, just hover over the area until you see the pencil icon for that cover. In the menu will be an option to edit your cover image. Adobe Portfolio generally reminds you to add a cover photo if for some reason it did not generate one.
|
Great! I've added a bit of color to the page. |
You have now successfully uploaded your first artwork. You should now be on your way to filling out your portfolio with amazing artwork and designs.
Customization
Earlier I mentioned that you can customize your portfolio to make it your own. There are many options you will likely be familiar with but I wanted to point out some specific ones that may not be easy to find. Just remember, most of your customization will be found under the blue edit icons and in the floating remote panel.
Typography is playing an even more important role on the web. The technology has evolved from using a handful of web safe fonts to being able to use a variety of unique web fonts. Adobe Portfolio takes advantage of web fonts and lets you change the fonts used in your portfolio.
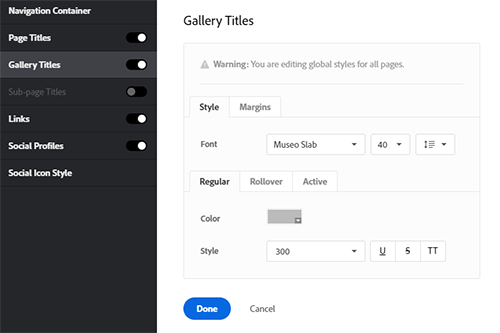
Hover over the navigation container, click on the edit icon and select "Customization" from the menu. In the window that appears you will see that you can edit the titles of pages, galleries and links as well as some other controls. Select Gallery Titles and take a look at the options.
|
The Gallery Titles screen will let you make change to your font. There are other options in this menu too. |
Click on the font name to reveal a drop down menu. You'll see that there is a font being used. The theme I am using has the gallery titles set to Museo. You'll also notice in the same list are some available fonts such as Helvetica, Arial, Verdana, and others. You can use those fonts if you want to keep things simple. It's good practice to keep the number of font families to a minimum and find fonts that go well together.
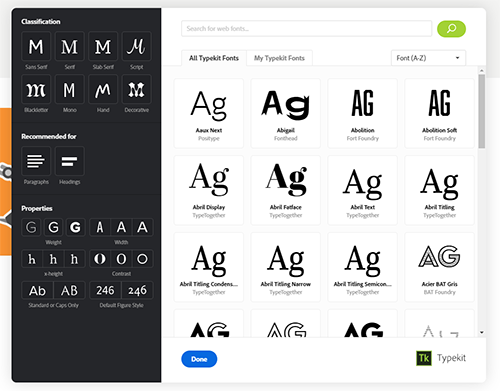
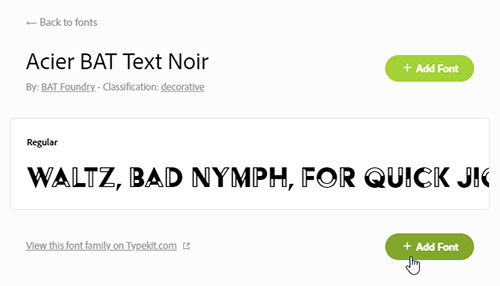
In the dropdown menu you will see an option to manage fonts. When you click on that option, a small window to Adobe Typekit will appear. Here you can search for new web fonts to add to your portfolio.
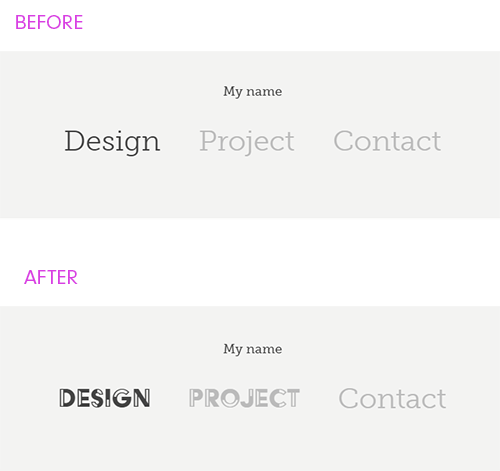
I selected a decorative font that will stand out just for this example so that the change is noticeable. I will click the button labeled "Add Font".
Once it is added, you can click the hyperlink near the top to search for other fonts or just click outside the Typekit panel to return to the Navigation Container panel. Now you will see the font on your list. Select the font from the list and immediately you can see the font change in your navigation.
There are many other ways to customize the gallery titles in the same menu. Feel free to explore and play with some of the settings. You should be familiar with what many of them do but if not, just play with it. Most of the editing tools will show you the result in real time.
Now that you've learned how to edit the navigation container this will prepare you to edit many of the other containers in your portfolio. You'll be able to edit more text, background colors, add background images, and even play with the margins of some containers. There are a variety of options in the edit panels waiting to be explored.
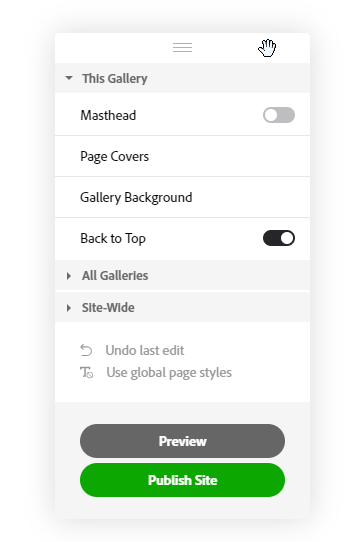
Floating Remote
You've learned how to edit the different containers in your portfolio with the edit icons but there is another area where you can make changes that will affect your portfolio. Let's briefly look at the Floating Remote panel.
|
The Floating Remote panel. |
Many of the options in this panel are the same ones you would find when clicking the pencil edit icon. When you get comfortable you can use the floating panel instead of the individual edit icons on the containers. You can make changes to the current location or all related content. This panel also contains an undo feature. You can also opt to use global styles on the page you're viewing.
You can preview your portfolio from this panel. When you press the preview button, the sidebar will disappear and you will see the portfolio as others would, except you will have a new little set of controls near the bottom. These controls will let you view your site as if it was being displayed in different devices. If you are happy with the look of your portfolio then you can press the button labeled Publish. If you still need to make some changes then you can return to the editor. The Publish button will also appear on the floating panel and can be pressed whenever you are ready. Once published, this button will change to Update Live Site.
Portfolio Settings
After you brand your portfolio with a look and feel that is suitable to you then next you can focus on the functional customizations. Adobe Portfolio offers flexibility when it comes to adjusting specific functionality.
Navigate to the left sidebar and click on the gear-shaped Settings icon.
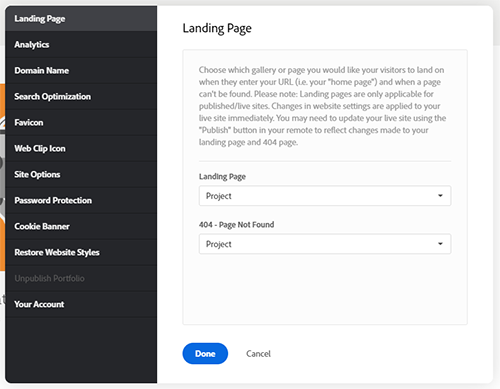
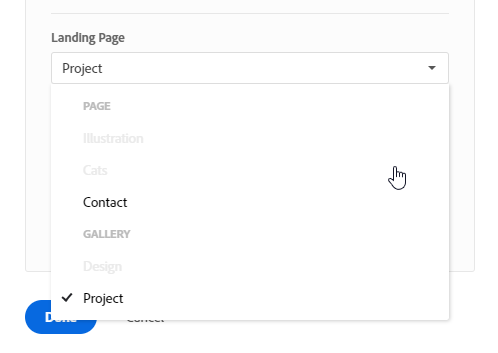
A window will appear with several sections you can edit. Earlier in the lesson I mentioned that you can change your landing page. This is the location where you can do that.
With the panel open, go to the landing page dropdown menu. You'll see that most of the list is greyed out. To specify a new landing page you will first need to publish your portfolio. Once published, the other selections of your navigation will become available to choose from. You may need to refresh the editor page to see this change.
|
My new gallery cannot be selected until I publish my portfolio. |
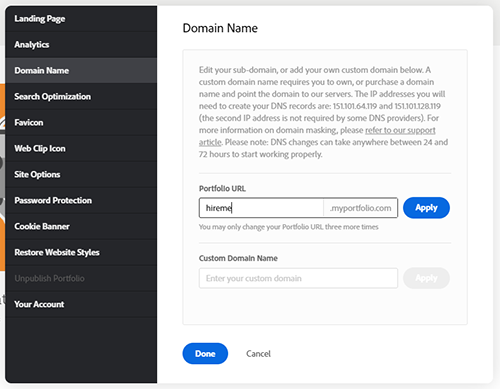
A little further down the Settings panel is the Domain Name section. This isn't something that you must do but for some of you who would like a custom URL then this is where you would go. After you publish your portfolio you'll see that the URL to it is something like adobe1234.myportfolio.com. This isn't a very personal URL but you can change it in this panel. When you enter a new name then Adobe will let you know if the name has been taken or not.
You can go one step farther and change the entire domain but you'll need to buy a domain name from a provider if you haven't already done so. If you have paid for a domain then you'll need to look at the instructions on how to do this with the provider you bought the domain name from.
Next up is adding a favicon to your portfolio. You should see the section in the menu. There isn't much to say about this other than I would recommend adding your personal favicon to help build your brand. It helps the user identify the tab of your portfolio among other tabs they may have open. the final version will be tiny so make sure what you pick is easily readable and makes sense.
|
Adobe Portfolio provides a nice preview of how the tab will look. I choose a pencil icon. |
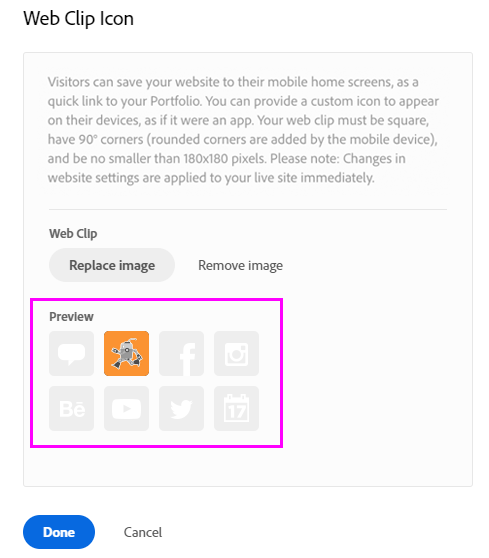
Speaking of icons, the Web Clip icon is another kind of icon you can edit. The Web Clip icon is when a viewer saves your website as a home screen icon. Your portfolio will appear on their device and look like an app! This would make it much easier for the viewer to revisit your portfolio—plus it just looks cool when your icon is sitting cozy with apps like Instagram and Spotify.
As we explored the Settings panel, you probably noticed I skipped over a couple of items. These items are not critical to get your portfolio up and running but can still be useful when managing your portfolio. In the Site Options you will find additional features you can enable or disable:
Finally, you can unpublish your portfolio if you need by accessing the "Unpublish Portfolio" section but first you should publish your portfolio!
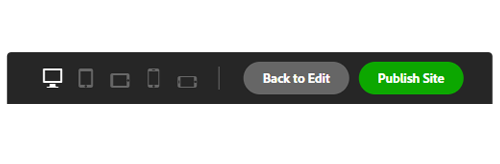
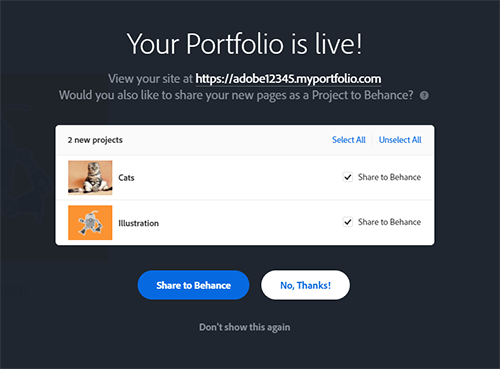
When you have everything set you can go ahead and click the button labeled "Publish Site" on the Floating Remote panel. You'll be asked if you want to share your work on Behance. This is up to you.
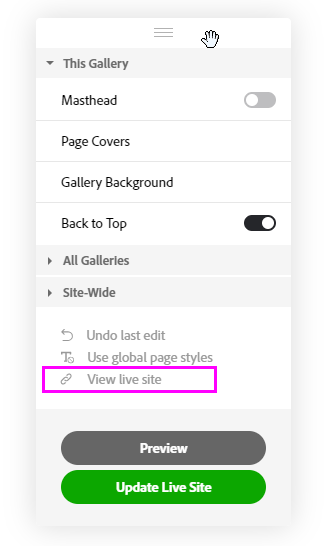
You can continue to edit and update your site if you find changes you want to make later on. There is a link on the floating Remote panel to view your live site.
Adobe Portfolio is a powerful tool for building a personal portfolio. Building a site from scratch is another option but don't dismiss tools like Adobe Portfolio. In the end you are still designing your portfolio site and Adobe Portfolio does provide you a lot of customization with a good amount of flexibility.
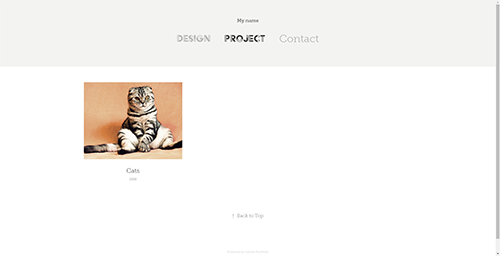
|
The site is live! There isn't much there on mine but yours will look much nicer. |