Texture
maps, which you have created throughout the course, are sometimes called color maps, and this may be a more descriptive name. A texture or color
map is used to
apply color
to a surface. By applying a color map you are "mapping" certain
colors to certain parts of the surface.
Objects
in the real world have characteristics beyond color,
and many of these characteristics can be simulated in game engines
as well. Varying levels of transparency can
be mapped onto a single surface using transparency maps. Certain shiny,
reflective surfaces can be simulated using environment
maps, sometimes called reflection maps. And bumps can be mapped
onto surfaces using bump maps. All
of these can be used to make the game world look more realistic.
Such
maps are, like texture maps, simply digital images. They can
be made in Photoshop or any image editing software. You will
usually use the color map as reference when creating other types
of maps, possibly working in separate layers in Photoshop.
 |
| This is a bump map that you'll encounter later in the
lecture. Like most maps, it is a grayscale image file, based on the
original color image (in this case, our brick tile). |
Most types of maps are applied
in the same manner as texture maps. In fact, they may be applied
at the same time—game engines and 3D packages tend to group
various surface characteristics into sets that are often called materials or shaders. You experienced
this when you learned about using Hypershade in Maya. A shader or
material might be so simple as to specify only one color (although the rendering
engine will usually make certain assumptions
about other characteristics).
Instead of specifying a color for
a shader, you can use a color map. You may also choose to use
a bump map, a transparency map, or any of the other types of
maps available. The resulting shader is then applied to the surface
exactly as a texture map would be.
Game artists will often apply
shaders to models as they build them. A texture artist might
create the various images (or maps) and pass them to the designer,
who will make the shaders for the game environment.
Let's explore how textures interact with the various maps that are available.
Transparency maps are used to create surfaces that are
partly transparent.
 |
|
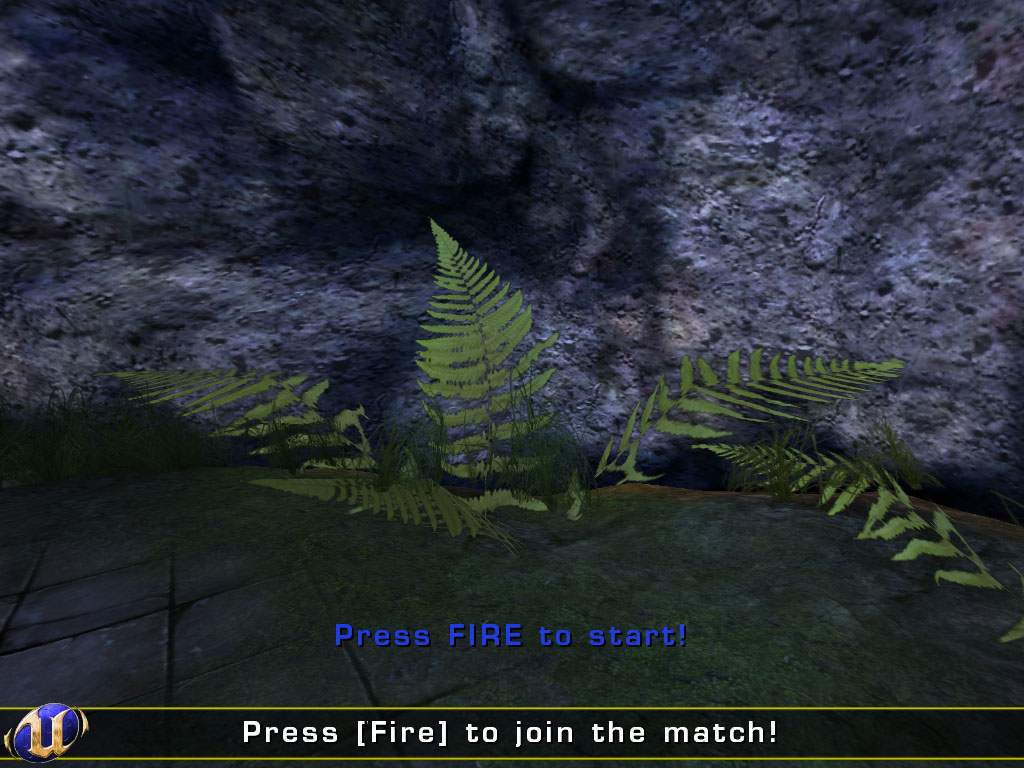
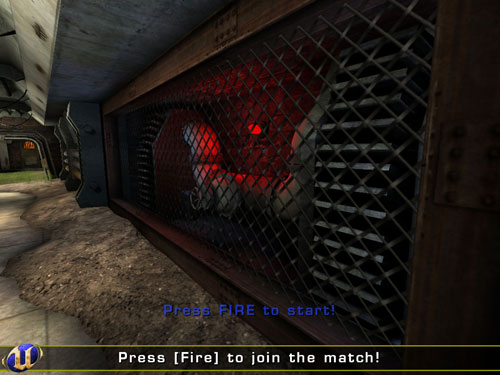
The two screenshots above show
examples of the use of transparency in textures; one in the steel
mesh, the other in the ferns. |
In a 3D software program like Maya, there are often separate images
used as transparency maps, sometimes called opacity
maps. In other applications, such as many game engines, you
can include an extra channel in your texture images called an
alpha channel, and that channel can contain the transparency
information.
Transparency maps should be grayscale, with no color. Portions of
the alpha map that are 100% white (255 red, 255 green, 255 blue)
represent full opacity. Black areas (0 red, 0 green, 0 blue)
represent total transparency. Shades of gray indicate partial
transparency—for example, pixels that have values of 64 red,
64 green, 64 blue would be approximately 75% transparent (or
25% opaque).
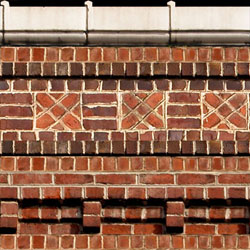
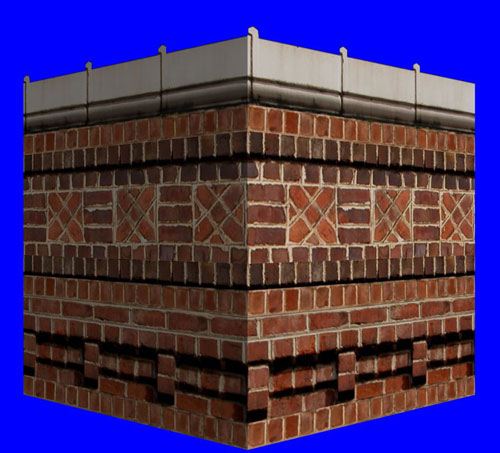
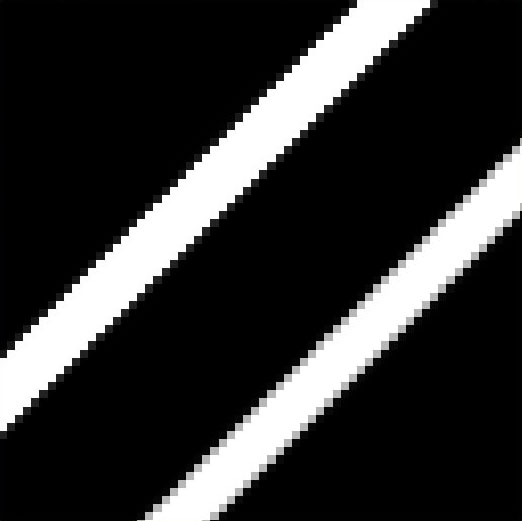
The top trim texture below could use some transparency mapping.
 |
Click the image above to get a closer look. |
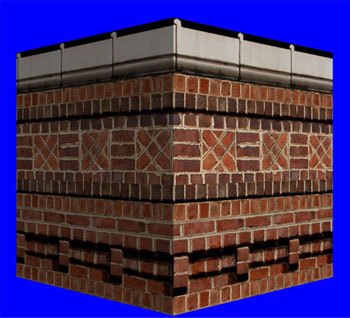
As it has always appeared against a black background, you
may not have noticed any problem. But rendered against a blue background,
the problem is obvious:
It is easy to create a transparency map in this case. We only
need the black areas at the top to be transparent; the rest should
be fully opaque.
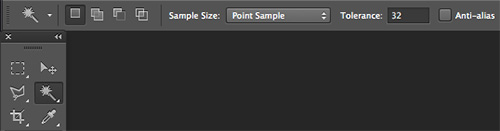
The Magic Wand tool often works
well with the Tolerance set to 32. For the purpose of creating
this particular transparency map, Anti-alias should not be
checked in the options bar.
A tolerance of 32 allows us to click one of the pixels
in the black areas above the roof trim. The parts that need to
be transparent, and any neighboring pixels within a color value
of 32, will be selected. For now we will create
a transparency map that contains only black and white information, no gray
pixels. To accomplish this we need to be sure that there is no
feathering of the selection, and no soft edges, and so Anti-alias
must be turned off.
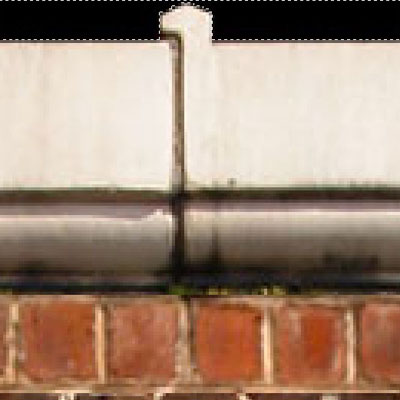
The image below shows the kind of selection we need.
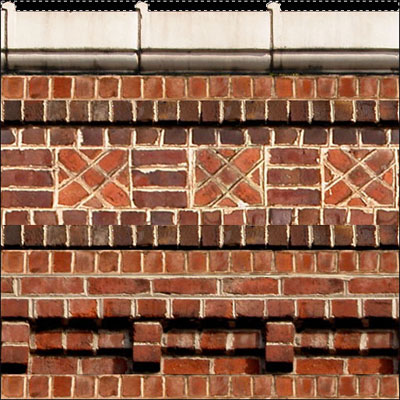
Perhaps the easiest approach is to make a new layer, invert the
selection (Select > Inverse), and fill the resulting selection with white.
It is important to be sure we are using 100% white (the default colors
are true black and white).
The resulting layer will look like the image below. A thin
black border has been added below that is not part of the image.

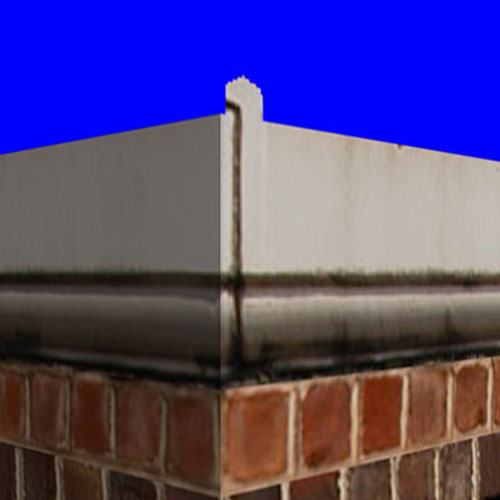
When used as a transparency map, along with the texture map,
the result looks like this:
A close look reveals that there is a slight "halo"—a dark line along the transparent edge.
This is common when creating transparency maps, and can be
corrected.
Here, the problem is that the white part of the transparency
map extends beyond the part of the image intended to be opaque.
If we zoom in for a closer look at the selection we made before,
we can see that the area selected, the area intended to be transparent,
does not include the gray pixels at the edge of the white roof
trim. It is these pixels that made up that dark outline (or halo).
It is a relatively simple matter to use Select > Modify
> Expand to increase the area selected by 1 pixel.
This expanded selection can be used to trim away the extra pixel
along the edge of the transparency map. Don't worry if a few
white pixels from the roof trim become transparent as well, this
won't be noticeable.

To bring this into Maya, you'd
use the middle
mouse button to drag a File 2D Texture from the Create tab in Hypershade,
and drop it onto your material in the Work Area. When the menu appears,
choose "transparency" and select the appropriate image file
in the Attribute Editor.
Using the
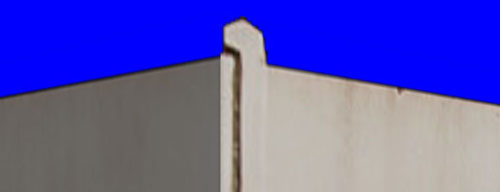
new transparency map, the halo is gone:
We can see in the image above, however, the aliasing,
or stair-step pattern, at the top of the little peak on the corner. In
this case, the game player will probably never get close enough
to notice this. This is a common problem though, so let's look
at ways to fix it.
Aliasing is caused by the fact that all lines drawn using
pixels are made up of pixels, which are square. Anti-aliasing is the use of transparent pixels on
the edges that can give the appearance of a smoother line. Of
course, this illusion breaks down when we zoom in too close.
To anti-alias the edges of our texture, we can use partial
transparency. If we expand the selection a little further, feather
it by 0.5 pixels, then cut (Ctrl-X on a PC, Command-X on a Mac) we get
the anti-aliased effect shown below.

The gray pixels are partially transparent. The darker they
are, the more transparent they are. These partially transparent
pixels create a softer edge, as shown below.

Alpha Channels
Game engines (as opposed to 3D modeling apps like Maya) tend to use
alpha channels for transparency rather than transparency maps.
RGB images are typically 24-bit images. They contain three channels:
red, green, and blue. Color values in each channel combine to
produce a large range of possible colors. When you add an alpha
channel, you are making the image a 32-bit, 4-channel image.
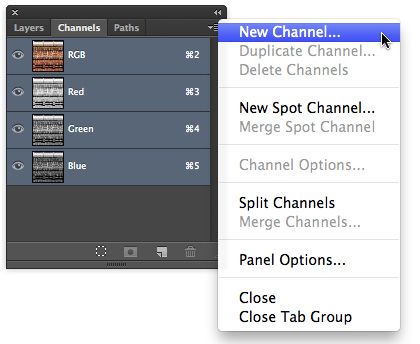
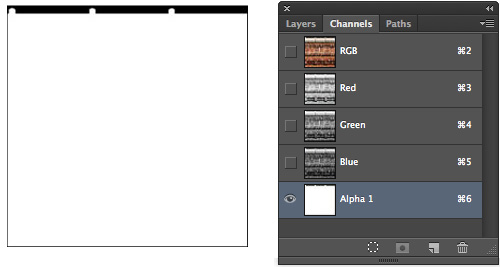
You can add an alpha channel to an image by going to the Channels
panel, and choosing New Channel from the menu. A New Channel
dialog opens. The default name of the new channel is Alpha 1.
Leave the settings as they are, and click OK.
You can now create your transparency map as usual, and cut
and paste it into your new channel.
Remember, not all image formats can have an alpha channel. Two that
are commonly used are TIFF and TGA. When saving, be sure that
Alpha Channels is checked in the Save As window, as shown below.

You'll also need to be sure that 32 bits/pixel is selected
in the Targa Options window if you are saving a TGA image.
PNG Image Format Transparency
The PNG image format is a good format if you need transparency for
Web pages or VRML. (VRML is an old 3D format for
the Web that is not very widely used.)
On a Web page you
might have a patterned background over which you want to place
a logo which is not rectangular or square. Since all images are
rectangular or square, your logo would have to have some transparent
regions.
The PNG format is also sometimes used in games, especially
2D games, often found on platforms such as mobile phones.
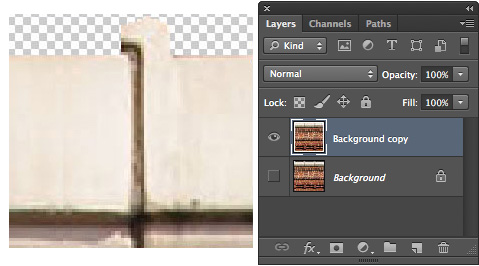
To easily make portions of an image transparent, duplicate
the background layer (assuming you are starting with a flattened
image), and hide the background layer. Select the parts of the
top layer that you want to be transparent, and press Ctrl-X (Command-X
on a Mac) to remove them. The Photoshop checkerboard pattern will show
through
the transparent areas.
Now save your image as a PNG file. You can use the default
interlace options. The default is "none" (off). Layers are not saved with the PNG format, so your image will be effectively
flattened.
Let's suppose we want to make parts of this texture partially
transparent. We can select those areas, and cut and paste them
into a new layer. We can then set the opacity of that new layer
as we see fit. This part of the image will remain partially transparent
when the image is saved as a PNG file.
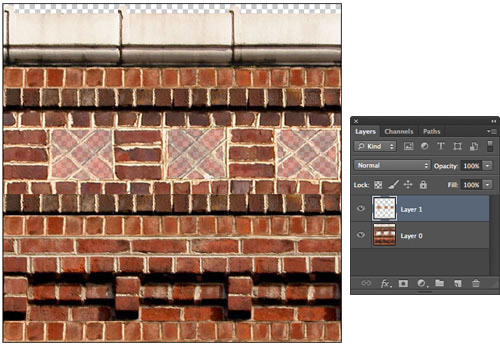
Below left is the JPEG version of the texture, and on the
right the PNG version with transparency.
|
The blue checkerboard
background appears behind the transparent and partially transparent
areas of the PNG. |
Bump maps are used to create the illusion of bumps or dents,
or both, on a surface that may actually be completely flat. A
bump map is created by a game artist the way a transparency map
is created, and is used by the renderer during the lighting of
the scene to add some depth to the surface.
Only the intensity
of the bump map image is used, so bump maps usually consist of
a range of grays. White pixels will result in the most pronounced
bumps, and black the deepest dents.
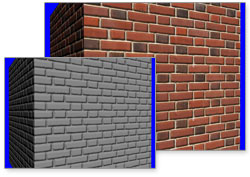
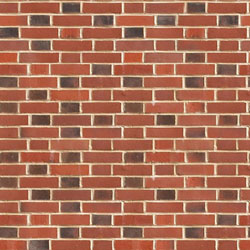
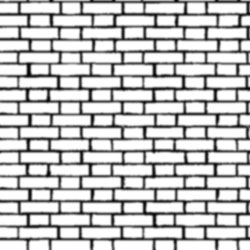
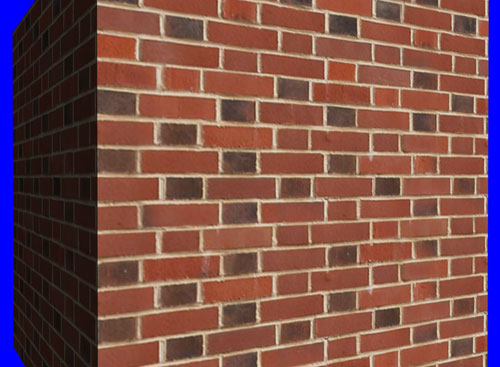
Below left is our base brick texture. Below right is a bump
map for this texture. The effect in this case is quite
pronounced—the brick areas are fully white, while the mortar
is fully black. The image has been blurred a bit, so the bricks
will have slightly soft edges.
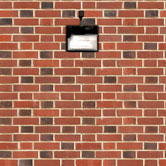
The image below shows the brick texture applied without bump
mapping.
Below no texture map is used, only the bump map.
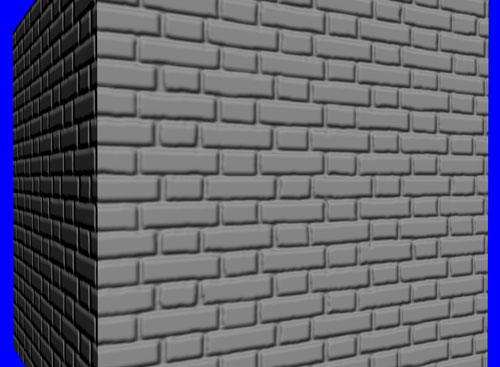
Finally, the image below combines the texture and the bump map.
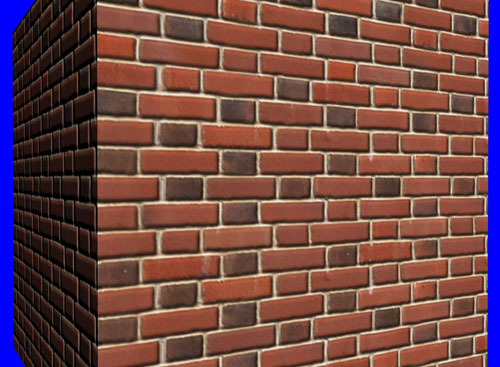
Note in the image above that the bump is not present at the
edges of the cube (not visible in the profile, against the blue
background). This is one of the limitations of bump mapping.
Light Maps
Light maps do wonders for the look of your textures as applied
to game environments.
In an early game like Doom, there were no light
maps. The lighting affected a polygon the same way over the entire surface of an object.
More realistic lighting was too slow to render in real time.
Although there have been huge improvements in processing power,
it is still common to render light maps and apply these when
the scene is rendered.
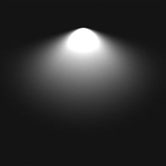
The image used in Lecture Five, below, can be used to describe
how light mapping works. It is common that game environments
need to be "compiled" or otherwise processed by the
computer before they can be run in a game engine. During the
compiling process (sometimes called "the compile") a light map pass may be performed.
The lighting for the
entire environment is calculated and stored in an image file—a light
map. Since every surface in an environment is lit,
this image can be very large, but a small part of it might look
like the image below left. When the environment is drawn, the
light map is applied to the texture, which might look like the
middle image below. The result might look like the image on the
right.
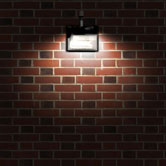
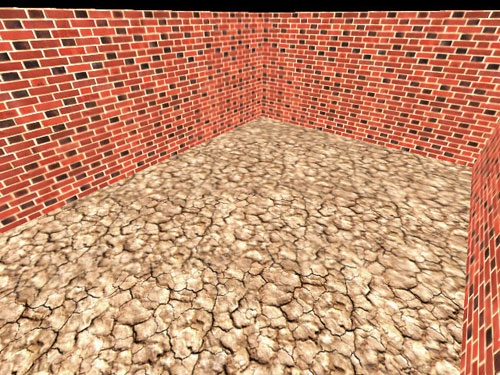
The image below shows a scene rendered by the Quake III Arena
game engine. This environment was compiled without a light map
pass.
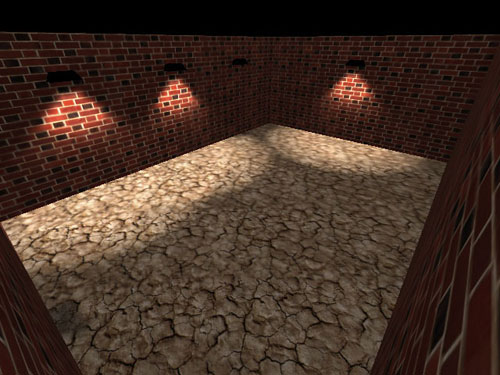
The image below was taken from the same environment compiled
with a light map pass. The light map is rendered while the map
is compiled, and applied when the scene is rendered. The lamps
are actual 3D geometry. A light mapped scene needn't be as dark
as this scene, but even a well-lit scene will be more realistic with
a light map applied.
Environment Maps
Environment maps can be used to make a surface look reflective.
In 3D software they are often called reflection maps. The idea
is that although game engines cannot, in real time, accurately
simulate reflections of the world around the object, they can
make an object appear to reflect the world if the reflection
map is not a clear and distinct image, but a more diffuse and
general reflection, perhaps made up of light and darks in an
image that does not contain any identifiable detail.
One key characteristic of an environment map is that it does
not "stick to" the surface as other maps do. Instead,
it functions as if fixed to the world. This means that as the
object moves, or as the viewer moves relative to the object,
the reflection map moves over the surface, as a reflection would.
It is, however, still just a simple 2D bitmap image, created by
a game artist, like the other maps we've discussed.
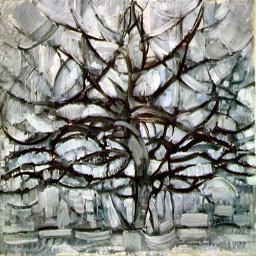
In our example here I have used Mondrian's Gray Tree painting,
resized to match our base texture resolution (apologies to the
artist). When applied as an environment map to a white cube,
it is not clear what is being reflected. It makes the cube look
shiny and reflective.
 |
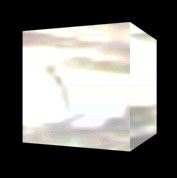 Click the image above to watch the movie.
 |
This map works for this example since we don't have to consider
the scene around the cube. It might work well in a forest scene
in winter, but may look strange in another environment.
Specularity Maps
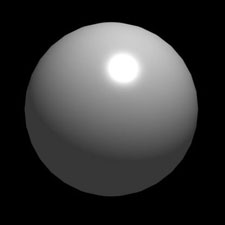 Specularity maps, or specular
maps, are used to create varying levels of specularity on different
parts of a texture. Specular highlights are the bright spots
caused by bright lights on reflective surfaces.
Specularity maps, or specular
maps, are used to create varying levels of specularity on different
parts of a texture. Specular highlights are the bright spots
caused by bright lights on reflective surfaces.
The sphere on the right shows a pronounced specular highlight.
Specular maps identify which parts of a surface
have high specularity and which do not. Specular maps are usually
grayscale images, and allow the full range of specularity to
be specified.
The image below left is an example of a very simple specularity
map. It has been applied to each quad of a low resolution sphere,
as shown on the right below. As a light is moved over the surface,
you can see the effect of specular mapping: In the areas where
the specular map is black, there are no highlights, and in the
areas where the specular map is white, there are bright highlights.
 |
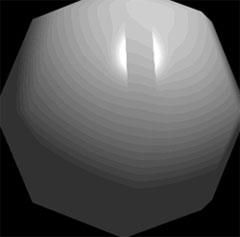
Click the image above to watch the movie. |
The
specularity map is applied in the same way as any other map.
Making tiling textures look crisp and sharp takes lots of practice.
The best way to do this on your own is to work with a game engine that
you
can easily make maps for—you might use Unreal, for example. Create game environments,
textures, and models for their environments. This is an excellent way to
learn and practice what types of textures are needed.
Game companies
like to see evidence that you can work as part of a team. Other
than experience on a professional game project, one of the best
ways you can provide this is to work with a team to create a
game in a non-professional capacity. The product of your efforts
can be a very good portfolio piece.
A good portfolio is essential to getting invited for an interview. You can put portfolio work together
through a course such as this one, or you can find a group of individuals
who
are
making a "mod" (modification) of a popular game. There
are various groups making mods for Unreal Tournament, for example. Do a Web search for mod groups to get involved!