Different Tiles for Different Detail
When working from photos, it can be tempting
to take the easy way out: to simply create from a photo one large texture,
and wallpaper a large surface with it. There are however significant
disadvantages to this approach.
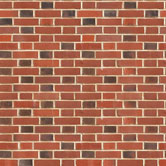
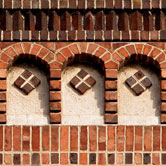
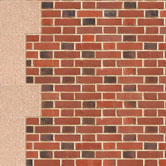
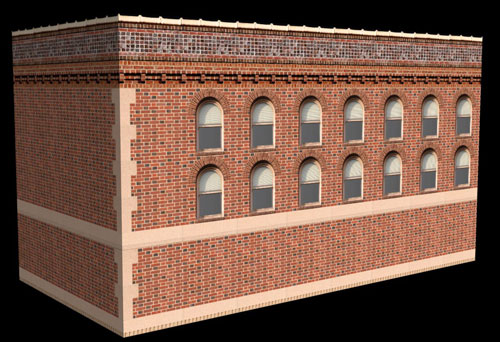
Consider the image below. This entire image tiles, so it is in fact
a tiling texture. A big one.

A texture like this is very easy to apply, and all of this
detail could be mapped onto one large quad. To match the texture
resolution we've been working with, this texture should be 1353x1216
pixels—double this if we wish to work at twice the resolution
of the required texture, as we have done so far. Of course, modern
digital cameras can capture images of this size. This represents
a rather large use of texture memory however.
It is wasteful,
because most of the detail in the image repeats horizontally
across the image. The basic brick pattern repeats vertically
as well. Smaller tiling textures could be made of each part.
There is also the disadvantage that this one large texture can
only be used to create this one wall, while isolating different
details to their own tiling textures allows for far greater flexibility.
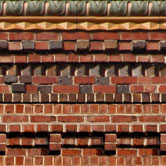
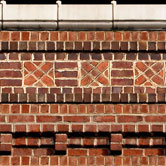
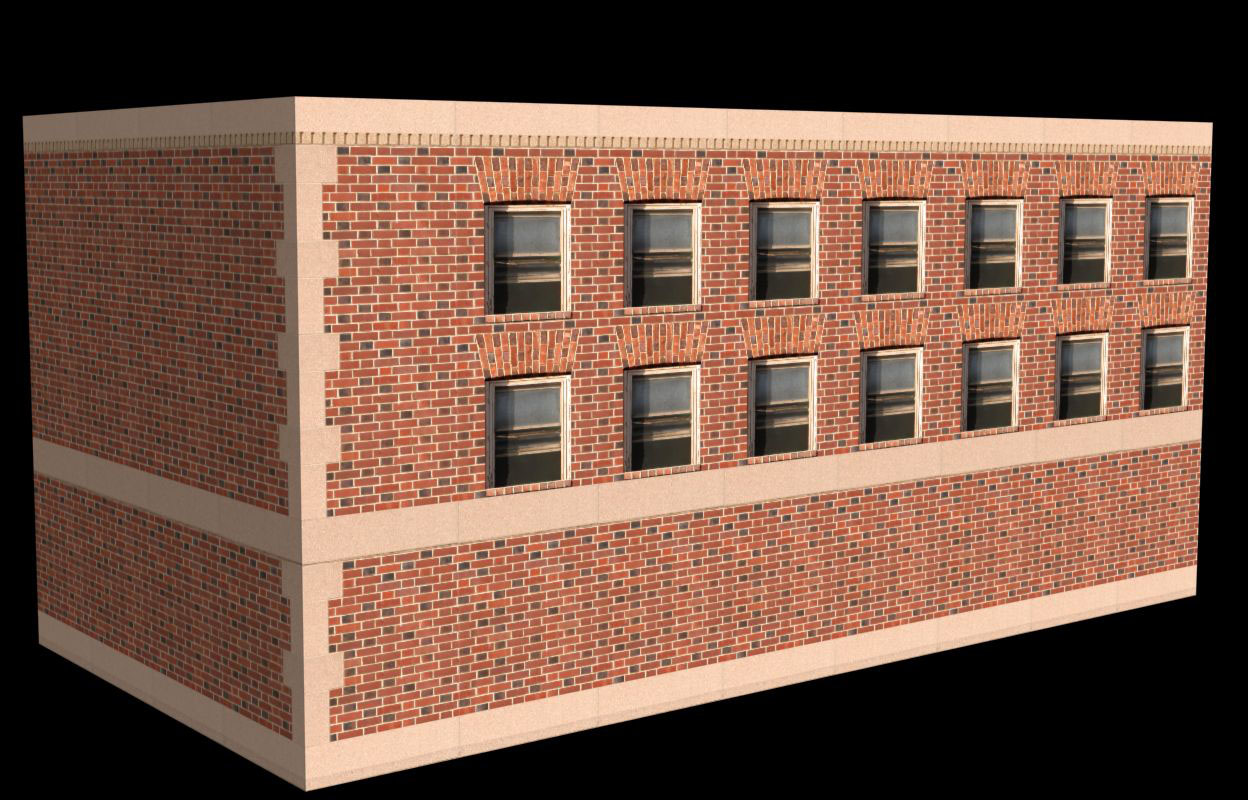
We can break this wall down into seven tiling textures. Adding
two end grain textures, we have a total of nine, two of which
are 256x64, for a resolution of fewer than 768 pixels square—a
substantial savings on texture space from the 1353x1216 pixels
required for the texture above (remember, I am working at a base
resolution of 512x512 with intent to scale down to 256x256).
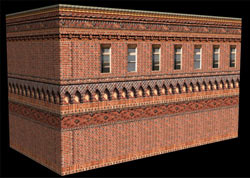
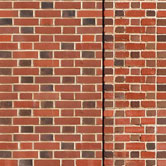
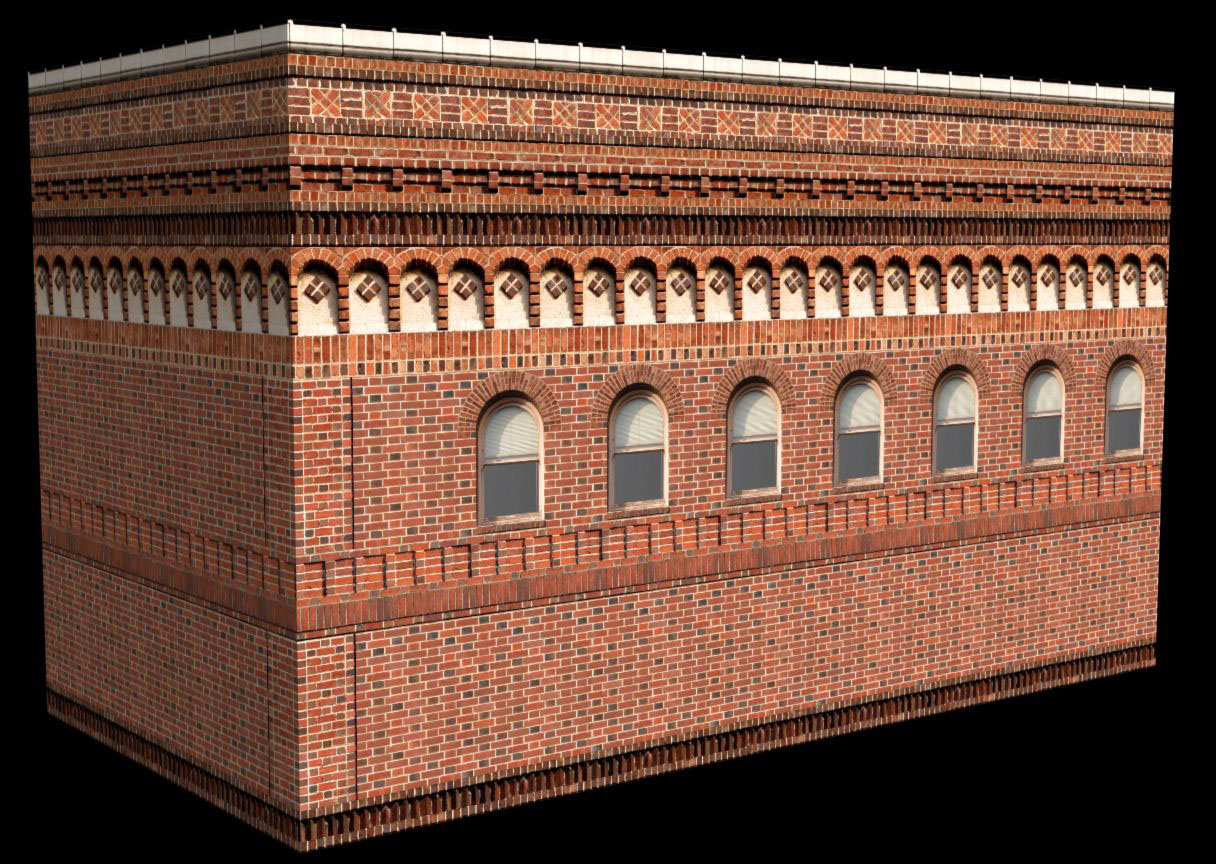
These nine textures make up the walls below.
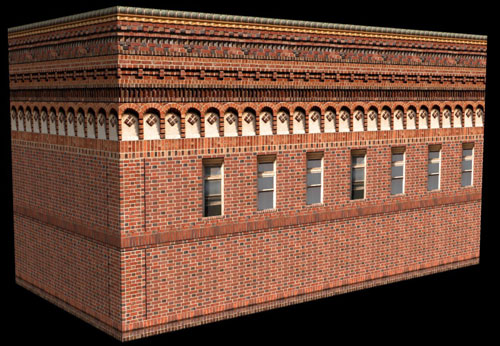
Notice the darker wall on the left above (darker because of
the lighting in the environment, not because of the textures
applied)—we already have available to us a simple variation
on the original wall that would not be available if we
used a single large texture.
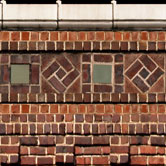
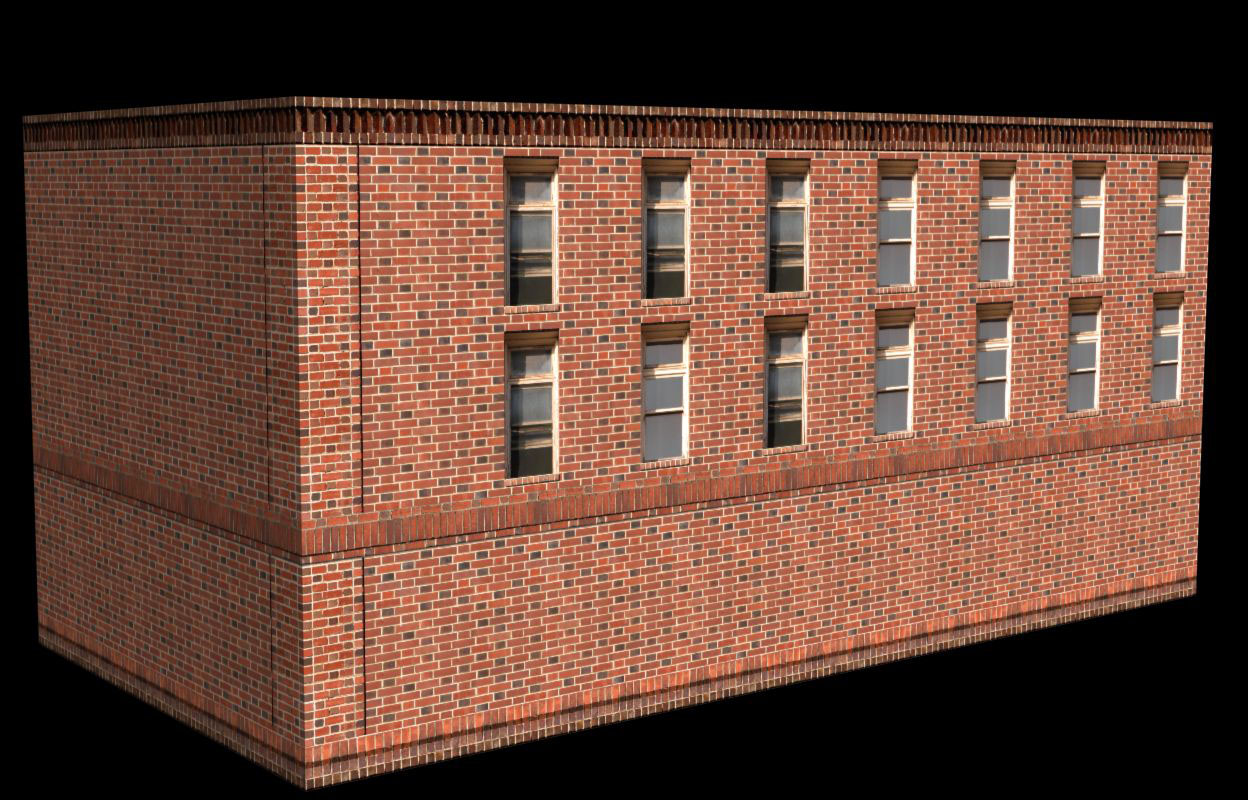
Geometry for the bottom, middle, and top trim
has been provided. This is an effective way to vary the look
of surfaces textured with the same texture set. Trim textures
like this are often not square. The bottom and middle trim textures
shown above are 256x64. Resolutions of 256x32 or 256x128 are
not uncommon. In this case there are two top trim textures, each
256x256. This is probably less common.
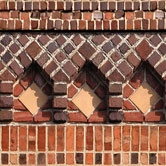
In most game engines, a single quad can only have a single
texture map applied. Therefore the visible geometry cannot consist
of two large quads (one for each visible wall). More polygons will
be required for this texture set (that is, one quad will be required
for each separate texture that is applied). In the image below
the wireframe outline of the geometry is overlaid.
This is a
worthwhile tradeoff. Nineteen quads is not a lot for a modern
game engine. It is simple enough to vary the dimensions of the
geometry in order to accommodate trim textures of different resolutions,
and different building shapes and sizes.
It
is worth noting that in many cases a level designer may be building
the geometry, not the texture artist. The designer is likely
however to understand the ways that textures and texture sets
will dictate the way the geometry is built.
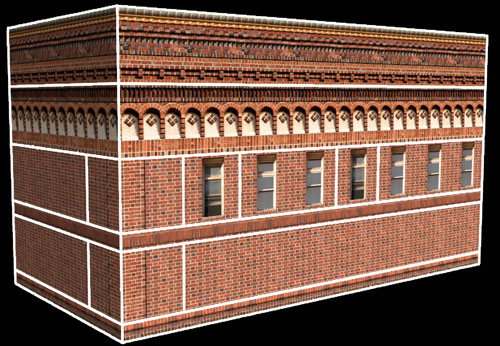 |
Here I've superimposed lines over my test geometry
so you can see exactly how the tiles were arranged. |
Expanding the Possibilities
By expanding the set we begin to increase the possibilities.
Adding three more textures, and using the same geometry, we can
create a different building in the same style, perhaps located in the
same complex as the building above.

A few more textures and a slight change in geometry offer
us another very different look to the top detailing of the building.

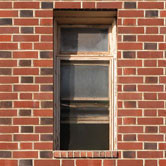
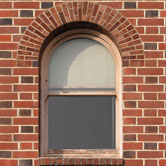
Windows are of course an important and distinctive feature.
If we expand the set just a little further, we can begin to mix
and match the various parts.
With the addition of the nine textures above, we can create
a great many wall variations. Some of the possibilities are shown
below.
When Is Your Texture Set Complete?
This building is going to need a door. Most likely, your set
should include several doors. There will normally be grand doors,
for main entrances to the building, and more simple back or side
doors.
You'll probably always find that as you begin to create geometry
and apply textures you discover that more textures are needed.
As an artist you will normally work closely with a designer who
will apply your textures to an environment. You will need to
try to anticipate the needs of the environment your designer
is building. There will be textures in your set that the designer
never uses, and there will be new textures that he or she requests
along the way.
When I was working on Akuji the Heartless for the PlayStation,
I worked closely with the level designer, and often made textures
on request. I made one texture to be used on a ship, above the
deck, on the walls that prevent the sailors from sliding off
into the ocean (in some places there were railings, and in other
places walls, the tops of which were probably just above waist
height). It showed the same planks that were on the hull of the
ship, but with large struts to create a more realistic look.
The designer immediately found a dozen uses for that texture
that I had never thought of—walls inside of rooms, ceilings,
the back side of almost any wooden surface. The number of uses
for that texture expanded to a dozen and one when I showed him
where I had intended the texture to be used!
Your texture set will thus often be complete only when the
environment itself is complete. Even then, you may work on later levels
in the game or its sequel, so you may well find a later use for textures you have made or discarded in your project.
Lighting is already "built in" to most of the textures
in our set so far. Lighting is often an important part of the
illusion. It contributes to the impression that the texture
has some depth, as opposed to being the completely flat computer-generated surface that it
actually is.
 |
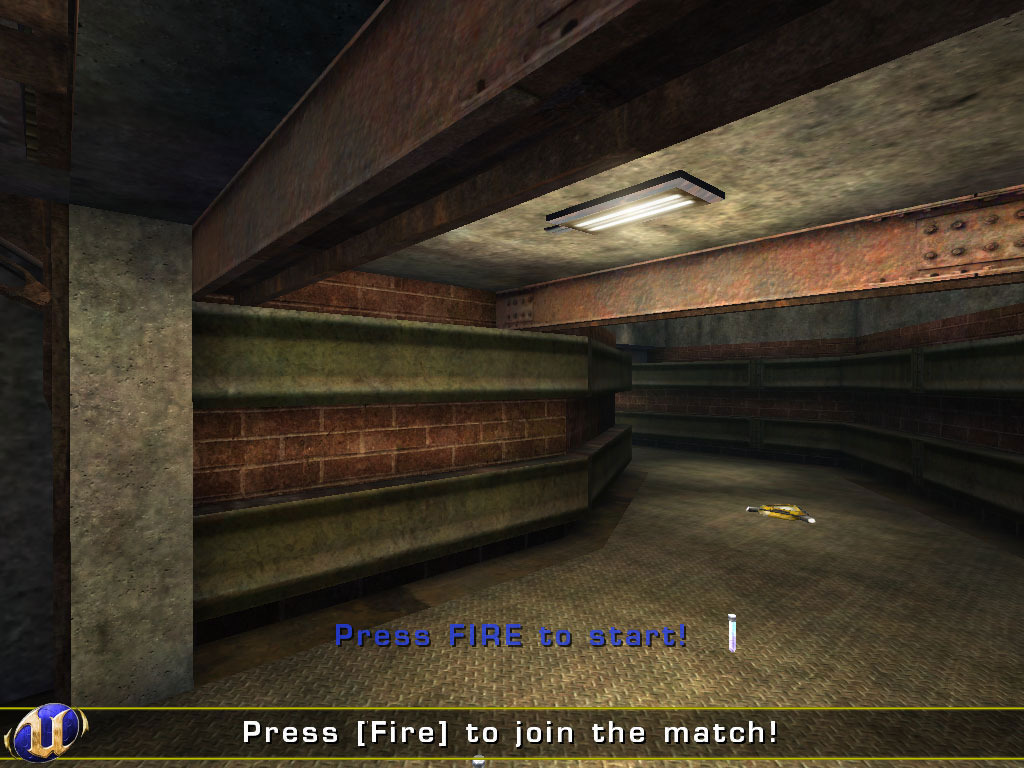
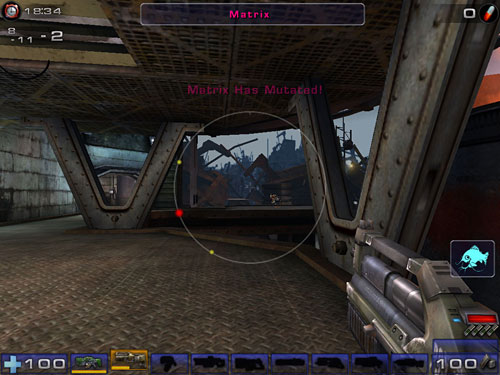
| UT2004 features highly detailed environments and
models, however sometimes detail is still added via textures rather
than geometry. Note the horizontal concrete beams in the image above:
the shadow under the top edge and the highlight above the bottom
ledge give the appearance of more detail than is actually there.
The same is true of the metal I-beams above. If you look at the edges
of the beams (for example, where the I-beams meet the walls), you
should be able to see where the illusion breaks down. Click to enlarge. |
 |
The same effect is at work on the support beams
shown here. Click to enlarge. |
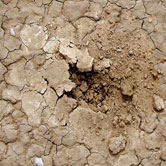
Consider the textures below. Some parts are lit, others are
in shadow. Even the ground texture below includes shadows cast
by one surface onto another surface.
These shadows come from the original photographs. They can
sometimes be too real. You will often have virtual lights in
your game environments, and these lights will cast shadows. It
can sometimes be very obvious if the shadows in your textures
fall in a different direction than the shadows cast by objects
in the environment. At the very least, you will want to be sure
that the shadows in your set all fall the same way. Do you notice
any inconsistency in the textures above? Perhaps you didn't
notice this until I pointed it out. This is one indication of what
you can get away with.
Ideally, anything that casts shadows will be geometry—all of your windows will be inset slightly from the walls, for example, and
the window ledges will protrude slightly. As the power of game
systems increases, the number of polygons that can be drawn increases, allowing much
more detailed models to be created. This
allows more and more of the lighting and shadows to be left to
actual lights in the game, rather than simulating the effect by painting it into textures.
In some cases, you may want to include lighting in your texture that
is emitted by objects represented in the texture. The example below is
from a hypothetical "moonless night" version of our texture
set, to emphasize the point.
 |
Here light is emitted
by the lamp in the texture image, not the actual lights in the
game. |
Light Maps
Most modern game engines can use light
maps. Light maps are created by pre-rendering
the lighting of the environment, and storing the lighting information
in a large map that is applied by the game engine at render time. Light
maps are often the most effective way to add lighting to textures,
and you should usually use them when available, rather than add lighting
to your textures as in the example above. Light maps will be explained
in more detail in the next lecture.
Bump Maps
Another option involves working your textures
to make the lighting more generic. You can create textures that don't
include
such strong shadows, and thus don't give an indication as to which
way the light is hitting them. Sometimes a texture is painted
so that the parts that protrude, that are closer to you, are lighter,
and the parts that are recessed are darker. This is also a simple
description of how bump maps are made...
Bump maps are image maps separate from
texture maps that can be used by some game engines to further create
the illusion of
a 3D surface. The trick is done in the lighting; when the surface
is rendered, the surface is shaded, using the bump map, as if
bumps were present on the surface. The name is descriptive in
that bump maps can add bumps to the surface, but not great depth. A brick
texture is a good example of one that might have a bump map. Accompanying
the brick texture would be a black and white image that shows what areas
should appear to protrude (the bricks) and what areas should appear to
recede (the mortar). We'll explore this idea more in Lecture
Six.