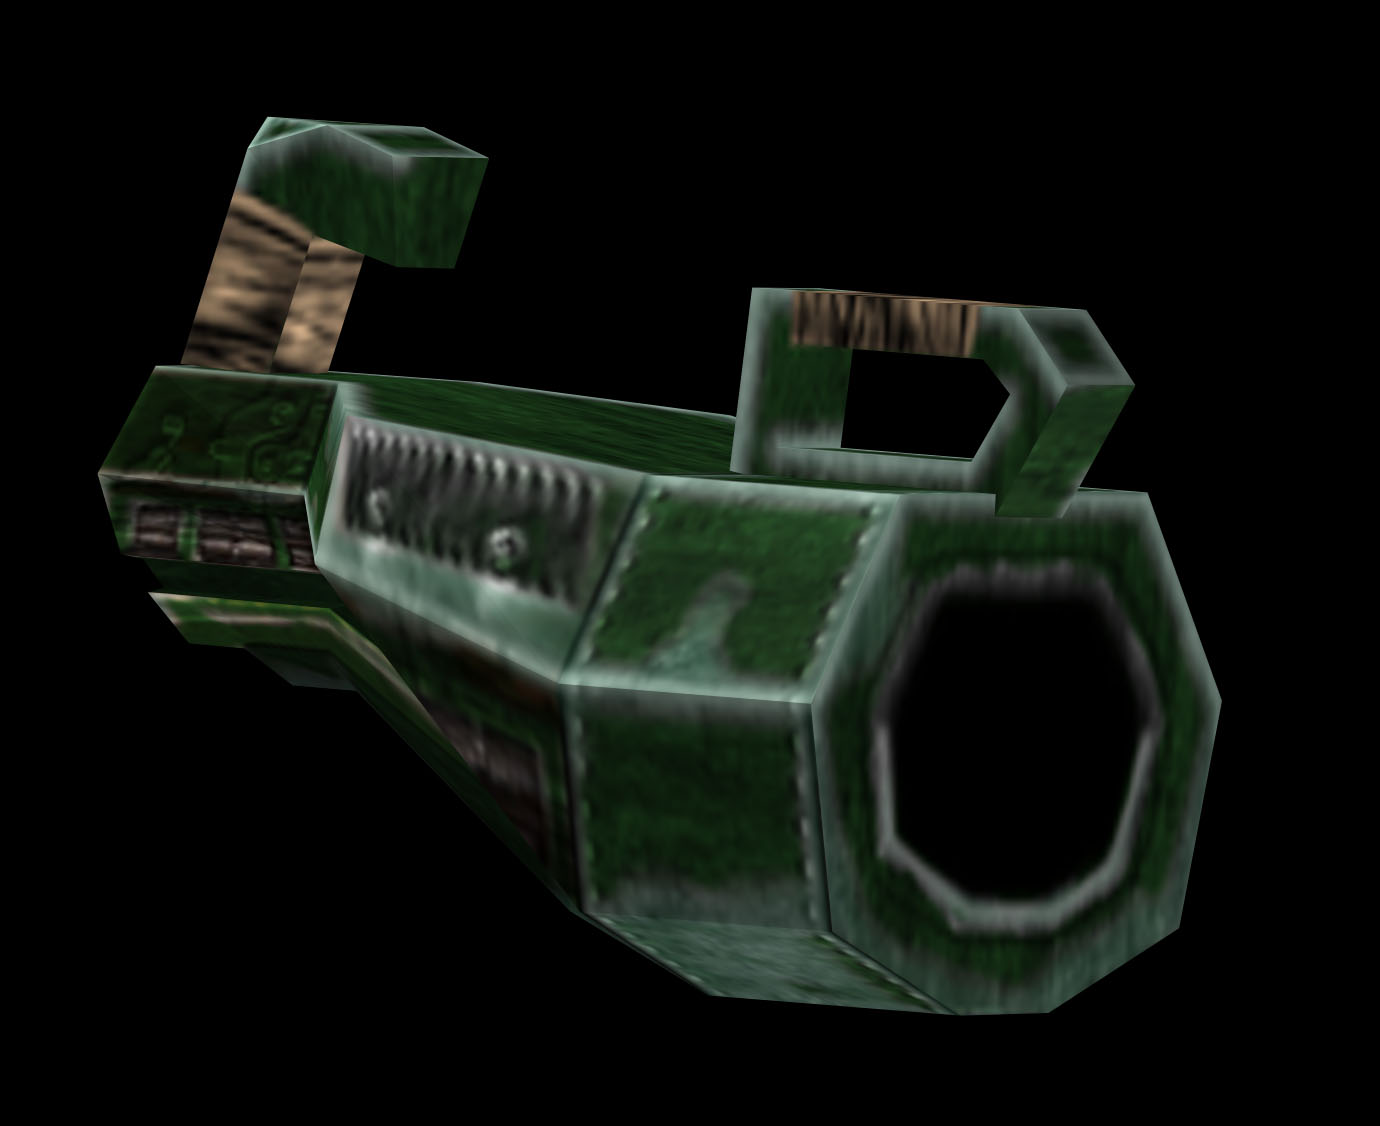
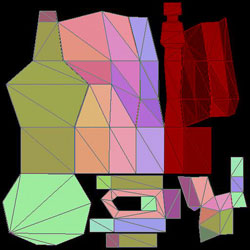
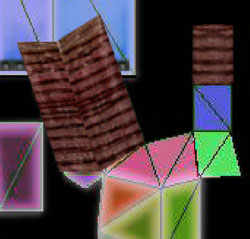
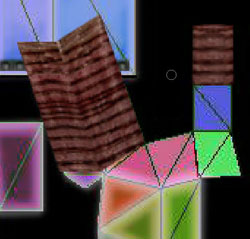
To figure out how UV mapping works, imagine the flat texture map below wrapped around a 3D model.
 |
The Minegun
from Political Arena, a mod for Quake
III Arena, Copyright © 2001 Todd Gantzler |
Or better yet, watch a movie of the texture wrapping itself around the 3D shape and then unwrapping itself to lie flat again (click here).
The end result is the Minegun that I created for a Quake III
Arena mod called Political Arena.
Political Arena was originally created as a campaign
2000 deathmatch between Bush and Gore, using all of the guns of the Quake
III Arena arsenal. When the election ran long, I added
lawyers, and later events also helped to keep it going beyond the elections
and expand it to
include new weapons and powerups! And while that election seems so very long ago, the technique used to texture the weapons remains a staple of today's game art industry.
The Minegun is an FPS version of a
landmine—you simply shoot
it where you want it. It sticks and waits for someone to come
too close. Its satirical role in the game has to do with casting the
Minegun as the weapon of choice for the Secretary of Defense of the
USA, since it is one of the few countries to oppose banning them.
 |
Click to enlarge. |
In the movie you just watched, you saw the surface of the model—with the texture already applied—being unwrapped. This is not usually necessary. While 3D data is stored for each part of the model, data that determines how the texture map fits on to the surface is stored separately. In addition, while "unwrapping" UV coordinates can look like unwrapping a 3D model, the model itself in fact stays intact.
How It Works
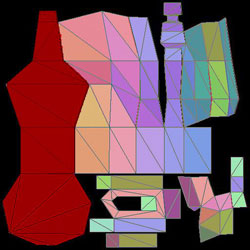
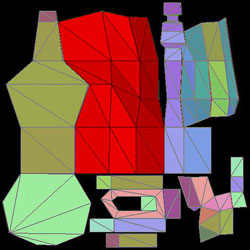
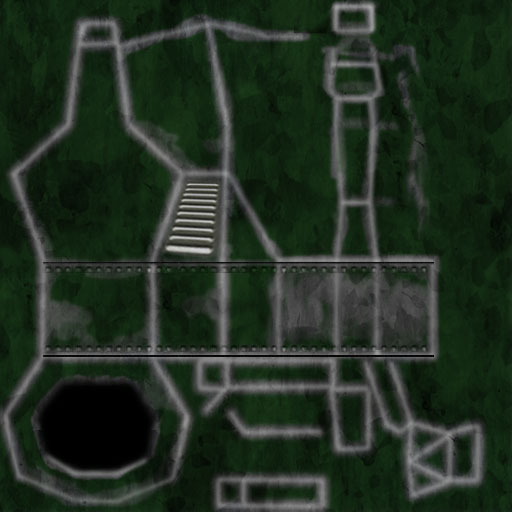
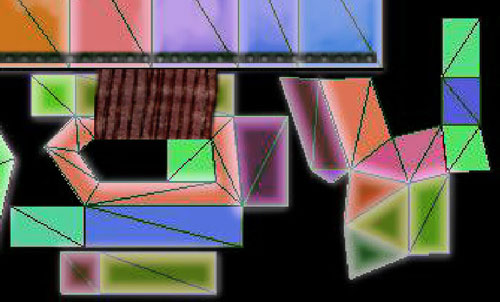
The process of UV texture mapping is actually most often performed in the reverse order. First, the UVs are unwrapped and a template is exported from the 3D software. That template is then used as a reference for painting the texture map. Below is the UV template for the minegun.
 |
UV template for the minegun. |
Download the template above and follow along as I paint a texture map for it. I don't have the images that I originally used to paint this texture, so we'll paint a new one in this lesson, and maybe do it a little differently.
Working from a UV Template
The UV template is a useful reference in many ways. There is an advantage to being the person who does the UV layout in Maya—that person is much more aware of which part of the model ended up where in the UV layout.
A texture artist painting a texture using a UV template will usually have to use trial and error—painting on the template just to mark a spot in the template, then viewing the texture on the 3D model in order to see where that spot lies on the model.
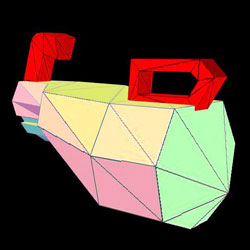
For the sake of this lesson, I'll give you a quick tour, so that you know where the parts of the template lie on the model. I've gone through the process of tinting certain parts of the template red so that these parts can be easily identified on the model. You will want to go through a similar process when you are first beginning to paint from a UV template.
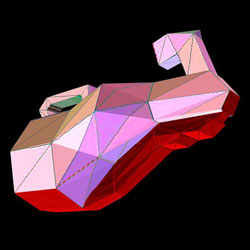
In the shots below, the faces highlighted in red in the texture
make up the top and front of the weapon (see below left and right).
 |
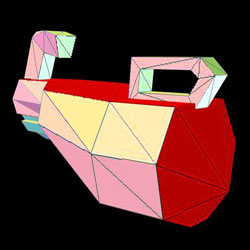 |
Red indicates the top and front of the weapon. |
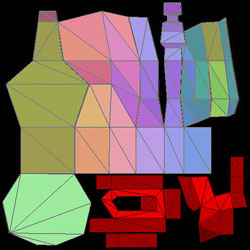
The next group of faces make up the side of the model, as shown below.
 |
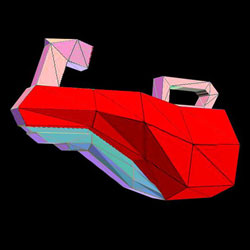 |
Red indicates
the side of the weapon. |
Actually, this part of the texture is mapped to both sides of the gun, as shown below. In this case, when I was laying out the UVs, I decided to save space in the texture by laying the UVs for the left side on top of those for the right. This has the advantage of using less space in the texture image, and the disadvantage of leaving the texture artist no option for painting the two sides differently.
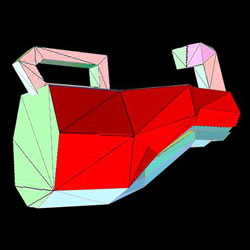
The next group of faces make up the bottom of the gun (both sides of the bottom part).
Finally, as you may have guessed, the remaining parts are the two handles for the minegun.
Thinking Through the Texture
Thus oriented, I can begin to paint the texture map for my minegun.
As a strategy for working out what the gun should look like, I first think about how the object is made—what
material is it made from, and how are these materials assembled? I
picture the parts of this gun being stamped from sheets of metal, folded
into shape, secured using rivets and other means, and painted green.
Over time, the paint will wear off of surfaces that regularly come
into contact with other objects.
There's no such thing as a Minegun, so to get some reference,
to inform myself on the subject and to get ideas, and maybe textures
I can use, I searched online for worn metal, guns, weapons, grenade launchers,
and rocket launchers. Those searches turned up enough related items that I got
a good range of reference. There are lots of ideas here for treatments
of the surface, and lots of ways to break up that surface and make
it more interesting.
Here are some of the links I found as I did my research:
The corners and edges that most often
come into contact with other objects will be worn smooth and effectively
polished by the contact,
until they are shinier than the other parts of the (exposed) metal.
The metal casing contains various internal parts, but there is
also some empty space inside, and with objects moving through the device
at some speed, it may need some place for air to escape besides
the
muzzle. That's enough information for me to get started, and there
is still plenty of room to improvise surface details as we work.
Nearly the entire gun is made of metal, so the metal textures I researched
were a good place to start, and I found a similar metal image for free that was just what I
had
in mind for this gun.
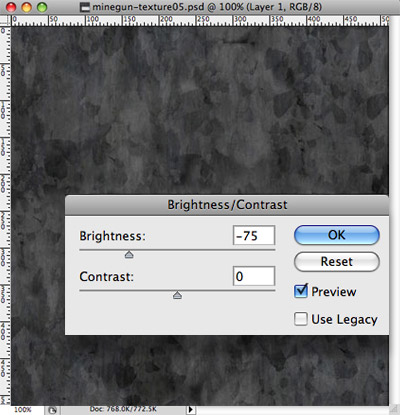
The size of the pattern on the metal was such that I decided to scale the entire texture to 512x512 and use it over the entire surface of the model. I pasted it into the image as a new layer. I also darkened the texture, as shown below.
Our gun will also be painted, so let's next apply the paint. I had something in mind that looked like a sort of army green. I chose R: 32 G: 72 B: 31. Fill a new layer with that color, then change Mode to Overlay.
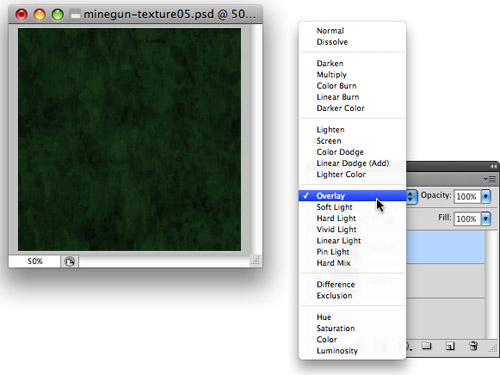
It is important to check your progress on a regular basis. Save
the texture in its current state, and apply it to the model in 3D.
You can see the textures starting to take effect in the model below.
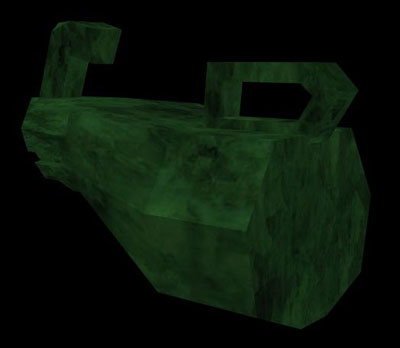 |
The Minegun
with metal and paint textures applied.
|
Testing a Texture in Maya
To preview your texture on the minegun model, first download the model here. Save both files of the downloaded ZIP into a single folder on your hard drive. Open Maya and press
Ctrl-O (File > Open Scene) to open a file browser and load minegun_textured.mb. The Maya interface should look like the image
below.
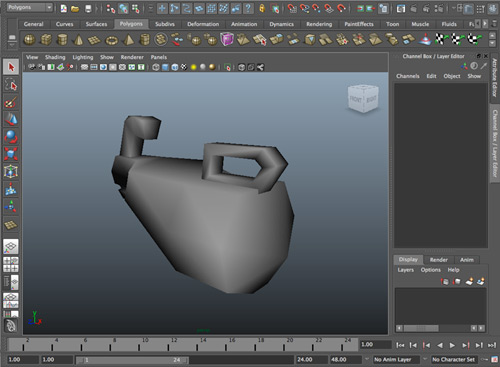 |
In Maya, the
model will appear gray and in perspective.
|
Press 6 on your keyboard for a textured view of the model. This
shows you the texture that I have already applied to the model. (If this texture does not display for you, don't panic. We'll fix it in a moment.)
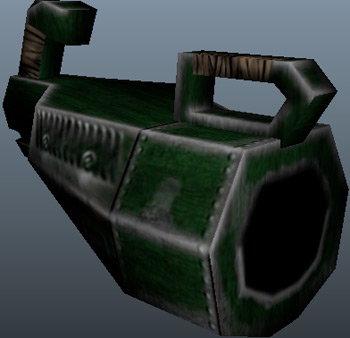 |
Pressing 6
displays the texture that I have applied to the minegun.
|
Click on the model once to select it. Press Ctrl-A to open a large right-hand panel of attributes. In the image below there is
an arrow button indicated; click it until you to locate the
lambert1 option, and then click that option. This accesses the details
of our texture.
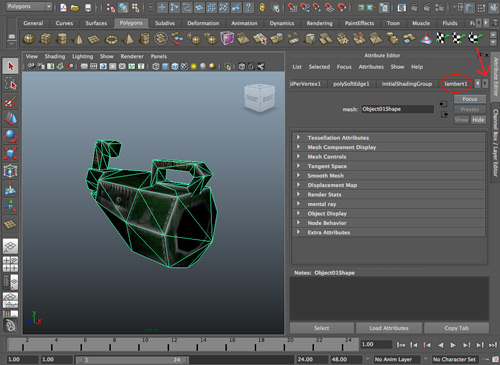 |
Click the arrow
in the upper right tab to access the lambert1 tab.
|
Next, click the button beside Color, circled in red in the image
below. This button will give us access to the file attributes of
the texture.
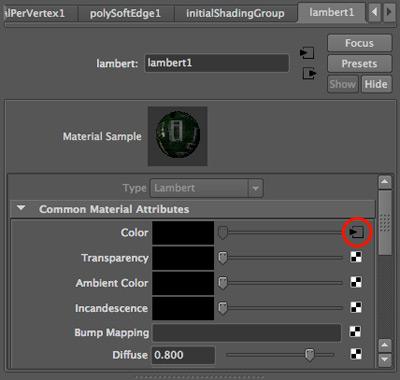 |
The button next
to the Color slider lets us access the file attributes that
tell Maya to display this texture.
|
If you weren't able to see the minegun texture when you pressed the 6 key earlier, click the folder icon next to the Image Name and browse to your minegun-texture.jpg download.
As you work on your own texture for the minegun, save it using the
same name and format as the original texture provided (minegun-texture.jpg).
You can see this name in the attributes.
When you have updated the texture, and want to see how it looks
on the model, simply click the Reload button, circled in red in the
image below.
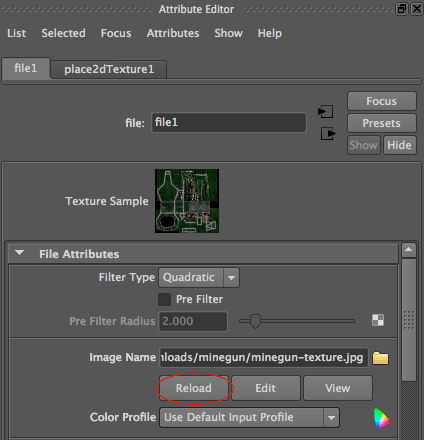 |
Reload the
file to show your latest saved version of minegun-texture.jpg
on the model.
|
If you decide to give your texture a different name, you'll have
to click the folder icon and browse to the file on your hard drive.
Reload as many times as needed to test your texture.
We need to drop in a few details that will make this thing start to look like a gun. Let's start with the opening for the muzzle.
As you work it will often be important to turn off various layers in order to see the template. Alternatively, you can set the transparency for that layer so that you can see through it while still having it visible for reference. For now it is easiest to simply turn off the metal and paint layers.
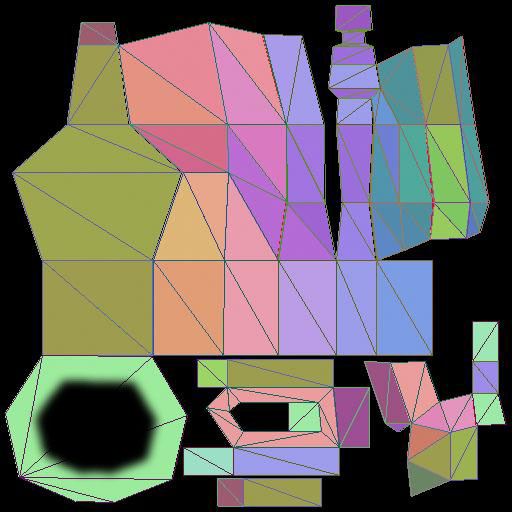
Select the faces in the template that make up the front of the gun. Go to Select > Modify > Contract and set Contract By: to 25 pixels. Feather the selection by 3 pixels, and fill with black (see below).
Polishing the Edges
There are various ways of dealing with the edges of a model. In this case the object has a very geometric shape, and not only because it is built using a minimum number of polygons—this object is actually meant to look like it has very angular surfaces. So on the one hand, we want to accentuate those edges. On the other hand, the edges we see in the previous render of the object are far too sharp and clean to be a real object, so we will want to soften the edges just a bit.
We can create the illusion of beveled edges quite easily. Remember I mentioned previously that some of the edges have had the paint chipped away, and those that get the most contact with other objects have actually been polished smooth over time? We'll start on the polished edges now.
One thing the UV template shows us quite well is all of the edges in the model. The template is therefore an excellent reference for our polished edges. Reveal the template layer, and begin to place white lines along select edges of the model (see below). I used lines of 2 pixels in width.
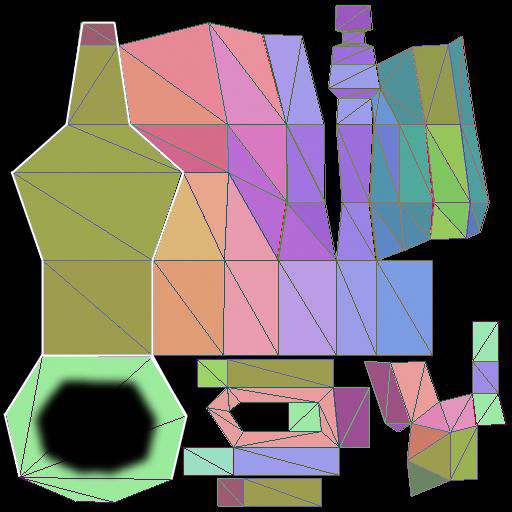 |
Add wear marks to the edges. |
The image below shows the first set of white lines, after a Gaussian Blur of 2 pixels, displayed over the metal.
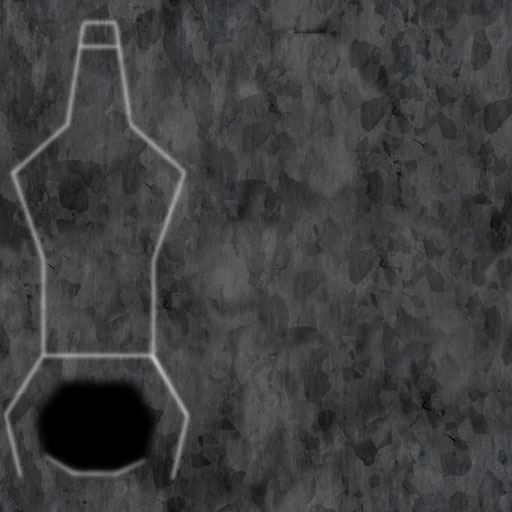
You'll notice the improvement to the bottom edges of the muzzle opening (I copied and pasted those edges one on top of the other, to brighten them—they have to compete with the black fade from the muzzle opening, which overlays them slightly).
Next I applied the texture map shown above to the model below. It takes a wee bit of imagination, but maybe you can see already what these lines do to improve the look of the model.
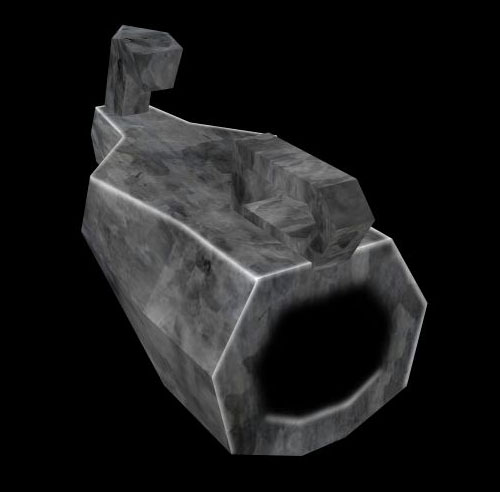
Notice especially how the lines help the opening of the muzzle. You may feel that these lines are too bold, and too consistent. We may well choose later in the process to make this layer partially transparent, or to do some work on them with the Eraser tool until they look less even and regular. But this texture map is going to get quite a bit more busy, so let's wait until we see the texture a little further along before making these decisions.
Did you notice that the two edges nearest the viewer, along the sides of the muzzle, look quite sharp and crisp on one side? This is because these lines have been added to the front surface but not yet to the side surfaces. The front of the gun and the sides of the gun touch, in the template, only at the top.
We'll continue now to paint the white lines used to create worn, polished edges. It is always important to think about how an object like this would be worn over time—what parts are likely to come into frequent contact with other surfaces, and thus have paint chipped away, and edges worn smooth, and which parts are not. Imagine the kind of use and abuse such an object might be subjected to. If the carrier has to hit the ground fast, or for any reason strikes the gun against another surface, or throws it into a locker (having made sure it was not loaded of course), the more prominent parts are likely to take damage, and have paint removed.
The outside front of the front handle will often take damage, while the inside of that handle will only be worn by the hand on the grip. Paint your white lines accordingly. This is likely to involve a lot of testing in 3D. Your process will be a matter or making changes to your image, saving the image over the texture map for the model, viewing the results in Maya, and going back to Photoshop to make adjustments. I'd expect you to do this several times over at least, to be sure you have your worn edges just where you want them.
Below is my texture map with all of the worn edges in place.
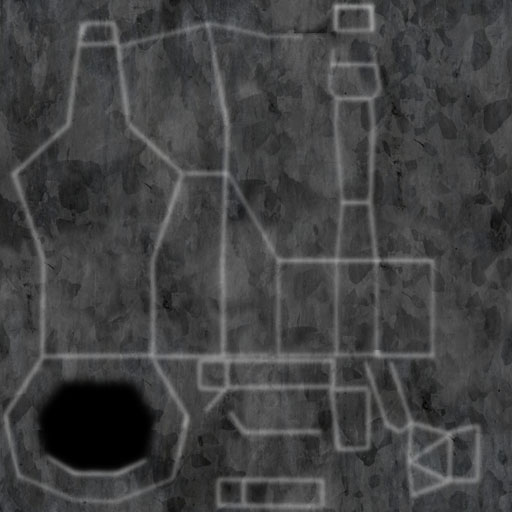
Previewing Textures... with Actions
Let's pause for a second here, and let me ask you something: When you are ready to try your texture on the model, what do you do? Maybe something like... duplicate the .psd file you are working with, flatten it to a single layer, then save it to a particular location on your hard drive?
Really? You still do that every time?
Then I must hang my head in shame, for I have still not taught you the beauty of actions.
Maybe you enjoy dull, repetitive work, but your boss at that game company wants you spending your time working creatively, not working on a texture map assembly line!
This, then, is your action challenge for this lesson: Make yourself an action named "save minegun texture" that will:
 |
|
 |
| |
1. Duplicate the current image.
2. Flatten it.
3. Save it over the texture map that is applied to the model in Maya.
|
|
 |
|
 |
Once you have this action working you can test your texture at any time by running your action, then refreshing the texture in Maya.
Next we can work the effects of wear and tear on the paint. This will be a simple matter of using the Eraser tool on the paint layer. I don't want paint that comes off in chips or flakes, and I chose to use mostly 100% opacity and flow. Anywhere that the edges are worn smooth, the paint is sure to be gone, so we can start there.
It can be easier to see what you're doing with the paint layer set to Normal mode (rather than Overlay). After working my magic with the Eraser tool, I arrive at the texture map shown below.
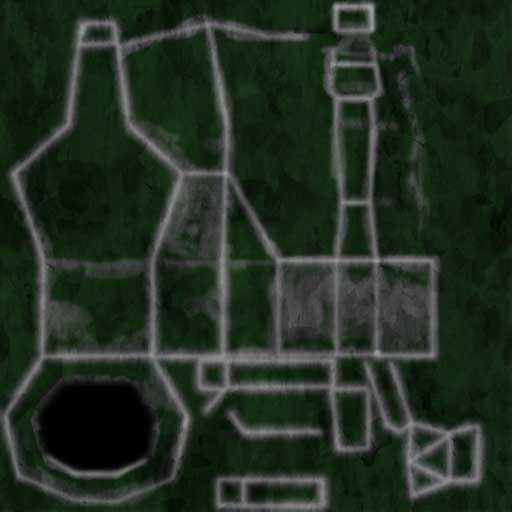
The gun is coming along nicely now. We can begin to add other kinds of detail.
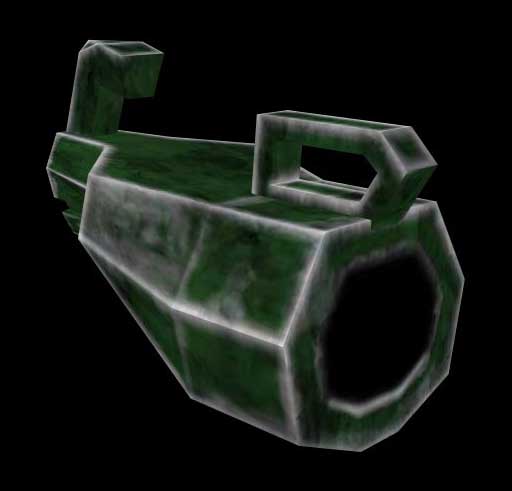
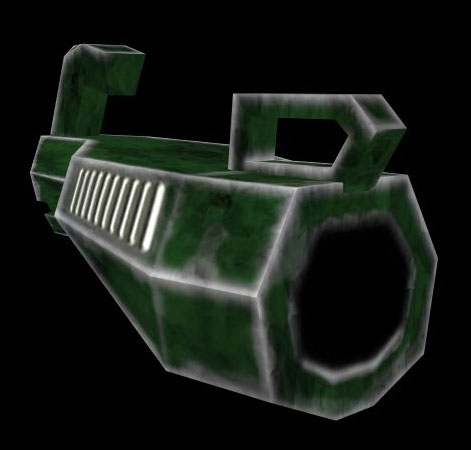
I mentioned the need for air to escape from the casing of the weapon. I don't want to go as far as putting exhaust pipes on this model, so I've gone with air vents.
I found this texture posted to TurboSquid for free download by Sanada10. This provides a good start.
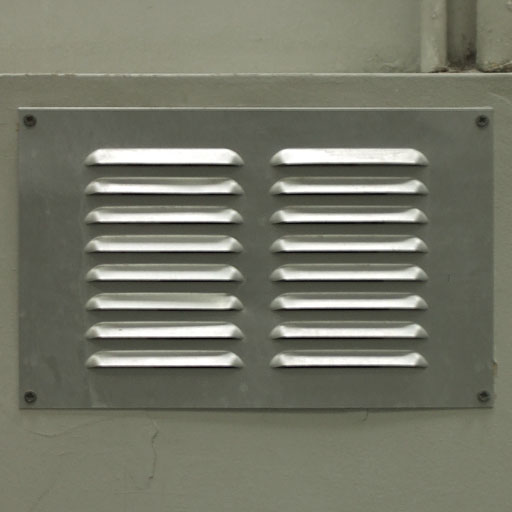
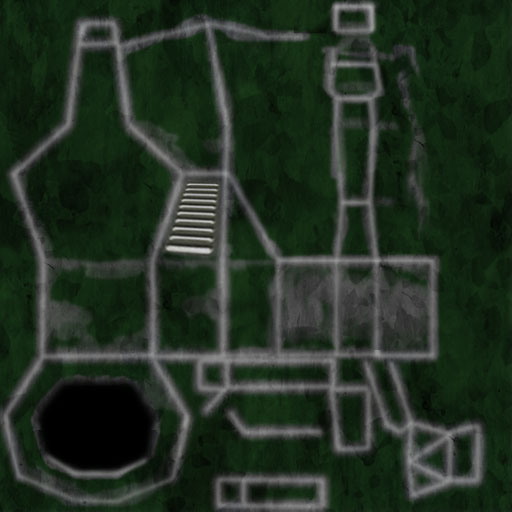
I cut one section of vents and made a copy, placing them one over
the other and using the Eraser tool to make the texture longer. I
used Edit > Transform > Distort to alter the texture's shape
and make it fit where I needed it on the gun. I decreased the brightness
and contrast to match the rest of the texture map.
Finally, I used the Eraser tool with a soft edge to erase away all of the metal around the vents themselves. See the results below.
 |
Vents in template view |
 |
Vents in preview |
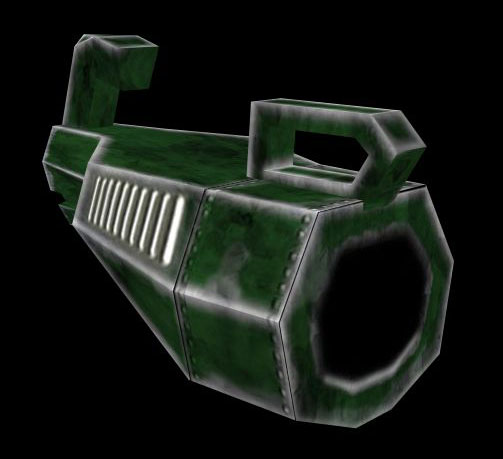
Next let's deal with the front of the gun. Again I'll address the edges, making the front a band of metal secured by rivets. A thin black line makes it clear that we are looking at separate pieces of metal that have been joined.
 |
Rivets in template view |
 |
Rivets in preview |
Next, let's deal with the grips. Whatever material this gun might have been made with has worn out long ago, and some unidentified warrior has wrapped the grips in leather for greater comfort. You can start with this small leather texture I've prepared for you:
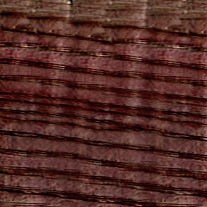
The UV template we're working with was laid out to make efficient use of texture memory, and in this case it makes it somewhat tricky to apply our leather so that there are no obvious seams. The time you spent familiarizing yourself with the model will be a great help in this process.
You'll need to rotate the leather texture and scale it to fit the grips. Don't use the top or bottom edge of the texture. Instead, erase so that you have the edge of one of the strips of leather as the edge of the texture, as shown below. Because the leather strips have been wrapped around the grip, the individual strips are at an angle. This adds to the challenge of making the results look seamless, but it can be managed.
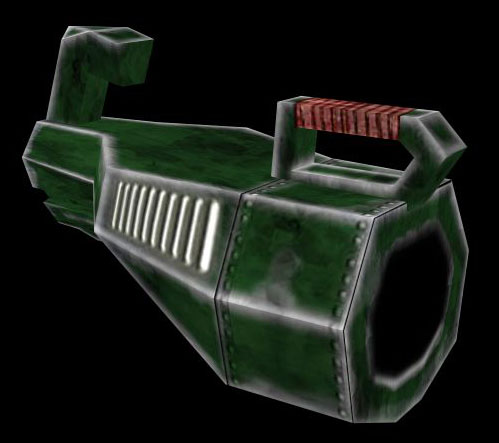
From the angle shown below, the leather grip looks just fine.
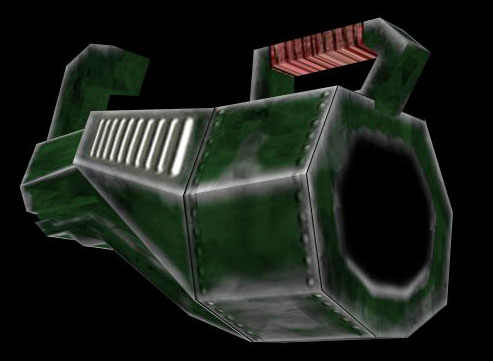
Something odd is going on from this point of view. Can you tell why the leather on the under side of the grip looks like this? If you can, then you have really studied the model and template!
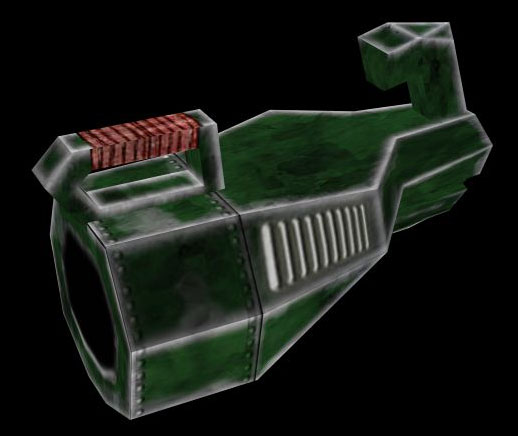
The leather strips don't line up from this view, which really spoils the illusion.
Lining Up the Edges
We've got a seam to fix, and it will help to analyze the texture and model to come up with a strategy for solving the problem.
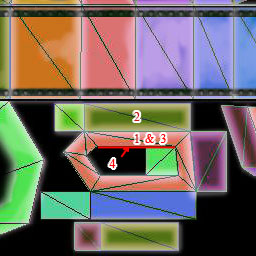
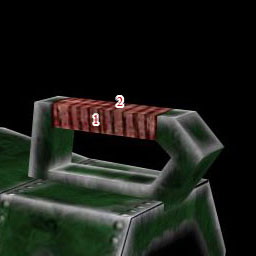
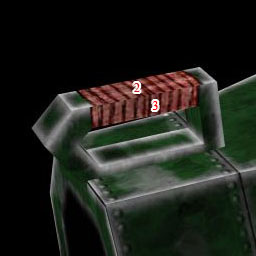
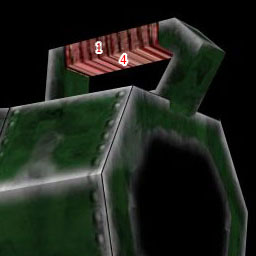
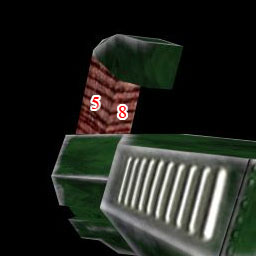
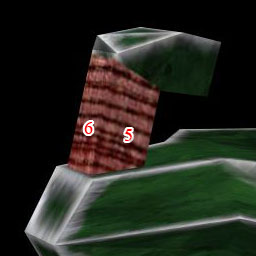
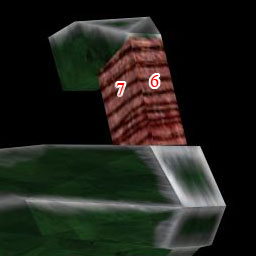
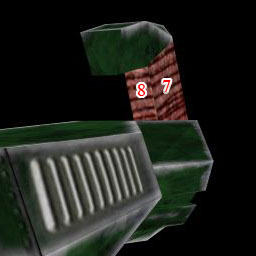
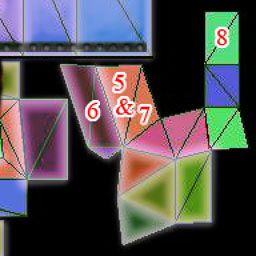
The images below identify the four surfaces on the leather-wrapped part of the handle by number, both in the texture map and on the model. As you can see, surfaces 1 and 3 use the same part of the texture. In the texture map, surfaces 1 and 2 share an edge, so there will be no difficulty making sure there is no seam between these two surfaces. The edge between surfaces 2 and 3 is another matter.
Surface 4 is another problem, but it is not one that a texture artist can address. This problem would need to be fixed by the 3D artist. Surface 4 has not been allocated its own space in the texture map. Look carefully at the template; this surface is not visible. The UV layout has been done in such a way that surface 4 was not laid out flat for planar mapping. It is actually there, but it is perpendicular to the plane of the other surfaces. This means that the pixels applied to surface 4 will be only those pixels along the bottom edge of surface 1, and those pixels will be stretched along the entire width of surface 4 (look closely at the lower right image above).
As I said, there's nothing that texture artists can do about this. It is however worth discussing. Allowing textures to streak like this is bad form. Fortunately, in this case, the streaking occurs on a part of the model that is not very easy to see, and in-game, very rarely visible. Also the streaking of the texture looks very similar to the leather texture. These two facts mean that we can probably get away with the streaking. Remember, however, that streaking textures give prospective employers a bad impression, and you should exclude models that show texture streaking in your game art portfolio.
So surfaces 1 and 3 are receiving the same texture, and 4 is receiving the bottom-most pixels of that texture, so we don't have to worry about seams between 1 and 4 (and between 3 and 4).
Surface 2 already works where it touches surface 1. We need to make it work where it touches surface 3. Remember that the top edge of surface 3 is the same as the top edge of surface 1. So we can copy the texture that is applied to surface 1 and flip it vertically, placing it in the image for reference. This allows us to see the seam, and to fix it by making changes to the texture on surface 2 (the selection identifies the portion of the texture that has been cut and pasted, and flipped vertically). This new layer will not be part of the texture; it is just being used for reference.
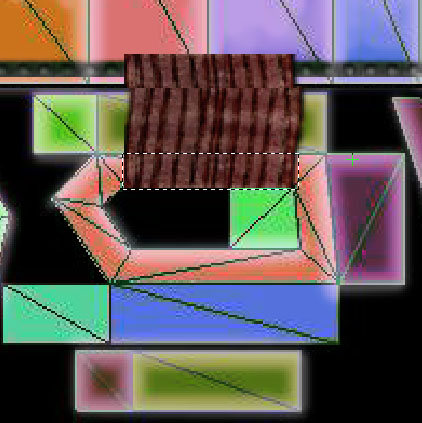
Remember that we need to preserve the edge between surfaces 1 and 2. We can cut and paste the texture applied to surface 1 to a new layer so that it can be modified separately. The image below shows the texture of surface 2 alone being skewed to more closely match the edge of surface 3.
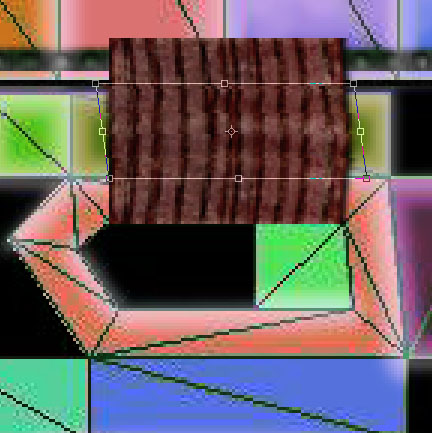
Keeping in mind that the edges of surfaces 1 and 3 are the same, copy the texture applied to surface 2 and flip it vertically, placing it over the other copy of the surface 2 texture. Now the top edge is seamless, and we can see the seam on the bottom edge (see below).
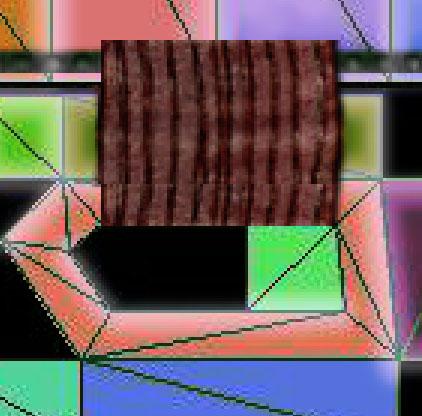
Carefully using the Eraser tool on the seam, we can remove it by exposing the texture behind. Look at the results as you erase—the goal is to erase until the bands of leather line up. Be aware of the possibility of erasing too much, and when it happens use Undo to restore your texture and try again.
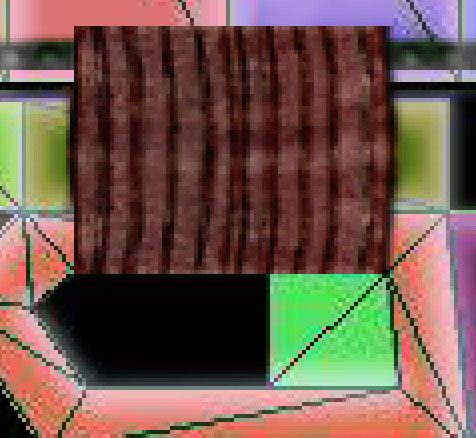
Below, the lower layer is hidden so that you can see the erasing done in the top layer.
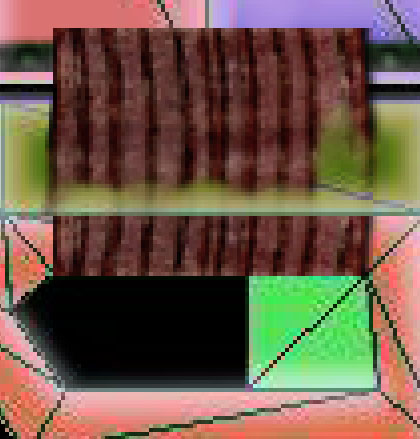
The image below shows the new edge between surfaces 2 and 3, with the seam fixed. Below is the texture map at this stage.
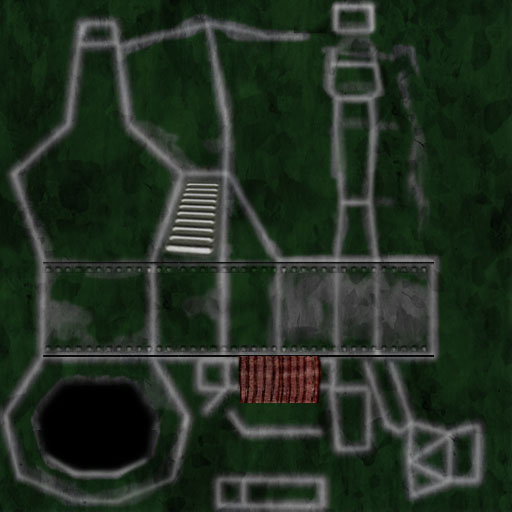 |
Corrected seams in template |
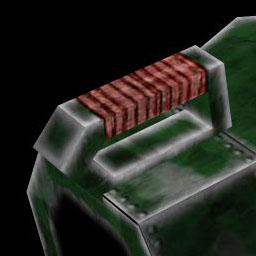 |
Corrected seams in preview/closeup |
The other handle is a bit trickier, because one of the parts is laid out at an angle. If we follow a sound strategy, however, this can be fixed without too much trouble.
Resize another copy of the leather texture. Set the new layer to around 65% opacity so that we can see the template behind it. We will need to skew the texture so that it fits the pink surface on the left below. However, we will also need to skew the texture in the other direction to fit the orange surface next to the pink one. By placing the texture over the template we can see how wide the texture for the pink surface needs to be. Then we can select the rest of the texture, as shown below. We will cut and paste this part into a new layer so that we can work with it separately.
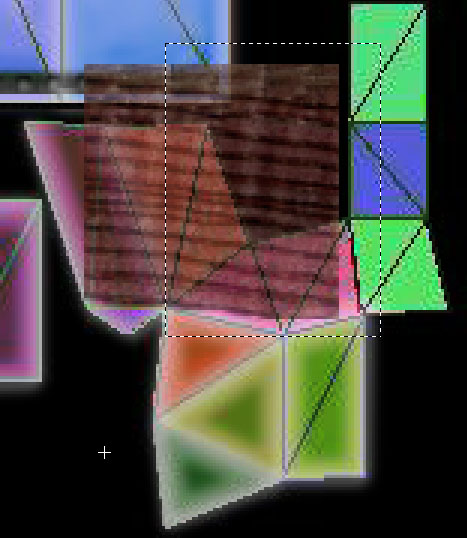 |
Selecting the pink area |
We can now skew just one part of the texture, as shown below. The intent is to match the angle of the top of the orange surface. We must keep in mind, though, that the next skew operation we perform will increase the angle of the top of the part we just skewed. With this in mind, I didn't skew so far that the top of the leather is parallel to the top of the orange surface, but instead stopped just shy of that (see below).
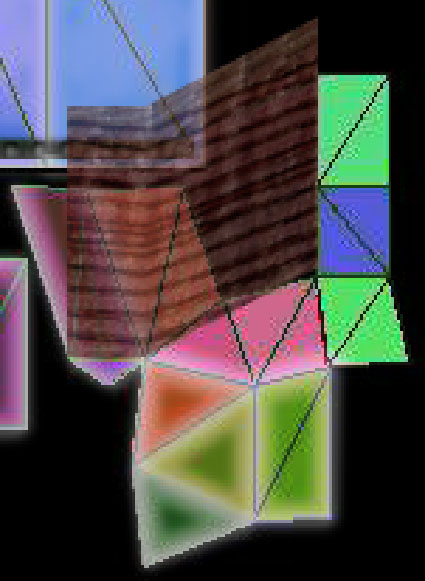
With one layer selected, hold down the Ctrl key (Command on a Mac) and select the other. Now you can skew both layers simultaneously to match the angle needed (see below). Notice that the texture now nearly aligns with the top of the orange surface.
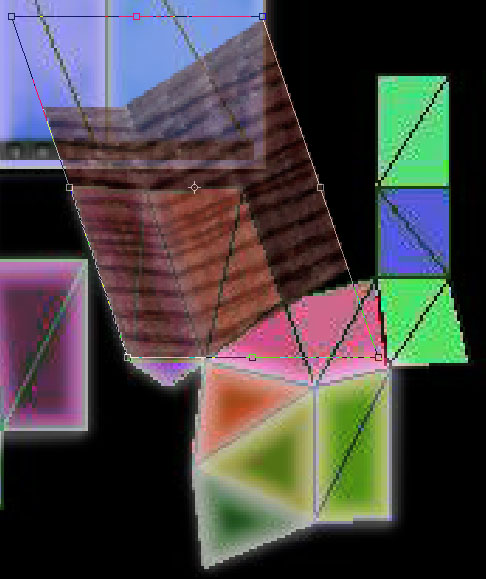 |
Skewing both surfaces |
There is now just a bit of a soft edge visible between the two layers (see below). This can be solved by moving the right piece one pixel closer to the left.
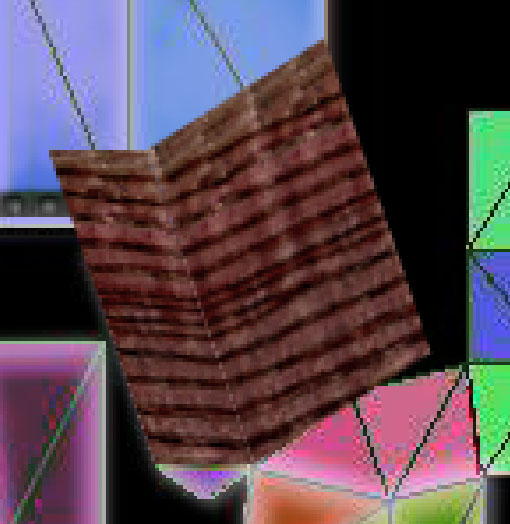
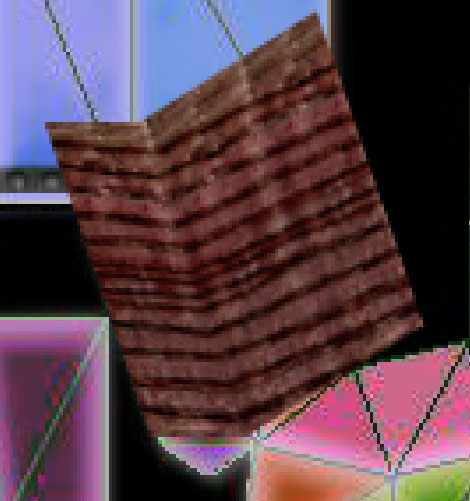
You can also see just a bit of the pink surface peeking out from beneath the leather (above). Move both layers one pixel to the left to cover this. The texture also extends beyond the edge of the orange surface. Move both layers up as necessary to fix this (see below).
With opacity again set to ~65%, select the portion of the texture shown below. We will use this on the other surface of the handle. Cut and paste it into a new layer.
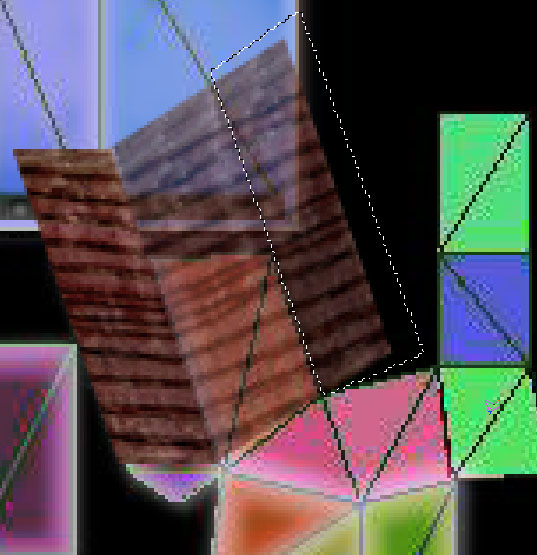
Next, we will need to skew in two directions to make the texture fit the green surface of the handle. The first skew is shown below.
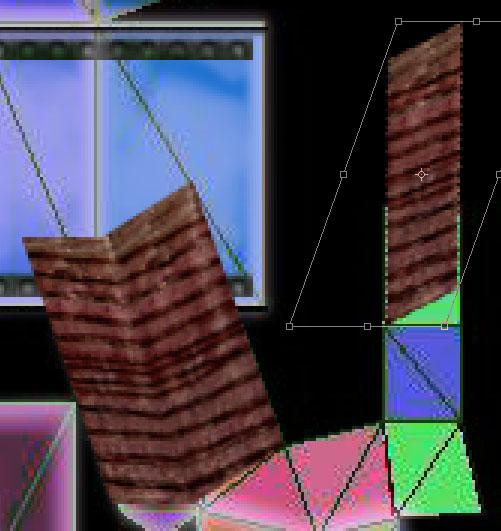
One more skew and a little horizontal scaling and the leather texture is fit to the green surface as shown below.
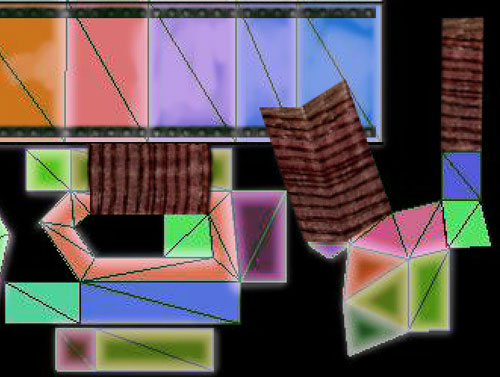
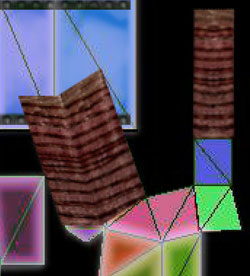
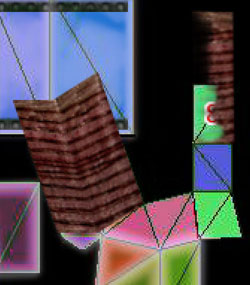
Images 1 and 2 below show edges with no seams. Images 3 and 4 show seams that are visible, but very close to lining up.
As with the other handle, two surfaces receive the same texture. That means that the edge between surfaces 5 and 8 should be the same as the edge between 7 and 8.
So the left edge of surface 8 has the correct texture, and this same edge should be duplicated on the right side surface 8. Duplicate the surface 8 part of the texture, flip it horizontally, and place it over itself. Then use the Eraser tool to expose the left edge of the texture below, while checking that the textures still look good as you erase.
The images below show the resulting texture (left), and the erasing of the top layer shown with the original layer hidden (right).
Fixing the Curves
The image below shows the results of our seam-fixing efforts. The texture lines up well, showing no seams, but some of the leather bands curve unnaturally. We can see this in the texture, and it looks wrong on the model. This can be fixed in various ways, however, but as long as we are careful to preserve the edges of the surface 8 texture, it will remain seamless.
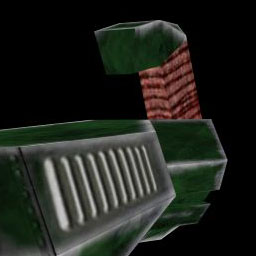
One option for fixing the curves would be to cut bands of leather from another part of the texture, and paste them over bands on surface 8.
The image below shows the new, straight leather bands I created (note that I also trimmed away the part of the texture that extended beyond the upper edge of surface 8). I made sure to check to be sure they line up with the texture below as I worked. Once all new strips of leather were merged into a single layer, I selected areas around both edges, and Feathered the selection by 2 pixels. Pressing Ctrl/Command-X will now trim away the edges of the current layer, exposing the edges of the layer below—the edges that we already tested and found to work.
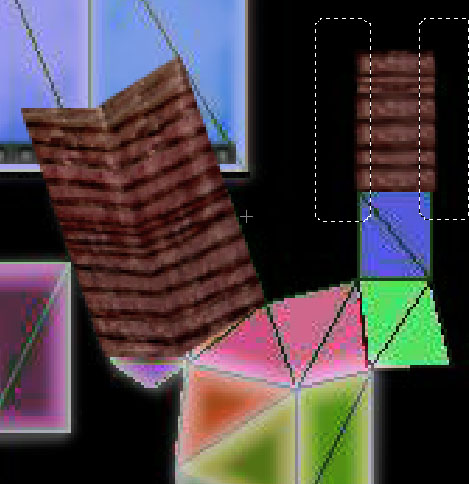
The image below shows the results.
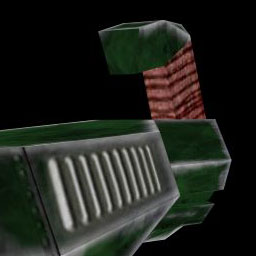
The edges of surface 6 are shared with the edges of surfaces 5 and 7. The texture is identical on these two edges. The texture lines up seamlessly between surfaces 6 and 5. So, to eliminate the seam we can duplicate the texture currently applied to surface 6, and flip it horizontally. To make it fit we will then need to skew it horizontally (see below).
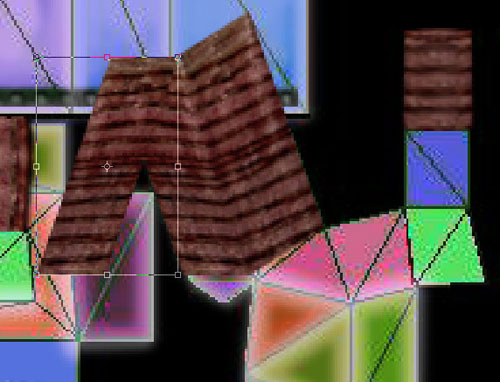
Below left is the new layer before erasing; below right after erasing.
Below are the results of our latest efforts. Toward the bottom of the grip, we start to see the curved bands of leather like we saw on the other side. Spend a little time cleaning up this part of the texture.
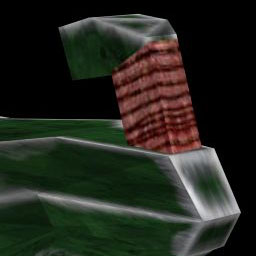
When you have adjusted your texture to your satisfaction, you can merge all of the layers making up the leather for the grip we've been working on. You will need to trim away the leather that overlies other surfaces, as shown below. It will look better if you trim away the other end of the map, and remove the partial leather band so that the border between leather and metal is the dark border between leather strips (see below).
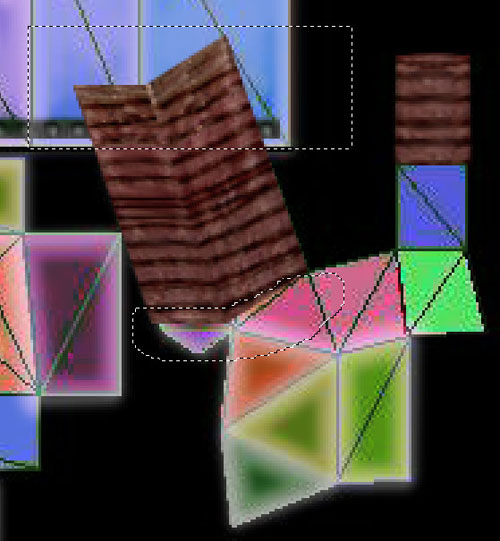
The results are not perfect, but are very close.
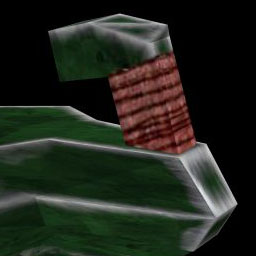
You have now experienced the process of painting a texture map starting with a UV template. Go ahead and finish the minegun on your own. You don't need to make it look like the original texture for the minegun. Do keep in mind that in Exercise Five you will painting an entirely original texture map for the minegun.


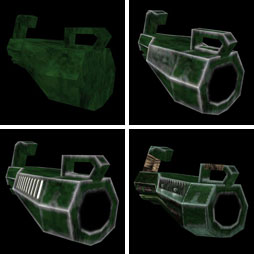
 Learn the basics of how UV templates work.