Poster Design
Posters are a great form to work in. They have a broad expanse of canvas, which makes you, as a designer, stretch out of comfortable habits. They force us to think about a focused single message but spread it out over a larger area than we may be accustomed. And they're great to look at, present, and show off.
When posters are done right, they get hung on walls as commercial ads, statements of concomitant belief, as turns in nostalgia, or simply and directly as expressions of art.
Note
Exercises will be evaluated for understanding of course concepts.
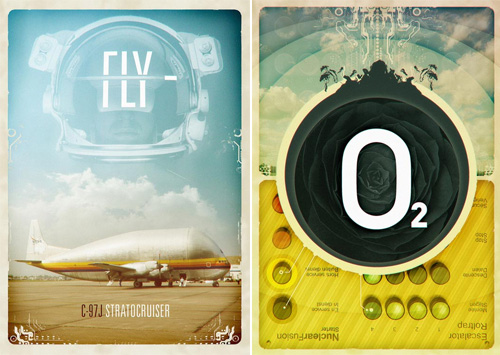
Poster designs—whether commercial, or artistic and nostalgic like these by Ruben Córdoba Schwaneberg—give designers an opportunity to be dramatic. Notice in these examples the rich blending and filtering of images, yet very minimalist, uncrowded compositions.
Back to Top
Creating a Safari Poster
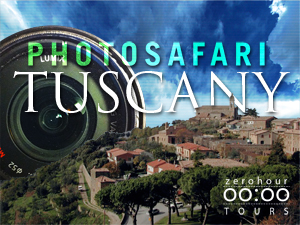
In your final exercise, your goal is to create a poster for a "photo safari" or "Photoshop safari" of a location of your choice. The subject place of the poster in the example is Tuscany. But your poster should be a place you've been, would like to go, or have seen (and can acquire photo material for). It might be your hometown or neighborhood (Photo Safari: Wichita), your dream city (Photo Safari: Sydney), or even your backyard (Photoshop Safari: My Backyard).
The poster should convey a sense of the location as well as the idea that this is a great place to take pictures. A photo safari!
You'll need at least seven different images for this project, but before you source them, take a look at the Review Kit below for another look at the retouching tools you learned about in Lecture Six. Then I'll show you my version and the digital imaging I used.
How I Did It
The artwork below is a simple composition, really. This travel poster uses techniques and skills from each of the six lectures in this course. Objects have been selected and taken form other contexts and placed into separate layers in this document. Other parts have been selected and then converted into masked areas. Different masks have been applied to layers. Type has been selected and has had effects and blend modes applied. Blend modes have been used on the sky (there are three sky layers). Corrections, filters, and retouching techniques have been applied. If we dissect the image, we can pretty much see how it is made.
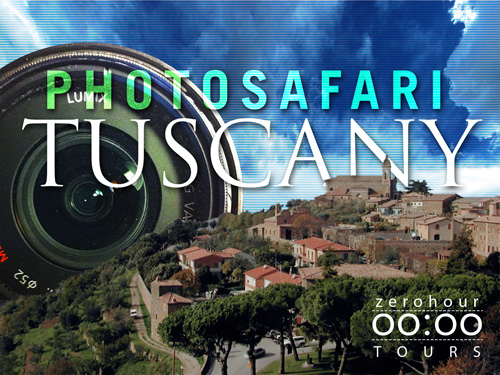
Can you pick out all of the original images?
You are welcome to download the PSD file in your Exercise Six downloads. I invite you to use parts of it in your final exercise, if you like. The idea of reusing elements (when you have permission to do so, as you do here) is a great way to build up a personal library for future use.
Check out this Walkthrough video for a summary of my process:
Your Poster
Your final exercise will be to create such a travel poster, using as many of the skills and techniques you've learned in this course as you can gracefully employ.
Your finished poster must include the following:
- At least seven different photo objects or scene elements.
- Correction and retouching accomplished with adjustment layers and healing tools as appropriate to the source images.
- Title text created ("Photo Safari: Place Name" or "Photoshop Safari: Place Name") using Photoshop type tools and other effects/techniques as desired.
- Zero Hour Tours logo found in the PSD file.
- At least one mask technique.
- At least one filter.
Here is a workflow for your final project. Additional details on sourcing your images and creating the poster design follow shortly.
- Decide on the subject of your travel poster.
- Collect your images. Take new ones if need be. If it's going to be Photo Safari: My Backyard, for example, then collect your images for the backyard and think about what best represents the area. Think about drama, about setting a stage.
- Place your images together on the canvas, and work out a balanced, focused, and dramatic composition. Make sure to cover all of the requirements above.
- Create a PDF contact sheet of all the images and image pieces you used or even just considered using, in the final composition.
- Save a JPEG of your finished poster.
- Write a brief report on your decision making and Photoshop tasks in this project.
- Celebrate your excellent work.
Sourcing Your Images
You may locate images from other sources and/or you may wish to take your own photographs. In both cases, be careful about resolution and sharpness of image.
Remember that not all of your images need to be perfect. You have a wide range of filter, correction, and retouching tools in your skill set to improve on your source imagery. And you will be expected to do so in this project.
You must use at least seven different photos in your finished travel poster. Here are some types of photos that might be helpful:
- Multiple shots of the location's landscape.
- Close-up imagery of important landmarks or local people.
- Imagery of a camera or a photographer, as this is a photo safari poster (you may use the lens image from my design if desired).
- Various sky images to combine for a dazzling background.
As we discussed earlier in the course, there are many online sources to choose from in selecting your images. The highest-quality images come from paid stock photography web sites like Adobe Stock and Shutterstock, but you are not required to purchase images for your project. Consider using an image or images from free stock photo web sites like Pixabay.com or Pexels.com.
Create a PDF contact sheet presenting your source images in a single document. Go to File > Automate > Contact Sheet II within Photoshop and choose your desired settings. You can also alternatively use Adobe Bridge or Lightroom Classic to create your contact sheet.
Developing Your Poster
Use the PSD file provided as a starting point for size and resolution.
Make your poster inviting and exciting, and remember to have fun while making it. Safaris aren't ordinary events, and a poster for a safari should reflect the extraordinary aspect of adventure.
Start with a main photo element—the one that is the focal point or most compelling piece of your poster concept. With that main element in place, think about the editorial elements of the poster. Those are the elements that communicate your idea, like a camera lens to play on the "photo" idea or a pith helmet to play on the idea of a safari. Juxtapose that with the ordinary backyard, and you have drama. As you combine these elements on the canvas, using masks, colorizing, blend modes, and such, you build up your design and your message.
The text and the company logo are the final pieces. Try all the blend modes, effects, masks, and point type skills you learned in Lecture Four to add type as another working element in the composition. Sometimes all you need to do is tuck some of the letters behind one or two elements in the composition, as you saw in my example.
Your finished poster must reflect the tasteful approaches to imagery and typography we have explored throughout the course. Remember to use a very simple typeface. Don't go overly decorative in your font choice, or you will distract (and detract) from your poster. Additionally, keep in mind that filters and other digital imaging techniques must enhance images, not smother them. Use, but use with care!
Save your PSD for future editing and use. Important: Make sure your PSD is fully layered!
Then save a JPEG for submitting your exercise. In File > Save for Web, locate the Image Size settings. Change the output from 1667 x 1250 to 800 x 600. Use the JPEG High preset and save.
Discuss Your Work
Take a few moments to carefully answer the questions below about your final project. This written component is required along with your JPEG.
- Describe your goals for your final poster and how well feel you have achieved them. What do you think is most effective about your poster? What was the biggest challenge?
- How did you color correct and/or retouch your images? What adjustment layers and healing tools were most useful in improving the images?
- What filter(s) did you use and why? How do you think this changes the impression of your final poster.
- What role did selections and masks play in your work?
Back to Top
Checklist

Grading Criteria
What your instructor is looking for:
- Assemble at least seven photos, along with a logo and typography, into an attractive and intriguing travel poster promoting a photo safari.
- Effectively use filters, color correction with adjustment layers, and retouching with healing tools to improve the source imagery.
- Utilize masking techniques to blend images into the final composition.
- Describe the Photoshop techniques used and decisions made and how they affect the resulting finished design.
Posting Directions