How to Use This Lecture
When you first visit an art store, you'll immediately notice that there is a wide variety of materials available. Yikes! Which brushes to buy? Which paints to use?
This lecture is all about answering those questions and getting you started. There's a lot to learn, so here's how I would recommend you approach each part of the lecture:
 |
|
 |
| |
Lecture Topics:
1. Guide to Materials. Discusses the many facets of brushes, knives, solvents, oils, acrylics, palettes, easels, tables, and other materials for your studio.
Use this section to check you've got all the supplies you need for your
studio.
2. Canvas and Support. Examines canvas, support, and sizing.
Use this section to check that you've bought and prepared a canvas for painting.
3. Oil Paint. Looks at the perils and pitfalls of oil paint, including what paint to buy.
Use this section to check you've got all the paints you need to begin the
project.
4. How to... Discusses painting fundamentals, including how to prepare your palette, hold a brush, and mix paints.
Prepare your palette and do some warm-up painting exercises
using the tips you'll learn here.
|
|
 |
|
 |
Choosing a good brush is important for any painter, so let's begin our guide to painting materials there.
Brush Hair
The type of hair used in a brush varies from model to model: some use animal hair such as boar hair or horse hair, and some are synthetic, made of plastic. Each type of brush has its own qualities and benefits. You will also notice that there is a large price difference between beginner and advanced brushes, which often reflects the quality of the brush. Natural hair, naturally, is often more expensive.
While quality is important, if you are starting out, I would recommend that you do not spend a fortune at this stage on your brushes. Buy what you can afford. You can always invest in better quality brushes in the future. You will find that even with the best care, your brushes won't last forever, so invest in better brushes when the time is right.
You should also note that different brushes are used for different types of paint. Make sure you get the right type of brush for the materials you are using. Don't buy watercolor brushes for this course, as they won't hold up to the oil and solvents that you will be using.
Also avoid using brushes for acrylic with oils, and vice-versa. Acrylic paintbrushes typically have shorter handles than their oil brush brethren. The longer handle of the oil painting brush is beneficial as it gives you more control when making straight lines. Plus it helps keep the oil paint off your hands!
You can really get into brushes as you develop more experience. Click
here for a PDF page with more details on brush hair types courtesy
of Dick Blick Art Supplies.
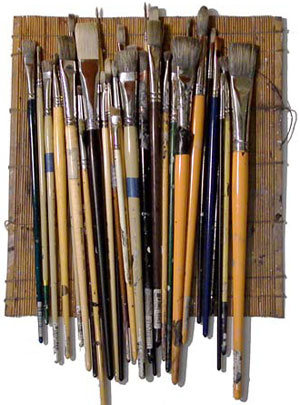 |
I have an assortment of different
brushes of various types and sizes. Each brush makes a special kind of mark. Try out a selection of brushes
to find out what kind of marks appeal
to you. I generally use flat brushes because they make it easier
to create sharp, straight lines that give a strong sense of form.
|
Brush Shape
After you have decided on the brush hair, you'll need to decide what shape of brush to choose. Again, there is a wide variety of different brush heads to choose from. Each one has a different use and creates a different effect. The three most universal brush types are the flat, round, and bright:
|
|
|
| |
-
Flat. Flat brushes, as the
name implies, have flat heads. These brushes are particularly
useful in trying to create a sharp edge on a subject. They
are almost like a chisel in that they allow you to carve
out form on your canvas. I recommend that students stick
to flat brushes in the beginning as flat brushes lend themselves
best to representing form.
-
Round. Round brushes have round heads at their tips. These brushes are good for making
fluid, almost calligraphic lines. These are also good
for making soft edges, as they tend to create a softer line.
-
Bright. Bright brushes look
a little like flat brushes except that they taper in at the
edges. These brushes are particularly useful when creating
areas of refined detail. They give you a lot of control
over a small area.
|
|
|
|
|
Click
here for a PDF page with more details on brush shape courtesy
of Dick Blick Art Supplies.
Brush Size
Brushes also come in a variety of sizes. They range from brushes that are very small to ones that are several inches wide. For the beginning painter, I recommend buying a handful of brushes, all about 1/4" to a 1/2" wide, and purchasing about three of each type.
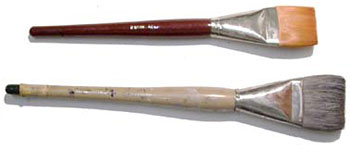 |
I save these for the biggest
paintings as they are several inches wide each.
|
Feel free to explore a variety of brushes, but I recommend sticking to just a few brushes at the beginning, as you are learning many new concepts at this point and it's best not to let decisions about tools and materials overwhelm you.
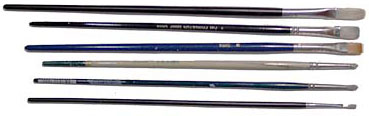 |
Here are some of the smaller
brushes I use. From the top to the bottom I'm using a bright,
flat, flat, 1/8 round, 1/8 round, and
1/8 flat.
|
Click
here for a PDF page provided by Dick Blick Art Supplies describing
in more detail the difference in brush sizes.
Knives
Painters even have their own type of specialized knives. (I have a funny
story about the time I threw a painting knife into one of my canvases
like a circus knife thrower. I don't recommend this).
There are two types of knives that painters use: palette knives and painting knives.
Palette knives are long thin knives that are not particularly sharp. They can either be made of metal with a wood handle or they can be made of plastic. I prefer the metal ones. They are flexible as well as durable. Palette knives are used to mix colors on your palette. It's a good habit to only use a palette knife to mix your colors, rather than using your brush. This will allow you more control over the mixing process and keep you from muddying your colors, something that happens when a brush is already loaded with other colors.
Painting knives are more specific in their shape and sizes. In fact, there's almost as wide a variety of painting knives as there
are brushes. These knives are used to directly apply paint
to the canvas. They are typically metal with wood handles, but
also come in plastic. Again, I prefer the metal ones, as the blades are
more flexible and have a bit more "give," which I like. You can experiment with a variety of painting knives to see what
different types of marks they make, but I would advise a beginner to
get one that is shaped like an elongated diamond.
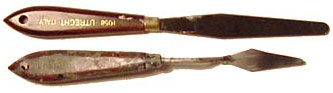 |
Pictured top is a brand new palette knife. Below it is a painting knife that you can see has been used over a long time. Despite the mess on the handle, the blade is kept clean and sharp.
|
If you can afford it, I recommend getting one small painting knife and
one large painting knife with sharp straight edges.
Painting solvents are chemical compounds that are used to alter the chemical makeup of your oil paint. They can thin or thicken the consistency of paint. They can also give it a matte or glossy finish. Drying time is also affected by the use of painting solvents. Some can help your paint retain its color, others can cause it to yellow and crack if not used properly. Some are just useful in getting the paint off your brushes.
The use of painting solvents can be a science in its own right. In fact, it is a science—we call it chemistry! Painters can get caught up in a world of different mediums and varnishes to use in their paintings. Each has particular attributes which lend themselves to specific effects. One can go nuts finding the right tool for the task.
For now, you should know that solvents come in three main categories: dilutants, mediums, and varnishes. We'll also look at brush cleaners in this section.
For a great reference on mediums, solvents, and a pretty brilliant discussion of the techniques in abstract painting I recommend the book "Abstract Painting: Concepts and Techniques by Vicky Perry.
Working Safely with Oils and Solvents
For those of you who are choosing to work with oil paint, make sure to set up your studio taking the necessary precautions for having flammable materials that require proper ventilation. Even with all of the necessary precautions, I think working with oil paints is a lot of fun, especially when you learn how to combine your paint with the proper solvents.
Dilutants
Dilutants are used to thin your paint—to make it easier for you to paint by making your paint more fluid. They come in the form of turpentine, turpenoid, mineral spirits, and odorless mineral spirits. I highly, highly recommend that you use odorless dilutants. The smell of pure turpentine can be overwhelming. I recommend using Gamblin's Gamsol as that is the least toxic (according to the company's fact sheet) in comparison to all of the other products on the market. There are some dilutants that are orange-scented. Again, just because it smells like an orange doesn't mean it won't kill you. Be careful.
Keep in mind that just because a solvent is odorless does not mean it is not toxic. Whenever you paint, you should always work in a well-ventilated area. Take breaks every hour or so and go outside and get some fresh air. I also recommend you have a fan on to circulate the air.
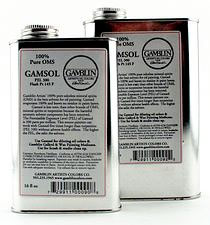 |
This solvent is a good one.
|
Do not smoke in the room with your toxins. Besides the obvious fire hazard you are creating for yourself, you are also multiplying the damage that you are doing to your lungs.
Likewise, make sure to not eat or drink anywhere near where you are working. All food items should be consumed in another room. Do not eat or drink while painting.
Check out this link to learn more about using solvents safely.
Oil Paint Mediums
Mediums are oily materials that you can mix with a dilutant to speed up or slow down the drying time of your paint. They can also add thickness to your paint, flatten the brush strokes on your painting for a smoother surface, and increase the matte (dry-looking) or glossy (shiny-looking) qualities of your paint.
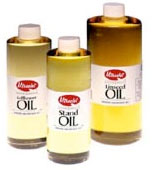 |
Utrecht Stand Oil is a good option for beginners.
|
Click here for a good list of mediums on the Gamblin Web site.
There are several different types of mediums including linseed oil, poppyseed oil, walnut oil, and stand oil. Each of these mediums possess unique qualities as to the matteness or glossiness of the paintings surface they create as well as their individual tendencies for yellowing or cracking.
Utrecht Stand Oil is a good option for beginners. For beginning students, I recommend combining stand oil with your dilutant in a 60/40 mix (60% stand oil, 40% dilutant). This will give your paints a nice flow and give your paintings a nice, even glossy surface. This mixture will be combined with your paint on the palette, which we'll talk about later.
Varnishes
Varnishes can be used to add a protective coat to your painting. They can also help you control the overall appearance of your work. Sometimes, depending upon the way you apply the paint your surface, varnishes can be matte, glossy, or uneven. Apply a varnish to your painting at least six months after your painting is finished, so that it has sufficient time to dry.
Why so long, you may wonder? Well, as the saying goes, paint takes time to dry. Just because your painting is dry to the touch doesn't mean that the paint on the bottom layers is dry yet. Oil paint takes a long time to dry.
Make sure that if you apply a varnish to your painting, you apply it all in one coat. If you apply it unevenly, you will get a line where the dry part and the wet part meet. You should also let your painting lean against a wall with the wet side facing the wall when the varnish is drying, to keep dust off the surface, as this will stick in the varnish and mar the finish. Also, apply the varnish evenly by loading your brush with the same amount of varnish with each stroke. Otherwise, you will get an uneven and bumpy surface to your varnish. Varnishing a painting is a lot like varnishing, staining, or sealing any surface, whether it's on furniture, porches, or wood floors.
Note: I typically don't use varnishes on my paintings as I can create a pretty even surface by the use of my medium alone. But you may choose to use it for its protective qualities.
Click here for a link from the Dick Blick Art Supply page detailing a list of different types of varnishes.
Oil Brush Cleaners
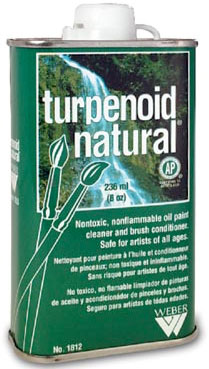
You can keep your oil brushes cleaner and extend their life using special products called brush cleaners. They are equivalent of shampoo for the hair of your brushes. These materials are to be used just to clean your brush and should never touch your paint or the surface of your canvas, as they are very through in eliminating oil materials and may damage the integrity of your painting if mixed into the surface.
|
This Turpenoid Natural product is a
great brush cleaner that I recently discovered. It is nontoxic
and nonflammable and doesn't smell too bad. These are all important
factors when working in the studio. Also, it gets the paint
right off and leaves the brushes in good shape. I have even been able to use it to get the paint off of my brushes that I have accidentally left to dry.
|
Despite the sound of it, there are non-toxic brush cleaners available. Still, use caution when using the brush cleaner because it will become tainted with oil from your brushes quickly. Also, the term non-toxicity technically only refers to a substance not being toxic to the eco-system, and not specifically to humans. So, it may not kill a tree, but I wouldn't take any chances.
Always use a brush cleaner, never soap and water, to clean your oil
paint brushes.
Acrylic Painting Mediums
The first medium you should be aware of when working with acrylics is water. You can use water to thin your paints out. It is important to always have a cup of water near by when painting to keep your brushes from drying.
My only recommendation for using water to thin your colors is to not get too carried away. You don't want to thin your paints down to the level of watercolors and be forced to paint layered stain upon stain. Let your paint stay thick enough so that the majority of the light you get from your colors is coming from the paint and not light bouncing of the canvas surface.
Because of acrylics' synthetic qualities, there are a number of mediums that you can mix with acrylic paints to get some fantastical effects. There are gels that hold their form and can be sculpted like clay, or pastes that are gel that contain other materials (such as glitter).
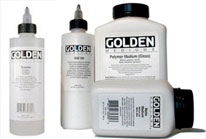 |
Retarder (propylene glycol) for acrylic paint
|
Here is a list of different Gel Mediums offered by Golden. For the purpose of this course I want your exploration of different mediums to be simple as we are going for a naturalistic looks for our works.
I would keep my focus limited to using a retarder (propylene glycol) to slow the dry time of your acrylics as well as some kind of thickening medium to affect the thickness of your paint as well as the desired finished surface. Certain mediums will dry clear and have a shiny or flat look to them. I would recommend looking for a simple matte medium or gloss medium for acrylics.
A palette is the surface you will use to mix your paints on. This surface can be any smooth, flat surface that has a consistent color (at least, it should be consistent when you start. It will probably change color as you begin to use it).
You can use almost anything for a palette, but you should make sure that you have plenty of room on it to mix your paints. Since this class doesn't require you to paint very large works, you can probably get away with a palette approximately 12" x 20" or so, but it couldn't hurt you to go bigger. I use a number of palettes in my studio, and I have one small one that fits in a box for when I paint outdoors.
Palettes can be made of wood, metal, plastic, mirror, or a pane of glass painted white on the bottom. I prefer the wood palettes because they are easy to clean up (the other types of palettes sometimes require you to use a razor blade to clean them, and I just can't see myself doing that). Also, wood palettes are light and you can hold them if you want to.
Here is how to hold a wood palette:
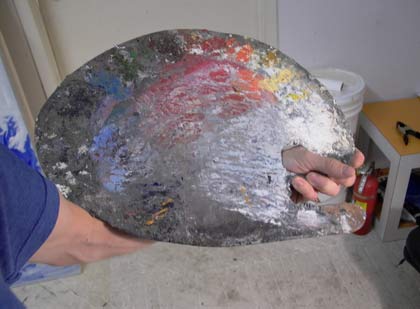 |
Notice how I let the palette
rest on my arm and hold it loosely in my hand. Often though,
I will set my palette down on a table at a comfortable distance
so my arm can be more relaxed while working. The advantage of
holding your palette is that you can hold it up close to the
surface of your canvas so you can compare the color you're mixing
to the other colors on the canvas.
|
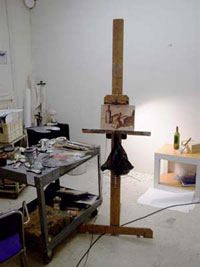
Table and Easel
Two other materials that are important to obtain are a table and an easel. A table is useful for you to sit your brushes, palette, and solvents on. Try to find some junky old table that you don't mind getting dirty. If you can't do this, make sure you protect your table with a plastic covering.
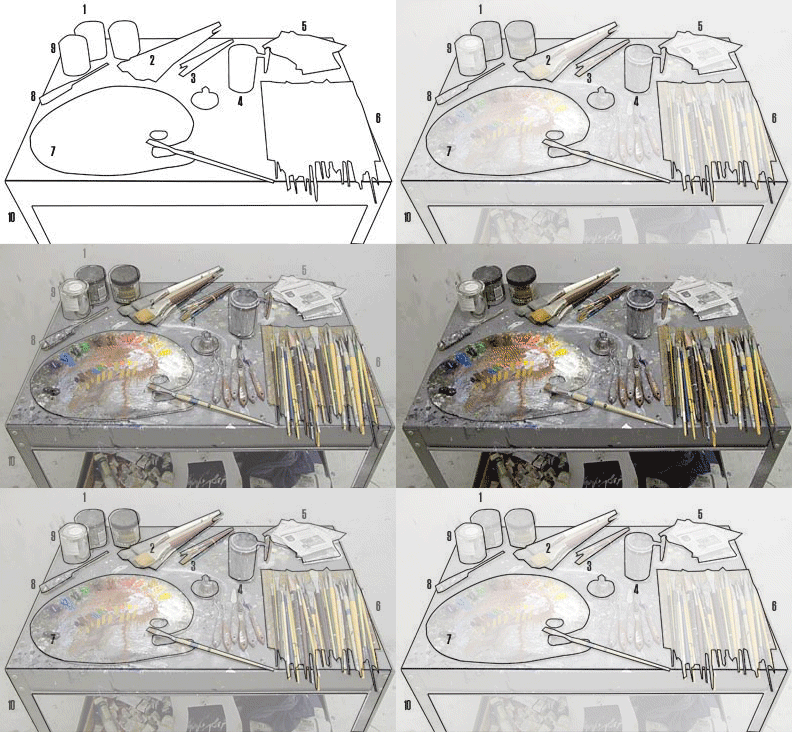
Here's what's on my painting table. Some of these inventory items I'll discuss in a minute.
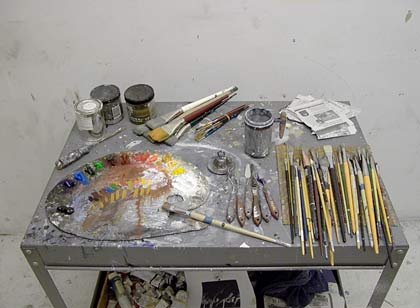 |
Beneath the apparent chaos, there is order.
|
|
|
1. Jars for cleaning brushes
2. Big brushes
3. Small brushes (for detail work)
4. Jar filled with Odorless Mineral Spirits
5. Newspaper for cleaning off brushes
6. Brushes
7. Palette
8. Screwdriver for opening up paint cans
9. Can of paint
10. Table |
Easels are those awkward things which look like tripods that are used to hold your painting
while you work on it.
Again, since this course doesn't require
you to work with a very big canvas you can get away with a small easel. Find
one that is appropriate for the size at which you are working. In my studio,
since I work very large (on a very large canvas, about 6' x 8' at times), I've made an easel
out of my wall. Easels can be made out of metal or wood, but I
recommend for the beginning artist a small, lightweight metal easel.
They are affordable and are easy to carry outside if you need to paint
outdoors. Plus, they fold up into a compact size.
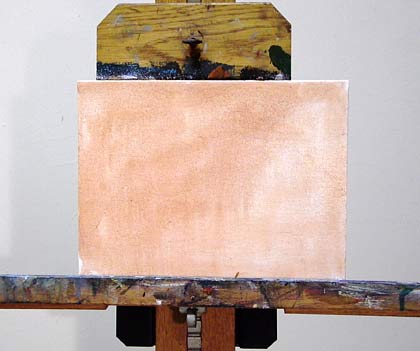 |
Easels can generally be adjusted to the size of your painting.
|
French Easel
If you have the budget and want to get fancy, you can purchase a French easel. Sounds fancy, doesn't it? This type combines an easel with a painting box (for you to put your paints in). French easels fold up into a nice portable box and fold out when it is time to paint. These easels are particularly useful when painting landscapes. Some nicer models also have areas for you to fit your palette in or even an area for you to clip on wet paintings.
This last category of materials includes some miscellaneous items you should always have in your studio when you are painting.
Paint Box
You should have some type of box for you to keep your paint tubes in.
I have a wooden box that closes like a briefcase with a handle on it.
I've had it for years and I find it to be very helpful, especially when
I'm painting outdoors or traveling with my paint. A simple plastic container with a lid would suffice, however.
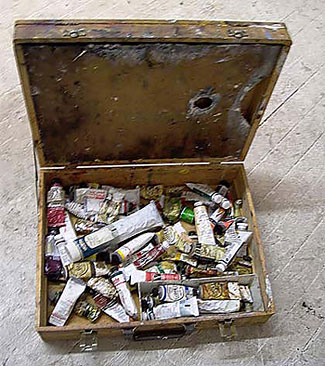 |
| Here is where I
keep all of my paint when I'm adding it to my palette. Keeping
the paint in a box like this is convenient and allows me to keep
them safe. This also makes it easier to paint when I'm out or
working from a different location. This particular box closes
like a briefcase and has a palette that slides into the top. |
Newspapers
Old newspapers are very handy to have around, as you can cut them up into little squares and use them as paint rags when cleaning your brush. This is more practical than using cloth, as you will be constantly cleaning off your brush and palette knife when painting. A paint rag is also good, but it will get real messy real quick and you won't want to keep it around. Using little pieces of newspaper that you can throw away easily is a much more practical solution.
Jars
Old jars, like the kind you use for tomato sauce, are good for mixing your mediums in or for storing your dilutants. Make sure you keep the lids, as you will want to close the jars when you are done. Most dilutants evaporate. Be kind to yourself and your air supply and don't allow any more toxins into the air than necessary.
Rags
I use a painting rag when I am cleaning my brush at the end of the day. This can be any old towel. Make sure to keep it, and all of your used newspaper and rags in a metal can with a lid, as they can spontaneously combust.
If you choose to use all paint in this course (which I recommend), keep in mind that the paint is oil-based. Oil is a fuel and it burns. I know I keep emphasizing the toxic and flammable qualities of all of these materials. For the record, I have never had any problem nor do I know personally any other painter who has, but it is always better to play it safe than sorry.
So far in the lecture, we've talked
about everything except the surface on which you will be painting.
So let's turn our attention on how to prepare a canvas.
There
are several different types of surfaces you can paint on. Of
course, literally you could paint on anything, but certain surfaces
work better than others for most techniques and what materials
you paint upon will certainly affect the archival value of your
work (how long it will exist before it decomposes and falls apart).
A canvas is a material that is stretched
over a frame to create a taut surface on which to paint. The material
that the canvas is attached to is called a support. The support helps your canvas retain its shape. It should impart a consistent firmness all across the canvas. Canvases with poor support feel unstretched and loose like regular fabric.
Stretcher bars are a very common form of support. They consist of wood beams connected to make a frame. The canvas is stretched over these beams and then either attached on the sides or in the back using staples or tacks. The canvas is stretched so that it is taut.
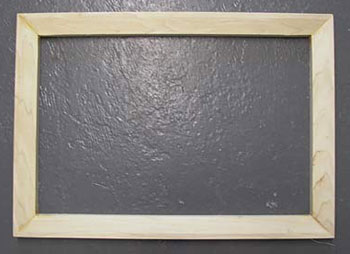 |
| See how these stretcher bars
assemble at the corners like a jigsaw puzzle? You could
attach a canvas directly to the stretcher bars or you could glue a panel board on them for added support before attaching a canvas. |
Cotton Duck
Cotton duck canvas is probably the most common surface used in painting. It is similar to denim or the sails of a sailboat, but lighter in weight. Cotton duck can be found in a variety of weight values. Typically, the larger you paint, the heavier the canvas you will need to paint on. Heavier canvas is made of a stronger and heavier weave and can be stretched more easily over a larger distance and support more paint.
Linen
Linen canvas is similar to cotton duck, though it tends to be more expensive and is considered to be of a higher quality. It is also naturally darker in color (a natural gray color).
Primed Canvas
You can purchase canvas already primed. This means that the canvas has already been covered in a protective material called a ground that will also help to size the canvas (keep it tight on the canvas and in the shape as it is stretched).
Primed canvas is typically primed with gesso, which is a white, synthetic material that covers your canvas in a flexible coat of plastic. Gesso is similar to acrylic paint. You will find that primed canvas will have a very flat and smooth surface as the canvases are evenly primed using a machine that sprays the gesso on.
Pre-Stretched Canvas
If you purchase a pre-stretched canvas, it will already be stretched on
stretcher bars and primed in gesso. I recommend using pre-stretched
canvas when you are just starting out. It is efficient and
affordable for you to work rapidly on small canvases without being
burned out by stretching and priming all of your own canvases.
Cotton-Duck Mounted on Board (Canvas Board)
Another option for you is to mount your canvas on a board, either before or after you paint on it. Doing this after there is a painting on the canvas can be quite tricky and should be for when you are at a more advanced level. To adhere the canvas to the board, you will need to use some sort of adhesive.
Another good option for when you are starting out is to use canvas
board. Canvas board is a canvas that is already attached to a piece of hard
cardboard and primed with gesso. This is even more affordable
than using a small pre-stretched canvas, though it doesn't deliver quite
the same level of presentation.
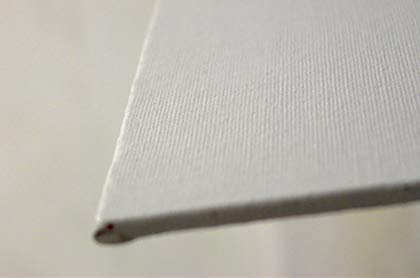 |
| You can see the
tooth of the canvas (the grain of the fabric) on this canvas board. |
Panel Board
Another option is to work directly on board. Typically artists use a piece of
masonite primed with either gesso or rabbit skin glue. The primary
difference between working on board versus canvas is that canvas has more
of a tooth to it (a rough texture that will grip the paint). Masonite
is very smooth and will lend itself to different effects as a result.
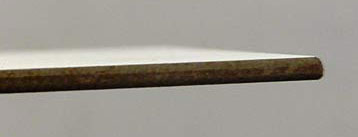 |
|
Notice the hard, smooth surface of the panel board. |
Also consider that canvas has a bit more give (you
can feel this when you press into the canvas with your brush), especially
when stretched on stretcher bars.
Colored Drawing Paper
Another affordable option is for you to work on primed drawing paper. For this you should use a heavy weight paper, one that is usually used for printing or watercolor drawing. This paper then needs to be primed with either rabbit skin glue or gesso.
Sizing is used to help your canvas retain its shape, stay tight on the stretcher bars, and to protect the raw surface of the canvas from your paints seeping in. Painting directly on raw canvas will give you a certain effect, but it will greatly decrease the life span of the piece as the oil of your paint will begin to break apart the canvas over time.
Two popular forms of sizing are gesso and rabbit skin glue.
Gesso
Gesso was originally made from a paste created by crushing old bones, typically chicken. Today, most gesso is actually acrylic gesso, which is made from a synthetic material. Gesso is a very convenient sizing to use, as it is water-soluble, quick to dry, and will adhere to almost any surface that is dry and oil-free.
Rabbit Skin Glue
Rabbit skin glue is an organic sizing material made from animal hide. It requires you to boil a crystallized material in a pan—cooking it. Then while the material is still hot you apply it in coats. Rabbit skin glue is an excellent material, as it creates a strong tooth than can be sanded to create a smoother surface, depending on your tastes.
Unfortunately, rabbit skin glue can also be affected by temperature and humidity and will cause your canvas to swell and expand. I find it best to spray water on the back of my canvas when it gets loose and I find that doing so, it snaps back into shape.
Click here for a link to page with more detailed report on sizing materials provided by Gamblin Paints.
At the art store, you'll find what seems like an endless number of colors available in oil paint. Each company has its own selection as well, and even though two competing brands may make a color with the same name, the end results are often actually very different. There are also degrees of quality in paint. You will notice that some brands offer a "student quality" and an "artist quality" brand of paint. The major difference is that the student quality paint has less pigment (the material in the paint that actually gives it its color) and more oil filler. Though it is same color as artist quality paint, there is less pigment and so the color won't be as strong. But, when you're first starting out and dealing with a number of issues in your painting, color intensity may not be your biggest concern.
Another thing to notice is that some paints have the word hue in their title. Each color of paint is made up specific materials that give it its particular characteristics. Hues, on the other hand, are actually made up of other colors that when mixed together look the same as the color named but aren't actually that color. You will find that hues will react differently to regular paints when mixed.
For example, Cadmium Orange is hard to come by now in its real form because it has Cadmium as one of its components, which is actually quite rare and expensive. Often you will see brands substitute this color with a Cadmium Orange Hue, which can be made from a number of elements, though many be dyes rather than mineral.
Feel free to choose hues when you are purchasing your materials, as they are more affordable than their counterparts. Just be aware that they are not truly the colors named on the label, and that you will be getting something that won't produce the same effect as regular paints.
A Recommended Basic Palette
Below is the palette that I recommend to students when they are first starting out. It consists of a variety of natural colors that are mostly mineral-based (rather than dye-based). I suggest that you get a tube of each of these colors and a big tube of Titanium White. You will be amazed at how much white goes into your painting.
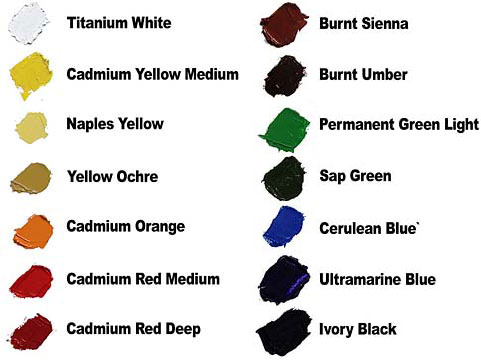
Other recommended colors you can purchase if you want to include:
Phew! Now that you've worked through this basic first orientation to your materials, let the fun begin. In this section I'll discuss painting fundamentals, including how to prepare your palette, hold your brush, and mix your paints.
This video tutorial provides an overview of my process for preparing my materials. Please watch it then read the detailed notes that follow.
Prepare the Palette
When preparing your palette it is important that you pick a designated space for each color to inhabit on your palette. When you go to grab a color to mix, your brain should be on autopilot and you shouldn't have to search around for the color.
I recommend that you lay out the palette going from dark to light, and
cool to warm, from left to right.
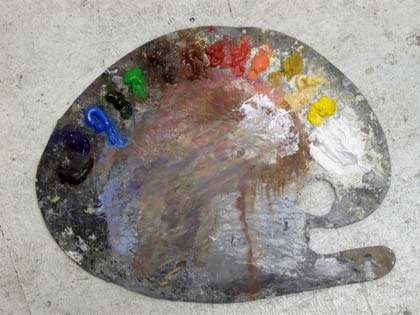 |
| Dark to light, cool to warm (left to right) |
What are those exact colors I have laid out? Let's take a look.
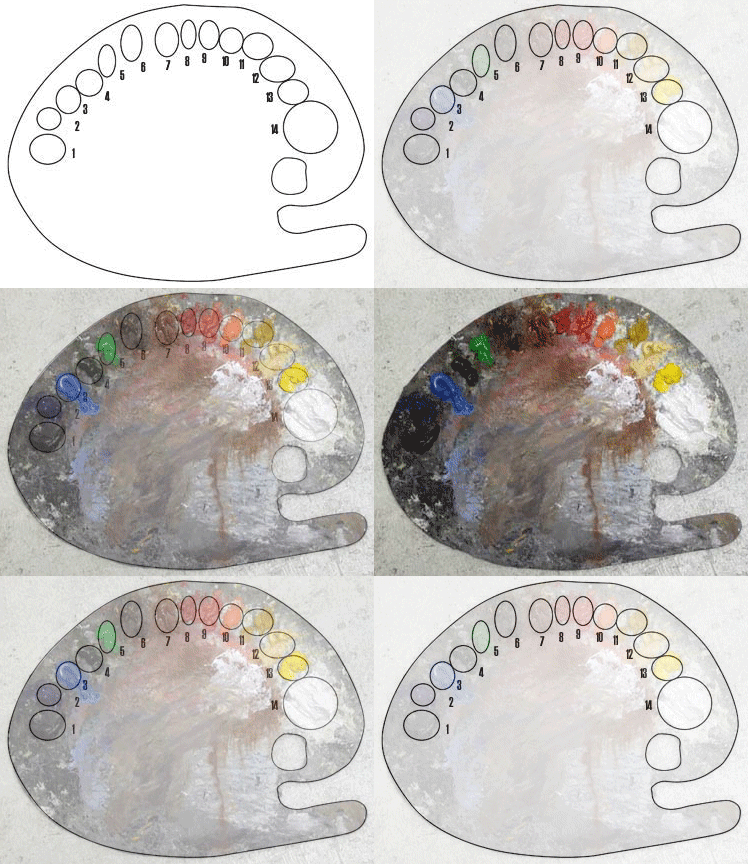 |
|
1. Ivory Black
2. Ultramarine Blue
3. Cerulean Blue
4. Sap Green
5 Permanent Green Light
6 Burnt Umber
7 Burnt Sienna
|
8. Cadmium Red Deep
9. Cadmium Red Medium
10. Cadmium Orange
11. Yellow Ochre
12. Naples Yellow
13. Cadmium Yellow Medium
14. Titanium White |
Remember to give yourself a lot of room for white and to leave a lot of room to mix in. Your colors don't need to be on the outer edge of your palette, but you should try to keep as much of the middle of your palette free for mixing as you can.
Remember to evenly mix the medium into your paint when mixing colors
on your palette. When mixing your paint using medium, you should start
out by dabbing your brush into your medium slightly—enough to
give you a small droplet of medium about the size of a dime. Then mix
your
colors together making sure that the medium is evenly distributed throughout
the compound. Increase the amount of medium relative to the amount
of paint you use. Mix only as much medium that helps your paint mix
easily without becoming thin or transparent.
The real light of your
painting comes from a light source hitting the surface of your painting
and reflected off the pigment in your paint. If you thin your paint
out too much with medium and don't allow for enough pigment in
the mix, your paintings may appear dull and lifeless.
You should clean
up your palette when you are done painting. You can leave pure colors
still on your canvas if you plan on painting again
during that day or the next day. You shouldn't leave your paint
on your palette for more than a day or so as your colors will begin to
dry
out, making them hard to remove from your palette. You shouldn't
use paint that is too dry as it will cause little clumps of dried paint
to show up on your surface, which will make your painting look junky.
Load the Brush with Paint
The term loading your brush refers to the act of dipping your brush in the paint. Just like loading a weapon, you are "loading the paint" onto your brush, so that you may then apply it on to your canvas. Make sure to get enough paint on your brush when you do this. Don't be afraid to apply paint to your painting. This is where the color and light comes from. Some techniques require you to load less paint on your brush, but for the most part, you should feel confident loading up an ample amount of paint.
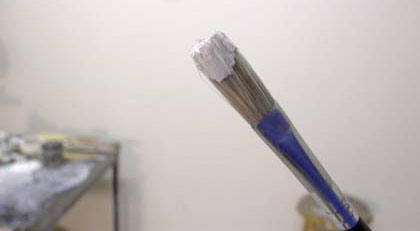 |
| Notice that there
is enough paint on my brush to work with. Don't be afraid of using
your paint. If you need to load more paint on your brush, then
do so. At the same time, don't overload your brush with so much
paint that you can't control the paint and it is dripping off your brush.
It will take a little practice but you will soon see what I mean. |
Hold the Brush
There are two ways to hold the brush. One way is to hold the end of the brush on the inside of your palm, like a baton, and the other is with the end outside, like you hold a pencil. You should grip the brush firmly but comfortably, about halfway down the handle. The long handle of an oil painting brush gives you enough room to properly balance the brush without covering your hand in paint.
I recommend holding the brush with the handle on the inside of your palm when you wish to make long, broad strokes or straight lines, or if you need a more fluid look in your stroke. Holding the brush like a pencil is good when you are seeking a more controlled look, but if you rely purely on holding your brush like this your work will have a cramped style and you will have a tendency to overwork your paintings. Remember to keep things loose!
Here are some examples. First, the baton method:
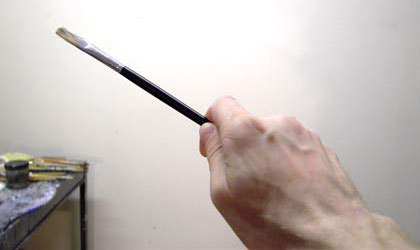 |
| Holding the brush palm side down will allow you to draw long, straight lines more easily. It will also help you "sculpt out" your forms when you are painting, as holding the brush in this way will allow you to have the brush touch the canvas when you are painting. |
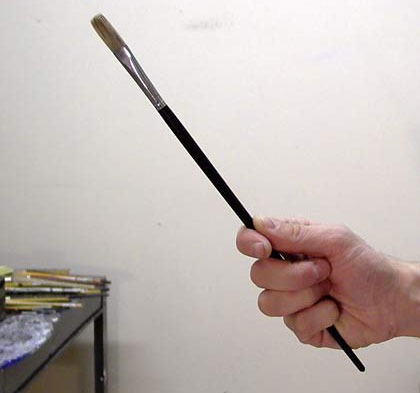 |
| When you are applying paint to the canvas you should hold it at a 30 degree angle from the canvas like I am holding the brush here. |
And here is the pencil method:
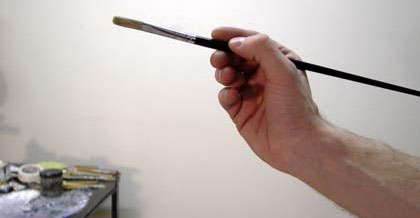 |
| Holding the brush
this way is a lot like holding your brush like a pencil. This
is good if you have to make little detail marks or if you are
using stippling techniques (which you will learn about in future
lectures). Though there are a good number of benefits to holding
your brush in this manner, don't let yourself fall into old habits
and only hold the brush in this manner because you are used to
writing. |
The moral of this story is: You should hold the brush palm side down most of the time. In fact, when starting out, you might try to commit yourself to only holding the brush palm side down until you get used to it.
Apply the Paint
The rule of the land for applying paint in your painting is fat over lean.
What this means is that
as you build up the layers of paint on your canvas, make sure you always
have the thinner layer on the bottom (closer to the surface of the canvas)
and then apply the thicker layers on top of that.
If you try to apply
thin layers of paint on top of thick layers, your paintings will
often crack or the color may even fade. It is important for you to
properly apply your materials to help the
paint dry
and to improve the archival quality of your artwork.
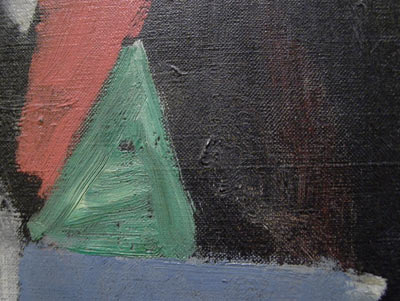 |
| In this example you can see how the
thicker green, red, and blue paint is applied over the thinner
coat of
black. You can still see the texture of the canvas through
the black, but only the brush stroke in the other colored areas. |
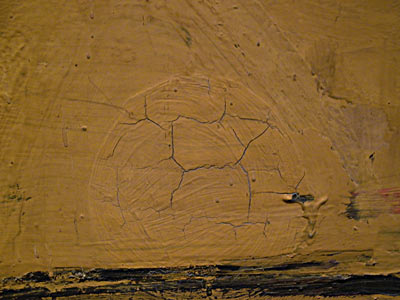 |
| Here is an example of a cracked area
from a painting with a thinner coat on top of thicker
paint. As
the thicker paint underneath dried at a different speed, it caused
the top thin layer to crack. |
Clean Your Brushes of Oil Paint
It is important for you to take proper care of your brushes. First off, brushes aren't cheap. The cost of your tools and materials will skyrocket if you are constantly in need of new brushes. Taking proper care of your brushes also helps insure that you will always be able to make a sharp and defined edge with your brush, making it easier for you to paint and make marks.
You should have a jar that is used specifically for your brush-cleaning solvent. I prefer to use the jars made by Silicoil as they have a tight fitting lid with a smooth metal spiral inside. This metal spiral ring is useful as you will are able to lightly move your brush against it, releasing stored paint in the brush, which will eventually settle to the bottom of the jar.
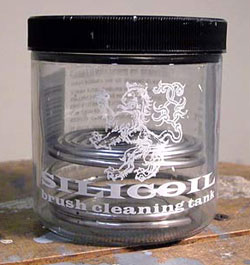 |
|
A brush cleaning jar |
The first thing to do is wipe off excess paint from your brush using a paint rag:
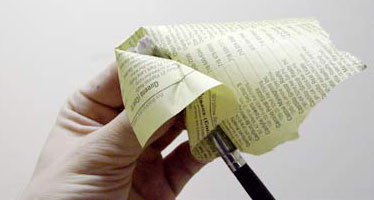 |
| I use little pieces of newspaper or pages from old phone books
that I can easily throw away after each use. Be careful where your inflammable paint trash is stored. Keep it in a metal can with a lid if at all possible. |
Then clear off any excess paint on the spring at the bottom of the cleaning jar. I fill my jar with Turpenoid Natural so it just covers the spring on the bottom by a half inch. Then I run the brush along the spring so that it knocks loose the paint from the hairs.
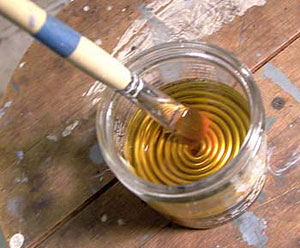 |
| I shouldn't need to apply too much pressure to get the paint out. Do make sure though that all of the paint is out of the brush before you put it away, as leaving paint loaded on your brush to dry will effectively ruin your brush. |
There are also a number of soaps that you can use to clean your brushes. Just make sure not to dump any solvents or paints into your sink. Don't contaminate your water source with pollutants. Don't throw your solvents outside either as the solvents in the soil will enter into your water source as well. Don't kill the planet. You can always recycle your materials along with motor oil at your local recycling center. Check around to find out where this can be done.
Clean Your Brushes of Acrylic Paint
Given that you have not let the paint dry on your brushes you should be able to easily clean your brushes using soap and water. You can even use mild dish detergent soap to do so.
Do not throw excess paint down the drain. This will clog your pipes as the paint will eventually accumulate and dry. Make sure to dispose of all paint in a wastebasket.
Mix Paint
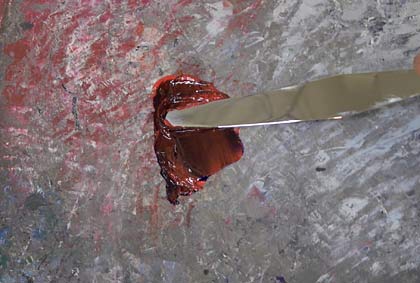
To mix your colors, take an amount of paint from each of the colors you wish to mix and place them in the middle section of your palette. Mix the two colors in the space between the two daubs, adding a little bit more of the pure tube colors as needed.
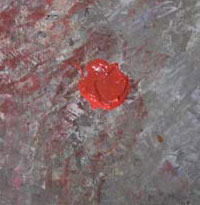 |
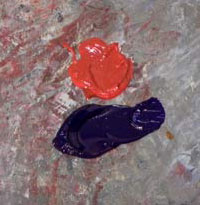 |
| When mixing paint,
start off by taking dabs of the pure color you wish to
mix and placing them in the middle of your palette. Don't let these
colors touch the pure colors on the edge of your palette, otherwise
you will taint them for all future mixing. |
A good practice is to mix paint using a palette
knife. Using a palette knife instead of your brush will help
keep your colors fresher as you will have more control over the
amount of
each color you add to the mix. You also won't have to worry about
colors hidden inside the hairs of your brush. Your brush will thank
you too,
as your brush will last longer if it isn't put through the task
of mixing colors for you.
Make sure to clean off your palette knife as you go from color to color. Don't contaminate the colors on your palette by accidentally mixing
up your pure tube colors. The designated areas on the outside
of your palette for the colors straight from the tube should be kept
clean and organized.
|
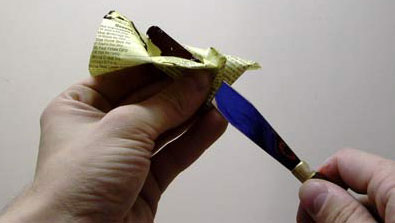
Make sure to wipe off your knife after putting it into a pure color. |
You don't need anything fancy to clean your
knife. I always have a pile of cut-up newspapers or old books that I
use as quick disposable rags. If you are using oil paint, make sure to throw away your used
paper rags into a metal container with a metal lid. Rags and paper covered
in oil have the tendency to spontaneously combust (though this has
never happened to me or anyone I know).
|
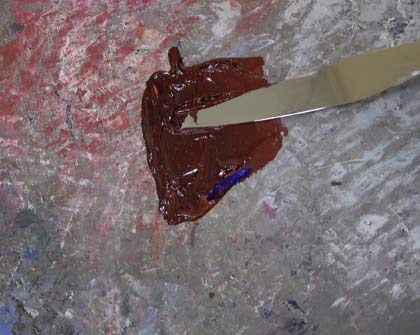
Proceed to mix the colors together
using your palette knife as if you were mixing frosting together.
|
|
Add a bit of each color until
you get the right mix. Use this opportunity to compare the pure
colors you are mixing to get the right result. |
|
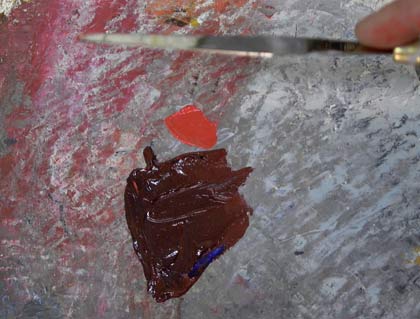
Keep mixing a bit at a time. |
|
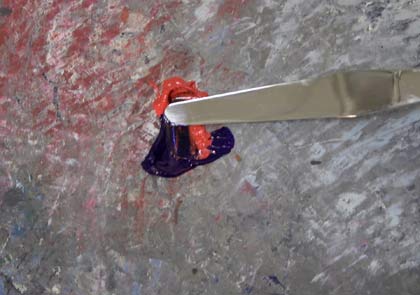
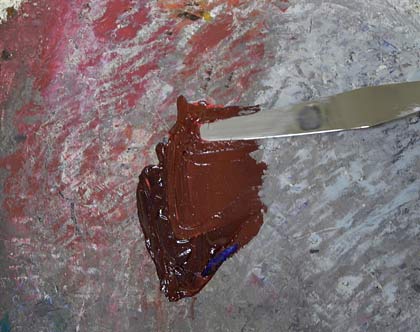
Don't be afraid to add more
pure color to get the results that you want. Here I decided I
needed more red in order to get the right color that I'm looking
for. |
Mixing paint well is a constant process of comparing the colors you're mixing with the results and trying to hone in on the final color that you're after.
In the example above, I'm mixing red and blue and asking myself "Is the color I'm trying to mix warmer like the red, or cooler like the blue? Is it more red in hue or more blue in hue? Is it lighter like the red, or darker like the blue?"
Learning to ask yourself these questions will help you attain the right results when mixing on your palette. Also mix your color evenly together so that you don't have any nasty surprises when you add the paint to your canvas.
|
Here, I've left a little of the darker color that I
originally mixed so I can use it for comparison. I know I need to mix
a lighter and more red color, but I wouldn't know by how much
unless I had the original darker color for comparison.
|
You should also pay close attention to where on your
palette you are mixing the color. Just as you placed the pure tube colors going from dark and
cool to light and warm, you should also arrange the colors you mix.
This will help you make comparisons, as you will be able to compare
the color you are mixing to all of the other hues and values on your
palette (both straight from the tube and mixed).



 Learn tips for assembling painting materials and setting up an artist's workspace.