The document object model, or DOM, is a concrete and useful way of understanding the structure of an HTML page, universally agreed upon by modern developers and the people behind Web standards (like W3C). It isn't a separate technology itself; it's a way of referring to the technology we already have.
You've already taken some HTML and CSS courses (or you should have!), so you know that an HTML document has a specific structure that holds it together. It's a defined hierarchy where certain elements can go inside other elements, and certain elements must go inside certain other elements, and so on. But where you see paragraphs and headers and images, the Web browser sees a carefully laid out series of nodes.
In HTML, you see those nodes as element nodes, which are the individual pieces of your document enclosed in tags like <body></body>, <p></p>, or <strong></strong>; and as attribute nodes, which are the required or optional attributes that go inside those tags—like id="sidebarContent", type="checkbox" in an input tag, or src="grandmas_photo.jpg" in an img tag. (There are also text nodes: the text inside any element.)
You can think of the DOM as the outline of any given HTML document, listing each node in the DOM tree. In a lot of ways, this DOM tree structure looks just like your "family tree": it tells you what comes first, which elements are part of other elements, and so on. As a matter of fact, we even use similar terminology to describe a DOM tree and a family tree! An element inside another element, like a <p> paragraph inside a <div>, is referred to as the child node of the other, which is referred to as its parent node. Another <p> or an <img> element inside that same <div> would be a sibling node of the first <p>. It's one big happy HTML family!

Family business. Just like you're the child of your parent, and your parent is the child of your grandparent, your HTML elements have parents and children—though they only get one parent each, which is why the tree seems upside-down (spreading out from the HTML root of the document instead of converging to the singular descendant of all your ancestors). If you have an <img> in a <p> in a <div>, then that <img>'s parent is the <p>, whose parent is the <div>, whose parent is the <body>. The great-[great-great...]-grandparent of all HTML elements is the document itself, the <html> tag.
This way of organizing the structure of an HTML document gives us a convenient way of traversing the various elements within it: going through them to find the one (or ones) we want and work with them however we need. JavaScript give us all sorts of ways to access, manage, and manipulate the DOM.
Object-Oriented Programming
(Déjà Vu All Over Again)
Don't worry, you didn't accidentally hit your browser's back button and end up in the first lecture again! We're just revisiting the object-oriented approach to software, because it happens to be very relevant...in case the name of the document object model didn't tip you off.
Recall that JavaScript, like many programming languages, is an object-oriented language: everything we use in JavaScript can be thought of as an "object," and because of that, we get a lot of flexibility and power. Remember how you can use a variable to stand in for the value it holds?
var userResponse = confirm("Are you a Web developer?");

if (userResponse) {
  alert("You are a Web developer!");
} else {
  alert("You're not a Web developer!");
}
...but you can also get the value straight from the function you used to assign that value:
if ( confirm("Are you a Web developer?") ) {
  alert("You are a Web developer!");
} else {
  alert("You're not a Web developer!");
}
That's because both the variable and the function are objects. And you get to use objects in JavaScript pretty much however you need to! We'll learn even more about the usefulness of an object-oriented perspective (as well as learning more about data types) later in the course, but for right now, we can use this to get a good grip on how DOM objects work.
A JavaScript variable is an object that has a name, can hold data, and allows us to manipulate that data depending on the type of data it is (e.g., numbers can be multiplied, strings can be transformed to all lowercase letters, and Boolean data can be inverted with a ! operator). A JavaScript function is an object that has a name, can accept values as arguments, will run the statements that define it, and can return a value as required.
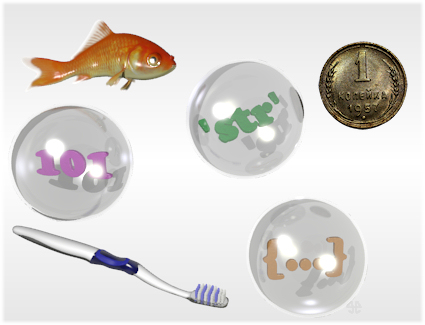
Objects in space. What do a fish, a coin, and a toothbrush have in common? They're all objects in the real world, with their own unique and specific properties. Objects in programming—including functions—work the same way: all different types, all unique, but all objects, so we know we can define and understand them in very similar ways.
But remember how we have to make sure to put (parentheses) after a function name in order to call it? That's because without those parentheses, a function name is just another variable! We can even assign that function as the "value" of another variable.

Try putting the following code into a script in a new, basic HTML document skeleton (remember to put your code between your <script> tags!):
function justSayHi() {
  alert('Hi');
}

var alsoSayHi = justSayHi; // No parentheses here!

alsoSayHi();
Save this HTML file and open it in your browser. You should see that alert dialog pop up and say Hi. See what we did there? A function is nothing more than a variable that contains instructions as its data. By assigning the value of our function—not its return value, but the function definition itself—to a variable, we've given that variable the same value: those instructions. It's simply a copy of the original function. We can even define functions as if they are variables:
var justSayHi = function() {
  alert('Hi');
}

justSayHi();
Rewrite your previous code to look just like the above (delete the previous script entirely and use only the script immediately above), then save your HTML file and reload it in your browser. It'll work exactly the same as it did! You can check your code against example1_function-is-value.html and example2_function-is-variable.html in the course downloads, if you need to.
By typing our usual function() { } statement in our code above, we declared and defined a function. By not giving it a name, we made it an anonymous function (quite literally, a function with no name). But then, by using = to assign that function definition as the value of a declared variable, we have a name to refer to it by: the name of that variable! Functions really are just variables with a different data type. And that data type is, in fact, the function data type—one of the remaining two data types we didn't discuss in the first lesson.
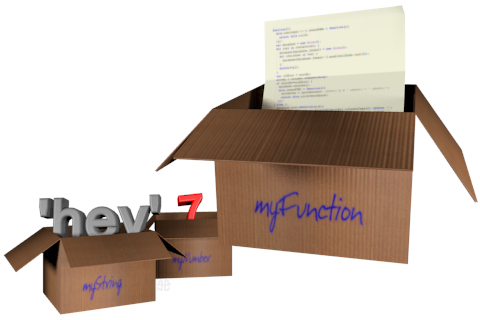
Just more stuff. While it's useful to think of functions as something distinct from variables, they're really no different. Naming your function means you're just naming a variable, and the function code itself is just data of the function type—a series of instructions that may or may not return a value—that you store "inside" that variable.
By the same token, the DOM provides us with additional objects—all still objects, just like our variables and functions, but with some of their own specialized ways of being referenced and manipulated. A <p> element is an object that can have a CSS style or class applied, can hold text and stylistic elements like <strong> or <em> (which can also hold text and similar elements) as its children, and can go inside of parent elements like a <div> or the <body> of your HTML page.
But since DOM nodes are objects, like variables or functions, we conveniently still get to work with them as objects. The document itself is an object, and JavaScript has a built-in keyword to refer to it: document (raise your hand if you saw that coming!). And just like a string variable has the toLowerCase() method (a fancy word for a function that specific objects can use) to change it to all lowercase letters, the document object has a method that helps us refer to any other object in the DOM:
document.getElementById('sidebarContent');
That getElementById() function is exclusive to the DOM's document object, and it returns the element in the HTML page (the "node" in the DOM "tree") that has a matching id attribute (in this case, id="sidebarContent"). If we assign that value—the DOM element that we tracked down by its ID—to a variable, we then have an easy way to refer to the element for the rest of our program.
var sbContent = document.getElementById('sidebarContent');

alert(sbContent.parentNode);
Why? Because typing out sbContent is a lot less of a hassle than typing out document.getElementById('sidebarContent') every time you want to refer to that DOM element. And a lot of what we're going to be learning here is about making things less of a hassle for you, the Web developer.
But the thing is, there are some folks out there who didn't have that in mind from the start: they weren't trying to make things easier for you. They just wanted to be the Overlords of All the Web. And that led to a little problem. (Spoiler alert: there is a happy ending!)
The Browser Wars
(Navigators vs. Explorers)
We can easily debate the pros and cons of capitalism all day long, but this isn't really the time or place for it. Suffice to say, capitalism gets one thing really right: it promotes innovation and competition. And capitalism gets one thing really wrong: it blocks innovation and competition. (Ha! You didn't really think I was going to take sides here in academia, did you?)
The point is, at the dawn of the Web, there were two major players who were calling most of the shots when it came to how the public viewed Web pages: Netscape Navigator (which we discussed in the previous lesson) and Microsoft Internet Explorer (which you've almost certainly heard of!). Each company had their fairly arbitrary perspectives on how Web pages should work and how Web browsers should interpret them, and there were no standards in place yet—it was the Wild West era of the World Wide Web, and there was no sheriff in town.

Epic. Okay, maybe it wasn't that dramatic, but it was a pretty raw deal for a Web developer at the time!
That conflict of World (Wide Web) views led to the dark age of workarounds, where we developers had to put all sorts of crazy, fiddly code into our HTML, CSS, and JavaScript just to get things to work at all from browser to browser, or system to system, and that was no guarantee that they would work the same way on each.
Internet Explorer had a huge market share for a while, but was pretty stubborn when it came to complying with standards; Navigator and the browsers that descended from it had better—though not perfect—standards compliance, but didn't have as many users. Sticking with IE didn't work out well, since its user numbers plummeted in the subsequent decade, and then you were stuck with a page nobody could view properly (and now that it's phasing out in favor of Edge, that ship has sailed). Going with the Navigator or Mozilla way too early meant you lost the millions who were still using IE before it lost popularity. "One or the other" just wasn't a productive solution.
That's why workarounds were developed, by clever folks with the same tools you've explored so far, and who had the experience to understand how to "fool" the browsers into only seeing the bits of code that those browsers preferred to see. For instance, that getElementById() function I introduced you to earlier...? Yeah, that's the simple version, which works on most browsers now. But years ago, you had to put in code that looked something like this:
// Deprecated workaround code!

var sbContent;
if (document.getElementById) {
  sbContent = document.getElementById('sidebarContent');
} else {
  sbContent = document.all['sidebarContent'];
}
And while there are shorter ways of writing that, you still had to check to see how each user's browser did things, and "work around" the problems to get the Web page to do what you wanted no matter who was viewing it.
The Web has calmed down a lot since those days, but that's at least partially because developers—of both Web sites and the applications (like browsers) that deliver and interpret those Web sites—learned some valuable lessons then that still hold true today. Compatibility, across systems and settings and browsers alike, is a vital thing for any modern Web site, so that you can be sure you're delivering a consistent and effective user experience for every visitor.
There are all sorts of JavaScript tricks—and HTML and (especially!) CSS tricks, too—that were concocted over the years, and veteran developers still have those tricks collected in their heads for when the need arises. And the need does arise: as smart people keep inventing new devices, new software, and new ways of displaying and manipulating data, we developers will always need to keep up with the current status quo to make sure we can deliver Web content that works on the latest technology, but also still gives users a couple of steps behind the same basic experience.

Compatibility used to make me cross. Pictured above is Sessions College's home page in four different browsers (clockwise from top left): Chrome, Internet Explorer, Safari, and Firefox.
Click here or on the image above to view the screenshots at full size and compare them. Even though all four are from the
same computer, with the
same settings, there are very subtle differences that we need to be aware of as developers—and this is a vast
improvement over the way things used to be!
But what if there were tools at our disposal that took care of the workarounds for us? What if we could learn one way of doing things, and such tools would do the hard work of applying our code across browsers and systems to make pages that look and work just the way we want them to? What if there were some central, organized bunch of people who kept those tools up to date, so we could just continue to use them without worrying about the intricate details?
And what if I stopped asking rhetorical questions and just came out and admitted that there are such tools? Because, of course, there are. And we're about to explore one of the most useful tools out there for making cross-browser, feature-rich Web pages without needing to know much more JavaScript than you've already learned in this course.

Don't adjust your browser or quickly look up the toUpperCase() function in JavaScript—there's no mistake, and that's really a lowercase j, if only by convention. It's as if the famous poet E. E. Cummings wrote JavaScript code. (He didn't, though. He also never legally changed his name to all lowercase letters. That's just a myth invented by a literary critic.)
jQuery is a JavaScript library. Simply put, in programming, a library is a collection of functions, each bit relating to a specific topic or task, which you can "borrow" to use in your own program—it'll take care of particular programming tasks without you having to program those parts yourself. Sometimes people mistakenly (but understandably) refer to jQuery as a framework—but that's different from a library, in that a framework is essentially a ready-made program that you can modify to make it more specific, rather than a set of specific libraries you can add to your program to make it more functional. With a suite of tools that give you what you need, but no intrinsic goal or application aside from what you make of it, jQuery is a library, not a framework.
The jQuery library is comprised of a great number of specifically-focused but generally-applicable tools that we can include in any JavaScript program, giving us more time to relax and focus on the goals of that program rather than the best way to get all the various bits and pieces to work together.

You can think of it like when you're building something with LEGO® bricks: you can get a basic set of bricks and build a really nice house with them, especially if you're good at this sort of thing. But if you get a set that comes with doors, windows, and all those nifty little bits that can serve as roofs or lamp posts, it suddenly gets a whole lot easier. Instead of putting together a few bricks that "kind of" look like a window, you get a piece that looks just like a window and—even better—clicks right in with all the other pieces you've assembled. In other words, instead of doing all the work to assemble pieces that look like parts of the house, you can take pre-assembled parts that an expert created for you and just put those to work in building the actual house!
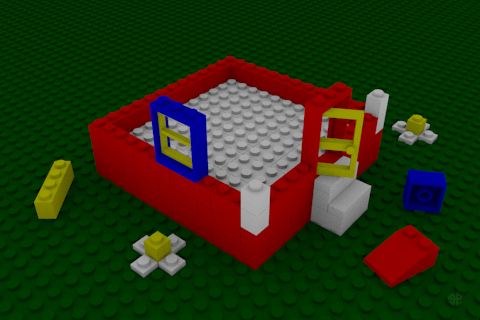
Instant house, just add LEGO®. Using jQuery is like using the pre-assembled pieces in your LEGO® collection. Instead of cobbling together a door or window out of the available basic bricks, you can snap an expert-crafted version right into your creation with no trouble at all.
With jQuery, you're not tossing a bunch of one-by-twos and two-by-threes together and seeing if you can come up with a house that looks halfway decent. Somebody already did the initial work for you, providing windows, doors, caps, stairs...all sorts of bits and pieces that go into the making of your house. All that remains is for you to decide which rooms go where, and what sort of interior decor you're into.
jQuery does an awful lot for us without asking too much in return. As long as we set up our HTML and CSS properly, we can make robust, highly interactive Web sites by adding just a pinch of jQuery—in some cases, you won't even need to add much JavaScript beyond that jQuery code! We can worry much less about the incompatibility of browsers and devices—for example, when we ask jQuery to find an element in the DOM of our HTML page, it knows how to find that element regardless of which browser or system our user may have.
This is a big deal, because at the most basic level, it means one simple thing: complicated workarounds are a thing of the past! Generally speaking, as a modern Web developer, you may never need to learn them at all, except as interesting historical knowledge.
So how is it that jQuery can take care of all the odds and ends so we can concentrate on the bigger picture? Well, it starts with the DOM, and it makes its way through another coding language you should already be familiar with...
CSS
(Dressing Up the DOM)
By this point in your Web design education, you've certainly encountered cascading style sheets already. CSS was the inevitable result of efficiency in software development; it helps us separate how we "show" data from the data itself. That way, we can work on just the data (the information and objects in our program) without affecting the visual presentation of our project, or (vice versa) changing how our project looks without interfering with the underlying data.
As you already know (I hope!), you can add styles to your HTML document in three different ways, much like JavaScript: either by including an external .css file, by putting a style into the <head> of your document, or by putting style information inline inside the style attribute of any element.
A typical instruction in CSS code would look something like this:
We open with a selector, and then inside the {curly braces} (just like with functions) we put whatever CSS rules we want that selector to follow. So the above example tells us that any <span> element in our document with an attribute class="redText" will have a text color of red (hex code #ff0000). It takes advantage of the fact that there are three very easy ways to refer to elements using HTML and CSS. Let's go over those three basic types of selectors to make sure they're fresh in your mind:
We can refer to elements by tag name, such as div, p, a, or img. This is a great way to select all the elements of the same type, regardless of anything else about them.
Tag names in selectors are simply typed out with no additional characters, like ul or span.
We can refer to elements by class, which means the element must include an attribute like class="dialog", class="externalLink", class="evenRow", or class="thumbnail". This is useful when we want to select a specific set of elements that we pick, rather than simply all the elements of a specific tag type.
Class names in selectors are preceded by a dot . (period or full stop), as in .dialog or .thumbnail.
We can refer to elements by ID, which means the element has an attribute like id="headerLogo", id="userEmail", id="rewindButton", or id="copyrightInfo". This helps us select a single specific element in the DOM (since you should never give the same ID to multiple elements!).
IDs in selectors are preceded by a hash # (pound sign or number sign), as in #userEmail or #rewindButton.
Remember that there are all sorts of ways to combine and mix these different selectors (and to use pseudo-selectors, which we'll look into a bit later) and thereby select very specific subsets of elements in our DOM. As a quick, non-exhaustive rundown to get us into the thick of things, remember these guidelines:
Selectors are, of course, cAsE sEnSiTiVe! (You should be used to that by now.)
Putting spaces between selectors tells the browser to look for elements within elements. For example, ul li a selects all <a> elements that are inside <li> elements which are inside <ul> elements.
Putting no spaces between selectors combines them into a single, specified element description. For example, div.upper.leftSide a selects all <a> elements inside any <div> elements that have both the "upper" and "leftSide" classes (yes, you can assign more than one class to a single element!).
Putting a , comma (pause) between selectors lets the browser know that you're looking for elements that match either the selector before the comma or after it (or both). So using div#headNav ul li a, div.internalNav a would select all <a> elements inside <li> elements inside <ul> elements inside a <div> element with the ID "headNav" as well as all <a> elements in any <div> elements with the "internalNav" class. You can use as many comma-separated selectors as you like in the list for any individual CSS rule set.
You may have noticed that I have a particularly consistent habit of naming my classes and IDs with the same careful spelling and capitalization that I use for variables. (If you didn't notice that, take another look!) There are two good reasons for this. One reason is that it's useful to get into the practice of naming everything that way, so you never have to think about the pattern—it's so ingrained you do it for any programming object you name, whether it's an HTML element ID, a CSS class, or a JavaScript variable. That way, you never have to pause and think: Wait, did I capitalize that letter or that one? You capitalized it the way you always do (ideally, in camelCase!), and can type it that way feeling pretty confident that you got it right.
The other reason is going to come as a bit of a wake-up call when we dive into jQuery and discover just what it is that makes it so truly convenient. But before we do, we've got one last step—we need to go get jQuery itself.
Getting jQuery
(A Double Meaning—Get It?)
Since jQuery is a code library that we don't write (I'm going out on a limb here and assuming you're not a contributing developer for the jQuery Foundation), it's something that we'll need to get from the people who do write it. Thanks to some smart people, we have some choices in how to do just that.
The most common way to use jQuery in your HTML documents is to include a link to a freely available online copy of the library script. It's just like using an external .js file—in fact, that's exactly what you're doing—but instead of saving that file on your own server, it's hosted elsewhere, on a CDN (a content delivery network), for everyone and anyone to use.
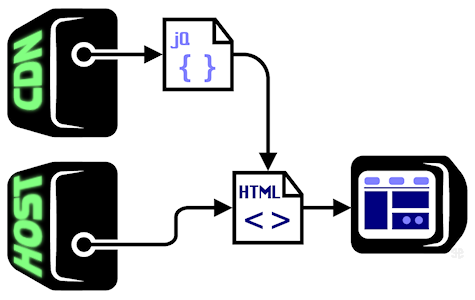
It's imported. Using a content delivery network like the ones maintained by Google or Microsoft relieves you of the burden of carrying jQuery on your own host server. Your host sends off an HTML page, and the HTML page requests a copy of jQuery from the CDN. The two documents work together in the end-user's browser to deliver a feature-rich modern page with fully integerated jQuery code.
Google, that master of Web technology, hosts and maintains copies of every current version of jQuery (and a few outdated versions at any given time). If you want to use their CDN for your copy of jQuery, you simply link to it in your HTML document, like this:
// Getting jQuery from Google
<script type="text/javascript" ↵
src="https://ajax.googleapis.com/ajax/libs/↵
jquery/1.12.0/jquery.min.js"></script>
Remember that the ↵ is just my way of reminding you not to go on to the next line in your own code. In fact, make sure you do not put a line break in the middle of your src value!
Microsoft, one of the other tech giants of our time, also hosts and maintains copies of jQuery, just like Google does. If you choose to use their copy instead, you can just switch the source (src) of your script, like this:
// Getting jQuery from Microsoft
<script type="text/javascript" ↵
src="http://ajax.aspnetcdn.com/ajax/jquery/↵
jquery-1.12.0.min.js"></script>
Either one works just fine, but remember that you only need to link to the script once.
If you prefer (or require), for any particular Web project, you can download and host your own copy of jQuery wherever you host your Web pages. In that case, it's just like any other script; if you put it, for example, in a folder called "scripts" and link to it in an HTML page in your root folder, you'd simply type:
// Hosting jQuery yourself
<script type="text/javascript" ↵
src="scripts/jquery-1.12.0.min.js"></script>
It's just like any other external .js file! You can always download any current version of jQuery from jQuery.com itself. Whenever you do, you'll generally want to download the compressed, production jQuery script for whatever version you need (you can see where it says exactly that on the page linked in this very paragraph).

Roll your own. If you want to host jQuery on your own Web site, or even just test the script locally without needing to connect to the Internet, you can always download the latest copies of the script
at this link and use it just like you would any other. (I've blurred out text that's irrelevant for our purposes, and subject to change. And it won't actually say "1.x.x" on the jQuery downloads page—it'll have the latest version there, and a few other previous ones.)
Sharp-eyed students have noticed that aside from the "compressed, production" copy of jQuery, you can also download the "uncompressed, development" copy. Compression, in this case, is very much like what you may know about file compression: it makes jQuery smaller in size and even more efficient. You can see the difference between the uncompressed and compressed versions (by clicking on those two links!).
The uncompressed version may still be hard for you to wrap your head around, but you can at least see that it's actual JavaScript code. The compressed version looks like a huge run of alphabet soup or gibberish! Compressed code is also called minimized code; as you can see, along with keeping file sizes down and running more efficiently, it also makes the code awfully tough to "steal." (Though that's not really a concern with jQuery, which is free in the first place.)
For the purposes of this course, we're going to generally assume that you'll be using Google's CDN for your jQuery script, linking to it directly in your HTML documents. Remember that this means you'll need an Internet connection to test your work, even if you're just testing a locally saved file: that HTML file on your computer will be linking to a jQuery script on Google's server, so if you can't connect to the Internet, it won't be able to find the server, and won't have the jQuery script for you to use!
Version Control
(jQuery What Point Oh?)
You've probably noticed that my examples so far use version 1.12 of jQuery. The library itself has moved on to version 2.0 (and above), but we're going to stick with version 1.x (that is, whatever sub-version of 1 is current) for now.
Why are we sticking with the "old" instead of moving on to the "new"? A lot of this has to do with backward-compatibility. jQuery 2.x has progressed to the point where the development team is no longer worrying about older browsers—the script no longer caters to them, and certain newer jQuery methods may not work in those older browsers, resulting in users not seeing what you thought you were programming.
While those old browsers are still in use, though—almost certainly by at least some of our students right here at Sessions—we're going to stick with jQuery 1.x, so that we don't run into any problems when you test your work in your browser. As time passes, this course will be continually updated to honor the latest requirements for jQuery; once all the old browsers are phased out, we'll start using jQuery 2.x exclusively. (As a note: if you're working with printed copies, make sure you're still checking the online version of this course for the most current version of the material.)
Until then, though, you don't have to worry about it: the core functionality and syntax remain identical, so learning version 1.x now will set you up to move over to 2.x whenever you need to. Get used to this sort of thing! Professional developers often find themselves needing to know older and newer versions of the same technology. It's like learning to ride a bicycle using an old but reliable bike on rocky dirt roads: when you're ready to ride a sleek new bike on paved streets, you already know how to balance, pedal, and steer; you just have a bike that you can get a bit more performance out of than you did with the old one, and you can still jump back on the old one when you want to tackle some dusty back roads.

Old and rugged vs. new and shiny. Whether you're on a reliable rust bucket or a carbon fiber miracle, you still know how to ride a bike. And let's face it: if you're going to ride some seriously rocky trails, you probably don't want to bring that tailor-made marvel of modern technology along—the rust bucket really knows how to conquer the mud and mountains.
A Tip About Internet Explorer
(Keeping Up with the Joneses)
I'm going to come clean about one tiny fib I've told you. While jQuery does give us a great opportunity to avoid the vast majority of "workarounds" that have been invented over the years for cross-browser compatibility, there are still a few bits and pieces in certain browsers (and one in particular!) that lag behind. Remember, that's part of why we're sticking with jQuery 1.x for now, instead of surfing the 2.x wave of the future.

If you happen to be on versions of Internet Explorer before 9.0 or so, I'll tell you straight out: you'll need to use a different browser for this course. Chrome and Firefox are both good choices, and Safari does a great job of keeping up with both of them in terms of technology and standards compliance.
If you're already on Microsoft Edge, you should be all set. The last few versions of Internet Explorer (9, 10, and 11, before Microsoft switched to Edge) are okay to use, too. But to keep all of our work consistent, we're going to let those versions know that we're modern Web developers by using a special little trick invented specifically for them.
Even if you're not using a previous version of Internet Explorer yourself, I'd like you to use this trick—that way, anyone who views your work in IE will get the benefit of all your smart design efforts. Throughout the course, make sure you include the following highlighted line of code in the <head> of all of your HTML pages, right after the <title>:
<head>
  <title>Being Nice to Old IE</title>
  <meta http-equiv="X-UA-Compatible" content="IE=edge">
</head>
See, while Edge is a newer browser, the technology behind it has been around a bit longer—and it's much more standards-compliant. That little line of code above tells the later versions of IE to "act like" they're Edge. They'll be able to work with modern CSS a lot better, and your Web pages will look a whole lot cooler because of that.
Now that you've got your hands on jQuery, it's time to learn how to get it up and running for your HTML document. As I mentioned, the entire jQuery library is just a script, so like any script, you can link to it in your HTML file and start using it from there. But there's a little bit more to it than that.
Take a look at the following stripped down, basic skeleton of an HTML document with jQuery included in it.

jQuery, present and accounted for. This is a completely basic HTML page, with jQuery included and ready to go. Remember that you don't need to cut your
<script> tag up into multiple lines—you should keep it all on one line as usual. To see a proper version of that,
click here or on the above image.

Create a new document in your text editor, and copy the code above into it. Get used to typing this up—it's the standard way of starting off any HTML document that you're going to use jQuery in! Of course, like any good developer, you can also simply do it once, and copy/paste it to your new documents as needed. Keep in mind that the link to the jQuery script can (and should) be all on one line, like this:
It's the same line as in the previous image, but without the line breaks. Save your document with a useful name, like jquery_practice.html. Remember that in order to test your jQuery work, you must be connected to the Internet—otherwise, your HTML page won't be able to download jQuery from the CDN! However, even if you're connected to the Internet, this page won't do anything when you load it into your browser just yet; but that's only because we're going to do a lot more with it in just a bit.
So what's going on in this jQuery setup? Let's look at the basic guidelines for including jQuery in your HTML.
Link to the jQuery script just like you would any external .js file.
Place that link in the <head> of your HTML document. Make sure that you link to jQuery before any other scripts that need to use jQuery.
After you've linked jQuery, add another script: the $(document).ready() script.
The first step, of course, makes sure that jQuery is included in our document. The second is important because, as you learned in the previous lesson, order matters when we write JavaScript. If you tried to use jQuery methods before you linked jQuery, they wouldn't work, because those methods wouldn't yet be defined!
It's the third step that really gets things going, though. Our jQuery script might hook up the engine to all the moving parts of the car, but this final script is what turns the key to start it up. And it does that by using the golden key to all of jQuery.

jQuery's $
(A Very Valuable Variable)
Whether you want to call it a "dollar sign" or a "string" (a habit I still have from back in the days when it was used to mark string variables in the BASIC programming language!), or think of pop stars who've replaced the letter S in their own names, remember that $ is one of the few non-alpha-numeric characters (symbols that aren't letters or numbers) that we're allowed to use in the names of our JavaScript variables, functions, and other objects. It's also, unlike numbers, allowed to start an object name. In this special case, $ is the start, end, and entirety of the name of a very special object: the jQuery object.
It's not uncommon for libraries like jQuery to offer an object that we can use to access all of their cool tricks and techniques. Our $, or jQuery object, can be used as either a function or a variable—remember that functions are simply variables with a different data type—though, in this course, we'll most often use it as a function.
Used as a function, $ is like the "Master Selector": it can find anything, anywhere in your DOM and let you perform all sorts of jQuery magic on it. So when you type:
$(document)
...you're telling jQuery that you want to work with its version of the document object itself. This object is not, by the way, the actual document object—the one that forms the basis of your DOM tree—but we can treat it as such, and by encapsulating it in the $( ) syntax, we get a special version of the object that has access to all of jQuery's cool functions and tricks. Using the jQuery $ lets us pick any DOM element and apply jQuery methods to it. That's so important, in fact, let's call it out specifically:
Using the $( ) jQuery object function, we can get a jQuery-enabled version of any object or objects (plural) in our DOM tree.
As you should recall from the first lesson, the . dot (or period, or full stop) is JavaScript's version of the English ' apostrophe that marks "ownership." jQuery's $(document) copy of the HTML document owns a method (remember, that's another name for "function") called ready(). The ready() function accepts one argument: a function (anonymous or not!) that will run as soon as the document is loaded and ready for viewing in the user's browser. In other words, we don't have to worry about writing functions that may execute too soon, or too late; they'll run right on time, when the whole page is ready to rock and roll.
So whenever we set up jQuery, we want to do two things right away: load the jQuery script (steps 1 and 2 above), and write a function that jQuery will run as soon as the page is loaded and awaiting orders.
    <script type="text/javascript" ↵
    src="https://ajax.googleapis.com/ajax/libs/↵
    jquery/1.12.0/jquery.min.js"></script>
    <script type="text/javascript">
$(document).ready(function() {
// Your entire jQuery-based program will go right in here!
});
    </script>
What you see in that second script is a call to the $(document)'s ready() function. You already know that you can send any variable as an argument to a function; you also know that functions are variables with the specific function data type. So, logically, all you're doing is sending the ready() function an anonymous function (which we just learned about above!) as its argument—a function (set of instructions, remember) that jQuery will run as soon as the HTML page is loaded up in the user's browser. Since we want our whole program to run if and only if the page is ready, we can (and will) put our entire program right into that anonymous function.

Ready when you are. Think of your $(document).ready() function as a reliable "Go" button. You put your whole program into it, and the ready() function will pay close attention to make sure your program starts up when and only when the document is ready for it.
Whatever you do, don't miss any of the punctuation in these important lines of code. Follow along step by step below, looking at the new (underlined) punctuation we add with each step.
$(document)
We're using the $ object as a function here, so it gets an argument in (parentheses) right after it. Since we want the jQuery document object, we send it JavaScript's DOM document as an argument.
$(document).
Immediately after the (parentheses), we have a . dot, showing that the jQuery document object owns the method we're about to call. JavaScript provides us with a capability called chaining: since any function or other expression may evaluate to an actual object, we can immediately use that object as if we had typed the name of a variable instead, which includes calling any function that may be owned by an object of its data type.
$(document).ready( )
Our call to the jQuery $(document) object's ready() method is, of course, a function call: so it too gets (parentheses) right after it!
$(document).ready(function(){ })
Inside that second set of (parentheses), we want to put our argument—what we want jQuery to do when it's ready. This means the full declaration and definition of our anonymous function goes in there, including the function keyword, the argument (parentheses) (empty in this case) that mark a function, and the {curly braces} that surround a function definition. Important: all of this anonymous function goes inside the (parentheses) that hold the argument for our ready() function call, so don't forget the closing ) parenthesis after the closing } curly brace!
$(document).ready(function(){ });
Finally, do not forget the statement-ending ; semi-colon after the closing ) parenthesis of the ready() function's argument. Yes, we've just defined a function, and we don't need to put a semi-colon after its definitive closing } curly brace—but what we actually just did was call a function (the $(document) object's ready() function), and that's a statement! (The fact that the argument we used is a function is irrelevant here.) So it requires a semi-colon at the end—we can't forget that, or we'll get a JavaScript error.
All of this sums up the pretty much immutable way we set up our jQuery programs. Link the jQuery script (from a CDN or elsewhere), start a new script (in <script> tags), and write the $(document).ready() function.
Commentary
(A Side Comment about Comments)
You may already know about code comments. Perhaps you've used them in HTML or CSS; if you've been copying the code in this course so far character for character, you've actually written code comments yourself, since I've included them in many of the examples.
Comments are terribly useful, because they allow us to make little notes in our code that only we will see. Other programmers looking at our code will also see them, sure; but when the user runs the program, the comments will be nowhere to be found! That lets us write explanations, descriptions, reminders, placeholders...all sorts of stuff that won't cause errors in our program, but will help us continue our work whenever we come back to it.
We briefly alluded to HTML comments in the first lesson:
<!-- This is an HTML comment. -->
And there are also, of course, CSS comments:
/* This is a CSS comment. */
In both cases, there are a few characters that start off the comment, and another few characters that end it. Anything inside the comment will be ignored by the browser—it won't be interpreted as HTML or CSS (respectively). That means we can write whatever we like in there, as long as we don't use the comment's "closing" sequence of characters (--> in HTML or */ in CSS).
Everything you need to know about your program. Comments are a great way to provide explanation and instructions in your program for other programmers, or even reminders and clarification for yourself. It's like writing your own Cliffs Notes for your code!
JavaScript gives us two different ways to put comments into our programs. The first is a line comment, which begins with two forward // slashes and ends at the very next line break in your code.
// This is a JavaScript line comment
Note that the very next line is not part of the comment! Don't try to put additional commentary there, because the browser will try to interpret it as JavaScript, and you'll likely get an error. You can, however, start a line comment at any point in a line—even after valid JavaScript code! So this:
var sum = 2+2; // A comment about our math...
alert(sum);
...is perfectly fine, as long as you don't continue writing commentary on the next line. Important: note that I included my semi-colon before the comment! Otherwise, the semi-colon would be part of the comment, and ignored...which means my first statement would have no ending semi-colon.
If you want to write a multi-line comment block, you use the same indicators that you use for a CSS comment:
/* This is a JavaScript comment block
Nothing until the final closing characters will
be interpreted by JavaScript, so you can write
longer explanations or descriptions with no
problem - even including line breaks! */
I encourage you to use comments throughout your code, just like I have. They're absolutely not "just for beginners"! (In fact, it's the beginner who usually forgets to use them.) Code comments are a vital piece of the puzzle for every level of professional (or amateur) developer. You'd probably agree that the actual developers of jQuery are experts, right? Well, take a look at just a small portion of the commentary they put into the uncompressed version of jQuery itself:

Color commentary. To give other coders a "play by play" of what each part of the code is doing, it helps to put in plenty of comments, especially if the program you're working on is a collaborative effort. Remember that even if it's your own program, it's all too easy to forget the details when you've been off working on other projects for a few months or years. Comments help you find just what you were looking for, and dive back in to continue the project.
If you're using a text editor (like Notepad++, in many of my screenshots), it will probably offer "color coding" of your code, which makes reserved keywords, operators, and other features appear in different colors than plain text. Most color-capable text editors will also tint your comments a different color from the rest of your code, which gives you a really easy way to spot where you are in your program.
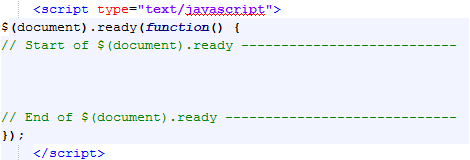
Getting the green light. With my code colored in Notepad++, there's no missing the spot where my jQuery program will go.
As a good example of helpful comment use, I often write reminders to myself where my $(document).ready() function begins and ends; that way, I won't accidentally type code outside of that function. If you feel like that will help you, too, I'd suggested always starting off your ready() function by typing out the following full code, including the highlighted comment lines:
$(document).ready(function() {
// Start of $(document).ready ---------------------------


// End of $(document).ready -----------------------------
});
Leaving some space between those comment lines, you'll have a ready-made place to write your entire jQuery-powered program.
Throughout this course, you're going to write all of the JavaScript for your jQuery programs entirely within this space—unless I specifically say to write code elsewhere, assume that this is always true. So as long as you stay between those comment lines, you're totally safe. The entire world of our program exists inside the anonymous function we send to $(document).ready().
$electors
(Using jQuery with Style)
Hopefully, the gears are really turning in your head now, piecing together what you've learned. We've explored JavaScript and the object-oriented way of thinking. We've examined the DOM tree and all the objects (elements) there. We've read that the $ jQuery object "selector" function can find any object in our DOM. And we've discussed how selectors work in CSS...and how I name them very much the same way I name my JavaScript objects. With all that in mind, here's where jQuery really starts paying off.
Remember that $ is like the Master Selector (not its official title, by the way!). The only thing we've done with it so far is used it to select the HTML document itself, but it can do so much more. Think about it: the only other context in which we've used the word "selector" is CSS, with tags and classes and IDs. What jQuery does is take advantage of the fact that CSS makes these selectors available in our DOM; it creates an entire system of selecting objects based on CSS!
$(red)
$(blue)
$(yellow)
$(flat)
$(sharp)
$(round)
A lean, mean, selecting machine. Move your mouse over each blue "selector" button above to watch this guy in action. Our $( ) selector uses CSS selectors, including tags, classes, and IDs, to pick out the DOM elements we want to throw some code at. And this one comes with a chrome finish!
In other words, you don't need to know any more about selectors than you've already learned from CSS to get started with jQuery. When calling the $( ) selector function, you can send it any string value equivalent to the CSS selectors you would use to refer to the same object (or objects) in your style sheet.

Go to the course downloads for this lesson, and download jquery_selectors.html. Open this HTML document in your text editor and take a look. Get a feel for the structure of the HTML here—the structure of the DOM tree, with <p>s inside <div>s and so on; some of these have IDs or classes, as well. It's a very basic HTML page with one (unused) CSS rule defined in the <head> and not much else going on.
But now let's add jQuery to this document in order to see just what we can do. First, link to jQuery on Google's CDN—add the following highlighted line of code (without line breaks!) to the page's <head>:
<head>
  <title>jQuery $electors</title>
  <meta http-equiv="X-UA-Compatible" content="IE=edge" />
  <script type="text/javascript" ↵
    src="https://ajax.googleapis.com/ajax/libs/↵
    jquery/1.12.0/jquery.min.js"></script>
  <style type="text/css">
.highlight {
  background-color: #ffff00;
}
  </style>
</head>
After the jQuery link and before the CSS <style>, add your $(document).ready() script, as highlighted below:
<head>
  <title>jQuery $electors</title>
  <meta http-equiv="X-UA-Compatible" content="IE=edge" />
  <script type="text/javascript" ↵
    src="https://ajax.googleapis.com/ajax/libs/↵
    jquery/1.12.0/jquery.min.js"></script>
  <script type="text/javascript">
$(document).ready(function() {
// Start of $(document).ready ---------------------------


// End of $(document).ready -----------------------------
});
  </script>
  <style type="text/css">
.highlight {
  background-color: #ffff00;
}
  </style>
</head>
Save your HTML document, and load it into your browser. As always, it's not much to look at before we add our code.
But if we throw some jQuery in here, we might be able to start spicing things up a bit. For a start, note the .highlight selector we've got in our CSS. It's a very simple rule set: it just makes the background color of any element which has the "highlight" class bright yellow (hex code #ffff00). It's possible to go into the HTML itself and simply add class="highlight" to whichever elements we feel could use the color...but instead of hard-coding the class in that way, we're going to add it using jQuery.
Remember that all of our jQuery programming will go inside the space we've got in $(document).ready()'s anonymous function definition. Go ahead and add the following highlighted code there now.
$(document).ready(function() {
// Start of $(document).ready ---------------------------

$("p").addClass("highlight");

// End of $(document).ready -----------------------------
});
Save your HTML document and reload it in your browser. You should see something a little different this time, like the image below.
Now that's something! Sure, it's not a huge corporate Web site with all the trimmings, but give yourself some credit. You've just successfully used jQuery in an HTML document. So what exactly did we do?
Remember, the $( ) selector function allows us to select DOM elements in our page. We do that by sending a string with the exact same selector we would use if we were simply working with CSS. In the code above, we've used a tag selector. Just like:
// The CSS version!
p {

}
...would select all <p> elements in the DOM and apply a CSS rule set to them, the JavaScript expression:
// The jQuery version!
$("p")
...returns a JavaScript object which is a kind of "list" of all the <p> elements in the DOM, to which we can apply our jQuery methods.
Meanwhile, addClass() is a method that belongs to any object you've created using a jQuery selector. It does just what it sounds like: it adds a class to the selected DOM elements, just as if you'd included that class name in the class= attribute in each tag. The string argument you send when you call addClass() is the name of the class you want to give to the selected DOM elements.
The cool part is that this works with any valid CSS selector you can think of! Try re-writing your program, completely replacing the line you just added with the following highlighted line:
$(document).ready(function() {
// Start of $(document).ready ---------------------------

$("p.plain").addClass("highlight");

// End of $(document).ready -----------------------------
});
Save your HTML document and reload it in your browser, and you'll see that only some of the paragraphs are highlighted.
The string argument we sent to the $( ) jQuery selector this time was "p.plain". That means—just like in CSS—we're looking for only those <p> elements with the "plain" class assigned to them. So this time around, only those paragraphs get highlighted—while paragraphs without the "plain" class are not selected and, therefore, not affected.
To emphasize: the selector string for the $( ) function works just like a CSS selector. (Though there are also some "extra" features we'll learn a bit later!) This means that all of the CSS selector rules we went over above—case sensitivity, spaces for elements within elements, no spaces for specified selectors, commas for multiple selectors—apply the same way. Rewrite that same line of code again so it matches the code below (only the highlighted part has changed):
$(document).ready(function() {
// Start of $(document).ready ---------------------------

$("#firstDiv p.plain").addClass("highlight");

// End of $(document).ready -----------------------------
});
Save your document, reload it in your browser, and take a look...
As you should expect, with the $("#firstDiv p.plain") selector, we're only selecting "plain" classed <p> elements that are inside of an element with the a "firstDiv" ID. (Remember, if we're using a .class or #id in a selector, we don't necessarily need to specify what kind of tag we're looking for.)
Our <div> ID is the really interesting bit, though: since CSS selectors can include IDs of individual elements, we can specifically refer to a single DOM element by selecting its ID. Does that sound familiar? It should: it essentially means that we're able to give variable names to the objects in our DOM! And that (mind blown yet?) is why I suggest you use the same good naming practices in all of your code. When you're working with integrated programming like jQuery and HTML, there ends up being no significant difference between naming a variable and naming an HTML element. Convenience strikes again!
If you think it through, you'll realize that this model implies even more power and flexibility when it comes to classes. Sure, you can make a CSS class and assign style rules to it; but just because you make a class, it doesn't mean you have to add CSS rules for it! By creating a class that you can assign to (or take away from) any DOM elements, you're sticking little "flags" on those elements—a way to track down the ones that have that class, regardless of whether the class has a CSS rule set. It's like having a variable name that refers to a whole collection of objects, and you can decide which ones are added or removed from the collection at any point in your program!
Before we explore the ramifications of all that, let's change our selector one more time. Alter your own $( ) function's string argument to read just like the highlighted portion in the code below.
$(document).ready(function() {
// Start of $(document).ready ---------------------------

$("#firstDiv p.plain, ul li.livingThing").↵
  addClass("highlight");

// End of $(document).ready -----------------------------
});
Save your document, reload it in your browser, and take a look...
Though you're probably not surprised by now, the selector with a , comma can let us pick out elements with more than one description. Now we've selected "plain" classed <p> elements inside whatever has the "firstDiv" ID, as well as "livingThing" classed <li> elements inside <ul> elements.
Go ahead and play with this on your own. Take a look at what tags, classes, and IDs are available in the jquery_selectors.html HTML code, and see what sorts of combinations you can up with to make a variety of selectors and highlight them (using addClass() and the "highlight" class). You can get pretty broad and inclusive, or very specific and selective.
Each time you change your selector string, save the HTML document and reload it in the browser. See if you can predict the results each time; assuming you don't make any typos or other errors, you should be able to guess it right just about every time, once you get the hang of it!
Once you're consistently getting it right, that means you really understand how these selectors do their job. It looks like jQuery selectors really do work like CSS selectors...and that opens up a giant galaxy of jQuery goodness.
Now that you know how to use jQuery selectors, it's just a short leap to putting them to work for you. jQuery gives us a wide variety of tools we can use to influence the appearance, behavior, and general interactivity of the elements in our Web pages. Here, we'll go over some of them to get you ready for this lesson's exercise...and the sort of jQuery you'd need as a professional Web designer!
Just a bit back in this lesson, you encountered the addClass() method. This is just one of the many methods that all selected jQuery objects get to use. A lot of the methods you'll learn here work pretty much the same way: they accept an argument (or two) and use jQuery's cross-browser-savvy coding to take our orders...and make 'em happen. In some cases, the arguments may be variables or other simple expressions; in others, you may send jQuery methods full-on functions as arguments, often anonymous functions (since we only need to write them that one time, we don't need to bother naming them!).
In the rest of this lecture, we'll look through a few kinds of jQuery methods—no official, strict categories, just useful groups that perform similar tasks—with a few examples of each, and start getting a handle on what we can accomplish when we push a little farther than just the basics.
Appearance Methods
(jQuery's Got the Look)

As you saw with addClass(), and have probably seen on much of the World Wide Web, one of the striking advantages of jQuery is the ability to let us quickly and easily change the appearance of DOM elements on the fly. We don't need to "hard-code" anything into the HTML, and we don't need to perform clever JavaScript tricks to change things around. jQuery takes care of it for us.
The addClass() method has a partner, suitably named removeClass(). Where addClass() assigns a new class to an element, removeClass() takes away a specified class. Remember that any individual element can have multiple classes simultaneously; adding a new class does not remove any other classes, and removing a class gets rid of only the one you specify.
Both addClass() and removeClass() accept a single string argument: the name of the class you want to add or remove. You can add more than one class by typing them all (separate by spaces) as your argument to addClass(); you can do the same with removeClass(), with the added trick that giving removeClass() no arguments will remove all classes from the selected objects. Here's how it looks when we add a class to our jQuery selection:
// Add a class
$("p").addClass("itemOnSale");

// Add two classes
$("p").addClass("itemOnSale discount20");
While here's an example of removing classes:
// Remove a class
$("p").removeClass("itemOnSale");

// Remove two classes
$("p").removeClass("itemOnSale discount20");

// Remove all classes
$("p").removeClass();
You can see both of these at work in the demonstration below (which includes some additional jQuery that you'll learn about very shortly!). Click on the buttons in this demo to see what happens to the paragraphs. (Of course, simply adding or removing a class won't change the text in an element—the demo shows the <p> tags changing purely to help you understand what's going on.)
<style type="text/css">
p.itemOnSale { background: #ffaaaa; }
</style>
<p>Paragraph element</p>
<p>Paragraph element</p>
<p>Paragraph element</p>
$("p").addClass("itemOnSale");
$("p").removeClass("itemOnSale");
In addition to adding or removing CSS classes, jQuery offers us a way to make elements just disappear. The hide() method does just that: hides the selected elements. Its partner, the show() method, makes them reappear again. Click the buttons in the demo below to see what I mean.
<p>Paragraph element</p>
<p>Paragraph element</p>
<p>Paragraph element</p>
$("p").hide();
$("p").show();
You'll notice that hiding or showing elements this way actually "morphs" the layout of your HTML document in the browser. That's okay! While older design standards considered this somewhat taboo, the modern Web, which is viewable on so many different devices and screens, has firmly embraced the idea of "fluid" design, allowing things to change and move on the screen to accommodate the current state of the information available. We'll learn even more about this in Lesson 5, but for now: don't sweat it.
Both hide() and show() (along with other jQuery animation methods) can accept arguments—most commonly, you can send them a single number value to change how long they'll take to hide or show the selected elements. This number is the duration of the change in milliseconds (1/1000th of a second); the more milliseconds you put in, the longer the transition will take. So for fast animation, use low numbers (even zero!), and for slow animation, use higher numbers—for example, a duration of 1000 milliseconds will take 1 full second to run, while a duration of 0 milliseconds will happen in an instant. Try the demonstration below to see this in action.
<p>Paragraph element</p>
<p>Paragraph element</p>
<p>Paragraph element</p>
$("p").hide(400);
$("p").show(400);
$("p").hide(800);
$("p").show(800);
You can see that the 800 millisecond delay takes just a bit longer to hide or show the paragraphs than the 400 millisecond delay does. The hide() and show() methods can accept other arguments as well, but we'll learn more about those later.
There are plenty of other jQuery methods that affect the appearance of your DOM elements, such as toggle() (which hides shown elements and shows hidden elements!), but we're going to put those aside for now to explore how we can allow our users to make these changes, rather than just coding them to change as part of our $(document).ready() function.
Event Methods
(jQuery's Ready for Action)

A Web page without interaction might as well be a magazine page. Interactivity—the ability to let the user influence the current state of the page, and offer input as well as view the output—is the key to nearly all modern information technology, particular on the mass market.
JavaScript, like many programming languages, awaits what we call events—things that happen, often because a user makes them happen. It maintains a thorough awareness of events like moving or clicking the mouse, pressing keys on the keyboard, and even resizing or scrolling your browser window.
When these events occur, JavaScript will look for instructions; it wants to know what we, the developers, intend to happen in response to those events. In most programming languages, such instructions come in the form of functions we call event handlers.
Was any of that particularly confusing? If so, don't worry! As with so many things, jQuery is going to give us a much simpler, quicker way to plug in to these advanced JavaScript notions.
jQuery does a wonderful job of allowing us to write out clear and concise instructions, and plug them in as event handlers, just waiting for something (an event!) to happen so they can run in response to it. One of the most ubiquitous examples of user interaction is a mouse click, and jQuery has got us totally covered there...with the click() method.
When we use the click() method with our selected elements, we're telling them what to do when the user clicks on them—we're giving them instructions for what to do when that event happens. Because we're giving them instructions, we can't use a simple variable like a string or a number.
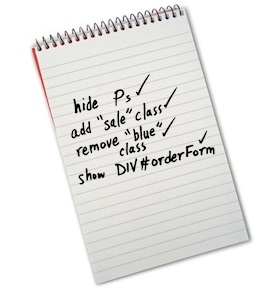
Checking off your To-Do list. When you make an anonymous function and send it to one of your event handlers, jQuery saves it as a list of instructions. Whenever the specified event happens, jQuery will diligently go through your instructions, step by step, and check off everything you asked it to do.
When you think "instructions," you should think functions. So the argument that the click() method looks for—just like the $(document).ready() function—is a function (which can, of course, be anonymous). This is exactly what we do with the $(document).ready() function, in fact, so the way we type it out is nearly identical.

Let's work up some jQuery with the click() method and take it for a spin. In your text editor, create a new document and fill it with a basic HTML skeleton. Add the setup for jQuery into the <head>—you should be starting to get the hang of this, but here's a refresher just in case:
<head>
  <title>jQuery click()</title>
  <meta http-equiv="X-UA-Compatible" content="IE=edge" />
  <script type="text/javascript" ↵
    src="https://ajax.googleapis.com/ajax/libs/↵
    jquery/1.12.0/jquery.min.js"></script>
  <script type="text/javascript">
$(document).ready(function() {
// Start of $(document).ready ---------------------------


// End of $(document).ready -----------------------------
});
  </script>
</head>
In the <body> of your HTML document, put the following highlighted tags and content:
<body>

  <div>
    <p>Watch me make these words ↵
      <a href="#" id="btn_Hide">disappear</a>...</p>
  </div>

  <a href="#" id="btn_Show">Bring them back!</a>

</body>
Pretty simple stuff. The thing to make sure of is that we give each <a> tag its own unique ID—just like variable names. You don't have to name everything the same way I do—but if you change any names, make sure you know which names, and that you keep your names consistent within your own code.
By the way: the only reason I added the href="#" in there was to make them true hyperlinks. In most browsers, an <a> without an href won't show up as anything special, so in this case it would just look like plain text...even though we will be able to click it! If you plan to style your linkless <a> tags to make them stand out as obviously clickable elements, you can often avoid this step.
Save your HTML document, and load it into your browser. I'm sure it won't come as any surprise to you that it won't do anything interesting—we still have to add in our jQuery code!
Inside your $(document).ready() function (between the two comment lines, if you're being smart enough to include them as reminders!), add the following highlighted code:
$(document).ready(function() {
// Start of $(document).ready ---------------------------

$("#btn_Hide").click(function(){
  $("div").hide();
});

// End of $(document).ready -----------------------------
});
Again, this should look a lot like what you do for your $(document).ready() in the first place. Here, you're choosing a jQuery object by using the selector "#btn_Hide"; since that # indicates an ID, jQuery looks for any elements with the attribute id="btn_Hide", and it should find only one. It uses this selected object's click() method to give it instructions on what should happen when the user clicks it.
Since you're sending an anonymous function as an argument, you should have all the punctuation in place correctly, just like a call to $(document).ready(): your anonymous function needs empty (parentheses) followed by defining {curly braces}, and all of that should be entirely inside the argument (parentheses) of the click() function; plus, of course, click()'s final parenthesis) needs to be followed by a ; semi-colon to complete the statement.
Don't forget that you also need proper punctuation for any statements inside the anonymous function. In this case, we only have the one statement, but it requires the usual $( ) syntax, (parentheses) for the call to the hide() method, and a statement-finishing ; semi-colon.
Save your HTML and reload it in your browser. If you've done everything correctly, you should get something very similar to the demo below.
Congratulations! You've just created a truly interactive demonstration of jQuery. By sending an anonymous function to our <a> element's click() method, we've given it full instructions on what we expect it to do. In this case, it was pretty simple—hide the div—but we can get a lot more complex than that with more advanced jQuery.
Of course, any magician can make stuff disappear—it's making it reappear that impresses the crowds. You may have noticed that no matter how many times you click the words "Bring them back!" above, nothing happens (unless you reload this page!). But that's because it's up to you to make it happen. Let's add another bit of code to our jQuery (only the highlighted part below has changed):
$(document).ready(function() {
// Start of $(document).ready ---------------------------

$("#btn_Hide").click(function(){
  $("div").hide();
});

$("#btn_Show").click(function(){
  $("div").show();
});

// End of $(document).ready -----------------------------
});
As always, save your HTML document and reload it in your browser to test your work. With that second function in place, just like the first, your demo should work a lot like mine below.
Is it starting to make sense? Aside from the sometimes tricky punctuation (which takes getting used to, but shouldn't take you too long!), it's very much an extension of the logic we discussed in the previous lesson: the idea that JavaScript is a language, and all we need to do as developers is translate what we want into that language.
jQuery isn't another language—as matter of fact, I wouldn't even call it a "dialect" of the JavaScript language. More accurately, it's the equivalent of "professional jargon."
Did you ever hang out with somebody who works in a field that you don't know much about? They can talk on and on about their job, using words and phrases that don't mean a lot to people outside of their profession. They're still speaking the same language you are, but they've got a bunch of lingo that you just haven't picked up on yet. However, from context, you can often figure out at least the gist of what they're saying, even if the specifics are still a bit alien to you.
That is jQuery's relationship to JavaScript: it's a professional's toolkit, and a professional's jargon, but it's all still spoken in the language of JavaScript.
If you're in the know, you know the lingo. jQuery isn't a whole different language from JavaScript—it's simply professional jargon spoken in the language of JavaScript. Since you've already learned a lot of JavaScript, jQuery's just a matter of learning some new vocabulary and phrasing.
Attribute and Property Methods
(jQuery Knows What's What)

Much like you can define variables in JavaScript and assign them values, you can define attributes and properties of your DOM elements in HTML, and assign values to them as well. There's a subtle but meaningful difference between "attributes" and "properties" when it comes to the DOM.
Attributes are the characteristics of an element that you, as the developer, assign in the HTML itself. These include things like the action attribute of a <form>, the src attribute of an <img>, or even the style attribute of a <p> tag. Generally speaking, attributes won't change as the user interacts with your Web page.
Properties, on the other hand, are only initially assigned by your HTML code. Once in the hands of the user, who is interacting with your Web page, the values of properties can be changed: like when a user types their name into a text box, or checks (or unchecks) a checkbox. While the attribute that we assigned doesn't change, the property does—so if we want to know what the latest information we've got from the user is, we need to check the property, because the attribute may not be up to date!
Some attributes and properties are pretty obvious at first glance, while others might be a little harder to recognize. Take a look at the following HTML tags.
Now, some of those are going to jump out at you, especially because you're familiar with HTML. But some of them might be more subtle; you really have to think about it to realize they're in there.
That <div> has an id attribute with a value of "mainContent" there. The <p> has a class attribute...but it also contains text (a text node, to be precise).
The <input> has several attributes, including its type, id, and name. From a DOM (and therefore jQuery) perspective, though, checked is a property—not an attribute. Remember, the difference is that the user gets to change it—its value may end up different than the value assigned to it when the HTML page loaded up.
The point is, attributes and properties are everywhere, and if we can access and change their values—which we can—that gives us a lot of power over the form and functionality of our Web pages. jQuery gives us an easy shorthand method of finding out the value of any given attribute: the attr() method. The highlighted portion below is an example of this method in use.
alert ( $("img#submitButton").attr('src') );
Used this way, the attr() method will look for the attribute you specify (as a string in the argument) and return the value of that attribute. For instance, if the source of our example <img> was a .gif named "submit_button_regular.gif" in a folder named "graphics" then the above example would return "graphics/submit_button_regular.gif" (the string value of the image's src attribute).
But attr() also has a second use: we can assign a value to an attribute! To do this, we just need to send it two arguments. The first is the name of the attribute (just like before); the second is the value we want to assign to that attribute.
$("img#submitButton").attr('title','Click me');
Remember that since these are all strings—including the return value when attr() reads an attribute for us—we can work with them just like we work with any strings. For example, this code:
$("img#submitButton").attr('title','Click me');
$("img#submitButton").attr('title',↵
  $("img#submitButton").attr('title')+' now!');
...uses concatenation to add the string " now!" to the image title's current value, and assign that as the new value (by sending it as the second argument). It's very similar to what you learned in the first lesson:
// For example...
var imageTitle = 'Click me';
imageTitle = imageTitle + ' now!';
Except that now we're working with the properties of a selected jQuery object instead of an independent string variable. (So we can't just use the += concatenation assignment operator this time!)
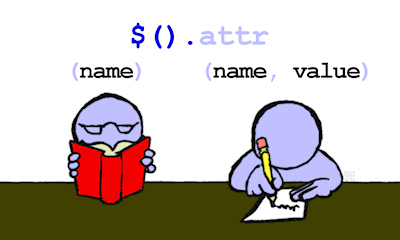
Get it or set it. It's a common behavior among jQuery methods: attr() will read ("get") a value if you send it just one argument (the attribute you're looking for), but write ("set") a value if you send it two arguments (the attribute, and the value you want to set it to).
The attr() method can get or set any attribute in a DOM element. But if you want to work with an element's properties, you have to be a little more careful: trying to get them as attributes may give you the original value, but it may not give you the current value if the user has changed it since the page loaded. To make sure we get an accurate reading, we use the prop() method instead:
alert ( $("input#checkMe").prop('checked') );
Since a checkbox-type <input> can be either checked or not, the above expression can only return one of two values—the Boolean values, true or false! We can set property values with the prop() method just like we can set attributes with the attr() method:
$("input#checkMe").prop('checked', true);
$("input#checkMe").prop('checked', false);
By including that second argument, we tell jQuery to set the value of our specified property—in this case, to set the element's checked property to true or false. The results will be immediately visible in your HTML page; play with the following demonstration to see how that works.

Head into your text editor and create a new document. Fill it with a basic HTML skeleton and set up your jQuery—no help this time! (If you're shaky on how to do it, look back through the lesson so far. Don't forget to include the <meta> tag for old versions of IE!) Save this document as jquery_attr_prop.html or any appropriate name you'll remember. Now put the following code into the body of your new HTML document:
<p>What is your name?</p>
<input id="userName" type="text" value="Type your name" />

<p>Are you smarter than a fifth grader?</p>
<input id="smartCheck" type="checkbox" />

<p>Prove it!</p>

<a id="firstLink" href="http://www.sessions.edu/" ↵
  title="" target="_blank">Look, a link!</a>
<a id="secondLink" href="http://www.google.com/" ↵
  title="" target="_blank">Another link?</a>

<br />

<input id="theButton" type="button" value="Click here!" />
It's a simple, silly HTML page that will let us experiment with our new jQuery tools. Of course, it won't do anything without some code, so let's get right to it—add the following code inside your $(document).ready() function, as you always should.
$("#theButton").click(function(){
  alert('The value of userName was "' ↵
  + $("#userName").attr('value') + '"');
});
Save your HTML file and load it into your browser. Keep in mind that the initial value of our userName text input is "Type your name"—that's an attribute, which we assigned in the HTML. In your browser, click the button that says "Click here!"
Without changing your HTML file at all, go ahead and type something into the text field—your name, or your friend's, or your enemy's, whatever you like. Then click the button again.
It doesn't update at all! That's the problem with confusing the attr() and prop() methods. Attributes don't keep up with the user...but properties do! So let's change our code just a bit. Revise your button's click() method to read like mine below (only the highlighted parts have changed):
$("#theButton").click(function(){
  alert('The value of userName is "' ↵
  + $("#userName").prop('value') + '"');
});
Save your document, and reload it in your browser. This time, whenever you click the button, the alert box will give you the correct current value in the text input. That's because the prop() method does keep tabs on what the user's done. So for any information that can be changed by the user, you should use prop(); for any other information on the page, attr() will work just fine.
For a lot of <input> elements, we also have a useful shorthand in jQuery: the val() method. It works a lot like prop(), but you don't need to tell it which property to look at—it always goes to the value property of the selected object. Try revising your code again (changing only the highlighted parts):
$("#theButton").click(function(){
  alert('The value of userName is "' ↵
  + $("#userName").val() + '"');
});
Save your HTML, reload it in the browser, and watch the magic happen. It won't do anything new, but that's a good thing—it works exactly as it did, which means that our val() method is a really quick and easy way of referring to prop('value') without typing the whole thing out. Once again, jQuery takes the hassle out of programming!
Something to keep in mind about jQuery's selected objects: they aren't the elements themselves, but rather a list of those elements that match the selector you supply to the $( ) selector function. Even if only one element matches your selector, the jQuery object is still a list of matching elements—it's just that, in that case, it'll be a list with only one item on it.

All together now. When you work with a jQuery selection, you're not just working with a single element in the DOM; you're working with a set of elements that matched your selector. You don't have an egg, you have an egg carton—even if there's only one egg inside it, you're still working with the carton!
This is important to understand when using jQuery methods, because it has a few specific consequences. To show you what I mean, I'd like you to head right back into your current HTML file and revise your JavaScript code yet again—change it so your click() function matches the highlighted code below:
$("#theButton").click(function(){
  alert('The href of firstLink is "' ↵
  + $("#firstLink").attr('href') + '"');
});
Save the file, reload it in the browser, and click the button. If you've coded this correctly, the alert will reveal the URL of the first hyperlink ("http://www.sessions.edu" unless you changed it!). That makes sense, right? Now alter your code according to the highlighted parts here (note the new selector string!):
$("#theButton").click(function(){
  alert('The href of the <a> tag is "' ↵
  + $("a").attr('href') + '"');
});
Save it again, reload it in your browser, and click that button. You'll get the exact same result that you did a moment ago! Why is this? Because when we "read" any values (include attributes and properties) using jQuery methods, we'll only get the specified value from the first element of our selection (unless we specify otherwise).
But how about when we "write" values—for example, using the attr() method to set the href value instead of getting the current value? That's a different story. Try changing your code as highlighted below:
$("#theButton").click(function(){
  alert('The href of secondLink is "' ↵
  + $("#secondLink").attr('href') + '"');

  alert('The href of firstLink is "' ↵
  + $("#firstLink").attr('href') + '"');

  $("a").attr('href','http://www.apple.com/');

  alert('The href of firstLink is "' ↵
  + $("#firstLink").attr('href') + '"');

  alert('The href of secondLink is "' ↵
  + $("#secondLink").attr('href') + '"');
});
Save it, reload it, click the button. Now you get four alerts in a row. In the first two, you can see that the href values of both the "firstLink" and "secondLink" elements are just as you assigned them in your HTML. In the last two alerts, you can see that the attribute's value has been changed for both <a> elements by our jQuery instructions! When you set values, the new values are assigned to all selected elements by default.
So remember: when we "get" (read) a value from a jQuery selection, we get only the first selected element's value; when we "set" (write) a value to a jQuery selection, we set that value for all of the selected elements.
Iteration Methods
(jQuery Takes It Step by Step)

So if a jQuery selection is a whole list of DOM elements, what can you do if you want to take a shot at each one on its own? You may want to give them each a class only if they have a certain title attribute, or hide them only if their IDs start with a certain letter...there are all sorts of reasons that might come up. Luckily, jQuery gives us plenty of ways to work with the individual elements in any particular selection.
The most basic method of dealing with selected elements one by one is each(), which does just what it sounds like: it looks at each element, in the order they appear in the DOM tree, and follows your instructions one time for each of them. The each() method looks something like this (which should look very familiar now!):
$("a").each(function() {
  // Put your instructions here!
});
Nothing shocking to a jQuery veteran like you, I know. Once again, we're sending a single argument to a jQuery method, and it's an anonymous function. Easy, right? But here's another question: now that you're in there...what can you do?
Remember, the each() method is going to look at each element in your selection, one at a time. So if you want to do anything to them, the method will need to be able to refer to "the one I'm looking at right now." In the sample code above, it does no good to try assigning a value with the $("a").attr()—no matter where we put that kind of function call, it's still referring to the entire list of <a> elements, and we're trying to refer to just the one we're working on each time each() runs through its instructions.
That's where this comes in. What is "this"? Well, in JavaScript, this is a reserved keyword; it refers to whatever object called the method that's currently running. If I had a programmed dog that calls its bark() method, I could put a conditional in there that checks: is this.owner finally feeding me? If so, then we'll make sure to call this.shutUp()! (Remember, the . dot implies ownership.) The keyword this will only work inside a function, but it usefully refers to whatever object runs the function in each unique instance. That makes it possible for us to write a function that various different objects can call, but be sure to refer to the right object every time the function runs.
This is the guy. Every time you run through a function, the JavaScript reserved word this refers to whatever object is running it this time around. You can use this useful keyword to make sure your functions work directly with the right object, even if you don't know what object might call them.
jQuery has its own answer to this, which we use the selector function to invoke:
$(this)
By simply putting the keyword this in for the $( ) selector's argument—not enclosed in string quotes—this particular selection will refer directly to the single element being examined in a single iteration of a jQuery method.

Let's explore how $(this) works by turning back to the simple HTML page we've been experimenting with. Revise your button's click() function completely, so it reads as follows:
$("#theButton").click(function(){
  alert( $("a").attr('href') );
});
Save your file and reload it in your browser. When you click the button, you'll get an alert—but, of course, it's only going to tell you the URL that the first hyperlink goes to. We know that this is because applying "get" methods to a jQuery selection will only get information from the first element in the selection.
Now let's try using the each() method to iterate through the whole selection. Modify your code to match the highlighted lines here:
$("#theButton").click(function(){
  $("a").each(function(){
    alert( $("a").attr('href') );
  });
});
As always, note that we're sending an anonymous function as an argument—so make sure your punctuation is correct! Now save it, reload in your browser, and click away.
You should find that you now get two alerts. That's good news—it means that the instructions we put inside our each() function are running twice: once for the first <a> element, and once for the second (there are only two, after all). The only problem is that the alerts are both clearly about the first link: it comes up as "http://www.sessions.edu/" both times. Where's the URL for the second link?
We know the answer to that: since our instructions for the each() method tell jQuery to give us the $("a") selection's link value, it's just giving us the link value for the first element in the selection...no matter which element the each() is currently looking at. But now change the highlighted bit below to match my code:
$("#theButton").click(function(){
  $("a").each(function(){
    alert( $(this).attr('href') );
  });
});
Save it, reload it, click it! Now you'll see two alerts...but the second one will correctly reveal the link for the second <a> element. That's because we instructed our each() function to use $(this) each time it runs through one of the elements in its selection—and $(this) simply and cleanly refers to whichever element it's currently running through the function for.
Functions as Values
(Getting a Return on Your Investment)

While the each() method is really useful to iterate through the elements in a selection regardless of the information you need from them, the fact is that nearly all of the jQuery methods you'll frequently use are iterating through your selections. For instance, you already know that this code:
$("p").hide();
...will hide all of your <p> elements. That's because the selector function is iterating through the selected elements (just like in the each() method) and applying the chosen method to each of them in turn.
This gives us a great advantage. Remember that we can send anonymous functions as arguments to our jQuery methods. So while it's all well and good to, for example, assign an outright value to an attribute, what if you want that attribute to have a different value depending on which element it belongs to?

Go back to the jQuery practice HTML document that we've been working on throughout this lesson. Replace the code inside your click() function to match what I've highlighted below.
$("#theButton").click(function(){
  $("a").attr('title','Sessions Web Site');

  $("a").each(function(){
    alert( $(this).attr('title') );
  });
});
Save your work, reload it in the browser, and click that button. We already have our each() method giving us the lowdown on each <a> element one at a time, but if you read the two alerts that pop up, you'll notice that they both have the same title value. You don't even need to trust the alerts—the title attribute holds the text that pops up when you mouse over an HTML element. If you mouse over either link (just move your cursor over one without clicking it), you'll see our string in the little tool tip that appears.
This makes sense: we know that when the attr() method is used to set attribute values, it applies them to every selected element. But we know that the second link doesn't really go to the Sessions site. We want to make that clear, by giving it a different title. Otherwise, we'd confuse our users!
Instead of sending a string as our second argument, let's send a function instead. Because attr() expects a string there, so it can assign that value to the attribute you've picked, our anonymous function must return a string value. Edit your code to look like mine, below—all I did was get rid of the string argument in our attr() call and replace it with an anonymous function (highlighted), just like all the others we've used so far.
$("#theButton").click(function(){
  $("a").attr('title',function(){
    if ($(this).attr('href')==↵
      'http://www.sessions.edu/') {
      return 'Sessions Web Site';
    } else if ($(this).attr('href')==↵
      'http://www.google.com/') {
      return 'Google Search Engine';
    } else {
      return 'Guess!';
    }
  });

  $("a").each(function(){
    alert( $(this).attr('title') );
  });
});
You've seen this sort of thing before! We're using conditional "if" statements to determine where the link for $(this) element (each one, one at a time) goes, and we're returning a value for the title based on that information. Note that we even have a "default" return value—if we wrote a function that had a chance of not returning any value at all where one is expected, we might create a JavaScript error.
Since the attr() method iterates through our selection to assign a title to each element in it, they all get one; but since it runs a function to determine the value to assign, each one will get a value based on how the function works with it specifically. Save your file, reload it, and click the button.
This isn't completely new: we've been sending anonymous functions to our jQuery methods all along, starting right from the top with $(document).ready(). But this new way of understanding things changes the game a bit—rather than sending a function value for a method to apply, we're sending it a value returned by our function.
The bottom line is that you can write functions—even incredibly complex ones—that return values for our jQuery methods to use. That right there gives us a tremendous amount of flexibility; we're no longer limited to simply assigning a value as given, but can instead choose to assign values conditionally, based on other factors in our program and in our DOM.
Before we finish off this lesson, I'm going to share an extra tip with you regarding the $( ) selector function. The simple fact of the matter is that, aside from simply listing tags, classes, and IDs in your selectors, there are a lot of other options!
Remember that jQuery's selector operates using the same selection criteria as CSS. While old CSS1 had a limited number of selectors (less than a dozen), CSS2 and even more modern CSS3 have added plenty. As an example of additional selector choices, you can select elements based on the value of specific attributes, like this:
$("a[target='_blank']")
This example gives us a selection of all the <a> elements that have a target attribute with a value of "_blank" assigned to it. Simply put [square brackets] in your selector, inside which you put an attribute/value pair separate by the = operator, with the value in quote marks.
Note that "_blank" is a string value that can be assigned to the target attribute, but our $( ) selector function requires a string argument, too. That's why I've used one set of "quote marks" for the argument, and a non-conflicting set of 'quote marks' for the attribute value inside that string. It doesn't matter if you use double quotes inside of single quotes or vice versa; what's important is that you don't accidentally close your string while you're still trying to type characters into it.
If we wanted to warn users about links that will open in a new window or tab, we could write a jQuery statement like this one:
$("a[target='_blank']").attr('title',↵
  'Link will open a a new window.');
Then every link on our page with a "_blank" target (which means it opens in a new window or browser tab) will have a pop-up title that lets the user know before they click on it.
For a full list of the selectors available to you, and how they're written out, you can check out W3C's CSS Selectors Reference. Making selections with jQuery really is a piece of cake—it's as easy as pie! Of course, making that selection is a much tougher choice, in my opinion.
A selection we can all get behind. Using the jQuery $( ) selector function is a whole lot easier than deciding between $(cake) and $(pie).
Have a look at this review kit that goes over the basics of jQuery.
You're all set now! After a heaping helping of JavaScript from the first lesson, hopefully this first bite of jQuery was a bit easier to swallow. (Yes, I'm still distracted by the cake and pie. My apologies!)
Now that you've got the hang of jQuery, and a practice HTML document to work with, feel free to experiment. Try using different selectors in your code; try putting in some CSS so you can work with addClass() and removeClass(). See what sorts of functions you can assign to your selectors' attributes to change them in different and useful ways. It's okay to play—you are not going to break your computer with a simple JavaScript error, so don't worry. The more practice you get here, the more prepared you'll be for the exercise you're about to take on.
So what have we learned in preparation for that exercise? Here's a re-cap.
- The DOM is an object-oriented structure that describes an HTML document.
- Functions are just variable values with the function data type; they can be assigned and copied like any values.
- jQuery is a JavaScript library that makes our coding quicker and easier, partly by addressing cross-browser compatibility for us.
- jQuery takes advantage of CSS selectors to access and manipulate elements in the DOM.
- We can load jQuery externally from a content delivery network like Google's or Microsoft's.
- All of our jQuery statements go inside jQuery's $(document).ready() function.
- jQuery methods like addClass(), removeClass(), hide(), and show() change the appearance of selected elements.
- We can use the click() method to give selected elements instructions for what to do when a user clicks them.
- Methods like attr(), prop(), and val() are used to get and set the information wrapped up in selected elements.
- Most jQuery methods iterate through the individual elements in a selection; the each() method does this explicitly. We can use the $(this) selector to refer to individual elements as we iterate through a selection.
- Anonymous functions can be used to produce return values for jQuery methods.
These are just the basics of jQuery, and we're going to expand on them quite a bit throughout the rest of the course. But for now, make sure you've got your bearings, because you're going to apply what you've already learned in the second exercise!

