There are literally hundreds of methods you can use when it comes to presenting your design ideas to your client or even designing the final layout. And I'm willing to bet that depending on the designer you ask you will get a different answer as to how to go about this business.
Well, regardless of the method you use, it's important to be perceived as professional by both your client and your peers. It's also a very good idea to have a clear understanding and mental picture of what you want to do before you fire up your favorite computer. This is why sometimes the old proven methods are the most practical and yield the most consistent results. Although we're not going to discuss everything you need to know about presenting and referencing your design ideas, I will cover some basics that will be of use to you.
In order to organize the enormous flood of design ideas that you might be getting after that essential design brief with your client, it's important to grab a pencil and paper and start sketching out some of these concepts. Ideally, we focus on the raw concept by sketching small, thumbnail size sketches on paper. You can pretty much use any medium you'd like. Pencil, pen, marker and even crayons are acceptable. The important thing is that you focus and narrow your thoughts to the best three to five ideas.
Some designers will show no more than five thumbnails to their client, because too many choices can be too much to handle for clients who are frankly paying you to come up with creative solutions to their problems. Although thumbnails are never considered "finished" designs, it's a good idea to use something other than crayon if you're thinking of presenting them to your client.
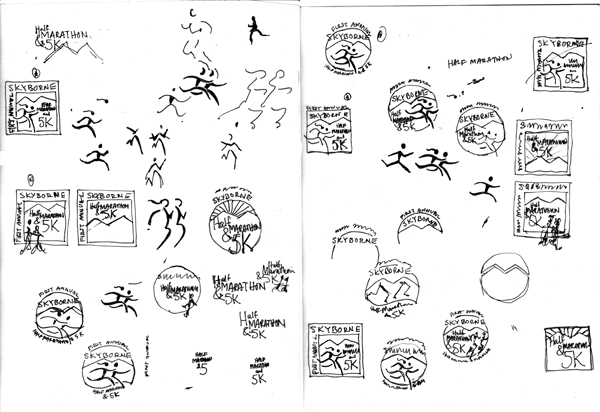 |
Thumbnails are small loose sketches that help the designer focus on a concept and help solve general design problems. In this sample, we see thumbnails for a corporate identity design. |
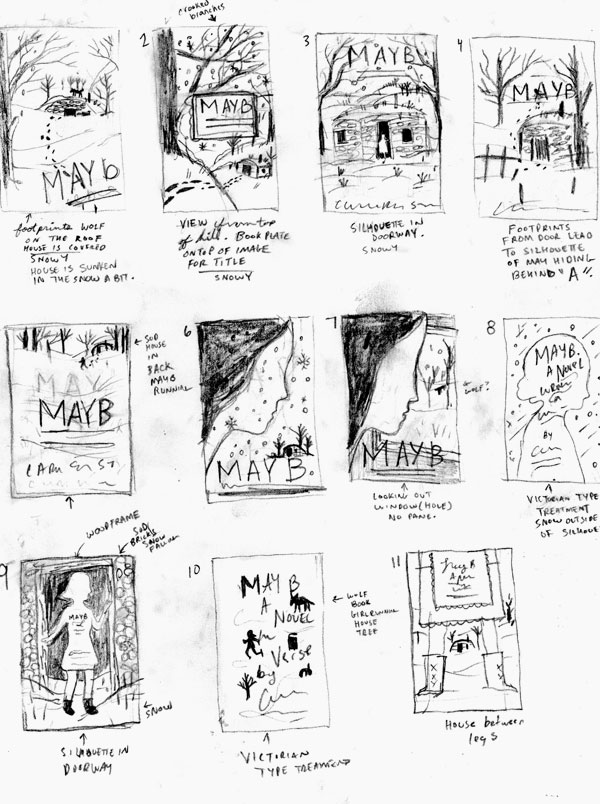 |
The sample above shows thumbnails for a book cover. |
The Rough Draft
A rough draft is the next step up in the analogous design process. At this stage, the client has already narrowed down the choices to two or three concepts, and now you need to show a tighter rendition of what these ideas might look like. A rough draft will usually be a sketch drawn to the same size as the final artwork. Be it same size or not, the important element is that the draft's size be proportional to the final layout's trim size. Otherwise you might be making promises that you won't be able to keep.
The rough draft can be as tight or as loose as you want to make it. Again keep in mind that if you're going to be presenting these to a client you might want to make it tight enough to sell your design idea.
 |
In the sample above the designer has hand drawn a rough draft of a Web site design. |
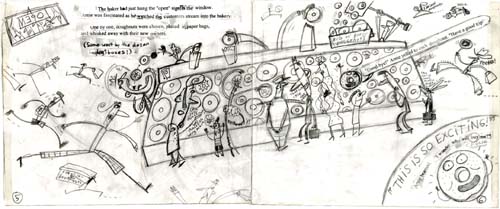 |
A spread from Arnie the Doughnut by artist/author Laurie Keller in the rough draft stage |
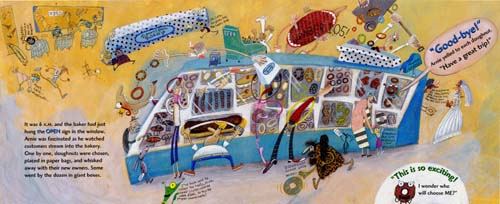 |
Final spread for Arnie the Doughnut |
The Color Comp
In the final stage of preproduction we have a rendered color composition known as the color comp. Traditionally this comp was rendered on paper using design markers. The renders were pretty tight and their objective was to sell the client on the final design idea and get them to sign off on it for final production.
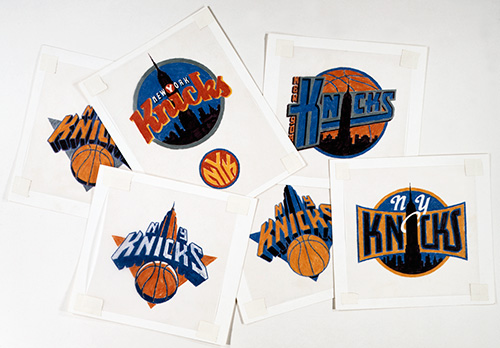 |
Color comp rendered for the Knicks logo by designer Michael Doret |
No matter what final method you decide to use to present your design ideas or to get a good jump start on your InDesign layout, remember that clarity and presentation is everything. No matter what anybody says, good first impressions are usually the best.