Keyboard Shortcuts
If you're an Adobe user, you no doubt are a heavy shortcuts person. And if you're not an Adobe user, you will be after you complete this course, at which point, you will also be a heavy shortcutholic. And the reason for this is that in order to really be productive in InDesign you must get into the habit of learning and using keyboard shortcuts. Let's take a look at some of the ways to become proficient at this.
Hover your cursor over the first tool in the Tools panel. Wait a few seconds for the tools tip and you will see, not only the name of the tool, but the letter (v) in parenthesis. This letter indicates the keyboard shortcut for selecting that particular tool, which happens to be the Selection tool. Now hover over the Type tool, and what letter does the tools tip display? I think you get the point. So, press the T key on your keyboard and you will select the Type tool. Press the V key, and you're back to the Selection tool. Well done!
Now say you're working with the Selection tool and you need to select the Rectangle tool for a quick edit. With the Selection tool active, press the M key to select the rectangle tool but don't let go just yet, and draw a quick rectangle on the page. When you're finished using the tool, let go of the M key and InDesign will spring back to the Selittlection tool. This behavior is something that the InDesign team borrowed from Photoshop a while back and it's called spring-loaded tools.
Save your document by going to the File menu and selecting Save. Before selecting the Save command, notice that the keyboard shortcut is also displayed to the right of the command (Ctrl-S in Windows or Command-S on a Mac). Most of InDesign's keyboard shortcuts can be learned this way.
InDesign Templates
InDesign templates are a special kind of document that can contain a generic layout for future use. Essentially they are identical to regular type of documents up until the point you either open or save one. When you open a template, you're actually opening a copy of it, leaving the original template safe and untouched. This is a great way to insure that the integrity of a design is maintained. When saving, the template option must be selected and InDesign will add a .indt extension to the file.
Document Presets
If you find that you're constantly creating the same type of document (with the same settings), you can use the Save document preset command to save the settings you've entered when creating a new document. Here's how this feature works:
 |
|
 |
| |
-
Once you set up your document via the New Document dialog, click the drive icon at the top (to the right of the Document preset drop down and before the trash icon).
-
In the Save Preset dialog, enter a name for the preset (use the name "Magazine Layout").
-
Click OK.
|
|
 |
|
 |
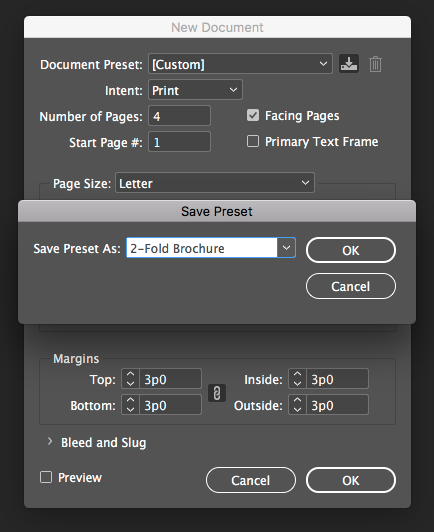
You now see the name you just entered as the chosen preset for the Document. Click Cancel, and once again choose File > New > Document. Select the document preset you just saved, and you're good to go. But let's say that you need to modify a particular preset you saved. In such a case you would:
|
|
|
| |
-
Go to File > Document Presets > Define.
-
Select the document preset you want to modify—in this case "2-Fold Brochure".
-
Select Edit.
-
Make the appropriate changes. For this example, we set our page size to A4, and we're going to change it to Letter.
-
Click OK.
|
|
|
|
|

Note that you can save your presets to your computer and share them with colleagues. Similarly, you can load presets from someone else.
Lock Files and Automatic Recovery Feature
It is very common for designers to work under very tight deadlines. Such is the nature of the beast. This is why it can be almost catastrophic when the Operating system goes down taking your unsaved work with you. I can't begin to tell you how many times I've been so involved with the design process that I've neglected to save the work, and at the very moment when everything is coming together and all the hours spent searching for options seem to finally be paying off, a system failure causes the Software to crash.
Fortunately for me and for all the designers out there, InDesign is not a normal program. The entire time you're working, InDesign is doing mini-saves of your document with a technology that Adobe calls the automatic recovery feature. Let's take a look at how this all works behind the scenes to give us some peace of mind.
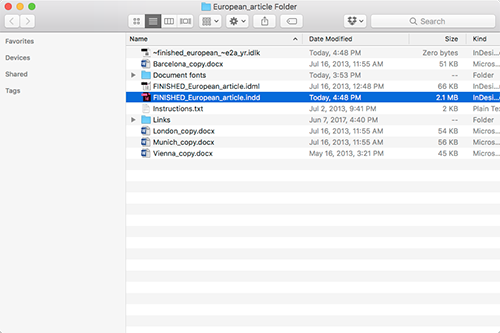
Open the Magazine layout document you saved earlier. On your computer, using the Windows explorer or the Mac OS Finder, browse to the folder where the document is stored. You will see a temporary data file (.idlk) different from the original InDesign document (.indd). It is in this file that InDesign stores any document updates you do to the original document, and in case of a system or software failure, all the temp data is automatically added to the original InDesign document.