It is very common to have more than one gob of text to work with, especially when you have multi-page documents. As you learned in the first two lectures, magazine articles, for example, can span several pages of text (not to mention images and other page elements).
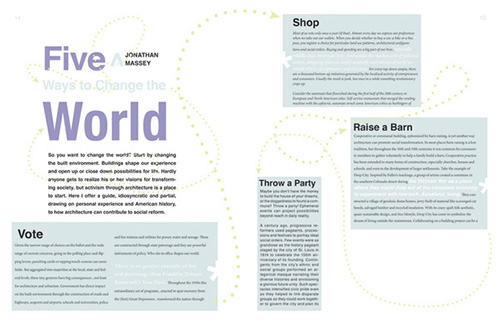 |
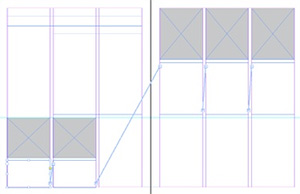
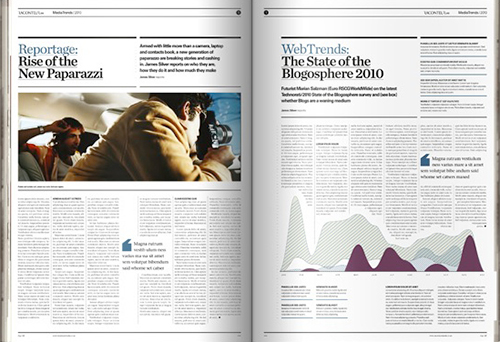
There are many ways to thread text between pages. In the example above, designer Dan Rezaiekhaligh uses interesting visual elements to thread text in an innovative way between a two-page facing layout. |
So how do you keep track of all that text? Well, you could draw the necessary text frames and begin copying and pasting text as needed, but any text editing after the fact would get very complicated and messy. InDesign has a feature called text threading that allows you to flow text from one frame to another, and we'll cover this next.

Flowing Text Into Frames
The text in a frame can be independent of other frames, or it can flow between connected frames. Connected text frames are commonly known as threaded frames. Threaded frames can be on the same page, or on another page in the document. (Think of that magazine article that spans through several pages.)
To see for yourself how this feature works, create a new document using the default document preset and set the number of columns to two. Also, make sure that the Primary Text Frame option is unchecked (meaning it is turned off). Now follow these steps:
 |
|
 |
| |
-
On the new document, draw a text frame with the Type tool  that extends the length and height of the entire left column. that extends the length and height of the entire left column.
-
With the Type tool still selected, right-click (Windows) or Control-click (Mac) inside the frame and select Fill with Placeholder Text. The frame fills with dummy text.
-
Switch to the Selection tool  and shorten the height of the text frame to about half its original size. Observe that the out port icon in the lower right of the frame indicates overset text and shorten the height of the text frame to about half its original size. Observe that the out port icon in the lower right of the frame indicates overset text  . .
-
 Click the out port once. The cursor becomes "loaded" with the overflowing text (shown at right). Click the out port once. The cursor becomes "loaded" with the overflowing text (shown at right).
-
With your cursor loaded, click and drag to draw a frame in the right column. Make sure the text frame you draw does not extend all the way to the bottom of the column.
-
Observe how this new frame automatically fills with the overset text from our first frame.
|
|
 |
|
 |
 |
The out port on the first frame indicates that the text is flowing into another frame. |
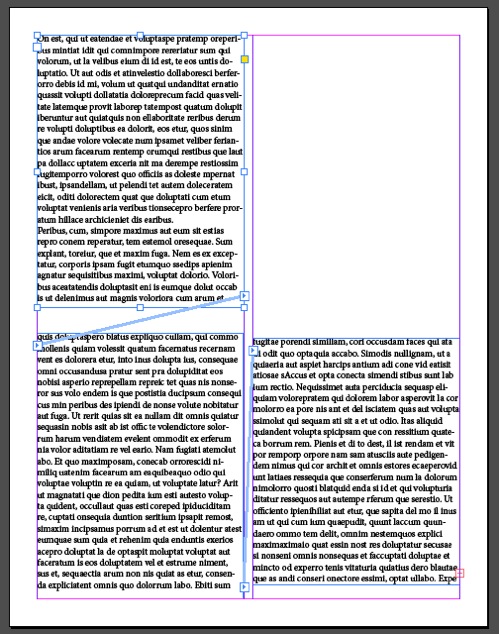
As a result of following the previous steps, you now have a couple of threaded frames. Here's where it gets even more interesting. With the Selection tool still active, click and hold the bottom control handle of the second frame you just drew. Drag it so that the last line of text is just visible. The frame's out port should indicate that all the text fits in the frame. We call this copy fit.
Go ahead and shorten this second frame back to its original size so the out port again indicates overset text .
Now, click the out port while holding down the Alt/Option key and draw another frame just below the first frame to the left. Notice that the cursor changes to display a semi-auto text flow icon:  . Hence, after you drew the frame, the cursor was still loaded. Cool! This means that we can keep drawing new frames to fill with the remaining text.
Draw one last frame below the one on the right, this time without using the Alt/Option key. It will fill with the remaining text. Note that because we aren't holding down the Alt/Option key, the cursor is not loaded after we draw the frame. If we didn't make our frame big enough to fit our loaded text, we can just continue to extend the control handles until we have copy fit.
What happens if we have to delete one of the threaded frames? Let's try it out by deleting the second frame; select the upper right frame and delete. Contrary to what you may have thought, nothing major happened. The text is intact and doing very well in the remaining three frames.
As you're working with threaded text frames, don't forget about the Story Editor, which you can access by selecting Edit > Edit in Story Editor. The Story Editor is a good way to refresh your memory about all the text you have available if you lose track of where it is among many different frames.
Now that we've looked at how to link different frames of text together, let's examine a different kind of link: the link between an image in an InDesign document and the original image file.
When you place an image in a document, you're in fact creating a link between the image itself and the InDesign document. Although you can alternatively embed an image—in which case the image becomes a part of your InDesign document—there are two major advantages to using the default behavior of linking images. First, the document does not become weighed down by images. In other words, you have a lighter file to work with. The second major advantage—and perhaps the most important one—is that you can edit and work with the image externally using whatever native application is necessary and then update the image in the InDesign document.
The image linking approach allows for parallel workflows where one person, usually the photographer or photo editor, will do the retouching and color correction of an image and the designer can work on the layout design. The designer will only need to update the image once it's ready. For this task we use the Links panel.
Meet the Links Panel
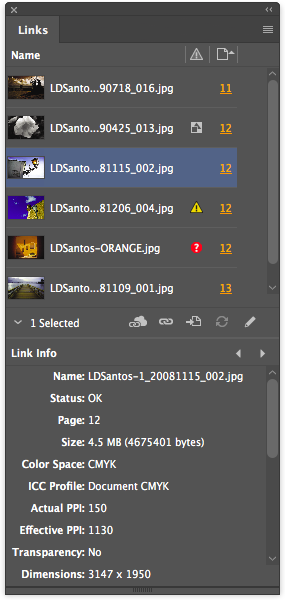
The Links panel is the command center for everything image related. You get a list of all the image files in a given document in the Name column. The next column to the right is where you can get a quick glance of the status of a link. Possible statuses include modified, missing, and embedded links. To the right of that you will find the page number where the image has been placed. Note that page numbers are actual clickable links to the page in your document.
|
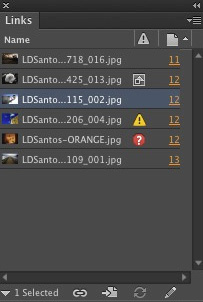
The Links panel lists all of your linked images, and it will indicate if something is missing or broken. |
At the bottom left corner of the Links panel, you will find an arrow. Click it to view the information for a selected link. This is the go to place when you need to know the resolution, color space, format, and other useful information about an object.
|
The bottom of the Links panel displays important information about the linked file. |
Managing Links
In some workflows it is common for multiple designers to work on the same project. For this reason, on this next walkthrough you will be using an InDesign document created by another designer to make the necessary modifications. But before this happens you will need to deal with one of the main issues that arises when sharing documents with your colleagues. I'm referring to links management.
I have a layout ready for you that needs some links management. Download the Lecture Three files and open the caribbean_BEGIN document. A prompt will ask you if you want to update the links; we're going to do that manually, so make sure you choose "Don't update links."
Now, open the Links panel (Window > Links) and try to identify which links may cause problems come printing time.
The second link tells us that the image is embedded with the embedded link icon  . This does not necessarily mean that it's wrong. It just means that we can't edit it because it is embedded in the document rather than linked.
Now check out the fourth link, the one with the yellow warning icon  . This icon indicates that the linked image has changed since it was originally linked up and it needs to be updated. If you hover the cursor over that icon you will see that you can update the link by double-clicking it, but we will use another method. Click the page number link to navigate to the problematic link itself. Now, click the Update Link button
  , which can be found between the Name and Link info areas.
The link is now up to date. Good job! Let's move on.
Do you see that red question mark icon  next to the "LDSantos-ORANGE" link? This means the link is missing, sort of like a broken image on a website. Let's fix this by telling InDesign the right place to look. Select the link name and to the left of the Update Link button, click the Go to Link button
  . Next, click the Relink button
  to the left of that. Browse to the Links folder found in your Lecture Four downloads and select the "LDSantos-ORANGE-2.jpg" file.
When you use the Relink command, InDesign replaces the link and keeps all the formatting you have applied to the graphic frame, including frame fitting options and transformations. This is why you won't need to resize the new image.
The last item on the agenda is to edit an original image file. Follow the next steps to accomplish this:
|
|
|
| |
-
Navigate to page 13 in your document.
-
Select the image at the bottom of the page.
-
In the Links panel, click the Edit Original button  . Notice that InDesign is sending the original image file to what your operating system determines is the native editing application for that type of file. . Notice that InDesign is sending the original image file to what your operating system determines is the native editing application for that type of file.
In my case, I have configured my operating system to open all JPEG files in Adobe Photoshop, hence the file opens in Photoshop. You can also use the Edit With command found in the Links panel flyout menu to specify the application you want to edit the link in.
-
Make any edits necessary (in this case, any edit you like) and save the file with the same name. (If you change the name, the link will be lost and InDesign will flag it as missing.) Observe that when you switch back to InDesign after making and saving the edit, the link is automatically updated.
|
|
|
|
|
The Links panel is your friend, and it will be very helpful for your workflow to be able to glance quickly at the panel and know what each icon represents. So here is a recap of all the different icons you'll see on the Links panel and what to do about them:
|
|
|
| |
- Embedded Link: Nothing wrong, just an indication that a link is embedded in the document rather than pointing to an outside file. This does mean we can't edit the item itself.
- Changed Link: The yellow warning icon tells us that a link has changed since it was originally linked. You'll want to update it using the Update Link button .
- Missing Link: This icon tells us that a link is broken. We'll need to go to the link with the Go to Link button , find the file we need, and click the Relink button .
|
|
|
|
|
Placing, Selecting, and Conveying
Back in Lecture 1, you learned about the Place command, which you used to place both text and image files. I kept it simple since you were just getting started with InDesign. But you've come so far along now that I think it's time to get serious with this feature.
You see, the Place command allows you to import more than one item at a time. For instance, you could select a number of images and place them in your document. You could do the same with text files, selecting several and placing them where needed, or you could select both image and text files simultaneously.
The beauty of this command lies in the Place gun, which is a special tool that allows you to preview the loaded files even before you place them on the page. So, when a text file is at the head of the Place gun, you will be able to preview the first few lines of text. You will also see a thumbnail for a loaded image.
Here's how it works:
|
|
|
| |
- Choose File > Place, and select multiple files.
 You now have your cursor loaded with the files and ready to place them. This is what we call the "Place gun." You now have your cursor loaded with the files and ready to place them. This is what we call the "Place gun."
- Use the up and down arrow keys to cycle through the loaded files. When you come upon a file that you do not wish to place, press the Esc key to delete it from the Place gun's "holster."
|
|
|
|
|
Wrapping Text
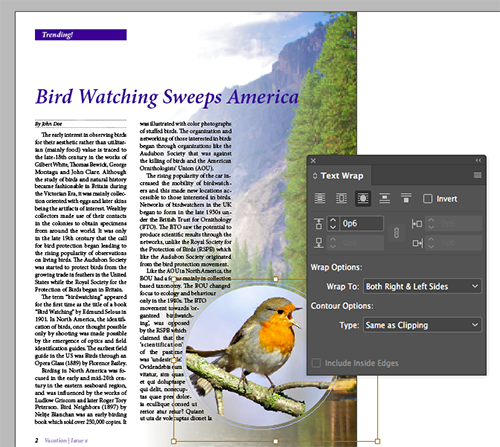
A very common layout technique is to have text wrap around an image on the page. This not only gives the page a little bit of visual interest, but it can also emphasize important elements on the layout. When using this feature the most important thing to remember is that the effect is applied to the image and not the text.
|
In this example, a text wrap technique is used on the page to the right to accentuate the info graphic. Layout by The Design Surgery, a creative agency based in London, UK.
|
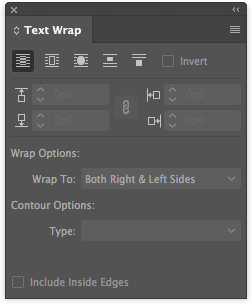
Let’s take a look at how we can set up a text wrap. First, we’ll call upon the text wrap panel by selecting it from the Window menu. At first glance we see that this panel is pretty straight forward. The first row for instance, includes different types of text wraps that you can apply to an object.
Among these you will find; no text wrap, wrap around bounding box, wrap around object shape, jump object, and jump to next column. While the first three don't require much explanation the last two might seem a bit abstract, that is until you try them out. Once you do, you'll find that the jump object will repel any text to the left or to the right of the text wrap object, while the last option will simply force any text to jump to the next column (if there's a next column to jump to.)
Choosing one of the text wrap options will make the panel come alive and other options become available. For example, you can now set the margins around the text wrap object or frame. If it’s a just a frame and you’ve selected the second option (wrap around bounding box) you can set spacing for all four sides.
So now we've covered how to manage images and text, but that's not all we can have in our document. To understand how everything fits together, we need a new definition for everything we've been working on so far and everything that's yet to come. And that definition involves objects. Objects can be just about anything, including but not limited to: text and graphic frames, images, shapes, and even interactive media.

|
Tabloid magazines are great examples of how designers use an abundance of objects (sometimes, OK, maybe an overabundance!) to give a layout style. (Image credit: dkpopnews.net) |
You learned a little about objects at the end of the last lecture, when you saw how to apply object styles to an image. In this section we'll tackle the business of organizing and manipulating objects for complete control of our layouts.
Arrange and Align Objects
Every time you draw a shape or place an image or text file on the page, behind the scenes InDesign is organizing everything by stacking each object on top of one another. This is called the stacking order. Each new object is placed in the front of everything else on the page. You can use various techniques to change the stacking order of an object.
 |
Each frame has a place in the stacking order. |
For instance, you can select an object and choose any of the Arrange commands found under the Object menu. Bring to Front and Send to Back are the two extremes and will either bring the selected object to the front of everything else or send it to the very back of the stacking order. On the other hand, by using the Bring Forward or Send Backward commands you will be moving the object one level up or down in the stacking order.
Open the "stacking_order.indd" document found in your Lecture Four downloads. Select the red frame with the Selection tool and choose Object > Arrange > Bring to Front. Observe that the red frame is now at the top of the stack.
With the frame still selected, right-click (Windows) or Control-click the frame. Now select Arrange > Send Backward. That's another way to access the stacking order. Let's try one more trick, this time by using the Control panel. The red frame should still be selected. In the Control panel, click the Previous Object button to the left of the fill color:

The pink frame should now be selected. This is a very good way to select objects stacked together.
Grouping Objects
Another useful way to facilitate the choir of working with many objects at a time is to group them together. Each group behaves like a single object and can be moved and manipulated accordingly.
In your current document, select all objects on the page by making sure nothing is selected and choosing Edit > Select All. Now choose Object > Group. Observe that all the objects are enclosed in a dotted frame indicating the grouping. Drag any of the control handles to transform the group.
To modify any single object inside the group, double-click it with the Selection tool. You have just entered a kind of isolation mode that will let you select and modify each individual object as needed. Double-click any object to select the group once again. To get out of the isolation mode, click outside the group.
Using Layers to Manage Page Elements
The stacking order is all well and good, but to truly organize elements, we need to use layers. It's hard to imagine what InDesign would look like without layers. Layers are at the heart of organizing layout elements and if used well can single handedly bring order out of chaos. Tidy layouts begin and end with the good use of layers.
Open the "caribbean_LAYERS" document found in your Lecture 3 downloads. Navigate to page 2 and observe how there are some images that are behind the tan frame. We'll fix this by making sure that all the images are on their own layer. Follow these steps:
|
|
|
| |
-
Open the Layers panel (Window > Layers).
-
Click the Create New Layer button  at the bottom of the panel. A new Layer 2 has been created. at the bottom of the panel. A new Layer 2 has been created.
-
With the Selection tool active, hold down Shift and select all the images in the current spread (pages 2 and 3). Observe a tiny blue square to the right of the Layer 1 name in the Layers panel. This square indicates that there are selected items on that layer.
 The actual selected items within the layer also have blue squares to the right of them, while items not selected have blank squares. The actual selected items within the layer also have blue squares to the right of them, while items not selected have blank squares.
-
Drag the tiny blue square next to Layer 1 straight up onto Layer 2. You now have a tiny red square indicating that the selected items have been moved to Layer 2.
|
|
|
|
|
In the screenshot below, notice that there is a red frame around each selected image. But most importantly, observe that the images that were hidden are no longer behind the tan frame. They have moved up in the stacking order. Therefore, anything you place on Layer 2 will be in front of whatever is on Layer 1.

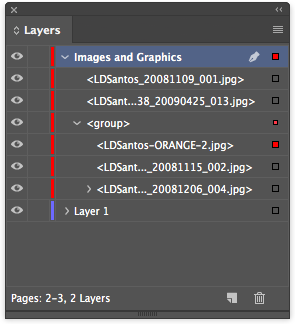
Working with layers becomes even more useful when we name them according to their content. In the Layers panel, select Layer 2, and choose the "Layer Options for 'Layer 2'" command from the panel's flyout menu. Change Layer 2's name to "Images and Graphics." Notice also that among the options available, you can lock, hide and even choose not to print the content on this layer. Click OK to accept the modifications.

Open the Images and Graphics layer and notice how all of the items within the layer are listed. There's also a strange looking object called <group>. Open this object, and you'll be surprised to find out that we can now select each individual object in the group. Select the first object of this group by clicking the Click to Select Item button (the little blank square) to the right of the item's name (LDSantos-ORANGE-2.jpg). Observe that the first image of the group is selected in the layout. Great work!
Still in the Layers panel, drag the item up until it is positioned before the <group> name. If you select the group itself in the layout, you will find that this item is no longer part of the group. Now, put the item back by reversing the steps. Isn't it so much easier to manage groups this way?
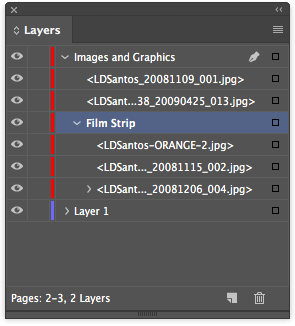
We'll do one last thing. Click the name <group> in the Layers panel. Next, click it one more time and wait a second or two until you can edit the item's name. Change it to "Film Strip," which is in my opinion a much more descriptive name for this group.
Manipulate and Transform Objects
Now that you understand how to manage and organize page elements you're going to learn to transform and manipulate objects. InDesign's drawing tools may not be up to par with applications like Illustrator or Photoshop, but they have plenty of power to bend objects to your will, and we'll do plenty of bending in this section.
First up are the transformation tools and features. You can apply transformations the likes of scaling, rotating, skewing, and even reflecting objects. In many cases you can do this with the Selection tool.
As a matter of fact, when you select an object with this tool, control handles become visible allowing you to scale objects. As you hover the cursor over the corners you will see a rotating tool temporarily active indicating that rotation operations are possible here as well. As you rotate an object, the Smart Guides and Smart Dimensions become active and begin to guide you in the business of transforming the object.
 |
The Smart Dimensions feature kicks in as soon as you start rotating an object. |
This guidance is all well and good, but there's a special tool for transformations such as this and it's called the Free Transform tool  . Hidden underneath this tool (hold it down in the Tools panel) you will find the Scale, Rotate, and Shear tools. However, the tasks performed by these can all be replicated with the Free Transform tool.
With the Free Transform tool you can scale and rotate as you normally would do with the Selection tool but if you add the Ctrl (Windows) or Command (Mac) key to the mix, you will have the power to shear an object as well.
The trick is to click a control handle and immediately after pressing the Ctrl/Command key for the shearing to begin. This tool works very similarly to the way the transform tools work in Adobe Illustrator. You will get different effects depending on the control point you decide to manipulate. Usually the top and bottom control points are ideal for this type of manipulation.
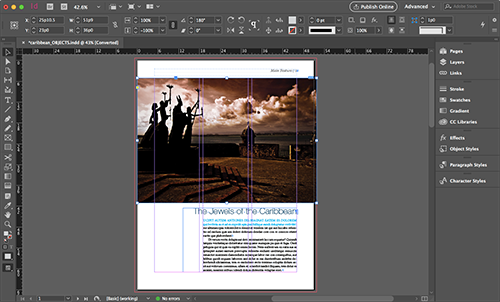
Let's explore other ways to manipulate objects, this time using the "caribbean_OBJECTS" document found in your Lecture 4 downloads. Navigate to the first page and select the image. You will flip the image horizontally. This flipping or reflecting can be easily accomplished by using the Control panel. Click the Flip Horizontal button  in the Control panel. This should be the result:
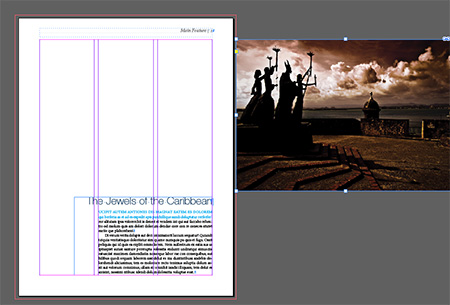 |
Oops, the image is off the page! |
In all probability the result is not what you expected, given that the image is now off the page and in the pasteboard area. The reason for this blunder is that the object's reference point was not set to the center. Whatever transformation we apply to an object will occur around the object's reference point. That said, let's make a couple of changes.
Use Ctrl-Z (Windows) or Command-Z (Mac) to undo the last action. With the image frame selected, set the reference point to the center. You do this by clicking on the center dot in the Reference Point widget in the far left of the Control panel.
Now that the reference point is set to center, let's try the Flip Horizontal command once again. Much better results this time, as you can see below!
 |
Notice that the "P" is flipped horizontally in the control panel alerting us that our element has been flipped from its original orientation. |