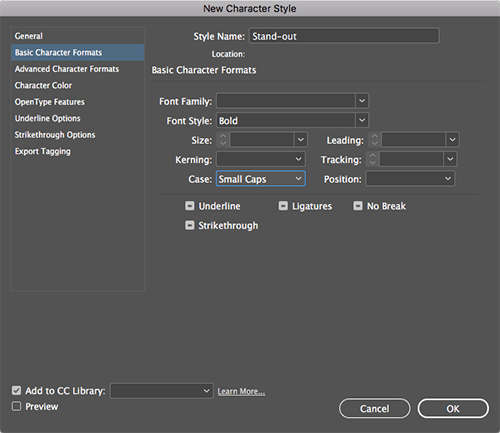
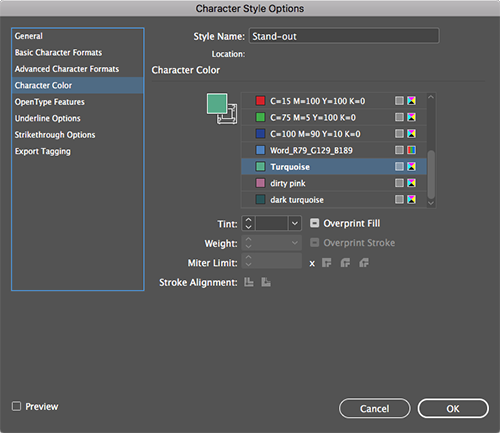
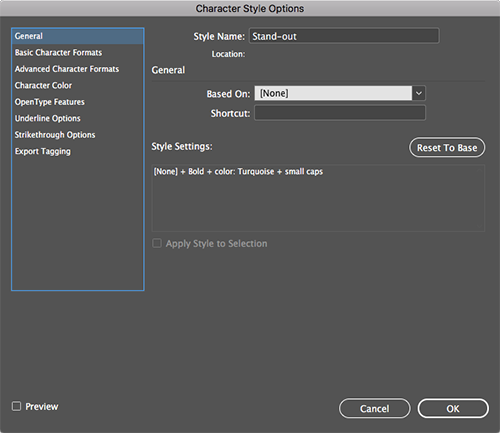
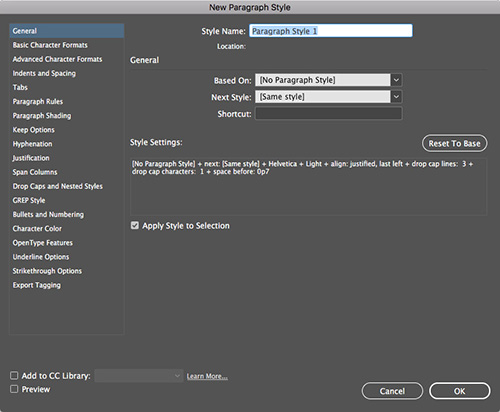
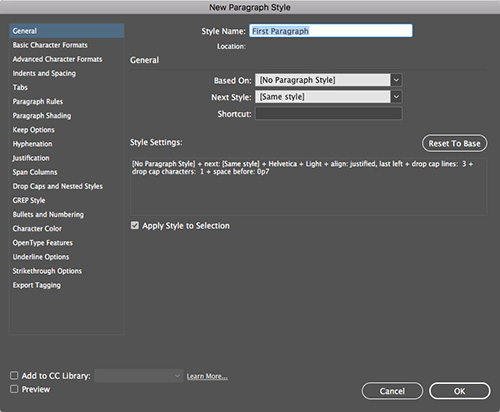
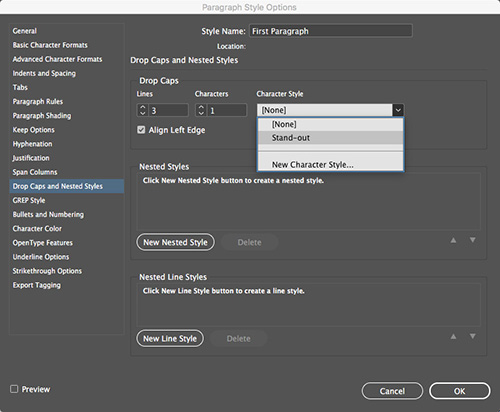
Now that we know how to edit and update our style definitions, we're almost ready to learn about two very special kind of styles. They are the cell styles and the table styles. But before we get into the nitty gritty of these, we need to know how to create tables in InDesign.
If you use Microsoft Word or Excel, chances are you're very familiar with tables. Tables are an excellent way to organize data and so they're often used for product lists, price lists, and other types of information display. We're going to use tables to organize and enhance the content of our documents.
|
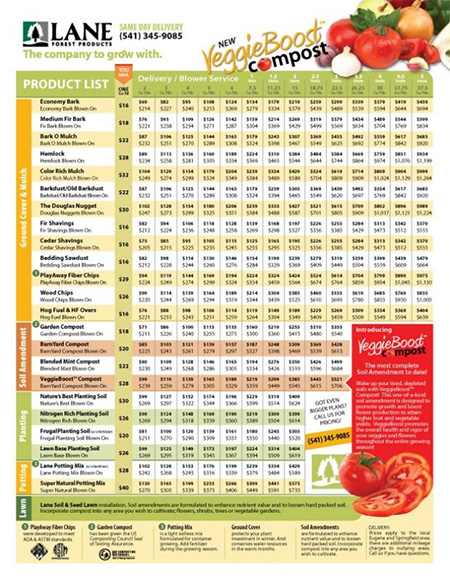
Tables are used frequently in price list documents, as in this example from a seed company by designer Josh Arguello, which uses bright, cheerful garden colors to match his client's brand. |
When it comes to tables, I don't see too many designers excited about the topic, but I think that once you learn about the possibilities and how easy it is to master the tools and features related to them, you will soon find yourself using them more and more, and who knows? Maybe you'll even come to enjoy using them.
Creating a Table
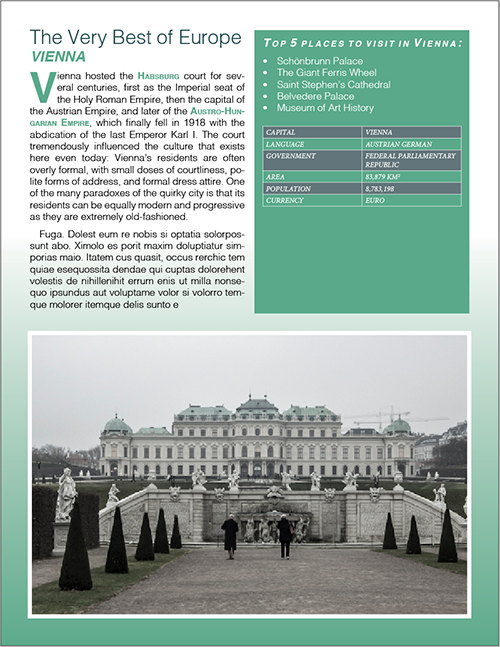
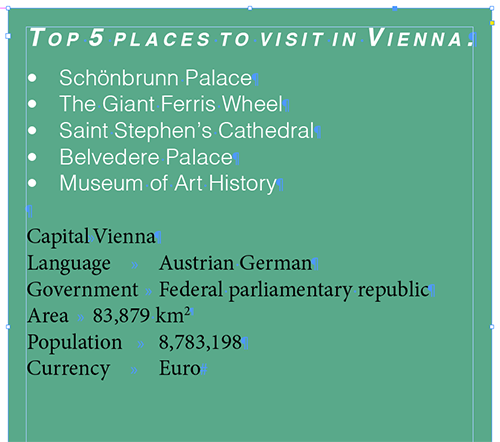
For the article we're working on, we have some very specific content about European cities that we need to present in the clearest way possible. The editor has included some important facts and insights about each city.
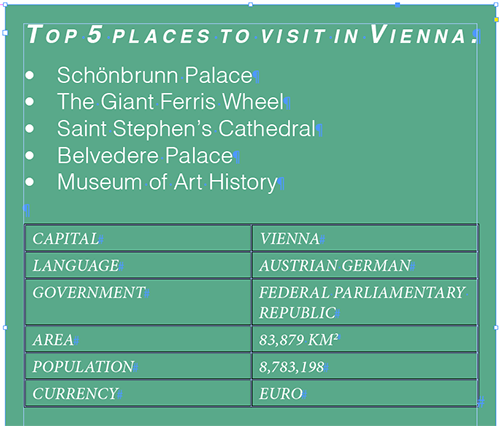
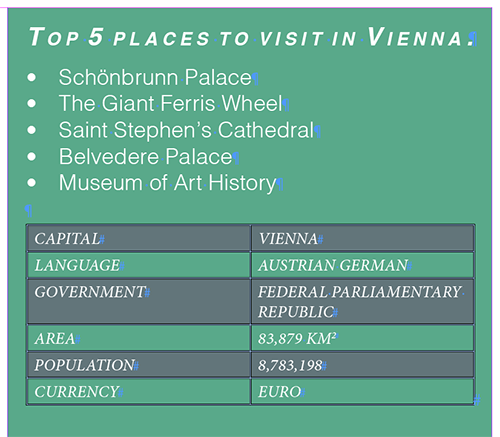
So we've decided that the best way to approach this chore is to create a table. But before we take on this task, we're going to do a very basic exercise so that you can see for yourself how simple it can be to create a table in InDesign. See below for a preview of what we're going to make!
|
We are going to make this fully formatted, slick table to provide the reader with important information about each city! |
There are two basic ways to create a table in InDesign. You can create a table by telling InDesign how many rows and columns it should have and letting InDesign figure things out, or you can convert text into a table. If I have to create a table from scratch—that is to say, if I'm not importing one from Word or Excel—I prefer the second choice.
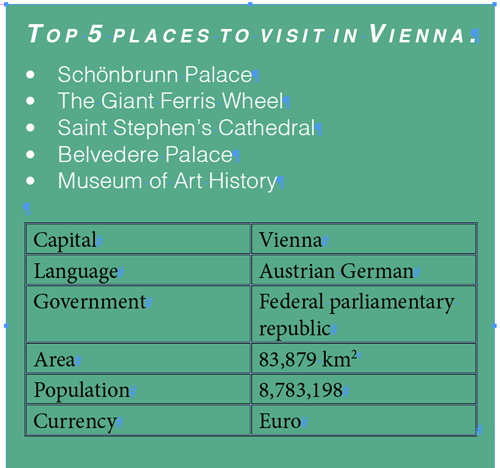
For the purpose of this demonstration, go ahead and open the "Lecture_3_table_start" InDesign document. Please take a look at page 1 and zoom into the text frame to the right to get a closer look.
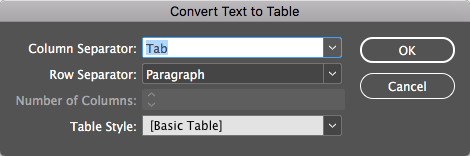
I have carefully written what will eventually become my table. Important to note is that I have placed a tab character after each column (by pressing Tab) and a carriage return (by pressing Return) to represent the table rows. We can tell InDesign to interpret this structure as it turns text into a table. Select all of the text and use the Convert Text to Table command under the Table menu.
This should produce the following:
Not so pretty yet, but functional and very easy to make! You can also modify the table structure organically by dragging the columns and rows as needed.
Formatting a Table
Now that you can create and modify the table itself, you're going to format a table on the layout. Our formatting will consist of two parts; formatting the text inside the table, and second, formatting the "look" of the table itself. Let's start with the first.
 |
|
 |
| |
With the Type tool active, insert the cursor inside the table, specifically inside the word "Capital". Next, click and drag down and diagonally towards the bottom right of the table. With this motion you will be selecting the entire table and its contents. In the Paragraph Styles panel, apply the "Table text reverse" paragraph style that I have already setup for you.
|
|
 |
|
 |
Observe that we have formatted the content of our table.
Now we'll format the table itself by using an alternating fills pattern. Alternating the colors of the rows makes the table content more readable.
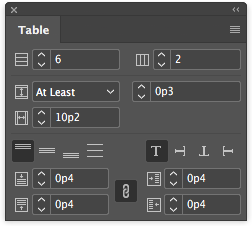
With the Type tool active, click anywhere inside the entire table. We'll now use the Table panel to make some modifications to the table design itself. With the table selected, open the Table panel by choosing Window > Type & Tables > Table. This will open the panel you see below, which I've labeled with the panel's various options:
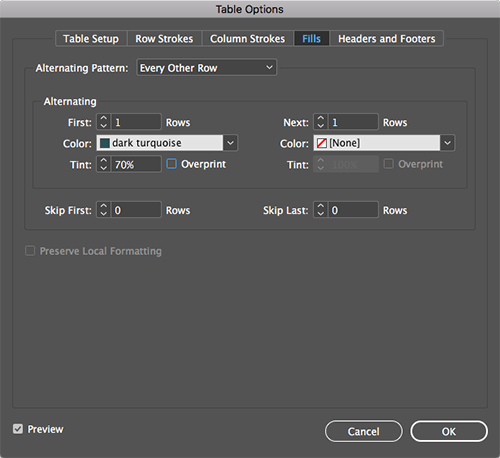
From the Table panel's flyout menu, choose Table Options > Alternating Fills. In the Table Options dialog, you can create an alternating fill pattern by defining two different colors or tints. We'll explore the use of a monochromatic scheme in this case by setting up different tints of the same color.
|
|
|
| |
Make sure you're in the Fills section and start by selecting Every Other Row for the Alternating Pattern option. Observe that you can specify the number of consecutive rows that will alternate. For the first row, select the "dark turquoise" swatch and set a tint of 70%. Turn on the Preview at the bottom left of the Table options dialog to preview the changes you're making in real time and make modifications until you're satisfied with the results.
|
|
|
|
|
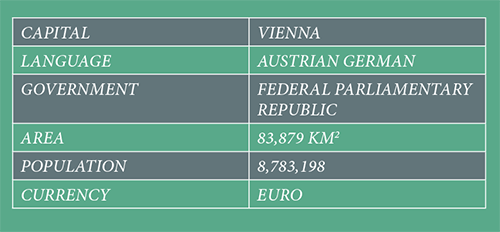
As a result you should have a properly formatted table complete with text styles and an alternating fill pattern.
While I'm mostly happy with the results, there's one thing that bothers me a bit. I say this because I feel the table and cell borders are too strong for the look I'm going for.
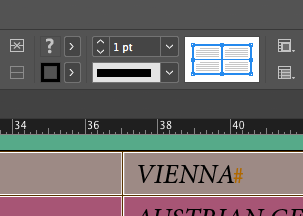
Select the entire table once again. In the Control panel, observe that you have a cell or table border widget that displays all sides of the selected table in a nice light blue color. The blue color indicates that all four sides of the table are selected and therefore ready to accept any modifications you may want to make to either the color or the weight of the stroke. The key to understanding this widget's behavior is to note that while the table "border" is selected, the inside cell borders are not, and are therefore shown in black. (This would be the inside horizontal and vertical lines.)
|
The top figure shows that only the table's outside border is selected. The bottom figure shows that all of the table borders are selected, including the borders around each and every cell. |
Hence, if you also want to modify the cell borders, as I do in this case, you must click on the vertical and horizontal lines inside the widget.
Since the effect that we're trying to achieve is to turn all the border strokes to white, on the table border widget, click both the horizontal and vertical lines (black in color.) As a result, the entire widget is blue and looks like the figure below:
The widget now shows that we have selected all the borders of the table and inside cells. Let's proceed to make the necessary changes. In this case, select a fill of paper and a weight of 0.5 points. As a result, all the table borders are now white. If needed, deselect the table to preview the modifications.
Creating and Applying Table Styles
Just as we moved from formatting individual elements of text to saving text styles, we're going to do the same for tables. As you can probably tell by now, styles are the life of the party, and you should use them whenever you can. I can tell you from my own experience that there's no other place styles help more than when it comes to defining the look of tables in a document. This is why I'm willing to spend a little more time setting things up at first, so that I can save myself frustration later on.
Whether you decide to use styles on tables is going to depend on how many tables you are going to have to format in a given document. For example, if you only have to do one table in a document, it might not be necessary to create styles, although some would argue that there are obvious advantages of always using styles. But you will definitely want to use styles if you have to work with and format many tables on the same document as we do in this case.
|
Table styles are so useful that some designers distribute or sell stock InDesign table templates, such as these fancy tables by Erick Ragas. |
There are two styles that apply to tables in InDesign: table styles and cell styles. Cell styles affect individual cells, and table styles affect entire tables. As with text formatting's paragraph and character styles, it often makes sense to use a combination of table and cell styles.
You should already have the "Lecture_3_table_start" InDesign document open, but if you don't, go ahead and open it now. After successfully completing the last section, you should also have a nicely formatted table. Navigate to page 1. The formatting of the table on this page determines the look and feel of all tables to be used in this document.
The first step is to create all the necessary cell styles. If you take a close look at the table itself you will see that there are only two types of formatting here. We have one formatting for all text inside the table and one formatting for all the body rows as defined by the alternating patterns command we used earlier.
Because of this, we only have to define one cell style.
|
|
|
| |
To create a cell style for the formatted table on page 1, select the first cell of the first row in the table. The cell reads CAPITAL. (Tip: With the Type tool selected you can click inside any cell and hit the Escape key. This will select the cell itself.) Open the Cell Styles panel by selecting Window > Styles > Cell Styles. From the Cell Styles panel flyout menu, select New Cell Style. Name your new cell style "Basic Cell Style." The Paragraph Style option allows you to specify the paragraph style that will be associated to whatever text is on the table cell. The paragraph style we used for all the table cells is called "Table text reverse". Therefore, select the said style from the Paragraph Style menu options (See figure below.)
|
|
|
|
|
Once you have created your style, you'll see that it has been saved for later use in the Cell Styles menu:
|
The cell style named "Basic Cell Style" has been created and is ready to be used. |
Now that you have created the cell style that you need, you're ready for the next step, to create the table style itself. As I mentioned, a table style defines the look of a table and can be independent of a cell style. This is why we created our cell style first, but don't worry: it'll all make sense when we put it together.
|
|
|
| |
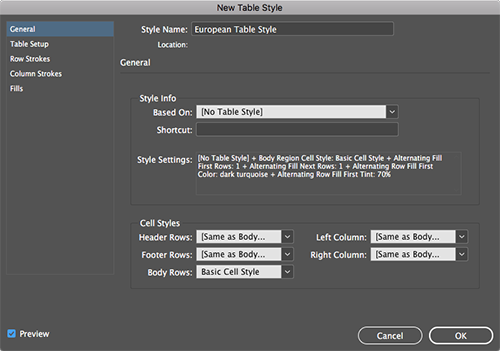
Select the entire table on page 1. Open the Table Style panel and from its flyout menu, New Table Style. For the Style Name, type "European Table Style." This is where it gets fun. Down at bottom find the Cell Styles section. This is where you tell InDesign the cell styles you want to use to define the look and feel of a table. Fortunately you have already created the cell style you need. (Note that you can set up cell styles for all kinds of things including header and footer rows. But to keep things simple, we'll only set the Body rows as shown in the figure below:
|
|
|
|
|
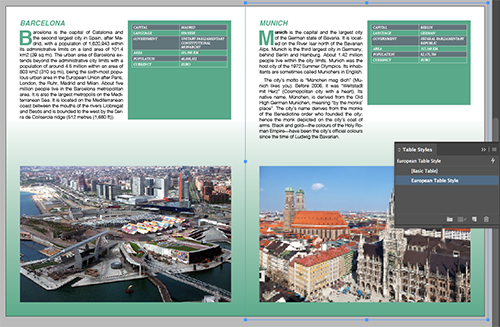
Now, let's test this style. Go to page 2. Convert the text on this page to a table (using the technique you learned earlier.) Click inside the table with the Type tool and apply the table style you just created ("European Table Style"). The results will amaze you. Repeat these steps to format the table on page 3 as well.
Object Styles
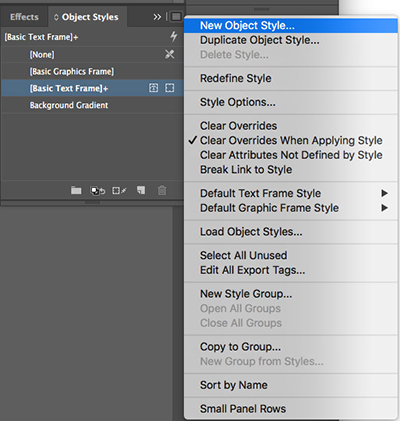
Now that you know about cell, table, paragraph and character styles, we'll end this lecture with a look at the final type of styling you'll learn to use vigorously: object styles. Object styles are a very powerful ally as they control not only how the frame looks but what's inside it. Let's create a simple object style. Navigate to page one and select the background frame. That would be the one with the nice gradient we created back in Lesson 2.
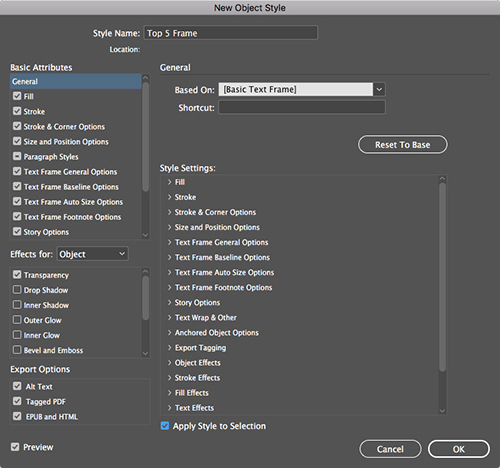
Now we call upon the Object Styles panel, which we can find under the Window / Styles menu, and finally select New Object Style from the panel's flyout menu. Because we had a frame selected InDesign copied the formatting applied and used it to define this style. Note that there's an impressive list of attributes to the left that we can tweak to our heart's content. Feel free to explore these later on and become familiar with all that's available. For now, I'll call this style, "Background Gradient". Follow the next steps to finish the task:
|
|
|
| |
Click OK and you will see the new Object style in the list of styles available to you within this document. With the selection tool active, click on an empty space within the pasteboard to make sure nothing is selected. Select the Rectangle frame tool and navigate to page two. Draw a rectangle on page two to create the background as you did on page one. With the newly created rectangle selected apply the Background Gradient object style you just created. Don't forget to send the frame to the back by right clicking and choosing Arrange / Send to Back.
|
|
|
|
|
Now that wasn't so hard, was it?
Object Height, Width Styles
The latest InDesign update (2018) allows you to specify the size and position of an object, therefore automating the process of resizing images and making sure everything is nice and tidy across your layout. Here's an example.
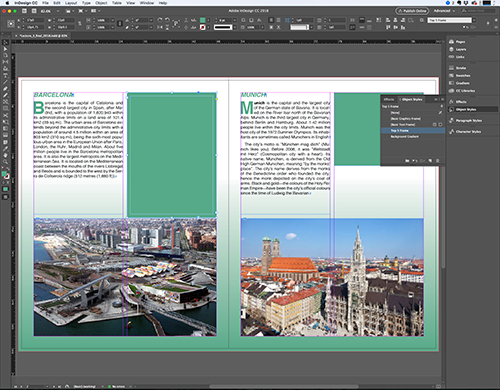
With your document still open, navigate to page one, and select the green text frame (or container) of the "Top 5 Places to visit in Vienna." Grab the bottom handle bar and pull down until the bottom of the said frame is flush against the bottom image.
In the next few steps you will create an object style based on this frame that will include information, not only about how it looks, but also about its size and position.
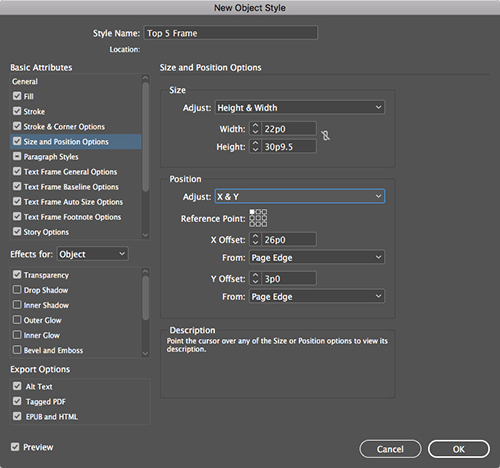
Do you remember how to create a new object style? Go ahead and create one based on the frame that you just modified. Name the new Object Style, "Top 5 Frame."
Because the frame was selected before you chose the New Object Style command, the New Object Style dialog displays a list of all the attributes that were copied from this frame. Now, select the Size and Position Options to the left of the dialog box. On the right, you will see two options that will need to be turned on for the magic to occur. The first is Size. Make sure you select Height & Width from the Adjust menu. For Position, select X & Y. Notice that you can fine tune these setting to make sure InDesign remembers exactly what you want about the object's size and position. But for the sake of clarity, we'll keep it simple and only make the described modifications.
There's one last step to do before we commit these changes. Go to General under Basic Attributes to the left and at the bottom right, make sure that Apply Style to Selection is turned ON.
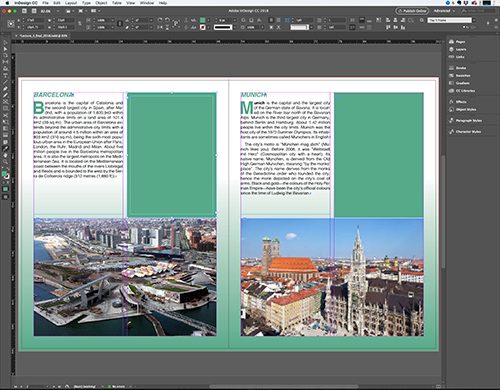
Now it's time to see if all the hard work paid off. Navigate to page 2. With the selection tool active, select the green frame to the right of "Barcelona." Mosey on down to the Object Styles Panel and select the "Top 5 Frame" object style. You will notice that the frame has expanded to fill the length of the column. Pretty neat!
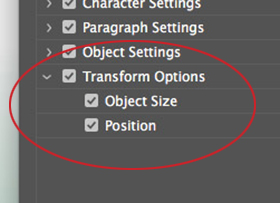
Finally, know that the eye dropper tool now has the ability to pick up an object's size and position information and paste it on to another object. There's one caveat though. You must turn on this feature, as it is off by default. Here's how to do it:
To see it in action, go ahead and click the frame that you modified a minute ago. Do you see how the eye dropper fills up? This indicates that all of the formatting attributes from that frame were copied and "sucked up" by the eye dropper. Finally, click inside the green frame on page 3. That would be the one next to "Munich", and there you have it!
When you combine text styles with object styles, you can take full advantage of InDesign's workflow automation capabilities. In this Lecture we've covered five of the major types of InDesign's styles. Truth be told there are more than five if you count things like TOC styles and document and PDF presets which are at their core a form of styles. That said, we've covered the ones that you will use the most in your InDesign adventures. As a matter of fact, if you're able to master these five types of styles you’ll be well on your way to becoming an InDesign master.