Here's how I prepared the cityscape as a seamless image for use in
my fireworks page.
Offset Filter, Gradient Editor, and Clone Stamp Tool
Upon bringing the photograph into Photoshop, the first
thing I did was use the Eyedropper tool to pick a dark color from
the nighttime sky as my foreground color. Then I switched to the Gradient
tool and selected the Foreground to Transparency setting
in the options bar (the second option from the left in the top row).
 |
Click the gradient ramp in the options bar (when
the Gradient tool is selected) to reach the Gradient Editor. |
Next, I created a gradient on a separate layer in Photoshop that makes
the top of the graphic so that the fade to transparency happens about
halfway through the image, like so:
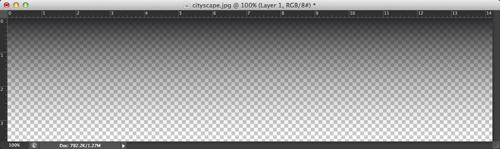
This technique allows me to set the background color in the Web page
to match the top of the graphic for a seamless transition between the
Web page and the image.
Speaking of seamless, the next step is to work on the cityscape itself.
I want the landscape to appear as seamless as possible. This means
that when the image starts to tile from the left to the right, one
can see when the image starts to repeat. Much like with wallpaper,
you don't want to see a pattern—but rather see the entire image.
This is a cool trick I picked up a long time ago: Use the Offset filter.
It comes bundled with your copy of Photoshop. Select Filter > Other > Offset to
bring up this dialog:

Here, I set the Horizontal offset to 600 pixels and left the vertical at
0 and clicked OK. This allowed me to easily see what would happen
if I set the image as-is, to tile in the Web page.
To fix the seam, I start using Photoshop's Clone Stamp tool and then work on copying parts from one side to another of the
photograph's
edge.
It's a bit of an art form and each image is different. Also, the Clone
Stamp tool takes some time to get used to, but you should be able to
have a passable bridge between both sides of the image.
When I'm done, I have three layers in my Photoshop file: the nightfall
gradient, the copy of the cityscape, and the original cityscape in
the Background layer, in that order.
Note: The Background layer is a locked file that I use as a backup
in case I altered the copy of the cityscape in some wrong way. That
way I can easily have a fresh copy of the cityscape by duplicating
the Background layer.
With my cityscape digital imaging done, I export the image as a JPEG
so it's ready to use on my page. Select File > Save
for Web (CS5 users, select File > Save
for Web & Devices) to
bring up the dialog and save the file.
When your image is done, head back to the exercise to work on your
page.