Flash Basics| Flash Basics


Course Developer: David Witt
Instructors: Boris Margolin, Geoph Essex
Original content by: Luke Harms
Editors: Margaret Penney, Tara Mackay, Rachel Sokol


David Witt

Hi there! Flash is hands down the best tool for creating animation and interactivity, but I'll admit it can be intimidating to learn. Throughout this course, I'll introduce you to Flash essentials with fun, hands-on projects. You'll draw, animate, and lots more... ready to go?

Flash Basics

Your Brain, on Flash. Ready for a mind trip? Click here to view the animation in a new window. If you can't see the animation when you click you will need to download a recent version of the Flash plug-in from Adobe.com.

Welcome to the wild and wonderful world of Flash! Unless you're part of the tiny fraction of a percent of Web users who use "text-only" Web browsers, you've seen Flash used in some form or fashion, in many places around the Web. From wicked animation to advanced interactivity to fully interactive rich Internet applications, Flash is the choice for creating interactive multimedia and animation for the Web.

And don't let anyone worry you about compatibility issues. By a wide margin, Flash is the most installed browser plug-in; 99 percent of all browsers on the Web today have one of the versions of the Flash plug-in installed. The future looks even brighter, as Flash's acquisition by graphics/publishing powerhouse Adobe has opened it up to even greater acceptance and innovation.

You've probably been drawn to Flash by one of the many amazing animations or interactive multimedia applications created using it, and you're here to try your hand at creating some Flash pieces yourself. I'm here to be your guide, to help you build a foundation for the future.

In this lesson, you can expect to:

Explore some of the main design applications for Flash through real case studies.
Discover the differences between bitmaps and vectors and the advantages of vector-based animation.
Learn the benefits of using Flash over other animation options.
Get familiar with the basic elements of the Flash interface.
Explore tools and techniques for drawing images in Flash.


Adobe.com's Showcase area is a great resource for exceptional sites built in Flash.


ActionScript is the programming language of Flash and it uses similar syntax to JavaScript.


The code of a vector image is a set of geometric equations for the shapes in the image.


Vector images can be scaled to any height and width without affecting the file size.


For special effects, bitmap images like photos can be incorporated into Flash.


Welcome to Flash!


The best Flash work looks smooth and effortless. To get to that point, you need to first spend hours practicing your craft, much like a star basketball player.

Learning to play basketball is a good metaphor for learning Flash; while the star forward's twisting, acrobatic shots are the stuff of SportsCenter highlights, it is the fundamentals that win championships. The great players have all put in thousands of hours working on their free throws and 10-foot jump shots.

Someday, I want you to create the Flash equivalent of the windmill slam dunk, which is why in this course you will be working on the fundamentals of Flash. Master these basics, and you'll soon be ready to take greater leaps with Flash!

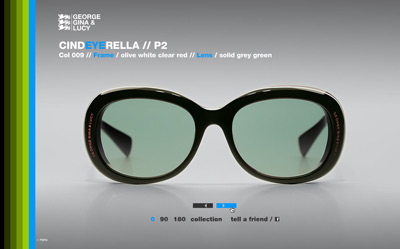
George Gina & Lucy is a company that uses Flash for exciting and novel navigation of its eyewear collections. Explore the site to see different types of navigation and user interaction with Flash.

PC and Mac: One World

One of the beautiful things about Flash is that it is cross-platform. Not only does a Flash movie (SWF) play on both Mac and PC, the original native authoring file (FLA) can be opened on both Mac and PC. This is an incredibly handy feature, and one that allows a Mac user like myself to exchange files with students, friends, and clients who are PC-based!

The screenshots you will see in this course are from the Mac version of Flash CS5. PC users fear not! The Flash interface is the same on Mac and PC, and the interface is updated to share a common appearance with other Adobe Creative Suite components. A consistent appearance across all Adobe software helps users work more easily with multiple applications.

The methods taught in this course will work with Flash CS4 and CS5. In most cases, the instructions are the same, but in some instances, I have provided separate notes for different versions.

Downloads: All of the working files for this course are found in ZIP archives in the course downloads area, organized by lesson. Click to download them onto your computer, and then double-click to unzip them into folders of individual files.

The Interactive Design Tool

When you're starting off learning any design tool, it's a good idea to consider its applications: What is it used for? What is its core purpose? On your Web travels, you've probably seen many examples of excellent work created with Flash. In fact, in many cases, you might not have even realized you were navigating a Flash interface. Let's explore some of the main options for Flash designers. We'll look at some projects and I'll explain why Flash was the best tool for the job.

The Flash Site

Tired of coding and tweaking HTML? Today, you can forgo the traditional Web development process by creating your entire site in Flash. The majority of Web users are easily able to view Flash sites, and building in Flash presents a number of advantages over HTML or XHTML. Flash sites download faster than many (X)HTML sites, they may include more animation, and of course, they can be programmed with much more impressive levels of interactivity.

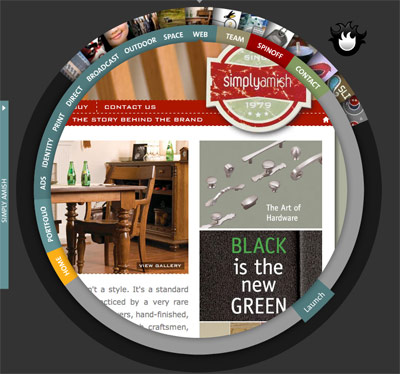
Spinlight is a print and interactive agency in Illinois that specializes in design and marketing in various media, including Flash. The Flash campaigns that come out of this studio, and the studio's own Flash site, prove to be conceptually strong, visually captivating, and highly interactive.

If we take a look at the site for agency Spinlight, we see a number of the nifty tricks of Flash being used to create an exciting Web design: the spinning navigation, the quick loading of complex graphics, a highly interactive environment, and most importantly, a nonlinear site with no beginning or ending.

Just as Flash can be used to create an entire site, it can also be used for individual elements of interactive design: navigation bars, buttons, and mouseover effects. Many "HTML sites" actually have Flash-enabled navigation or other page elements.

Why so? Well, Flash allows the designer to go beyond simple rollover effects, and create complex effects and animations that add a "look and feel" that can't be matched in HTML-only sites.

That's another advantage of Flash: graphic-intensive sites with lower file sizes than their HTML counterparts.

Splash Animations

One of the most popular uses of Flash is to create animations that play when users arrive at a Web site for the first time, called splash pages. Done well, splash page animations evoke the visual language of movie credits. An artful, brief animation with text and graphics creates a drama and a storyline around a company's name, tagline, products, and services. It communicates the company's branding and gets the user excited about visiting the site.

Later in the course, you'll make one for yourself! We'll discuss in detail the underlying philosophy and design choices that go into making a splash page through the case study created for the International Basketball League.

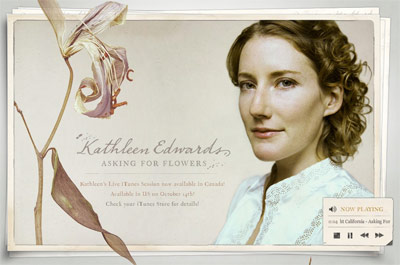
Click here to see a splash animation for singer/songwriter Kathleen Edwards. It creates a dramatic entry point with image, animation, and music that conveys the artist's attitude.

Interactive Ads and Games

Who said banner ads are dead? Now, more then ever before, Flash is used for all sorts of Web ads. The banner ad is still the dominant ad medium for the ever-expanding Web, and a sophisticated animation can go a long way towards intriguing the jaded public.

Flash is perfect for creating banner ads because the small file sizes make for quick downloads, while still allowing for more complex animation than the old-school animated GIF. Beyond that, Flash enables user interactivity, allowing for boring banner ads to become immersive, interactive experiences and mini-games!
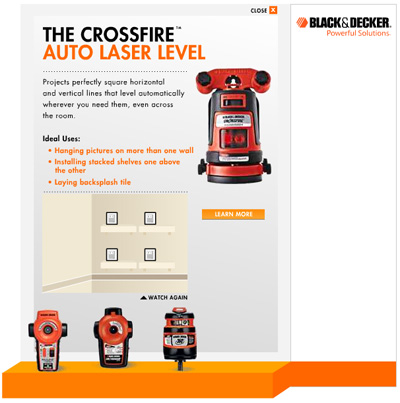
Click the image above to see a Flash banner ad created for Black & Decker (MRM Partners). In this banner ad, the content folds out to fill the screen, and animations detail step by step instructions on how to use the three products.

Flash likes to entertain as much as it likes to work, and there are hundreds of Flash-powered games and fun interactive experiences on the Web. On top of its graphic capabilities, Flash is powered under the hood by ActionScript, a full-on programming language that's built into the Flash authoring environment.

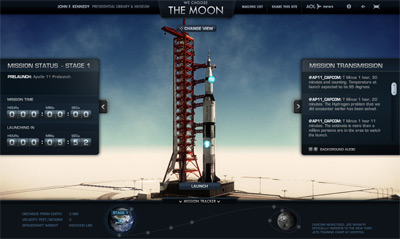
Domani Studios created We Choose the Moon for to commemorate the Apollo 11 moon mission. The site recreated the mission precisely 40 years (to the minute) from the actual Apollo 11 mission, including rocket takeoff.

Flash games and applications are created using a mixture of Flash motion effects and ActionScripting. Generally speaking, more ActionScript makes a Flash piece more powerful and smaller, but at the cost of being more complex and time-consuming to create—something to keep in mind for the future! While you won't be learning how to write ActionScript code for games in this basics course, we'll build a firm foundation for doing everything we've just discussed. So, on with the lesson, and back to basics...

Flash 101: Why Flash?

Back in the late '90s, in the early days of the World Wide Web, Internet bandwidth was limited and connection speeds were very low (these were the dark days of the 28.8 or 56K modem, and broadband was still a future dream for most people). Also, computer processor speeds were very slow, compared to today's models.

FutureSplash, the ancestor of Flash, was originally conceived as a low-bandwidth animation and multimedia tool, designed to take advantage of vector graphics to achieve small file sizes, and therefore shorter download times. To make more sense of this idea, let's take a look at the two main types of computer graphics.
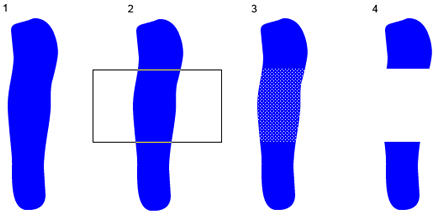
Bitmaps vs. Vectors

A bitmap is an image made up of tiny squares, or pixels. Every pixel is contained in the graphic file. For example, an image taken with a digital camera is a bitmap image. Today, the most popular bitmap image file format is JPEG, or .jpg if you want to use the file extension.

When enlarged, you can see the little square pixels that make up the image. Each pixel has a color assigned to it.

Hint: It's good to memorize the different file type extensions (the three characters after the file name and dot) so that you can tell what format a graphic is in just by looking at its extension.

Photoshop is the most well-known program for editing or creating bitmap image files, and there are many other programs that perform similar functions. For Web graphics, Photoshop and Fireworks are both popular.

Unlike a bitmap, a vector image doesn't contain information about pixels. Instead, a vector file uses mathematical equations that instruct the computer how to "draw" the image onscreen. So instead of describing where all the pixels are in a circle image, a vector file describes the equation that creates the circle. Illustrator and CorelDRAW are well-known vector drawing programs.

Vector images tend to be non-photographic, or line art images, and they tend to be small. For example, an image of a circle filled with a color or gradient can be drawn as a vector graphic in less than 5 kilobytes (5 kB).

Additionally, vector images have another big advantage in that they can be scaled to any size without increasing file size or losing clarity. Bitmap images, on the other hand, do take up more memory at larger sizes, and can suffer from the jaggies if they are scaled up.

On the left, a vector image of a logo at 100%, crisp and smooth. The logo on the right is the same image at 200% and witness the difference: none! That's the beauty of vector files; they can be resized and altered over and over without losing a speck of quality.

So, for less complex graphics, vector images can be much smaller than bitmap images, and can scale more efficiently. However, it's an old myth that vector graphics are always smaller than bitmap images—the more complex a vector image is, the harder the computer has to work to draw it. While it is possible to vectorize a bitmap image, the result will often be so complex that it becomes larger than the original bitmap image!

Flash vs. GIF Animation

So what does this all mean for Flash?

In the early days of the Web, GIF animation was the standard. GIF animations were bitmap graphic animations, set to the lowest common denominator; their sole advantage was that they could play in the browser without a plug-in.

However, GIF animations suffer from bitmap size issues; any animated GIF larger than a banner ad quickly becomes huge, and more complex graphics cause the same problem, so GIFs are really limited in what they can do.

Flash, on the other hand, because it's vector-based, and has state-of-the-art file compression, quickly outdistanced GIFs as the preferred way to animate for the Web. Today, GIF animation is still around, but its popularity is very low, and getting lower...

The Ubiquitous Flash Plug-in

The Flash plug-in been included with most new browser downloads since 1999, and many devices come bundled with Flash, making the Flash plug-in the most popular browser addition of its type. In fact, according to Adobe, upwards of 99% of users are able to view Flash content.

Years ago, Flash was often regarded as an esoteric addition to a site, unnecessarily complicating matters. Nowadays, with the penetration of Flash into almost every browser, this concern is greatly diminished.

Of course, there are people who don't like Flash, and have either uninstalled it or surf with it turned off. While this may be incomprehensible to you and me, it is a reality that Flash is an add-on—for this reason, sites that are purely informational and need to be viewed by as wide an audience as possible (think your local elementary school's Web site) are best done in basic (X)HTML and CSS.

But for graphic impact and interactivity, the only real competition for Flash today is DHTML. DHTML interactivity is achieved using XHTML, JavaScript, and CSS, and can be authored with software such as Adobe Dreamweaver (an application used for Web layout). The main advantage of DHTML is that users do not require a plug-in. But there are many drawbacks to DHTML as well.


DHTML vs. Flash Comparison Chart

1. Images are still bitmap JPEGs and GIFs and not as small as those created with Flash.

2. There can be cross-browser (Internet Explorer vs. Firefox, for example) issues when developing DHTML. There are none with Flash.

3. It can be more difficult to develop complex interactivity with DHTML than it is with Flash.


A Flash Tour
Introducing the Interface

OK, now that you've heard all about the magic of Flash, let's dive into it. Click on your Flash application to open it up. Go to File > New to open a blank document.

You'll be asked what kind of Flash file you'd like to create, so select "Flash File (ActionScript 2.0)". We won't use much ActionScript in this class so we're not going to jump ahead to ActionScript 3.0 here.

The Flash interface

The first thing you'll notice is an abundance of areas filled with tools and settings. Like Photoshop and many other applications, Flash has many different panels that can be opened or closed within the program and dragged around at will. If you're not careful, your desktop can look like this:

Too many Flash panels = panel pandemonium.

While all of these panels provide access to different functionalities within Flash, some are definitely more important than others. To start, we are going to focus on the big four panels: the Stage, the Timeline, the Library, and the Properties panels. Later we will go into more detail about each of these, but for now, here's a basic overview.

The big blank space you see below is the Stage, and below that is the Timeline:

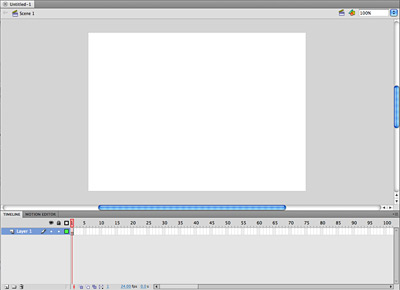
All the world's a Stage.

This is where the visual layout of a Flash movie occurs. You can think of it as the screen for viewing a Flash piece, which can be set to any size you desire. It's one of many metaphors that Flash borrows from the theater, film, and traditional animation. Flash animations, for instance, are usually called movies. Each movie is composed of a series of units of time called frames. The Stage you see above is where it all comes together; you can compose each frame of your movie by drawing directly on it, importing artwork, and moving it around to create the optimal composition.

Below the Stage, you can see the Timeline extending like a ruler from left to right. Just as it sounds, the Timeline helps you edit and manipulate the movie frame by frame. The Timeline has been around since the beginning of Flash and is at the heart of the Flash design metaphor. When a Flash movie is played, each frame is displayed, one after another, as the playhead moves from left to right down the Timeline. Just to add another wrinkle, you can also edit and arrange individual frames as layers, or have many layers running concurrently as part of the same Timeline. More on layers later.

The Library is the backstage area where the cast of your movie sits, waiting to be put onstage. The Properties panel is where settings for your document or any selected object can be viewed and set. If you don't see the Library or Properties panel, choose them from the Window menu (Window > Library and Window > Properties).

Like Photoshop, Illustrator, and other graphics programs, the Tools panel (right) is where you'll find the tools for selecting elements on the Stage, and for drawing shapes and adding text to the Stage.

We'll be going more in-depth into each of these major Flash interface areas later in the course, but for now you've got an idea of what they do.

File Formats and File Extensions

If you can't see the file extensions when browsing through files on your computer, go to your computer's System Preferences (Mac or PC), and turn on the option to view file extensions. This is important, because it helps you identify what kind of file you are dealing with.

The file you have created is called a FLA and is the native, working file in Flash with extension .fla. The second kind of Flash file, called a SWF after its file extension, .swf. This is the movie, the executable output. A .swf is compiled, meaning that it is the final form and cannot be edited. In other words, this is the final version that will be played for the final audience. It's key to remember the difference.


FLA (pronounced "flah") = the native file or authoring document—where you construct and edit the elements of your Flash movie.

SWF (pronounced "swiff") = the export file or executable output—the actual movie the audience will see on the Web.


The moral of this story? Always keep one copy of each file type on a project. If you save your working file as a SWF and don't keep your FLA, you are up a creek, as the working file is lost. Conversely, always remember that you cannot publish a FLA on the Internet.

Keyboard Shortcuts

All of Flash's functionality can be accessed in two different ways: from the pull-down menus across the top of the Flash application, or by using key commands, also known as keyboard shortcuts.

Key commands are one of the secrets of the pros, simply because they are much faster to execute. When beginning to learn Flash, you need to go slowly in order to find where things are, but later on you'll want to use key commands as much as possible because they will help you work much faster. Take it from me, you'll be spending a lot of time on Flash as it is, so learn the key commands and save yourself some valuable time!

Throughout the course, I will be giving you key commands to execute important Flash functions. An important distinction is that whenever I refer to the Ctrl key on the PC, the Mac equivalent is the Command key.


Memorize the key commands to work faster. You can find a Flash keyboard shortcut cheatsheet here.


Use the arrow keys to "nudge" or "walk" objects to exactly the place you want them.


Preparing Your New Flash File
Document Settings

OK, back to our Flash file. It's important to start off on the right foot in Flash, and this is done with some basic settings for your FLA. Every time I create a new Flash doc, the first thing I do is set the Stage size in the Document Settings (Modify > Document). (CS4 users, note that this dialog is called Document Properties.) You'll see that the size is set to 550x400 pixels. You can also see this size in the Properties panel.

Now you're ready to learn (and use) your first keyboard shortcut: Ctrl+J for PC users, Command+J for Mac users. This opens the Document Settings dialog without having to go to the Modify > Document menu.

The document should be set to 800x600. While your final Flash piece may end up a different size, 800x600 is about as large as you'd want a Flash site to be. Working with these dimensions will help give you a feel for proportion and how big to make your artwork relative to the size of a standard Web site.

Also in the Document Settings dialog, you have the ability to set the background color of your Flash piece. To do so, click and hold the color swatch next to "Background color." Then you can drag over one of the 256 colors in the basic palette, or enter your own hexadecimal color value (such as #006699) inside the color value field at the top of the palette.

The third important option to set here is the frame rate; this is the speed at which Flash moves through the frames in your movie. In the past, this was often set to 12 fps (frames per second) or slower, due to the slower speeds of older computers. Today, that's much less of a concern, so a better rule of thumb is to set your frame rate at 24 fps, which is the standard rate for video playback. You can set it up to 30 or perhaps 36 to speed up your animations, but at a certain point it won't go any faster and can conceivably move slower, so 24 fps is a good default.

Navigating the Work Area

Another thing I always do upon first entering into the Flash editing area is maximize my Application window.

Time for our next keyboard shortcut: Ctrl/Command+Shift+W, which switches the view from "pasteboard" to "no pasteboard" and can be also be found under View > Pasteboard.

When you use this command, you will see that the Stage moves from the center to the upper-left corner. Look at the upper left corner of the interface and you will see the scale control showing that you're currently viewing your work at 100%. For now, let's work at 100% in the "no pasteboard" mode with the Stage in the upper left. If you try this command again you will see that the Stage moves back into the middle.

Now that you've set up your work area, let's start working with Flash's drawing tools...

Drawing with Flash

Metaphors comparing the computer environment to the real world are helpful, but often woefully inadequate, especially in the fields of art and design, where each medium has its own unique strengths. What we call drawing on the computer has little or nothing to do with what Rembrandt or Da Vinci did with pencil and paper. While you can learn how to "draw" effectively on the computer, it's always important to remember the difference.

Rather than trying to emulate the Old Masters in creating realistic drawings, my advice is this: Keep it simple, and try to find ways to create an impression of the thing or idea that is being represented, rather than aiming for realism.

Back in the early days of the graphical user interface, somebody famously remarked that drawing on a computer using a mouse was like trying to draw with a bar of soap. Today, many computer artists and designers have the option of using a drawing tablet and pen. While these are great tools, and greatly expand the possibilities of what you can do, they should be be looked at as nice luxuries; learning to "draw" with the mouse should be a basic skill.

Flash has some good drawing tools and functionality, similar to those in Adobe Illustrator. Once you get used to working with them, Flash's drawing tools can be very effective.

Before we start, it's important to understand this: Flash has many surface similarities to Photoshop and Illustrator, but it does many things its own way, so be prepared to start over in learning Flash's unique properties. (If you remember trying to learn how to draw Bezier curves in Illustrator, you'll know what it means to struggle until it finally clicks.)

Pencil, Brush, and Pen: Flash's Drawing Tools

Back in the early '90s, Apple's MacPaint was the first popular computer drawing tool, and it introduced a number of innovations, primarily the toolbox of drawing tools: the pencil, brush, pen, paint bucket, and eraser. You'll find similar tools today in all of the major drawing and painting applications, from Photoshop, Illustrator, and Fireworks, to, of course, Flash. With some minor differences, they all operate in pretty much the same way as other programs. Let's take a quick look at the drawing tools in Flash's toolbox and explore how they work. Of course, the best way to learn is by doing, and even better, by playing!

There's a boatload of tools and different functionalities within Flash, and they're all worth exploring. However, some are much more important than others (or at least more commonly used), so for now I am going to focus on the core tools.

Hint: If there's a tool in Flash that you want to know more about before we cover it or that is outside of the scope of this course, but it isn't covered in the course material, visit the Flash Help menu in the upper right of the interface, or even try searching the tool name in Google for some different perspectives and answers.

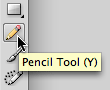
Also, since it's hard to remember what every tool is called, Flash has included "tool tips," which are little labels that will pop up if you hold the mouse over a tool without clicking.

For each of the following tools, I want you to revert back to childhood, and start by scribbling: Change the parameters of the tools in the Properties panel, and experiment with the tool options (in the Tools panel, the options at the bottom change depending on the tool you have selected). For now, don't worry about trying to draw something specific, just play with the tools and see what they can do!

Pencil Tool

The first drawing tool, the Pencil tool , allows you to draw lines on the Stage, using the Properties panel to set the width and style of the line as well as the color. Go ahead and scribble with the pencil, varying the line width and color to achieve different effects.

Here are some of the ways you can draw with the Pencil tool. Use the menu in the Properties panel to change the style. I achieved straight lines by holding the Shift key while drawing.

Now look at the bottom of the Tools panel. The options here allow you to set the amount of smoothing that Flash will apply to the lines you draw. Set the pencil mode to Straighten and use the Pencil tool to draw a rough circle on the stage.

You will notice that the rough circle you draw is smoothed out and converted into a perfectly smooth circle or oval. Next try drawing lines with the pencil mode on Smooth. There is also an option called Ink which maintains all of the original curves and jags of your lines.

The first line is set to Ink with no smoothing, the second has been smoothed. See the difference? The second is much cleaner and, well, smoother.

Very often Flash artists will use a stylus and graphics tablet to draw in Flash, but the mouse is fine too. Here are two faces, one quickly sketched with the Pencil tool without smoothing, the other one smoothed.

Use smoothing to create rounded shapes in your artwork.

Flash provides these curve reduction tools because the more curves your lines have, the more equations Flash is required to include in the file that renders these lines.

Hint: If you don't like something you did, there are a couple of options. First, remember that you can always back out of something by hitting Ctrl/Command+Z (undo) once, or several times to back out more steps. You can also reach this in the menu: Edit > Undo. If you just want to start over with a clean slate, click and drag around all of your work with the Selection tool or press Ctrl/Command+A to select everything, and then hit the Delete key.

Notice the different options on the Properties panel for the Pencil tool. I could list them all here, but the better way for you to learn what they are is to explore them yourself—if you want to know what something does, try it! (Remember, you can always undo it.)

Brush Tool

The Brush tool works similarly to the Pencil tool, but with some different options (and an important difference that I'll introduce shortly).

Here are some examples of brush shapes that you can create using Flash. In the Tools panel, the overall size/width of the brush is being chosen.

You can set the brush width and style (shape) by clicking on the icons that appear at the very bottom of the Tools panel.

The Brush tool has a range of styles and angles that allow you to paint more realistic strokes. You can even try calligraphy!

Pen Tool

The Pen tool is an innovation that was inspired by Illustrator. While the Pencil and Brush tools are "bitmap" tools, the Pen is a tool used for drawing "vectors" or lines and shapes that are mathematically defined by points and curves. Flash's Pen tool is capable of creating complex curving lines and shapes, and with Adobe's acquisition of Flash, now behaves similarly to the Pen tool in Illustrator with more accurate drawing and fewer overall points.

Eraser Tool

Another innovation first introduced in MacPaint, was the Eraser tool . Working like its namesake, you can erase graphics created with the Brush or Pencil tools by scrubbing across them with the Eraser.

Cut, Copy, and Paste

If you make a bad move in Flash, don't sweat it, undo it! Remember that you can Edit > Undo (Ctrl/Command+Z) all of your pencil and brush experiments, if you don't like 'em.

Like them, but just want to move or duplicate them? There's copy, cut, and paste (just like the ones in Word and most other programs). Flash also gives you a Paste in Place option which allows you to paste an object in the same place you copied it from. Regular pasting will place the object in the center of the stage. These are all in the Edit menu.

Get to know the handy keyboard shortcuts for these actions:


  • Ctrl/Command+C: Copy
  • Ctrl/Command+X: Cut
  • Ctrl/Command+V: Paste
  • Ctrl/Command+Shift+V: Paste in Place (PiP)


Selecting

Let's look at how Flash treats the graphic elements that are created with the drawing tools, and how you can manipulate what you've made.

After you create shapes using the Pencil or Brush tools and click them with the Selection tool , you'll notice that they are filled with a dot pattern. This indicates that they are selected.

To see an example of this, select the Brush tool, choose a large brush tip at the bottom of the Tools panel, and draw a random shape. Drag the shape around the Stage a bit to move it. Then, with the Selection tool, click away from the graphic you just made (meaning, click on an area of the Stage, or outside of the Stage, that doesn't have any graphic content covering it). Doing this deselects the graphic you'd made previously, and the dot pattern should disappear. Click on the graphic, and the pattern should appear again.

Now, with the Selection tool still chosen, click away, and then click and drag over just a portion of the graphic (this is called a drag-select) and notice how just that part is filled with the dot pattern—this shows only the part that you selected with the Selection tool, and you can copy, paste, or delete just this piece using the key commands or menu options. Give it a try!

Dragging to make a selection and deleting an area.

This may seem simple, but it's amazing how much can be done with cut/copy/paste, by moving shapes around, and by deleting portions of shapes!

Selections can be tricky in any software program, so let's explore how to make selections in Flash in this video tutorial:

Running Time: 3:30 Read the Transcript

Curve Reduction

Let's talk now about curves and curve reduction. What's that, you ask, a new diet program?

As we discussed earlier, the more detail an image has, the bigger its file size. The reason Flash allows you to smooth and straighten things is to make files smaller, not only allowing for quicker downloads, but also smoother animation. By smoothing your animation you are reducing the total number of curves, thus reducing the file size.

Draw a complex shape with your Pencil tool. Then click away from it, choose the Selection tool, and double-click on your drawing, which will select the entire outline.

With the entire outline thus selected, try the smoothing option on the Tools panel. Did you see how the image changed? Now undo it and try it with the Straighten option.

When Flash has to animate many different objects, it can get bogged down doing the math to make the shapes move around.

The bottom line: Shapes that have a low number of curves will be easier for slower computers to manipulate and download faster.

Bitmap or Vector?

Here's something unique about Flash: Shapes can act as either bitmap or vector objects. When you create a shape using the Oval or Rectangle tool, it acts as a bitmap (you can tell this because Flash fills a selected bitmap shape with a dot pattern, just like it did with your Brush shape above). When you edit it using the Selection tool, it acts like a bitmap. However, if you use the Subselection tool (white arrow) to select/edit a shape, you'll see something different—vector points and handles! Now, since the selection is acting like a vector graphic, you can do all kinds of things by selecting the points and handles, and moving them around (something that takes getting used to but is very precise).

Hint: You can "walk" a vector point around the Stage, by drag-selecting it, and using the arrow keys on your computer keyboard to move it one point at a time.

Now I'll reveal the differences between the Brush and Pencil tools. Clear off your Stage area, and draw a line using the Pencil. Then use the Brush tool to draw a fat line next to it. Next, use the Subselection (white arrow) tool, and click on each one in turn: You'll notice that the pencil line is now a vector line with a beginning and end, and the brush line is actually a closed shape!

For my last trick, I'm going to show you how to create a curve from a straight line. Click on an empty part of the Stage so nothing is selected. Now, using the Selection tool, move the black arrow cursor towards the Pencil line you just drew, until you see a little icon of a curved line appear next to the arrow. Now, click and hold the mouse, and start dragging, which makes a curved line!

This trick also works with brush shapes and others created in Flash, and has lots of interesting applications, so try it out, and keep it in your bag of Flash tricks...

We've just scratched the surface of Flash, but already you know how to properly set up a Flash file for working, and have explored the basic tools and learned some tricks of the trade. While we will be getting deeper into more complex procedures in Flash, these simple actions—like cutting and pasting, and bitmap- and vector-editing of drawn shapes—are core competencies, things that you will use daily in Flash, so get to know them and remember your shortcuts!

     
Learn how to create and reuse symbols in Flash.
Learn the three types of symbols that can be used in a Flash movie.
Discover the advantages of using movie clip symbols.
Learn how to create instances, add effects, and edit library items.
 

Exercise
Explore drawing tools by creating character designs.

Discussion
Share your thoughts and opinions with other students at the Discussion Board.