Under-Running and Over-Running Real Time
Let's start with a closer look at the phenomenal fact that real time can be under- and over-run in video. Short and intense passages in life can be expanded in film and video to represent a subjective perception of time. Action films showing the last 10 seconds of a ticking time bomb come to mind, where those 10 seconds of screen time are actually 20 or 30 seconds in real time.
We can take a scene and slow it down to make it easier for our audience to examine it in detail. But we also have the ability to accelerate time, by compressing long seconds, minutes, or even hours into a short stream of imagery. We saw this a bit in the last lesson's examples of montage.
So given this powerful ability, how do you decide whether or not it's a good idea to alter nature's "real time" standard? We'll talk about some possible answers, but first a classical editing challenge:
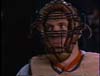
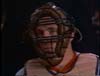
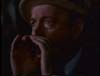
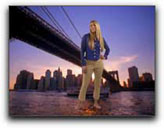
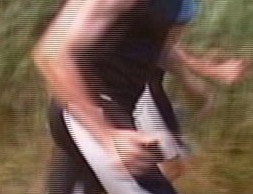
Imagine cutting a scene that was recorded with two cameras. A woman plays golf, swinging her club. You cut from a semi-close up (frontal) to a wide shot (showing the person from behind). You decide to cut a few frames before her club hits the ball.
 |
Golf clip: a two camera shoot from different angles. Click the image to play the clip. |
From a technical viewpoint, the length of the scene (in frames) might be accurate, but since the second clip shows a different angle, the continuity will most likely look inaccurate. Interestingly enough, from certain angles it may look as if a fraction of a second was cut out. In this case, the optical illusion has to do with perspective—the distance between arm, club, and body. Different camera angles make the distance look longer or shorter. We adjust this problem by adding a few frames, under-running real time.
This highly interesting example proves that you must always cut a few frames before an action. Once you have cut a few frames before a dramatic action (like a club hitting a ball) it is perceived better because it takes more than a single frame (1/30th of a second) to recognize an object.
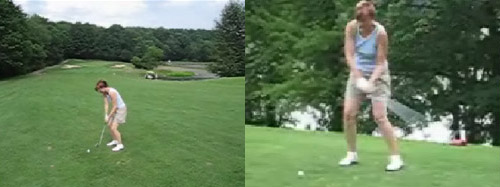
Let's look at another example where time is being stretched in a more complex way. It is not a coincidence that a lot of these time stretching effects occur in action films, or anything that shows cause and effect of physical actions.
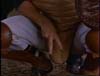
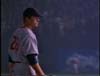
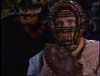
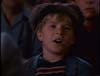
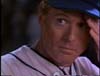
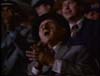
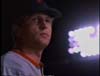
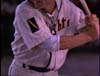
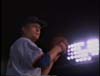
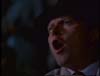
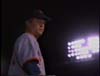
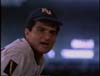
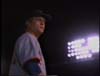
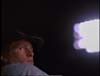
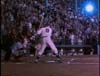
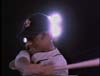
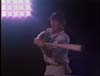
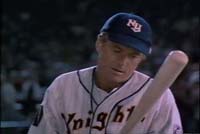
For instance, let's watch a sequence of the movie The Natural (1984) with Robert Redford. This baseball movie has several scenes in which time is stretched. One famous such scene depicts Redford at bat preparing for an enormous hit.
 |
"The
Natural." Click the image to watch the movie excerpt. |
As you can see, this sequence has repetitive actions similar to those in the golf clip. Watch closely when Redford is about to hit the ball. Near the end of the sequence, several clips are embedded in slow motion to dramatize the moment.
Now let's dissect the sequence shot by shot. Slow motion shots are indicated in the "speed" column. The duration column lists seconds and frames.
This
brilliantly-edited, suspense-loaded sequence shows impressively
how time can be stretched in a dramatic but almost unnoticeable
way
over the course of an entire sequence. In reality, this sequence
of actions would take a maximum of 20 seconds, but in this movie
the time elapsed was tripled—lasting exactly 59 seconds.
As it is such a crucial scene in the film, the viewer notices the
enormous time manipulation only subconsciously.
This type of dramatic time insertion certainly has a limit before it becomes recognizable. An absurd example is John Carpenter's hero (played by Kurt Russell) in Escape from New York. He is set up to get killed by two poison capsules that are slowly dissolving in his carotid artery. During the entire film he is wearing a stop watch with giant red LED numbers indicating his remaining lifetime. The stop watch, the most reliable "real time" indicator, becomes almost a joke when repeatedly appearing in the last showdown scene that almost doubles real time.
Certainly the repetition of a scene or a whole sequence (for instance from another protagonist's point of view) can be a very elegant way of stretching real time. Sometimes, too much can be happening in a short amount of time and to understand its entire context we must see all the components one by one, even if it makes time run slower.
Slow motion is a powerful technique used to help your audience understand a scene where the action happens too quickly for the brain to process it or there is a key moment that requires an unusual highlight.
Most
editing
software, including Final Cut Express and Premiere Elements, can change the rate at which the frames
are displayed to achieve slow
and fast motion effects. Changing speed in even
increments where frames are halved, doubled, tripled,
and so on is pretty easy for the editing software. But things can
become difficult if you need something other than the even numbers.
Here is where software developers had to work with more complex algorithms to meet the demand. Imagine an uneven slow motion as a mixture of doubling and tripling the frames. We talk about interpolation which is the process of analyzing the motion data in the video frames on your tape, and not only displaying them at varying frame rates, but actually "inventing" frames that do not exist on the original tape. In case of slow motion, the software inserts extra frames that are built out of the information of the two adjacent frames. In a way, it fools the viewer's eye into believing that the slow or fast motion on screen is both smooth and realistic.
Good interpolation algorithms are at the heart of getting really believable results in re-mapping time for fast or slow motion effects. The big disadvantage with interpolation is that the image gets a tiny bit more blurry, simply by the fact that two frames are fused into one.
 |
Two interlaced frames |
Like every other video and editing effect, time re-mapping is most powerful when it is used to underline an action that has a real justification for being shown extended or shortened. This classic clip from the film Run Lola Run provides an example.
Combining High Speed and Slow Motion
A speed manipulation technique that combines fast and slow motion became fashionable in the late 1990s. It is a blend of over- and under-cranking real time.
The technique is mostly seen in commercials and music videos. Typically a person such as a runner is filmed over several minutes in action. Then the clip is sped up (five to 10 times faster than real time) and suddenly it switches to slow motion.
Nowadays the slow motion is often topped by a freeze frame, in which an array of cameras circle around the character, typically in the midst of a jump or other action. It is commonly known as the "Matrix Effect" (first
introduced in 1999's The Matrix).
The effect works best when the change in speed is dramatic. This is why in some instances the action is sped up in order to set up the slow motion.
However, there is a limit to how fast a movement can be shown. A moving image can lose fluidity simply because speeding up an action can involve dropping too many frames. The running movement will have eventually have too many interruptions to be perceived as a smooth motion of "one leg in front of the next."
To increase the desired impact of a tremendous speed change, your best bet is not to further speed up the first half, but to slow down the second half. The impact is enormous.
Re-Mapping Time
A few years ago, time re-mapping was introduced to editing software. With this new capability, the user doesn't have to specify a single percentage of "faster" or "slower" for an entire clip, but he can apply this capability to ramp up or slow down the speed changes via key frames. With this development, we saw a sudden rash of speed change effects in cinema and on television.
Time re-mapping is visually exciting and very convenient in terms of continuity. And today many editing programs offer this effect. The advantage is that you can control the speed of your scenes gradually. This can be used effectively in dramatic moments.
Here is an example of its usefulness: Let's say you are making a "video tour" of the company you work for. The offices are spread out in a big building with lots of corridors. You start with the cafeteria, then the lobby, and finally offices 1, 2, and 3. Instead of shooting the cafeteria sequence, then turning off the camera and walking over to the lobby to shoot the next sequence, just let your camera roll and film the walking from one location to the other. Using time re-mapping, you can accelerate the footage of the "walk" so that the audience goes along on the trip between the buildings in hyper-speed! This gives the audience a better sense of the physical layout of the office while avoiding the boredom of a long, slow walking shot.
This kind of smooth interplay between fast and slow is the opposite of the motion effect of the runner that we described earlier. The company tour would work with simple speed changes as well, but would be more abrupt and disjointed.

Check
out some time changes by downloading the following clip from the
course download area.
 |
Click
the image to watch the clip. Go to the course download area
to save a copy and work with it below. |
In Final Cut Express, go to File > Import > Files and look for the downloaded tower_detrn.mov. When it's in the Browser, double click it or drag it into Viewer. Go to Modify > Speed, or hit Command+J (For those of you using Premiere Elements, this feature can be found under Clip > Time Stretch)
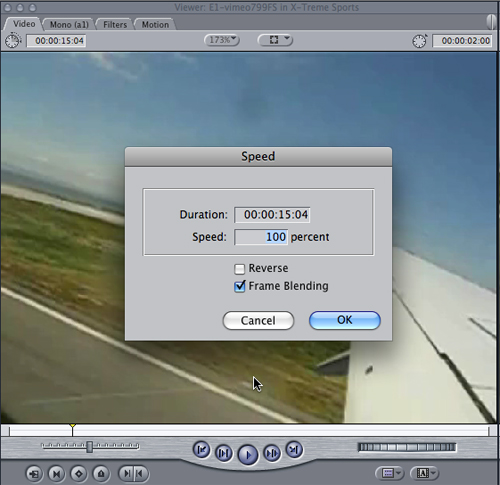 .
.
Experiment with various speed values. Make three or four segments and try out different slow motion values as well as slow motion methods. Also try to render a slow motion backwards (using the "Reverse" check box).
Fit to Fill
If you are editing a music video and/or anything where images relate to a beat, you will often face the problem that you are missing a few frames or seconds before the desired cut to coincide with the next downbeat. For example, there is often too little space to insert an entirely new shot but too much space for the one you have.
In this case you can use the Fit to Fill effect in Final Cut Express to calculate a slow motion that will exactly fill the gap. The longer the scene is, the less the slow motion will be visible. We will try this later in the exercise. (Please note that Premiere Elements does not provide this feature. Use the Time Stretch Tool  to stretch or condense your clips.)
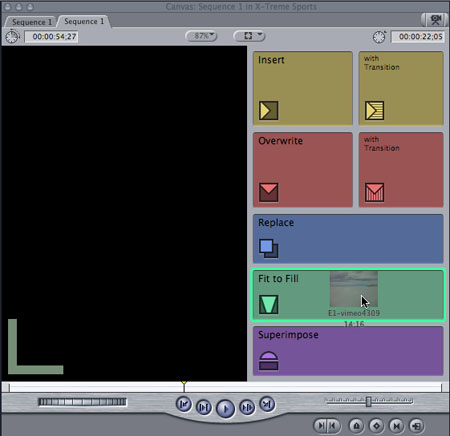 |
Fit to fill |
Transition Effects
Editing offers a variety of possibilities for bridging time and space. Every cut to another scene is such a bridge. Sometimes this time bridge must be emphasized. A mere cut would not show it. We either fade to black or insert text that helps describe to the viewer how much time has passed between the two scenes. Sometimes visual effects are added for amplification.
The dark secret: Virtually any visually stimulating transition makes two images blend together. It acts as a type of distraction that helps to camouflage a problematic cut. It's the oldest magician's trick. Some visual effects even follow the editing techniques we discussed. For instance, images are sometimes animated (for example, "pushed" out of the frame) in order to continue a movement. Others are distorted to make a graphic match fit perfectly.
The most popular visual effect used for transitions is the white flash: a five to seven frame cross fade to white in between two frames. TV news often to uses them to camouflage jump cuts in interviews when a few sentences are cut out of a dialogue. Commercials also use the white flash, and a multitude of animated digital effects have pushed this strategy further. Think about why and where to flash right at the beginning of the editing process.
Transition effects can be appealing, but we should understand from the beginning what impact they might have on our images. Finally, before you start shortening scenes and applying transitions effects or speeding up every other scene in your video, remember—you have probably seen every frame of your video a hundred times during editing. Your audience has not.
Special visual effects are a strange bunch. There are effects that are applied for a distinctive reason and there are effects that are applied to make something more exciting. They can be intriguing, but their flavor is fake.
In music videos, visual effects for pure enjoyment or "eye candy" became so worn out that they are avoided nowadays. For instance, in 1994 all commercials just had to have a morph sequence to be cool. Morphing is a wonderful "organic" effect compared to those with jagged edged wipe patterns. But unfortunately it was used up very quickly after having seen any possible household product changing its shape. It almost disappeared as an effect.
 |
This animation demonstrates morphing. |
Let's take a look at some of the most common and still broadly used types of effects:
Keying
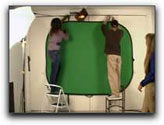
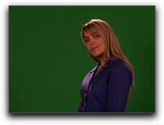
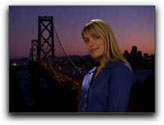
There are two types of image layering called Chroma and Luminance keying.
In Chroma key, one color is filtered out (usually blue or green, the most opposite of the spectrum of skin colors) to reveal an image underneath. This effect is also known as the famous blue box (or green screen). TV newscasters and weathermen use it regularly.
In Luminance key, either the black or white elements of the image are filtered out to reveal the background underneath.
Motion Graphics
Three-dimensional effects are becoming much more popular these days. In three-dimensional effects, images
are not only distorted but the moving image is mapped as a surface
for animated 3D objects. Motion graphics effects are typically part
of special plug-ins for your editing software, or found in separate
motion graphics applications. A third-party software for Final Cut Express such
as Boris FX or Motion for Final Cut Studio offers an infinite
number of plug-in effects: some stunning, others kitschy.
When
effects are used for a very specific reason, they usually need
to be customized to really work. And this is where we reach the
limit of options in given presets. That is why programs
like After Effects (known as "the Photoshop for video"), Shake,
or Apple's Effect are used by professionals to build effects from
ground up. Similar to Photoshop, After Effects offers the same
variety of layer behaviors, controlling how images or graphics
appear over a background image.
In fact, this type of work might not be called an effect anymore—it belongs to the complex specialized field of compositing. Compositing includes animating graphics and working with multiple video layers. FCE offers only very limited tools for compositing. Your better bet for such tasks would be another program such as After Effects, Effect, Combustion, or Shake.
To
give you any old example of motion graphics would be unnecessary.
But we thought we should steer you away from the image of a bad toothpaste
commercial with flipping text and jumpy images. We want you to see
some really good motion graphics.
This example was created by Logan, the advertising agency that does a lot of work for Sony, Apple, and Playstation among others. Watching this clip, pay attention to the transition cuts, and think about how these excerpts are stitched together for this reel.
 |
Logan:
Reel 2008. Click the image to play the clip.
|
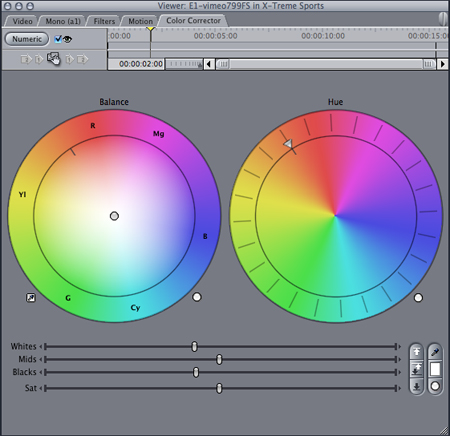
Color Effects
Final Cut Express offers numerous Color and Image effects in the Video Filters folder. Images can be stretched, distorted, or animated, and the contrast and color can be manipulated almost an infinite number of ways. You have to experiment to find the ones that work best for your situation. For example, graphic designers will be tempted to use the Brightness and Contrast (Bezier) video filter to adjust for lighting but the Levels filter typically does a better job in video.
A note to those using Premiere Elements: Video filters and effects are found under the Edit tab, under Effects. Brightness and Contrast is an option offered under Effects, but Levels are not offered in this program.
|
The Color Corrector video filter from Final Cut Express. |
As a basic starting point, just some advice: always sit back and objectively judge what this addition contributes to your video. Are you trying to make something more exciting that otherwise looks dull. And if so, did you really succeed?
Don't get us wrong: We definitely don't want to prevent you from trying things out. Go ahead. Knock yourself out! You might discover something perfect for your next project.
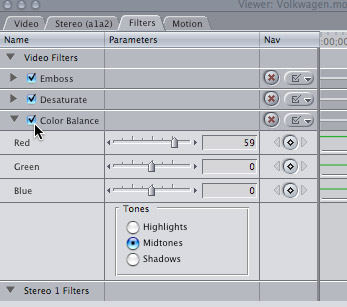
To add an effect, you can drag it from the effects tab in the Browser window onto the clip in the timeline. Or, first make sure you double click on the clip, then go to Effects > Video Filters (Video Effects under the Edit tab in Premiere Elements) and select the effect. Then, in the Viewer under the Filters tab you can work with the the different parameters of that effect. On top of that, you can add any number of additional effects to that same clip. Click the check box near the name of the filter to turn that filter on or off.
|
All effects for a clip are housed in the Filters tab. |
Apply as many effects as you like to your clips. Check the filters, apply distortions to images, emboss, colorize, and switch back and forth between negative and positive.
Note to Premiere Elements users: To adjust the settings, click the Edit Effects button at the bottom of the Effects view, and edit the settings. Not all of these effects are available for Premier Elements, but go ahead with the effects offered!
It's a crazy world out there!