Here's an all-too-common Web design scenario. You spent weeks creating
a gorgeous Web site for your new employer. Now, the work has become
somewhat repetitious. Text here, graphics there. Sigh! When is lunch
again?
Too bad you have all this grunt work to do—there's a new project you want to design. How can you hurry through your tasks as quickly as possible? By developing templates for similar page layouts. That way, all you have to do is insert the content and you're set. Plus, should you decide to make last-minute changes, you simply edit the template and Dreamweaver will update all related pages automatically.
Let's take a look at how you can speed things up by using Dreamweaver
templates. You'll create a template-based site starting with the
following scenario:
Download the "scuba" folder from the course downloads to
get some hands-on experience using templates. Define a new site in
Dreamweaver (Site > New Site) and
select the "scuba" folder as the local root folder.
Planning Your Page Layout
We'll start by creating a basic layout for the essay pages. Open essay.html and take a look.
First, identify the global elements
that will appear on every page—the top banner, the navigation
bar with the link to HOME, and Mark's email address.
|
The global elements are highlighted in red—these elements will appear on every page of the site. |
Then, identify the editable content
that will change on each page—the essay title, content, photos,
and captions.
|
The areas highlighted in pink will change on each page. |
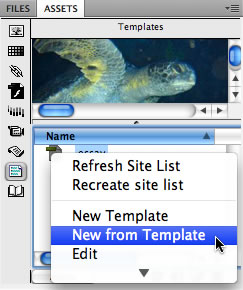
Creating a New Template
Now that we have the basic layout, we can convert it into a template. Go to File > Save As Template.
When the Save as Template dialog
pops up, choose the "scuba" site from the Site dropdown to
make sure the template is saved in the correct site.
Name this template "essay" (lowercase letters, no spaces). Dreamweaver will add the extension.
|
Entering a description of the template is optional, but it could be helpful if you are using several different templates. |
When you click Save, Dreamweaver goes to work. A Templates directory
is created inside your local root folder. The essays.html page is converted
into template format and copied into the Templates directory. A dialog
pops up asking you whether you want to update links. Click Yes.
After the dust has settled, you'll see a few changes in your workspace.
The document toolbar is now titled <<Template>> essay.dwt.
This indicates that the page is now in template format.

|
The <<Template > > title is one way to tell you are working with a template rather than a regular HTML page. |
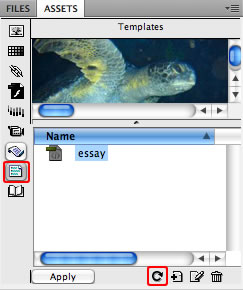
Notice the new Templates directory in your local root folder, listed
in the Files panel. It contains the essay.dwt template file.
|
Dreamweaver keeps all template files in the Templates directory. |
The original essay.html file remains in
your scuba folder. Dreamweaver created a copy before converting to
template format, keeping the original HTML page intact in case you
need it later.
Creating Editable Regions
The first step is to identify the editable
page areas, known in Dreamweaver as editable
regions.
1. Select "Insert title here," then
click the <h1> tag using the Tag selector in the lower-right
corner of the document window (this ensures that you have selected
the entire h1 tag). Go to Insert > Template
Objects > Editable Region.
In the New Editable Region dialog,
name the region "essay title" and click OK.
|
Give each editable region a clear name, so you know what goes where. |
Your new editable region will be highlighted. The name appears in a tab on top. If you don't see the editable region tag, choose View > Visual Aids > Invisible Elements.
|
By default, the Editable Region tabs are teal. If you want to change the color, choose the Highlighting category in your Preferences panel. |
2. Select both paragraphs of greek text and choose Insert > Template
Objects > Editable Region. Name this region "essay".
3. The photo is next. Select the image
placeholder, choose Insert > Template
Objects > Editable Region, and name the region "photo".
4. One more region—the caption under the photo. Select the small line of text that reads "caption", then click the <p> tag in the Tag selector to make sure you've selected the entire paragraph. Choose Insert > Template Objects > Editable Region.

That's it. Go to File > Save to save your changes. If a warning message pops up about block tags, click OK.
The block tag message is confusing at first. Basically, it is
telling you that the "essay title" editable region is inserted
within a <h1> block tag. It looks like this in the code:
<h1><!-- TemplateBeginEditable name="EditRegion3" -->Insert title here<!-- TemplateEndEditable --></h1>
When you create an HTML page based on this template,
you'll only be able to enter one line of text. It is not valid to enter another block tag (like another header or paragraph) inside this editable region.
To prevent this type of error message, be careful to select the entire <h1> tag before you add the editable region. The code should like this:
<!-- TemplateBeginEditable name="essay" --><h1>Insert title here</h1><!-- TemplateEndEditable -->
Here, the editable region tags are outside the h1 tags. This means you will be able to insert additional block tags within this area.
As long as you select the block element correctly before applying the editable region, you won't ever see the block tag alert. But if this problem does turn up, just switch to the Code view to manually reverse the tag order, so the block tag is inside the editable region.