The band Killer
Flamingos, one of our favorite rock bands, is in the process
of developing a... killer site. (Well, naturally.)
Go to your course download area and download the flamingos file for Exercise Six. Unzip it and move it into your dw1exercises folder.
Part I: Home Page
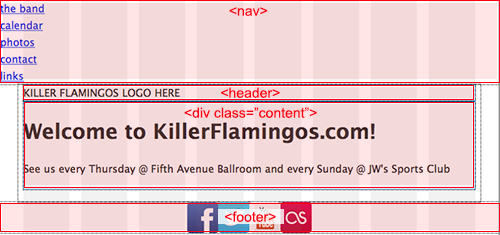
Open the index.html file in the flamingos folder. The basic fluid grid structure has been built for you. A nav element contains an unordered list, a header provides a space for a logo, a div holds page content, and a footer along the bottom of the page supplies social media icons.
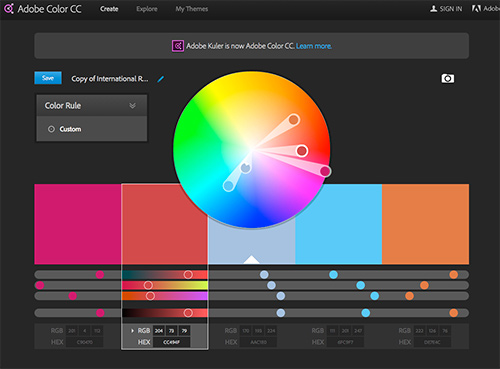
You are responsible for the design and styling. Start by looking for a knock-out photo for the content div. Flickr is a terrific image resource. Select the "Only search within Creative Commons-licensed content" option at the bottom of the Advanced Search page so you won't violate copyright regulations.
Use search terms such as "Killer Flamingos" for photos of the band, or "flamingos" to find a cool flamingo image, or "flamingo graffiti" for street art. Then, use your chosen imagery to build a color palette.
Create a Killer Flamingos logo to insert in the header. Choose any font that you think fits the band's image. Browse dafont.com for new options, or Google "cool free designer fonts." Create your logo in Adobe Photoshop, and save in Web format.
Following the same process we used to build the navigation bar in the Hotel Cielo Rojo site, format the nav as a responsive navigation bar using the responsive-nav.com plugin.
Create a body style, and add a background-color, background-image, or gradient.
Create a h1 style to format the page heading.
Part II: The Band Page
Open band.html. Add the "responsive-nav.css" and "responsive-nav.js" links to the document head.
<link rel="stylesheet" href="responsive-nav.css">
<script src="responsive-nav.js"></script>
Add the plugin script right before the </body> closing tag.
<script>
var navigation = responsiveNav(".nav-collapse");
</script>
Insert your Killer Flamingos logo in the header.
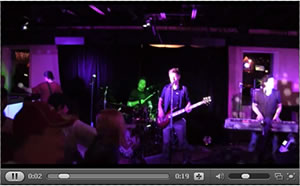
At the bottom of the content div, a gray box holds a HTML5 video element.

Switch to Code View to study the source code.
The video should already be working, so you don't need to make any changes. Go to File > Preview in Browser to test the video in your browser.
If you don't see the video, HTML5 probably isn't supported by your Web browser. Upgrade to the latest browser version and try again.
Part III: Calendar
Open calendar.html. Add the "responsive-nav.css" and "responsive-nav.js" links to the document head.
Add the plugin script right before the </body> closing tag.
Insert your Killer Flamingos logo in the header.
The Calendar data is inserted in a table with a class of "calendar". Using the skills you've learned in Lesson 4, create a table.calendar selector to style the table. Format the individual table cells using a td.calendar selector.
Part IV: Photos Page
Open the photos.html. Add the "responsive-nav.css" and "responsive-nav.js" links to the document head.
Add the plugin script right before the </body> closing tag.
Insert your Killer Flamingos logo in the header.
Use the frescojs.com lightbox plugin to create a lightbox photo gallery.
Part V: Contact Page
Open the contact.html. Add the "responsive-nav.css" and "responsive-nav.js" links to the document head.
Add the plugin script right before the </body> closing tag.
Insert your Killer Flamingos logo in the header.
Create an h2 style to style the h2 headings.
Part VI: Links Page
Open the links.html file. Add the "responsive-nav.css" and "responsive-nav.js" links to the document head.
Add the plugin script right before the </body> closing tag.
Insert your Killer Flamingos logo in the header.
Create a new style to format the link color, and also the visited link color: a:link, a:visited
Create another style to format the color of the links on rollover:
a:hover, a:active
The links to local bands, music sites, and venues are inserted in unordered lists (each with a class of "favlinks"). The default unordered list style looks a little drab. Here are some ideas to style unordered lists.
Create a ul.favlinks selector to format the unordered lists.
Create a ul.favlinks li selector to format the individual list items.
Create a ul.favlinks li:hover to format how the list items appear on rollover.
Troubleshoot your site to make sure all the links are working correct. Here are some helpful tips:
I look forward to seeing your designs. Be proud of the range of Dreamweaver skills you've mastered. They will stand you in good stead in all your Web design projects, and give you a solid foundation for taking your skills to a more advanced level.
Post to Your Web Server
When your site is finished, open your index.html file and add a link to the index.html file in the flamingos directory.
Publish your project using Dreamweaver's FTP feature. Click the Connect icon at the top of the Files panel to connect to your Web host. Select the flamingos folder and click the Put Files icon.
Summary
Briefly answer the following questions:
1. Have you enjoyed the class?
2. Are there any features you would like to explore further?
 In
this course, you've developed a range of skills. In this final exercise, you'll put it all together by adding the final
touches to a rock band's Web site.
In
this course, you've developed a range of skills. In this final exercise, you'll put it all together by adding the final
touches to a rock band's Web site.