Site Definition is the first step in the FTP process (file transfer protocol, which
is how you upload files to the Web). Here's a video tutorial I've
put together that can help you visualize the
steps that follow:
1. Go to Site > Manage
Sites. Select the dw2projects site that you defined in Lesson 1, then click the pencil icon.
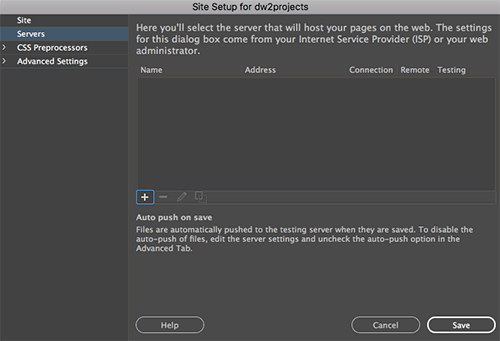
2. Select the Servers category, then click the plus sign.

Fill in the FTP settings provided by your Web host.

 |
|
 |
| |
- Server Name: Fill in the name of your Web host, for example "GreenGeeks" or "Site5".
- Connect using: Choose FTP (File Transfer Protocol). Dreamweaver will use FTP to access your Web host.
- FTP Address: Enter the location of your FTP host. This information is supplied in the confirmation email you received after signing up for hosting.
- Username / Password: Enter your username and password for your server access. These settings are given to you immediately after signing up for hosting. If you are using your own computer (not a shared computer), save the password so you don't have to enter it every time you connect to your Web host.
- Click the Test button to see if Dreamweaver can access your site. If the test is unsuccessful, check the FTP and login information and try again. If the test repeatedly fails, contact your host to make sure you are entering the correct information.
- Root Directory: The root directory setting depends upon your Web host. Sometimes this field should be left blank, sometimes a forward slash
/ should be inserted, and sometimes /public_html/ should be inserted. If you are not sure which setting to use, ask your Web host.
- Web URL: Enter the full URL of your site, for example, http://www.yourdomainnamehere.com.
|
|
 |
|
 |
Click Save. You'll see a new entry in the Servers list in the Site Setup dialog. By default, "Remote" should be checked.
It is possible to add multiple servers, for example, you could troubleshoot on a local production or QA server before publishing to the remote server. However, this won't be necessary for this class. Skip the Version Control and Advanced Settings as well—you won't need to adjust these settings unless you are handling some heavy code.
3. Click Save to save your defined site.
If you ever need to make changes to your Site Definition settings (such as a new FTP host or password), go to Site > Manage Sites.
Post to Your Web Server
Ready to post your files online? The process of uploading files to a Web server is called FTP—File Transfer Protocol. The files on your hard drive are local files, and the files on a Web server are remote files.
1. Click the Expand icon  in the Files panel.
Next, click the Connect icon  in the Files panel.
If you have defined your site properly, you will be able to access your Web server. If you get a connection error, make sure your FTP Host, Login, and Password information are correct. Contact your Web host's technical support if necessary.
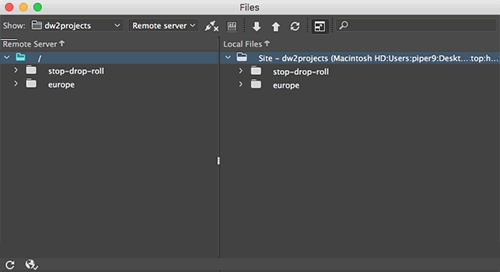
On the left, you'll see the remote files that you have posted online. The local files are on the right.

Select your europe folder
and click the Put Files icon  . When Dreamweaver asks
if you want to include dependent files, click Yes. This will ensure that all linked images and related HTML files will upload.
If you see a folder called "htdocs" or "public_html" on the Remote side, then your files need to go into this folder to appear online. You can drag and drop your europe folder from the Local side into the "htdocs" or "public_html" directories on the Remote side. Or, set it up so the "htdocs" or "public_html" folder opens automatically by following these steps:
 |
|
 |
| |
- Go to Site > Manage Sites
- Click the pencil icon to edit your site.
- Choose "Servers" from the left menu.
- Click the pencil icon to edit the server settings.
- Enter /public_html/ or /htdocs/ into the Root Directory field.

- The next time you connect to your web server, the FTP panel will open directly into the "public_html" folder.
|
|
 |
|
 |
Click the Expand icon  a second time to collapse the Files panel back into place.
2. Finally the
fun part—see your page published on the Web.
Add the file name to your URL:
http://www.yoururl.com/europe/index.html

