Bootstrap is often criticized for its bloated framework — the bootstrap.css file contains over 6700 lines of code! The browser has to read and process this code as the page loads. The minified bootstrap.min.css file is formatted as a single chunk of code with no space marks or line breaks. The difference in file size is significant.
In additional to using the minified Bootstrap files, you can improve site performance by linking to the Bootstrap framework on the Bootstrap CDN (content delivery network). Bootstrap's high-speed server is probably faster than your humble Web host, and chances are, your site user has visited another Bootstrap CDN site so the files are already cached in their browser. Sweet!
When you browse getbootstrap.com, you'll notice that there are several versions of Bootstrap to choose from. A beta version of Bootstrap 4 was released in August 2017 - feel free to check it out. However, we will be using the latest stable release of Bootstrap in this class: Bootstrap 3.3.7.

Launch Dreamweaver. Go to File > New and choose "None". Click the Create button.
 |
The "None" option in the New Document window. |
The HTML file will open in a new document window. Right away, go to File > Save As, saving the HTML file as index.html in your stop-drop-roll folder.
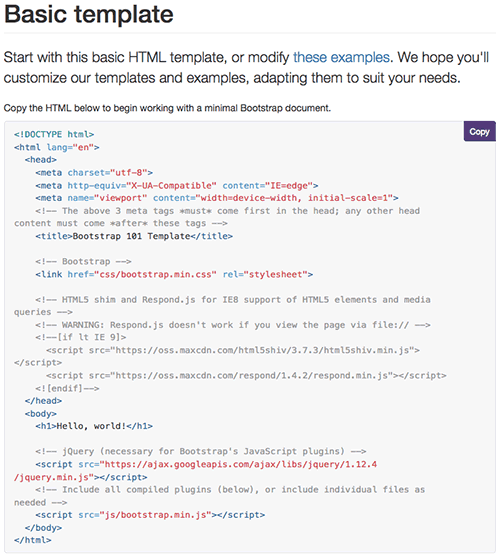
Head to getbootstrap.com and copy the code for the basic template.

Back in Dreamweaver, choose Edit > Select All and hit your Delete key. Then Edit > Paste the code you copied from Bootstrap.
You need several files in order to apply the Bootstrap formating: a CSS file with the Bootstrap styles, a JavaScript file with the Bootstrap JavaScript, and the jQuery library.
You can copy the CDN links from getbootstrap.com. Select the link for "Latest compiled and minified CSS" and Edit > Copy.

Back in Dreamweaver, select the link to the bootstrap.min.css and hit your Delete key.

Edit > Paste the link that you copied from the Bootstrap website.

The link to the jQuery library is already included in your basic template. It is linking to the jQuery file on Google's content delivery network. You don't need to make any changes here.

You do need to change the link to the bootstrap.min.js however. Hop back to getbootstrap.com. Copy the link to the "Latest compiled and minified JavaScript".

Back in your index.html file in Dreamweaver, select the link to the bootstrap.min.js and hit your Delete key.

Paste the link to the JavaScript file that you copied from the Bootstrap website.

There you have your basic template! This method takes a little longer to set up than using Dreamweaver's New Document dialog, but the advantage is that the files are minified and they load over a fast CDN.
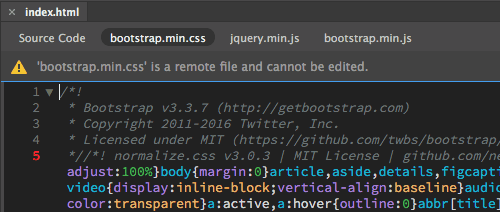
You are linking to the bootstrap.min.css on the Bootstrap CDN, the jquery.min.css on the Google CDN, and the bootstrap.min.js on the Bootstrap CDN. All three of these files are listed in the Related Files toolbar at the top of the Dreamweaver interface. If you click the link to bootstrap.min.css, you'll see a message that 'bootstrap.min.css' is a remote file and cannot be edited.

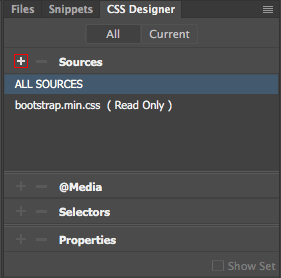
Create a custom.css file for any custom formatting. Toggle back to the Source Code in the Related Files toolbar. Go to Window > CSS Designer to open the CSS Designer panel, then drag the panel so it docks behind the Files panel (as you drag the panel, you'll see a blue outline when the panels are ready to dock). Click the + sign next to "Sources". Choose "Create a New CSS File".

Type "custom.css" into the File/URL field and choose "Add as Link". Click OK.

Make sure that the custom.css appears after the bootstrap.min.css. You want your custom styles to override the default Bootstrap formatting.

Choose File > Save All. Your Bootstrap framework is installed!

