Web design is a complex business. Building even a modest website will require you to keep track of a multitude of elements, including:
 |
|
 |
| |
- HTML pages
- Cascading style sheets
- JPEG, GIF, and PNG images
- Navigation buttons or graphics
- PDFs for download
- Animation files
- Links
|
|
 |
|
 |
Dreamweaver maintains links between the various files in your website—and alerts
you if any important files have been moved, added, or deleted.
In order to perform these miracles, Dreamweaver needs a little help from you. The first step in any Dreamweaver project is to define a site.
Create a Local Site Folder
A local site folder is the folder on your hard drive that contains the HTML files, CSS files, and images for your website.
Go to the Course Downloads area to download the graceheaven file. Unzip the file on your computer's desktop and open the
folder to view its contents.
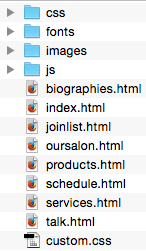
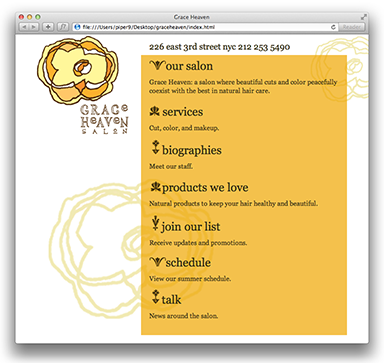
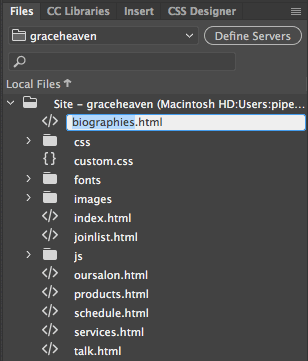
The graceheaven folder contains a sample website for a little East Village
hair salon. Each web page is represented by an HTML document (biographies.html, index.html,
and so on). A CSS file called custom.css controls the page styling. The images are saved inside the images folder.
In order to define this site, you need to tell Dreamweaver that this folder (in this specific location
on your hard drive)
is the
local site folder where you will store the all the files for this website.
Create a New Site
Follow these steps as we define a site together.
1. Open Dreamweaver. Choose Site > New Site in the top menu bar.
2. Type "graceheaven" into the Site Name field.
3. Click the folder icon next to the Local Site Folder field. Browse to select the graceheaven folder on your desktop. Click Save.

Document Views
Select the Files panel, where you'll find the graceheaven folder. Expand this folder by clicking
the + sign (Windows) or triangle (Mac). Double-click index.html to open the Grace Heaven home page.
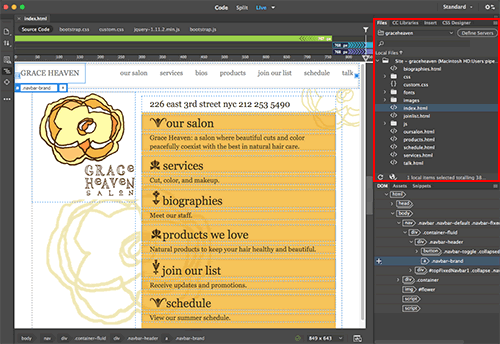 |
The Files panel lists all of the files inside the local site folder of the defined site. |
Dreamweaver offers us a few ways of looking at our document. In the top-center of the Document window (in what's called the Document toolbar), you'll find three very important buttons: Code, Split, and Live.
Live View
Live View renders the final page layout. In this mode, you can format text, create tables, insert images, create links, and on and on, without typing a single HTML tag.
 |
Use the buttons in the Document toolbar to toggle between the various views. |
Page elements are outlined by dotted blue borders in Live View. For a seamless display, you can hide the borders by clicking the "Live View Options" icon in the Common toolbar on the left side of the interface. But keep them turned on for now!
Hiding behind Live View in the dropdown menu, you'll find Design View. The layout looks a bit wonky in Design View, but not to worry. Live View gives a more accurate depiction of how the page will display in a browser. In earlier versions of Dreamweaver, pages were built in Design View and previewed in Live View. Today, almost all of the work can be achieved directly in Live View.
Code View
If you're a visual thinker, editing code might seem as interesting as ironing shoelaces or watching paint dry. Nonetheless, even with Dreamweaver's advanced toolkit, there are times when you need to write or fix some HTML code. Working in Code View is a more precise
approach.
 |
Code View allows to to directly edit the HTML source code. |
Split View
Split View, as you might guess, splits the Document window
into two active panels. This is handy if you want to see the design change as you edit the code. Drag the division between the panels to see more of one panel or less of the other.
Code View is synced with Live View, allowing you to make selections in Live View and edit them in Code View. Try this out: click the ornament next to "services". You'll see that exact image highlighted in the code.
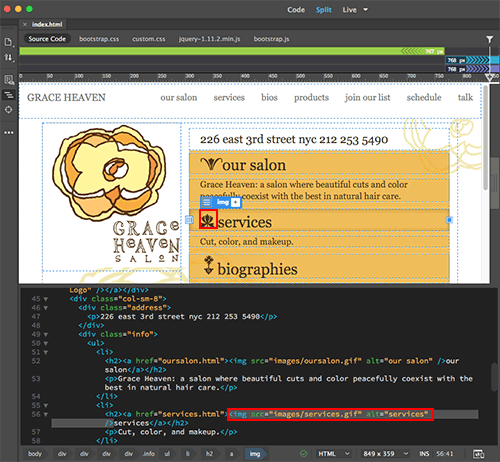 |
Objects highlighted in Live View (top) are also highlighted in Code View (bottom). |
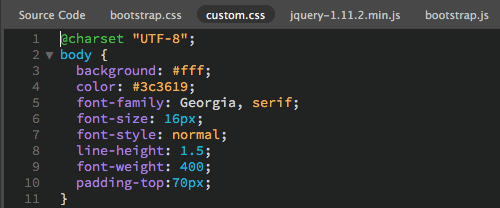
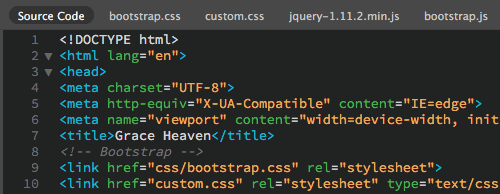
Related Files
You will notice several items below the index.html tab: Source Code, bootstrap.css, custom.css, and jquery-1.11.2.min.js
 |
External CSS and JS files are listed in the Related Files toolbar. |
Source Code is the parent HTML document, bootstrap.css and custom.css are external style sheet files, and jquery-1.11.2.min.js and bootstrap.js are external JavaScript files.
All these files are related—changes made to the CSS or JS files will affect the HTML file. The Related Files toolbar gives you quick access to all files.
Toggle to Code View, then click custom.css to open the external style sheet.
Click Source Code to see the HTML source code.
Navigating Live View
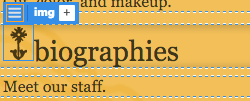
Toggle back to Live View. Select the ornamental flower next to the "biographies" heading by clicking it once. A blue tab will border the image, letting you know that the <img> tag is selected.
 |
A blue border appears around a selected image. |
Take a look at the Tag selector along the bottom of the Document window. The selected image is highlighted in blue.
 |
Click the other tags in front of <img>, and you'll see how
elements above or surrounding the image can be precisely selected,
like the <a> tag that creates the image link or the <li> tag forming its list item. |
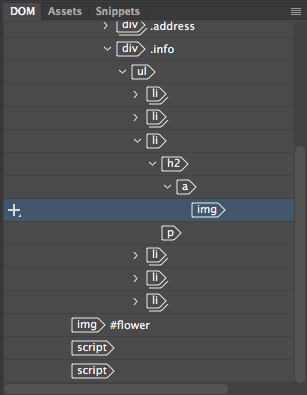
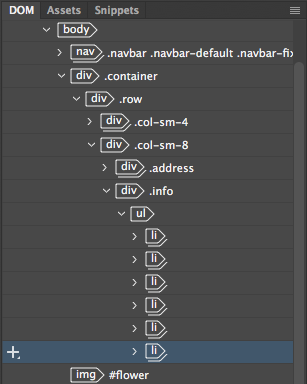
The <img> tag is also highlighted in the DOM panel. This handy panel shows the element's position in the document structure. Press the up and down arrows on your keyboard to move through the hierarchy. The right arrow key will expand a node, and the left arrow will compress it.
 |
Navigate around the page in Element Quick View. |
You can drag and drop elements directly in the DOM panel. Go ahead and try it out! Select the Biographies image, then drag and drop somewhere up the document tree. A green line will indicate the exact position of the image when you release. Choose (Ctrl/Cmd + Z) to undo the changes.
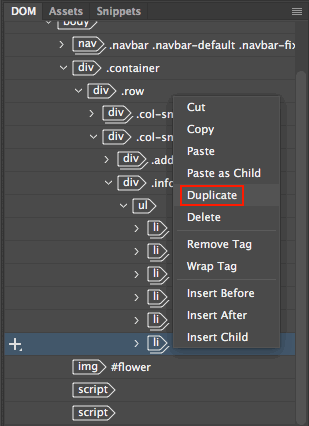
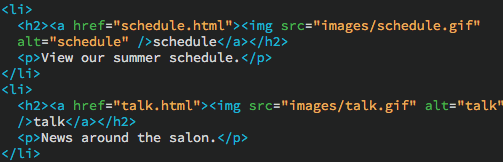
Grace Heaven would like to add one more item to the Home page. We'll make quick work of this task by duplicating the "schedule" item and modifying the text and link.
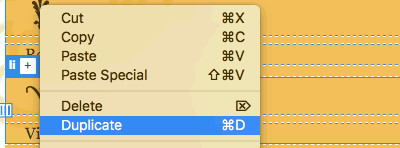
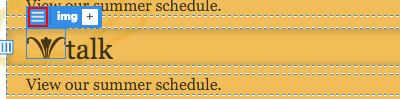
1. Click to select "schedule", then press the up arrow on your keyboard twice. This will move up the document hierarchy to select the list item surrounding the "schedule" link.

Right-click (Windows) or Ctrl-click (Mac) the blue li tab and choose "Duplicate" from the context menu.
2. Double-click "schedule" to insert your cursor inside the duplicate list item. You'll see an orange border around the selection once it becomes editable.
3. Click and drag to select "schedule".

Type "talk".

4. Click and drag to select "talk", then click the Browse for File icon and choose the talk.html file.
Click anywhere on the page to dismiss the link field when you're done.
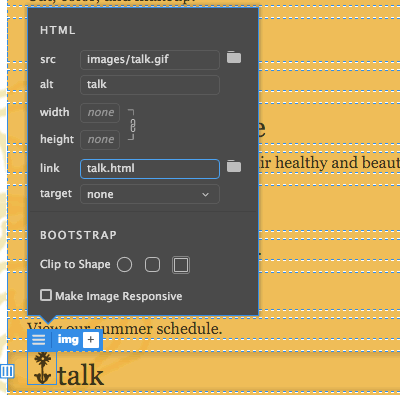
5. Select the floral graphic next to "talk" and click the hamburger icon to edit the HTML attributes.
Browse to select talk.gif from the images folder. Enter "talk" in the alt field (alternate text is very important for SEO and accessibility).
Set the image to link to the talk.html file. Keep the link target set to "none" (you don't want this link to open in a separate browser window). Leave the image width and height settings blank (it isn't necessary to define the image size in the browser). Click anywhere on the page to dismiss the HTML attributes when you're done.
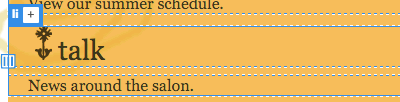
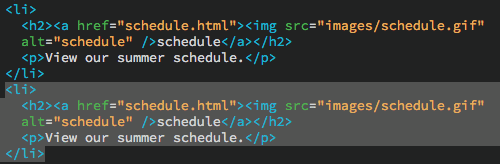
6. Triple-click "View our summer schedule" to select the entire line of text.
Type "News around the salon."

How did that go? Did you like the visual approach to editing the content in Live View? Or did you find all the clicking and selecting to be tiresome? We'll try the same task in Code View to compare. But first, delete the talk list item to start with a clean slate. Click to select "talk", then hit your upward arrow key twice to select the li.
Hit your delete key. Gone!
In Dreamweaver, there are two ways to accomplish any task. You can use Live View or you can use Code View. We just duplicated a list item and created a new link using Live View. Let's do it again in Code View to compare the process.
1. Toggle to Code View. Use the DOM panel to select the last list item. This will highlight the Schedule list item in the Code View window.
2. Right-click and choose "Duplicate".
3. Now you have two duplicate list items.
4. Edit the link, image source, alt text, heading text and paragraph text.
Toggle back to Live View to see how it looks. Was the Code View method faster than the Live View method?
Real-time Preview
Dreamweaver's Live View shows how your page will look in a web browser. In fact, it uses the same rendering engine as Google Chrome. Nonetheless, it is a good idea to test your layouts in an actual web browser (or several web browsers).
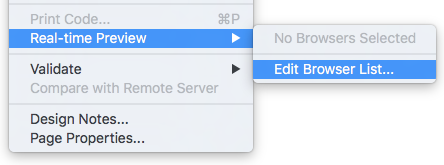
Go to File > Real-time Preview,
and choose Edit
Browser List.
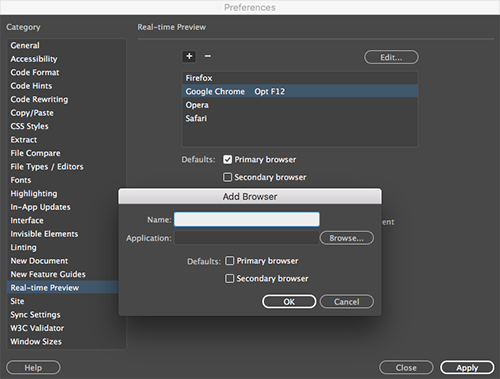
Click the + sign
and browse to your Applications folder to select the Web browser you normally use on your computer.
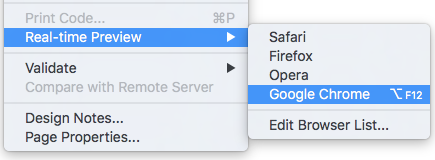
The next time you go to File > Real-time Preview, you can choose your browser directly.
Dreamweaver will prompt you to save any unsaved changes. Click Yes.
You can keep the Real-time Preview window open as you work in Dreamweaver. Any changes to the HTML file or CSS file will update automatically.
CSS Media Queries
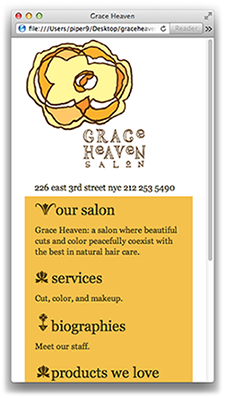
Resize your browser window to a smaller size. The layout compresses to a single column.
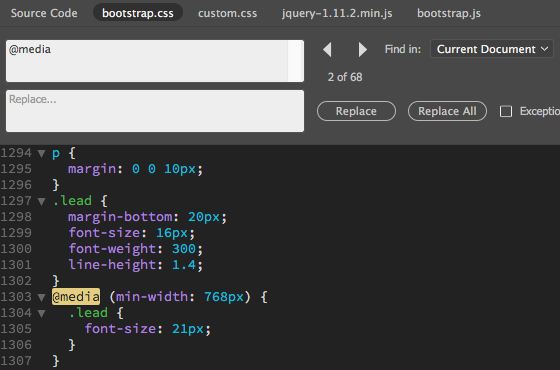
CSS media queries are making this happen. In Dreamweaver, switch to Code View and use the related files toolbar to toggle to the bootstrap.css file. Choose Find > Find and Replace (Command F). Type "@media" into the top search field, choosing "Find in: Current Document" from the dropdown menu. The first @media is a print media query which reformats the page content for printing. Click the right arrow to jump to the next occurrence. You'll see a media query which formats the "lead" text on large screens that are at least 768 pixels wide. Keep clicking the right arrow, and many more media queries will come up. Each media query is responsible for formatting content at a specific screen size.
 |
Click the X in the top-right corner to close the Find and Replace dialog when you're done. |
Back in Live View, you can see these media queries in effect using the visual media query bar which spans the top of the document window. If you click the green media query bar, the layout will display as a single column. If you click the blue or violet media query bars, the layout will display as two columns.
 |
Each media query is color-coded. Green media queries have a maximum width, purple media queries have a minimum width, and blue media queries are defined with both minimum and maximum widths. |
For a more fluid approach, drag the vertical scrubber bar to resize the Dreamweaver window to any desired width. Then double-click the grey scrubber area to expand the window back to full size.

The visual media query bar is handy but it does take up a chunk of screenspace. You can hide it by clicking the "Hide Visual Media Queries" icon in the Common toolbar.
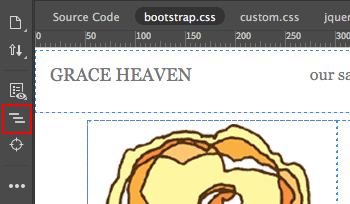 |
Click the fourth icon from the top of the Common toolbar to toggle the Visual Media Queries bar on or off. |
In future lessons, you'll master media queries so your designs look great at any screen size.
If you need to rename a file, use the Files panel so Dreamweaver can update your links.
1. Click biographies.html once in the Files panel, wait a second, then click again. You'll see a bounding box. Insert your cursor inside the box and change the file name to bios.html.
 |
Edit file names directly in the Files panel. |
2. Click outside the bounding box when you're done. Dreamweaver will ask if you want to update the linked files. Click Update.
There you go—you've changed the file name and updated all
links.
Creating a New Folder
Right-click (Windows) or Control-click (Mac) the top level "graceheaven" folder in the Files panel. Choose New Folder from the context menu. When the bounding box appears, name the folder "forms".
Moving Files
In the Files panel, select joinlist.html and drag it into the forms folder. Dreamweaver will ask if you want to update your links. Yes, please.
Before we move on to our first assignment, some important notes on preventing broken image links and other web design woes.
You can head off many problems at the pass by simply naming your files correctly. Here are some rules of thumb:
|
|
|
| |
-
Keep file names short. Concise
file names make it easier to write links.
-
Make sure that file names are descriptive. Use logical
file names that describe the contents of each file.
-
Don't use spaces. Browsers
can't read spaces. So, rather than "grace heaven.html", name your file "graceheaven.html" or "grace-heaven.html".
-
Don't use capital letters. A mistyped letter casing in a URL could cause a broken link.
-
Always include a file extension. The file extension tells the browser what to do with the file (see table below for common file types).
|
|
|
|
|
Common file extensions:
| File extensions |
| .htm or .html |
HTML page |
| .jpg |
JPEG image (best for photographic images) |
| .gif |
GIF image (best for line art and logos) |
| .png |
PNG image |
| .mov |
QuickTime movie |
We've all encountered frustrating 404 error messages indicating
a missing HTML page or those little x marks indicating a missing image.
Nine
times out of ten, unless the requested file doesn't exist,
the path specified in the code is incorrect.
There are three ways to structure a file path. Let's examine the merits of each one.
Absolute Links
An absolute link is a complete URL (Universal
Resource Locator). It contains not only the name of the file being
requested, but also the domain name of the Web server where the file
is located. Moreover, it starts with the http:// (Hypertext
Transfer Protocol) prefix.
Here are some examples of absolute paths:
|
|
|
| |
http://www.nytimes.com/
http://www.slate.com/articles/sports.html
http://www.npr.org/music/ |
|
|
|
|
Use an absolute path to link to a separate website (a link to CNET.com from your Dad's home page, for example).
For linking to pages, images, or files within your own site, however, it's preferable to use document relative
links.
Document Relative Links
Document relative links relate one file to another file within a site. The server begins at the currently open file and goes through the specified directories to get to the location of the other file.
The rules for constructing these links are simple. Each / within a path tells the browser to move down one folder level, and each ../ tells the browser to move up a folder level.
How would you use document relative links in this recipe site?
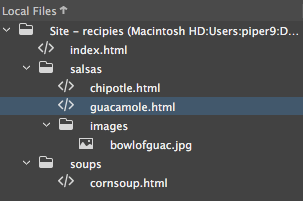
Starting from the guacamole.html page....
| The link |
How to get there: |
| chipotle.html |
Look for chipotle.html in the same folder as the guacamole.html page. |
| images/bowlofguac.jpg |
Look for a folder named "images" within the current folder. Then find bowlofguac.jpg. |
| ../index.html |
Go up one folder level (indicated by ../ ) and then find index.html. |
| ../soups/cornsoup.html |
Go up one folder level, find the soups
folder, then find cornsoup.html. |
If you link to a file outside your local site folder, Dreamweaver
can't write a relative link. It has no frame of reference for the external file, so it writes an exact path starting from your
hard drive such as src="file://D/vacationphotos/beach.jpg".
This link will break when you upload your site to the web. You'll
see the image on your computer, but no one else will
be able to.
Always link to images
within your local site folder so Dreamweaver can write valid links.
|
|
|
| |
An HTML file does not actually contain any graphics or multimedia files. Image source tags in the HTML code merely tell the browser where to find the image file.
<img src="images/talk.gif" alt="our salon" width="189" height="30" border="0" />
If a page has 20 images, the browser (a dogged device) will retrieve and display each one individually. If you've ever wondered why web graphics seem to load one-at-a-time, now you know! |
|
|
|
|
Site Root Relative Links
A third option for path structures is the site root relative link. Whereas a document relative link establishes the relationship between two files, a site root relative link establishes the relationship between each file and the root of the site.
Site root relative links put a slash at the front of the file path, as follows:
|
|
|
| |
/salsas/images/guacamole.jpg |
|
|
|
|
The path translates to:
1. Go to the root directory (/)—in
this case, the local root folder for the Mexican Food site.
2. Go to the salsas folder (salsas/).
3. Go to the images folder (images/).
4. Find the file guacamole.jpg (guacamole.jpg).
A disadvantage to using site root relative links is that you can't test them locally, since the browser doesn't know where your root directory is. The Preview in Browser feature won't work if you use site root relative links.
Which Path Is for Me?
Site root relative links are employed in large, dynamic sites with multiple servers (like Amazon.com). Site root relative links can be difficult to maintain. When you upload the site to the server, links will break if there is an extra folder level above the local root folder.
Document relative links are much easier to use. You'll be using document relative links for your projects in this class.
If you have read through this section about paths and are feeling confused, don't worry. As long as you follow the instructions in the exercise, you will create links that work. And after a while, you will even understand what you're doing!
So, let's move on to the first project: creating a favorite links page.