Drawing a Sphere
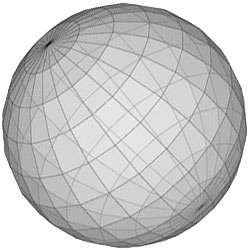
Spheres have inner edges as well. Think of a sphere as a series of planes interconnecting to create a perfectly round shape.
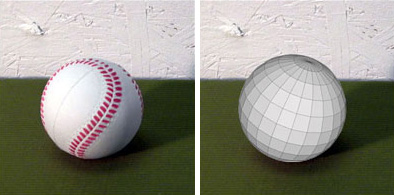
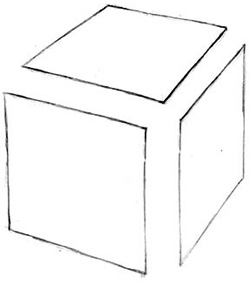
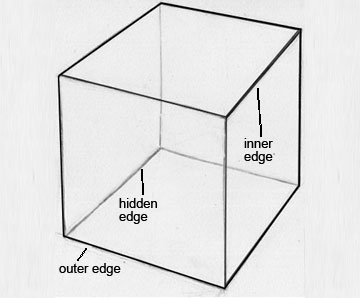
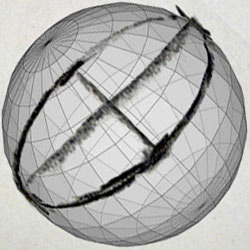
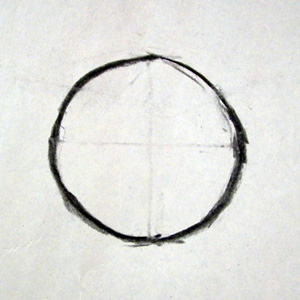
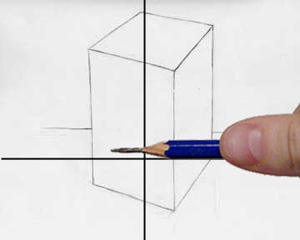
A sphere can be drawn using a similar method. First locate the outer edges of your subject.
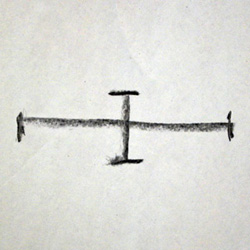
To keep it simple, let's work out the farthest points to the top, bottom, left, and right. We will be able to draw a cross hair down the middle of our edges.
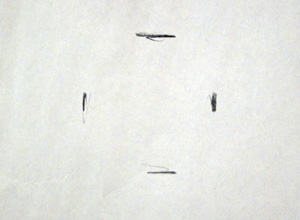
Make sure that the cross hair is in the middle, and all of the four quadrants are of equal size and distance from the center.
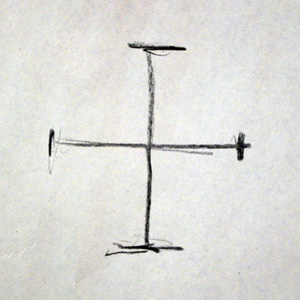
From there, slowly fill in the arcs between these points. Make sure to keep your lines an equal distance from the center.
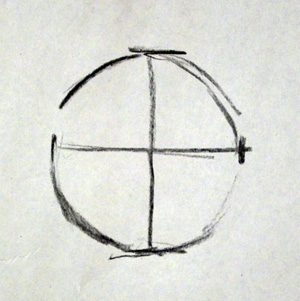
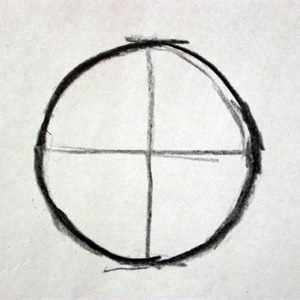
Erase the guidelines in the center when you are finished.
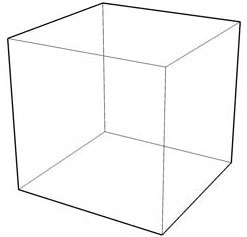
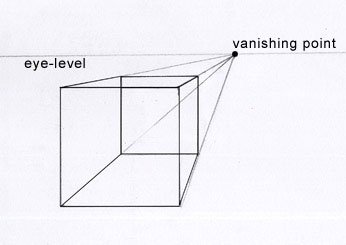
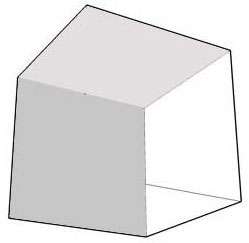
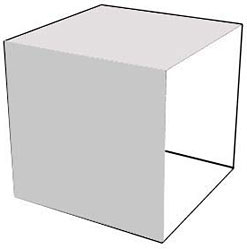
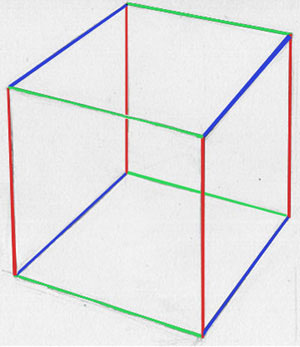
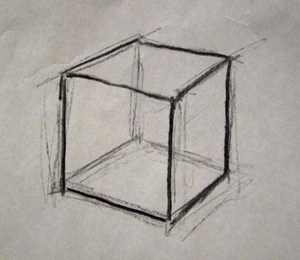
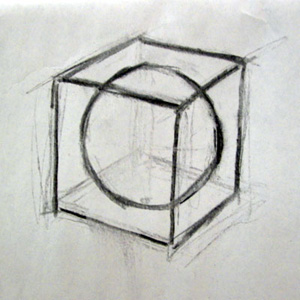
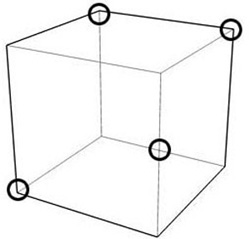
You can see how a sphere fits inside of a cube in three dimensions.
Drawing an Ellipse
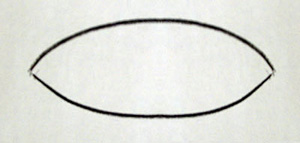
Here's a helpful approach for drawing an ellipse. You can alter the dimensions of your ellipse simply by changing the proportions between your corner points.
Change the angle of the ellipse to match the angle of the plane that it lies on.
When you are drawing your ellipses, make sure that the ends of the ellipse remain round and oval shaped. Avoid pinching the ends so that they become points, as illustrated below.
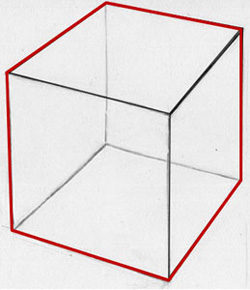
You can see how we built on the idea of the cube to lead us to the sphere. You will find that there are many similarities to these techniques to develop basic forms.
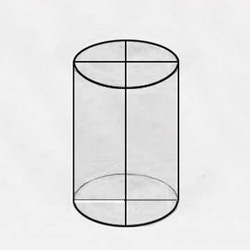
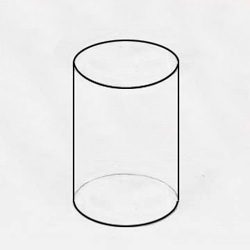
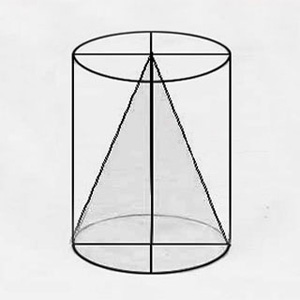
Drawing a Cylinder
A cylinder is made up of two parallel ellipses connected by vertical planes.
Look for parallel edges to keep your edges aligned.
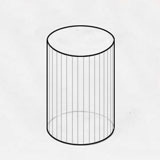
You can see how the round side of the cylinder can be broken down into planes.
Drawing a Cone
To draw a cone, simply draw an ellipse for the base. Then, draw a vertical line originating from the center of the ellipse, and connect the far point to the two sides of the ellipse.
Drawing a Pyramid
Pyramids are similar to cubes and cones. Begin with a geometric shape with three or four points, such as the base of a cube or a triangle. Then draw a point originating from the center of the base and draw it in a line perpendicular to the base of the object.
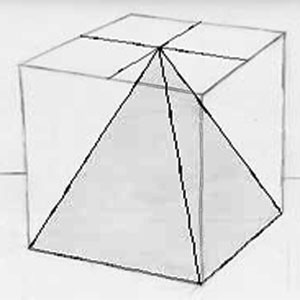
Then connect the far point to all of the points around the base.
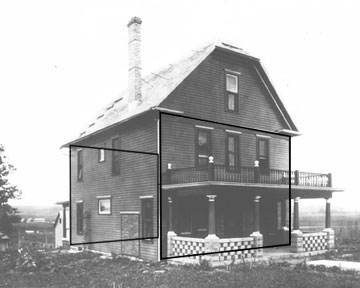
Proximity of Forms
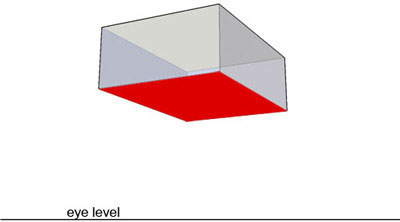
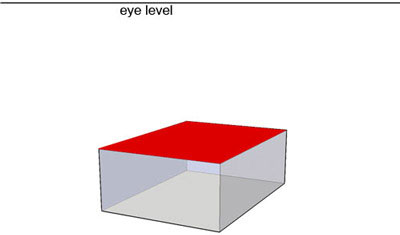
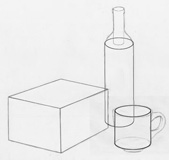
When drawing your basic forms in perspective, pay close attention to where objects meet and touch. Be careful your objects do not sit above or inside a surface that they are supposed to rest on.
Remember to check parallel edges to make sure that they sit on the same plane! For instance, make sure that the bottom of an object and the table they are sitting on are parallel.
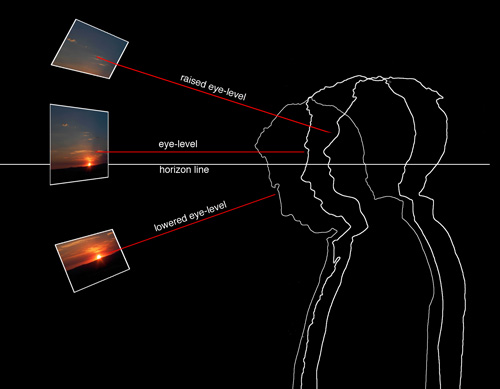
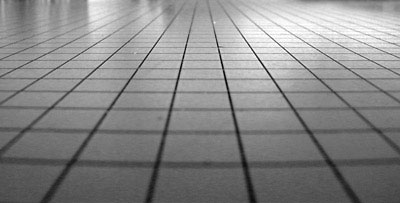
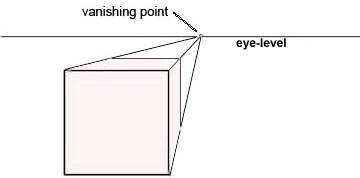
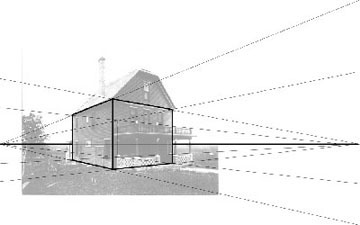
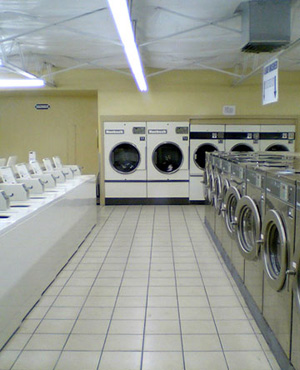
Of course, everything around us isn't positioned on a grid, or at least that's not how we see our surroundings. For us to draw objects around us, we will have to learn other ways to take measurements and to check our angles.
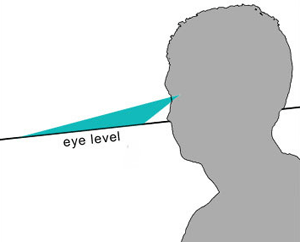
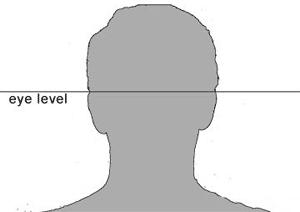
We will explore these methods in a moment. Don't forget to keep the basics of linear perspective in mind! If you want your drawings to look realistic, you must keep eye level in mind and be aware of foreshortening and convergence. Think about how many sides of an object you should be able to see from any one vantage point.
Checking Space and Distance
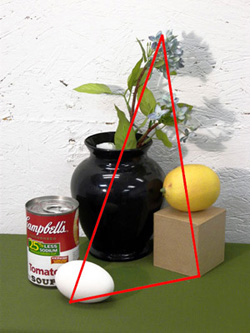
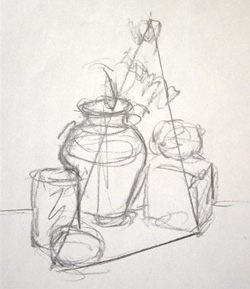
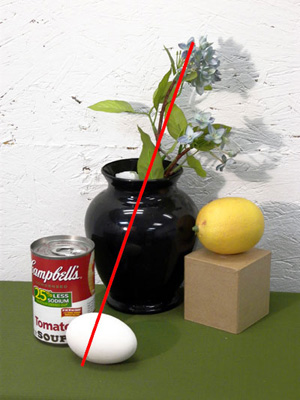
One quick way to make a quick measurement of your drawing is to use triangulation measure the angle created between the two longest distances.

I'll start a drawing by making a long straight line between the two farthest points in my composition.
The length of the line establishes the distance that these points will occupy in space, and its angle shows where two points exist, relative to one another.
I will then draw a line showing the second longest distance.
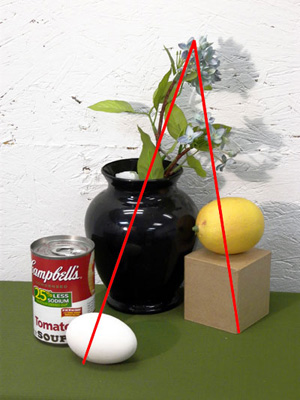
This will typically result in two sides of a triangle. You can use these quick guidelines to check the placement of your forms, as well as to provide a plumb line to compare angles. It quickly illustrates what space your drawing will take up on the page.
Once you've made these quick measurements and gestured out the basic mass, check your proportions before working into the contour.
Plumb Line
Another method you can use to make measurements of your drawing is a plumb line, to see how the measuring points of your object align with one another.
Plumb lines are straight lines that you can use to see how objects in your drawing relate to one another in space. A plumb line gives your drawing a reference point to work off.
Using a vertical or horizontal plumb line will keep your drawing balanced and proportionate.
Measuring Points
Using measuring points is a good way for you to maintain the angles and edges of your drawing proportional. A measuring point can be found any time a line starts, stops, changes direction, or is overlapped by another line.
Comparing these measuring points to one another and comparing them to your plumb line will help you keep your drawing proportionate.
Checking Proportions by Hand
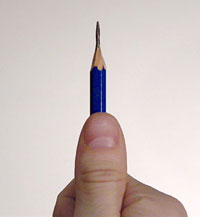
I'll check my proportions by hand using the tip of my thumb and drawing tool.
A very good way of helping you take measurements to keep your drawing proportionate is to use your pencil and thumb. Hold your pencil like this:
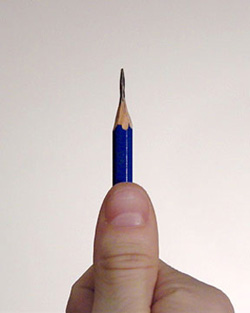
Holding your pencil like this will measure the distance between the tip of your thumb and the tip of the pencil.
Now hold up your pencil to your still life:
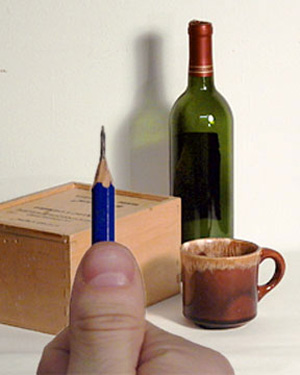
Now you can determine how tall the bottle is by using your pencil and thumb as a reference point. The distance between your thumb and the tip of a pencil creates a unit of measure.

Make sure you hold your arm out straight and locked while you are measuring your subject, and keep the pencil parallel to your body with the distance from your eye to your thumb and pencil sighting device must remain constant—otherwise, you will get distorted measurements, and your drawing will appear distorted and out of proportion.
Checking Angles
One method to use when drawing angles is to hold your pencil up to the subject at the same angle, and compare that angle to the one you have drawn on your paper.
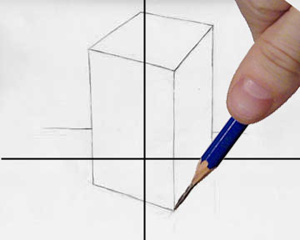
You can also hold your pencil vertically or horizontally, and compare the difference to the angle of the object.
Here's a video tutorial that shows this technique in action:
Compare Positive and Negative Space
Make sure to compare the positive and negative space and shapes in your form to be sure you are capturing the shapes that make up your subject.
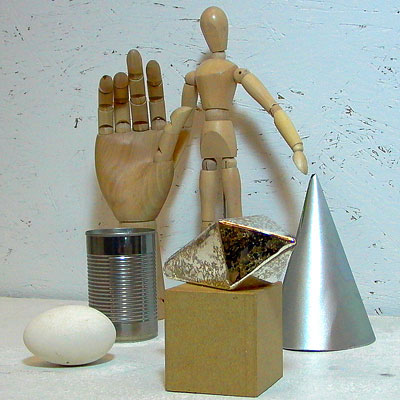
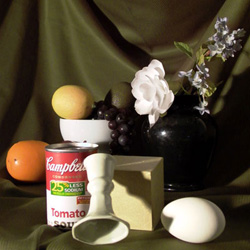
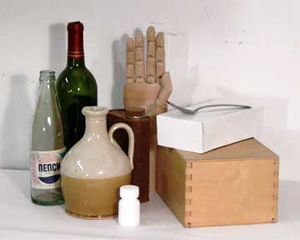
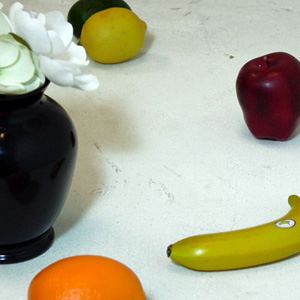
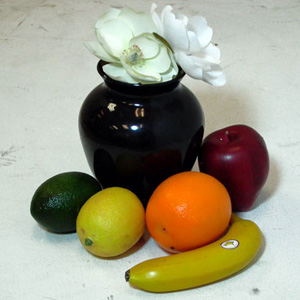
Think of positive and negative space as pieces in a jigsaw puzzle. When you are putting together the pieces of a puzzle, you don't think of any one piece as more important than another. What is important is how the pieces interconnect to make up the larger picture. Positive and negative space is similar. Let's look at the still life I set up with a few objects I had in my studio:
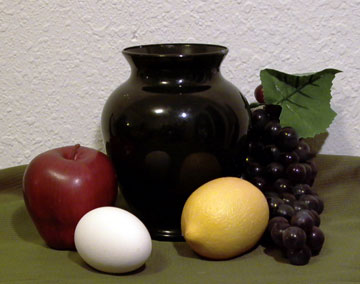
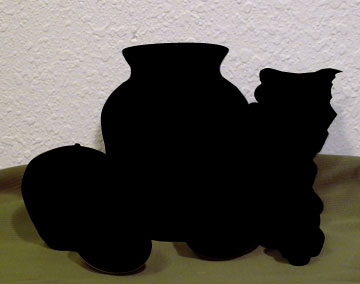
Each of the objects in the still life has mass and makes up the positive space. Below, I have silhouetted the shape of the positive space in black. You can see that it forms a very distinct shape in which separate objects are connected.
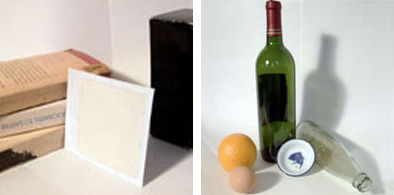
Let's not forget that the negative space has a shape, too. Below, I have silhouetted the negative space (the space around the mass) and filled it in black:

In this photo (as in any drawing), an artist must notice how the positive and negative spaces make shapes and how the shapes interconnect.
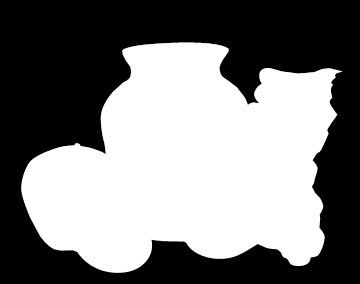
Sometimes, it might actually be easier to concentrate on the shape of the negative space, rather than the positive shape. Of course, once you define the shape of the negative space you will have defined the shape of the positive shape as well; it's like two pieces in a puzzle.
Now that we know how to draw basic forms, how can we create the illusion of space without necessarily having to rely upon linear perspective?
Creating Depth Using Scale
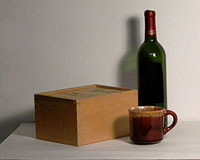
A good way to create depth in your drawing is by using scale. Using scale in this way is similar to the effects of convergence and foreshortening in linear perspective. Objects that are drawn larger will appear to be closer while objects that drawn smaller will appear to be farther away.
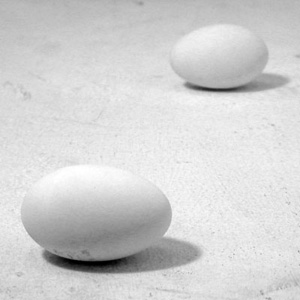
Notice that the figure that is closer to us appears larger than the figure in the background. If we held them next to each other they would be the same size. To create a sense of depth, we scaled the figure; the larger one will appear closer, and the smaller one will appear farther away.
Creating Depth Using Overlap
Overlapping forms is also a good way to communicate depth. It stands to reason that objects that are closer to you will overlap objects behind them when aligned.
One common mistake is forgetting that objects overlap. Watch the edges of your object and make sure that the shapes you draw clearly describe one object overlapping another. If your shapes don't overlap, then you leave the space ambiguous, making it hard for the viewer to decipher which of the objects is in front, and which is behind.
When composing your drawing, be aware of how your objects relate to one another. Be aware of the scale and the overlapping of forms.
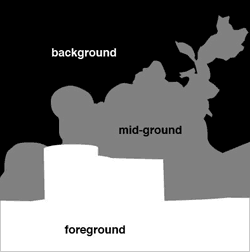
Foreground, Mid-ground, and Background
Be aware of the foreground, mid-ground, and background placement of your objects. If all of your objects occupy the same space, there isn't much room to create depth. However if we divide our objects into areas of foreground, mid-ground, and background we are able to create a greater sense of depth.
If your drawing is lacking a sense of depth, consider adding something in the foreground or the background to really push the sense of depth and space.
Symmetry and Asymmetry
When setting up your composition, be aware of symmetry and asymmetry.
Symmetrical compositions are compositions where one side of the composition mirrors the other side, typically limiting eye movement and keeping the viewer's focus on a central location.
 |
Approximate symmetry |
Asymmetry is when a composition is not uniformly balanced. Differences between one side and the other force the viewer's gaze to move about the composition.
 |
Asymmetry |
Open and Closed Composition
An open composition refers to one where objects are cropped so that part of them exceeds the perimeter of the picture plane. This way the composition creates the impression of going on past the picture, as if you can only see a part of it.
 |
Open composition |
A closed composition is completely contained within the perimeter of the picture plane. The forms are drawn closer together, creating a much more unified feel.
 |
Closed composition |
Rhythm and Pattern
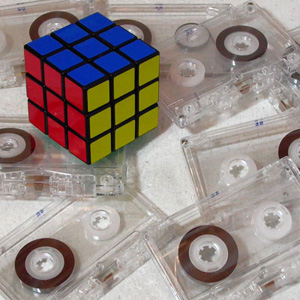
You should also be aware of the basic forms of your objects and how they relate to each other. You can create visual harmony by the placement of different, often repeated basic forms to create a rhythm to your composition.
You can create dynamics in your composition by disrupting the pattern with a contrasting element or accent. Notice the accent created by the toy cube in this rhythmic sea of cassettes.