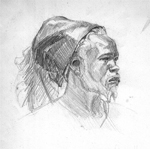
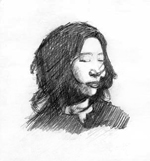
How do you represent these basic forms in your work?
One useful concept to remember is that drawing is a lot like sculpting. Even though you're using a pencil or charcoal stick and
drawing on a flat piece of paper, rather than working with clay, you
still need to think three-dimensionally about what you are drawing. With
each line you make, you are creating the illusion of cutting into the
space of your drawing, carving out the form you are trying to draw.
When you make any mark in your drawing, it must adhere to a plane. Your marks must represent the surface of the people or objects that you are drawing.
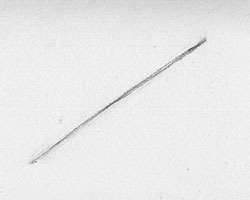
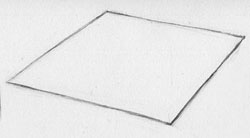
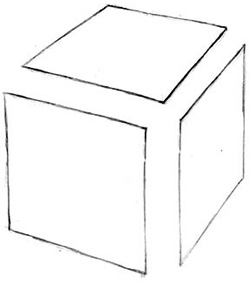
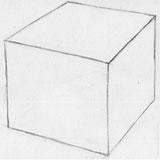
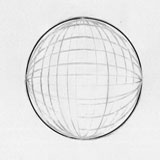
A plane, intersecting with other planes, creates a feeling of form and the illusion of space. You can see this most readily in the planes that make up geometric, regularly-shaped objects:
 |
 |
 |
| A
cube consists of six flat planes, one for each side. A sphere is trickier; it is actually made up of a seemingly infinite number of planes intersecting at different angles, giving the impression of being round.
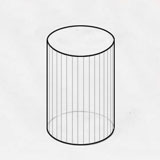
A cylinder is comprised of two circle-shaped planes at the top and bottom, and
a series of planes that wrap around the two circular planes. |
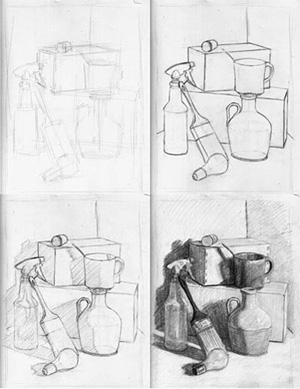
Objects in the real world are rarely quite so regular, so it's important to be able to see the underlying basic forms of your subject. This is why still life drawing is such a great discipline. It gives you the opportunity and technique to tackle objects that you might initially shy away from drawing.
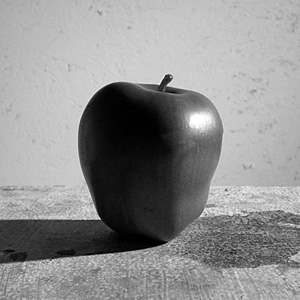
Take this water vase from my studio, for example. At first glance, this form is not clearly geometric. It appears very fluid, almost a one-of-a-kind object.
 |
How would you draw me? |
Looking closely, you can see that the shape can be simplified to a series of interlocking basic forms:
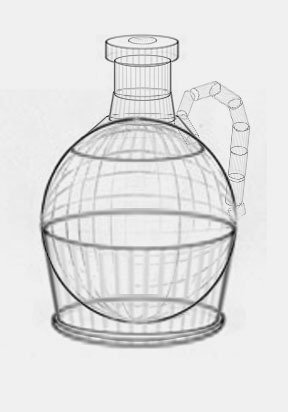 |
I see a circle, a sphere, and many cylinders. |
Even the most complex object is made up of interconnected simple planes. Identifying these planes and basic forms will help you break up complicated shapes into their simple components, and maintain perspective in your drawing.
In your first exercise, we are going to practice gesture drawing. If you already have a basic proficiency with contour drawing (and even if you don't) gesture drawing can help you develop a looser approach for your drawing work.
Gesture drawing is a loose but vigorous drawing technique that uses many lines to convey the physical mass of objects. The formal definition of the word "gesture" is "the act of moving the limbs or body to show, express, or direct thought." This is the key to the special meaning of the term for artists.
Keep your lines loose, being aware of the physical movements you make in order to capture the mass of the subject. This type of line is called gestural because it communicates the physical gestures made by your arm and hand during the process of making a mark.
|
|
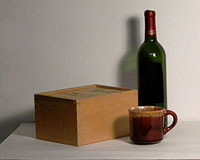
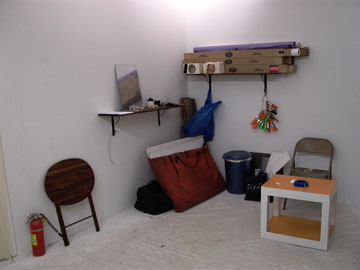
Still life objects |
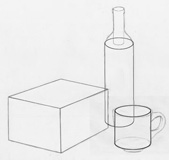
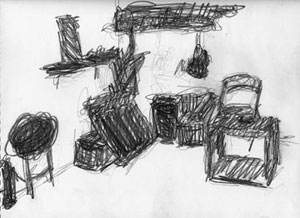
A loose, gestural drawing |
Gestural drawings can be done almost anywhere. Gestural drawings can be done while you're waiting for a subway or bus, or even done in a room in your house or studio.
 |
My studio |
A quick gesture drawing should aim to capture the mass of the objects in the drawing and their relationship to each other. Gesture drawing is a good way to focus on the positive and negative space in a drawing, a concept that we'll be revisiting later in the course.
 |
Notice the composition of the objects and the positive and negative space created by their grouping and placement on the page. |
Here's a video tutorial that shows my approach to gesture drawing:
How to Do It: Representing Mass
When you're doing gesture drawing, it's important to draw quickly, without second thoughts. Don't use an eraser during this type of drawing. Remember, your goal is to capture the gesture, a suggestion of where the mass of the objects is.
Start in the middle of each object and work your way out. Focus on the interior of the object and how much mass it takes. Areas that are thicker and take up more mass should have more line. Be sure to continually compare your drawing to the still life in front of your eyes.
Don't think about shading or drawing an outline and then filling in shapes. The idea isn't to draw shapes and shade them in. The goal is to build shapes out of lines like you would build a sculpture out of clay. Use many lines to create an area of mass.
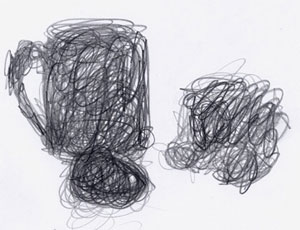 |
| This is a drawing of a mug, an egg, and some broccoli. With a gesture drawing, don't worry too much about the details, just get the masses situated. |
Don't even worry about having smooth or straight edges in your drawing and don't try to make this look realistic. What's important is that you begin to understand the mass that each object takes up on your page, and the voids around them. Focus on the positive and negative space.
Make sure not to spend too much time on each drawing (one to two minutes). Move around your drawing quickly and evenly; don't systematically finish one object at a time. If your subject has several objects, try to take turns working on all of the objects, working them evenly. Get in the practice of working your whole drawing together.
Gestural drawing can seem kind of rough and scary at first, but give it a go! Practicing a loose, fluid approach will help you develop the fluidity you need to create more nuanced works down the road.
 |
Supplies for this class are available for 10% off at Utrecht.com. Visit Utrecht.com,
add your chosen items to your cart, and use discount code 86572
at checkout. 10% discount not available on sale or clearance
items. |
Be sure to check out the Materials List.
In the first exercise, we will be using charcoal along with a kneaded eraser. We should also discuss what else we need to set up a proper work environment.
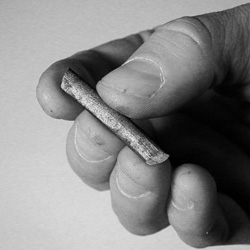
Charcoal comes in variety of forms such as sticks, pencils, and compressed blocks.
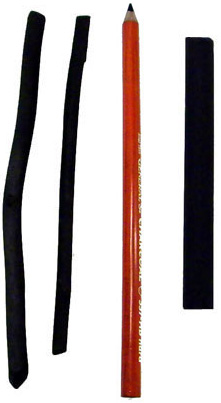 |
Two charcoal sticks, a charcoal pencil, and compressed charcoal |
Charcoal can also come in a variety of weights to create marks of different values: softer for darker lines, and harder for lighter, sharper lines.
You can use either vine or willow charcoal sticks. Each type has different qualities. In my opinion, vine charcoal sticks to the paper better, but willow charcoal is more fluid and easier to use. I prefer the willow charcoal for its rich, dark tones. I just need to be careful where I rest my hand and spray-fix my drawing when I'm done to avoid unwanted smudges or smearing.
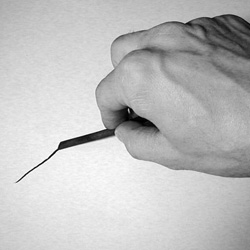
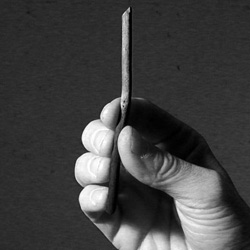
You should be holding your charcoal either width-ways or palm-in way, depending upon what the drawing calls for.
 |
 |
The palm-in way to hold charcoal |
Notice how the edge of the charcoal runs along the tips of the fingers and the area of pressure is between the thumb and the middle finger. The other fingers guide the direction and hold the charcoal straight.
If you are drawing with the palm-in approach and using the tip of your charcoal you should be using pieces that are several inches long. Hold the charcoal by the end of the stick.
If you are drawing width-ways, your charcoal need only be an inch long. Make sure that you have enough charcoal to work with. Use too small a piece, and you may make accidental marks with your hand.
 |
 |
Holding charcoal width-ways |
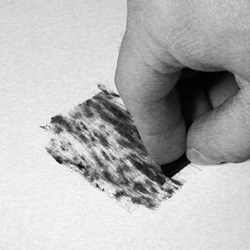
 The kneaded eraser can be shaped to make different marks. You can make thin and wide marks depending upon how you shape the eraser. Tear off little pieces to make thin and controlled lines. I find it gives me greater control over the mark.
You can also shape the eraser and pad areas to lighten them. This is useful to lighten an area without losing the qualities of the mark-making.
 |
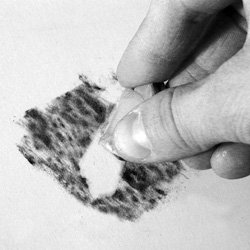 |
A shaped kneaded eraser (left) and the eraser used to make marks (right) |
Drawing Paper
 For these charcoal drawings you will either be using your newsprint or a heavier drawing paper with a tooth that is good for working with charcoal.
The tooth refers to the texture of the paper. Paper can be very smooth, and have very little tooth, or very rough with greater tooth for capturing drawing materials. Paper with more tooth may be easier to make deep marks on but will also be more difficult to erase.
I recommend a drawing paper with a medium weight: 80-120 lb. paper. The weight refers to the amount of the pressure placed on the paper during its fabrication to make it flat.
Newsprint
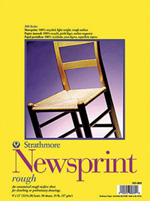 Newsprint is a cheaper, often slightly gray paper. Its affordability makes it appealing to use when doing preliminary sketches or warm-up exercises. However, newsprint is not very archival; it tends to yellow and become brittle when exposed to the elements and direct sunlight for too long.
Drawing Board
You will also find it useful to lean on a drawing board when working. A drawing board is a smooth piece of wood, not much larger than your drawing paper and typically made of hardboard. You can purchase a drawing board at an art store that may have clips for holding your paper attached.
I find using a piece of hardboard found at a hardware store works just as well and may be cheaper.
 |
Hardboard |
It is important that you work on a drawing board or some other surface other than your pad of paper as you may make marks that will indent the pages below, making unnecessary and unwanted marks in future drawings.
Masking Tape
You will be using masking tape to secure your paper on your drawing board. There is a special type of masking tape called artist tape. Strathmore is a recommended brand of artist tape. Artist tape is a better quality than the masking tape you would find in a hardware store. It is often white or blue in color. Artist tape is easier to lift off your paper without tearing. If you can afford it, I would recommend the artist tape; if not, any masking tape will do. When taping your drawing to your drawing board, it isn't necessary to use a lot of tape, just enough to secure your drawing.
Using an Easel
If you can afford it, I suggest purchasing an easel to use for this course. Several different types of easels are available on the market. I would recommend a small, portable, metal easel. These are very useful and can be set up almost anywhere. Don't feel you need to spend a lot of money when purchasing an easel, but do get your money's worth. Thin, cheap easels tend to fall over and break very easily.
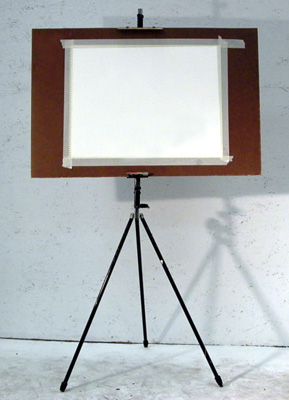 |
Drawing board with taped paper on an easel |
It's all right if you don't have an easel, just make sure that your drawing board is well supported. You could sit on your bed and prop your board against the wall or with some pillows or even try using another chair.