Lecture Topics
In this lecture, you can expect to explore the following topics:
Using Aperture for Depth of Field
Have you ever compared a snapshot portrait with a professional portrait? One thing you might notice right away is how well the subject in a professional shot appears to pop from the background. This background separation is likely caused by
Depth of Field (DOF), a blurring of the background to make the subject stand out from the stuff behind.
You can achieve a shallow depth of field
by using a wide aperture—a small number, such as f/2.8. This is great for portraits. Or you can get the opposite, a
deep depth of field
(great for landscapes), by using a small aperture, a large number such as f/22.
Note that DOF applies to both foreground and background, although we might think of only background. Add a foreground element
to your image and you'll quickly see it affects both! Anything along the same
plane as your subject will be sharp, and anything in front of or behind that plane will be less so, based on your settings.

In this candid portrait taken during a live event, the background was quite busy. Using a shallow DOF allowed the foreground audience member to stand out, while still including the rest of the audience and luncheon for context. Credit: Felicia Kieselhorst
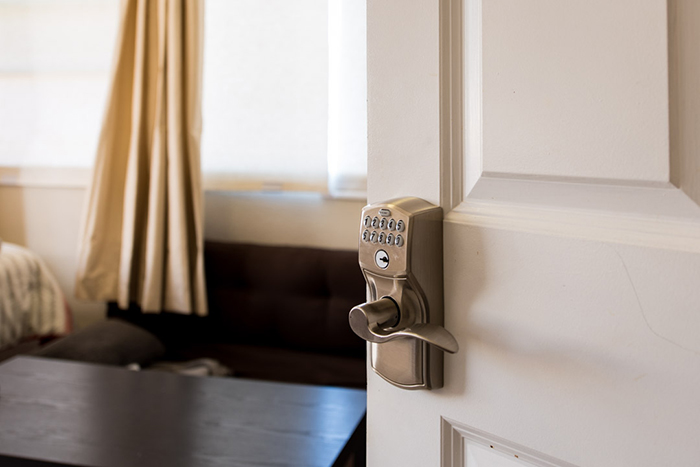
In this real estate photo the property owner wanted to highlight that each room had its own security. A shallow DOF here lets the viewer's eye land on the lock, while still giving the sense of the home by showing the room in the background. Credit: Felicia Kieselhorst
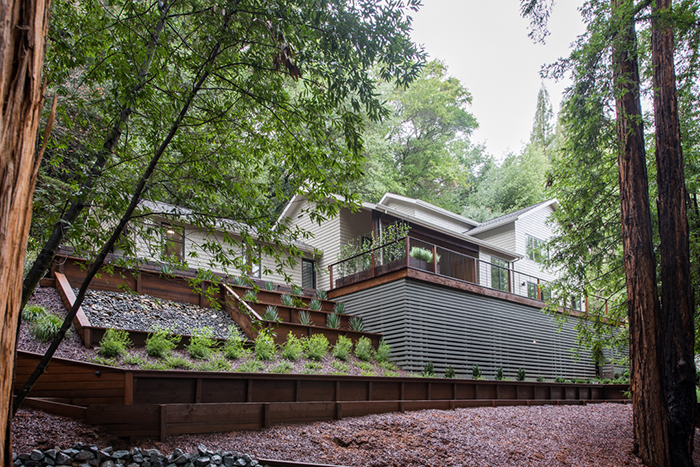
For a shot of this home's exterior, the landscaping was important to the owner. Rather than blurring it out with a shallow DOF, a deeper DOF lets the viewer see the care taken on the yard space. Credit: Felicia Kieselhorst
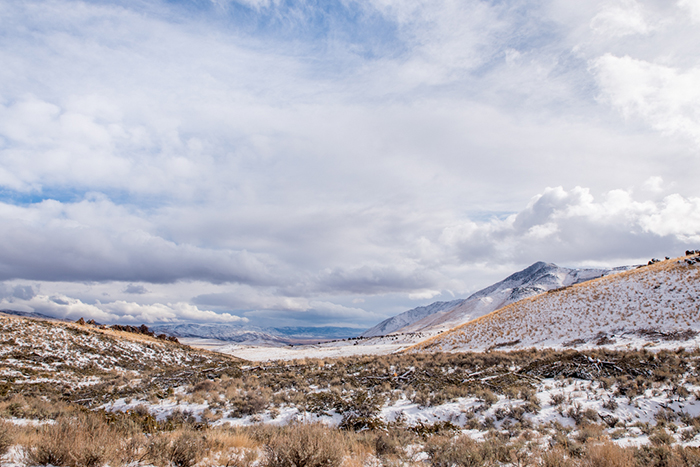
This empty landscape seemed to go on for miles. A deep DOF here communicates the expansiveness of the place more thoroughly than a shallow DOF would. Credit: Felicia Kieselhorst
From a creative perspective, DOF is pretty easy to grasp…you use wide openings to produce shallow foregrounds/backgrounds and you use small openings to add more sharpness throughout the image.
Note
Use a wide aperture (a small number such as f/2.8) to create a shallow depth of field. Use a small aperture (a large number such as f/22) to create a deep depth of field.
Things get tricky when you remember that your aperture is also controlling your exposure! Want a shallow DOF on a bright sunny day? You can't just throw open your aperture and go for it. You'll need to adjust other parts of the Exposure Triangle to compensate.
You want to simultaneously make aperture choices based on creative preferences and on exposure needs.
One way to do this in the beginning (and even at advanced levels, depending on your genre) is to use Aperture Priority Mode for shooting. You'll set your Aperture based on your creative needs, and the camera will choose an appropriate shutter speed for a "correct" exposure (and will choose your ISO too, if you are on Auto ISO).
Back to Top
Using Shutter Speed for Motion
Like aperture, shutter speed has a practical purpose in exposure and can be employed for more creative purposes, so you'll want to keep both in mind.
You can use fast shutter speeds (less light) to freeze action. How fast you need will depend on the speed of your subject. For example, a moving human is much slower than a speeding bullet or water falling: each of those subjects will require a different level of speed. As a general rule, plan for a shutter speed above 1/200th of a second in order to freeze motion.
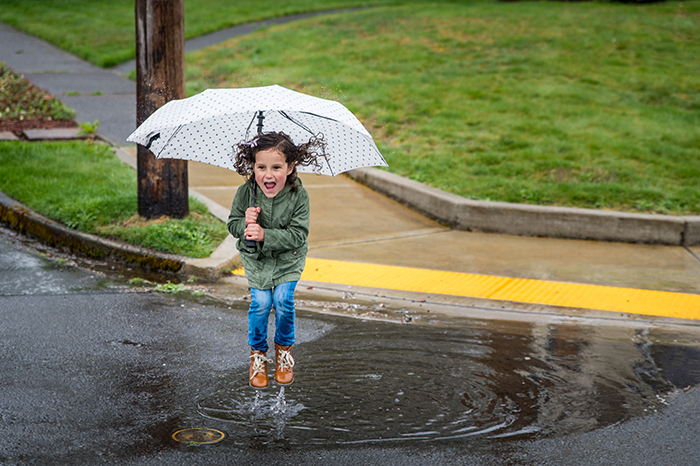
In this image, the jumping child is frozen in air. Even the water attached to her shoes is frozen in an unnatural freestanding column and her hair is still flying. Credit: Felicia Kieselhorst

A high shutter speed is generally required to freeze motion.
When you slow down your shutter speed, you create the opposite effect, by causing
motion blur. Slower moving subjects will need longer shutter speeds to blur. For example, blurring moving water might not take too long, half a second or a few seconds maybe. Blurring the stars in the sky will take several minutes at least. All shots are different, but a shutter speed below 1/15th of a second is a good place to start when aiming for motion blur.

In this photo, the spray coming out of the nozzle is coming with faster force, so it appears to be blurred together like a motion blur. The mist bouncing off the tire is moving at a slower pace and is frozen in air. Credit: Felicia Kieselhorst
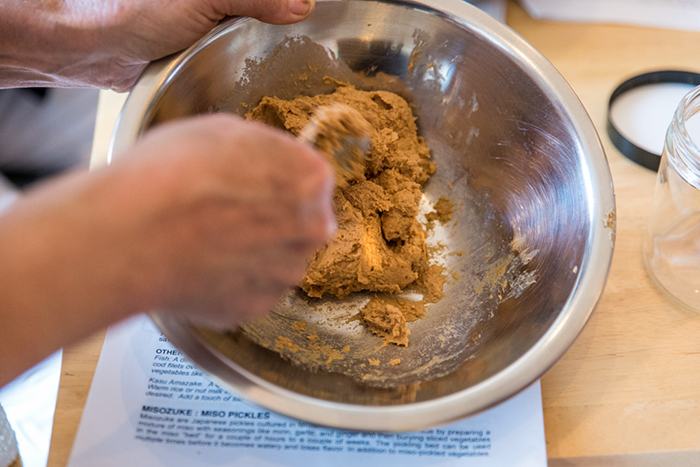
This participant at a Hands-On Pickling Class is stirring a bowl of Miso. Since the scene was rather boring, some experimentation with motion blur was a good approach. In the end, this shot was rejected for other reasons (mostly that distracting hand blocking so much of the area of interest!). Credit: Felicia Kieselhorst
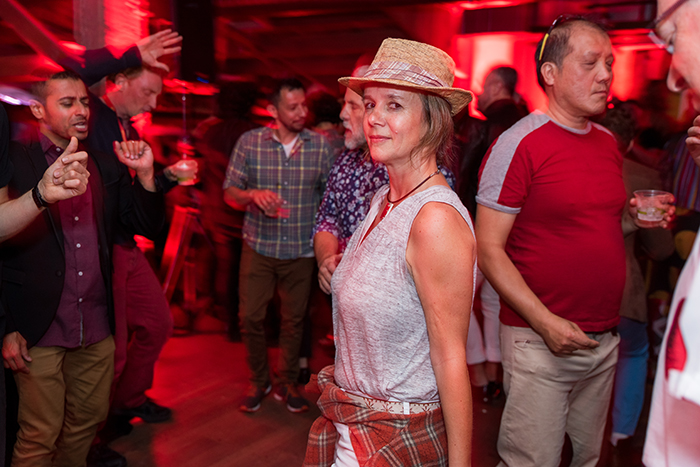
This motion blur example utilizes a long shutter speed coupled with an on-camera flash to achieve an effect called shutter drag. The relatively still foreground subject is frozen by the pop of the flash, while the faster moving background subjects show more motion blur. Notice the overall red color cast as well, a result of the party lighting in play at the venue. Credit: Felicia Kieselhorst
A shutter speed below 1/15th of a second is a good place to start for motion blur.
Freezing action is relatively easy to do, with no special equipment needed (aside from lots of light to compensate for that fast shutter!). Creating motion blur is a little more involved.
A tripod (or a monopod in a pinch) is really essential to cut down on camera shake
. Camera shake is a second type of motion blur… an undesirable one. Have you ever been shooting in low-light and come home to find your images all seem a little blurry? That's camera shake! At slow shutter speeds, even your own breathing will blur an image. Intentional motion blur can add to an image. Unintentional camera shake can ruin it!
In a motion blur image, everything in the image except for your moving subject should be sharp (for example, the trees, the walls, or the table). In a camera shake image, all those non-moving parts get blurry too. Using a tripod when at lower shutter speeds will prevent this. As a general rule, one can handhold without camera shake at 1/30th of a second. Keep in mind that a longer lens is harder to hold so you'll need to speed up your shutter if you have one. Too much coffee can also require a speeding up!
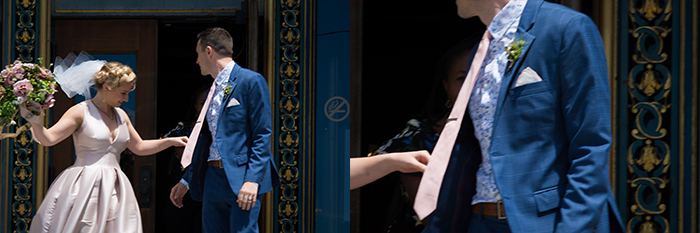
Take a close look at the example of camera shake in these two photos. When viewing the image as a whole, it isn't super obvious that there is camera shake at all. Getting a bit closer in on the action, one can see not only that the people are blurry (which could be attributed to motion blur) but that the ornate doorway detailing is also blurred… a sure sign that this image is suffering from camera shake! Click here to see larger version. Credit: Felicia Kieselhorst
Important
Use a tripod to cut down on camera shake or shoot at 1/30th of a second or faster.
In Lesson 6 we'll deep dive into photographing motion and revisit Motion Blur in more depth. For now, just remember that shutter speed plays a practical purpose in exposure and a creative purpose in the look and feel of your shot!
You can shoot on Shutter Priority Mode if you want to control Shutter Speed while the camera sets the Aperture (and the ISO if you are on Auto ISO).
Back to Top
Troubleshooting Different Scenarios
Now you know how the Exposure Triangle works together to control the light hitting your sensor. You also know how those elements used individually can affect the visual and creative aspects of your image. Putting them all together can lead to some sticky situations.
Imagine the following troublesome scenario and think of how you'd approach it.
Scenario #1: Dancing the Dark
You are shooting dancing in a dimly lit ballroom with moving DJ lights. The client will print 4x6 photos in their party album and share on social media, but the images won't be used for publication or enlargements.
It's dark in here! How do we make our subjects stand out?
The Creative Elements
- You want to freeze people dancing so that you don't have motion blur.
- You'd like a shallow DOF to separate dancers from the busy background.
The Technical Elements
- A dark room will take MORE light (by using a higher ISO, a longer shutter speed, or a wider aperture).
- Freezing dancing requires a faster shutter speed to prevent motion blur.
- A shallow DOF requires a wider aperture.
- The lowest possible ISO is always better, but for small prints and web use, higher ISOs can be acceptable.
- Those moving DJ lights mean you need to be prepared for potentially changing exposure with each image.
How would you approach this scenario, based on everything you've learned so far?
Recommended Approach
In this case you choose to shoot on Manual Exposure (so you can control both your shutter speed and your aperture).
You set your shutter speed on the low end of high (maybe 1/200th or 1/500th) to freeze the motion while still letting in maximum amounts of light. You open your aperture to its widest, simultaneously allowing in the most light and achieving a shallow DOF.
The small output size needed by the client means you can get some wiggle room out of your ISO—a good thing because even with your f-stop at 2.8, your 1/500th shutter speed means you've still got a pretty dark exposure. Throwing your ISO up high will get you to the exposure you need.
You decide to shoot on Auto ISO (your camera sets the ISO) since you've settled on higher ISOs being acceptable. This gives you some additional flexibility and speed to compensate for the ever changing DJ lights.
You'll shoot on Spot Metering or Center Weighted Metering (remember this from Lesson 1?) since the most important area in the exposure will be your focus point and the DJ lights might cause some extreme contrasts.
BONUS—If you are already an advanced shooter, you might add on-camera flash or off-camera flash to the scene. How would this change your approach?
Let's explore a couple more scenarios and think about how to approach them from a technical standpoint.
Scenario #2: Up with the Lark
You are shooting a landscape right before sunrise. There are foreground and background elements, but no moving subjects. You plan to create high quality enlargements for gallery display.
The Creative Elements
- You want front to back sharpness in your image (ie. deep DOF).
- You don't want any camera shake (which will be very noticeable at large size).
- You don't want any ISO noise (which will be very noticeable at large size).
Consider what you know about the technical requirements and determine your approach to shooting this image. Don't forget to factor in:
The Technical Elements
- Your exposure mode (why did you choose this mode?)
- Your metering mode (why did you choose this mode?)
- Thoughts about ISO, Shutter Speed, and Aperture settings:
- Your exact settings will depend on the specific lighting, but you should be able to say whether you'll be on the high, medium, or low end of each scale.
- Are you choosing your settings for creative reasons or technical reasons? Your choices may vary.
- Image quality appropriate to your desired output.
- Do you need any special equipment to get the ideal result?
- BONUS – Are there any special considerations to this image and how do you address them? For example: shooting into the rising sun or away from it, silhouette or not, changing light conditions during sunrise, and so on.
Scenario #3: fun in the Sun
It is a bright, sunny day and you are shooting a portrait with a creek as a background. The images will be used on social media and might be blown up to decent-sized prints.
The Creative Elements
- You want a shallow DOF so your portrait subject pops from the background
- You don't want any motion blur in your subject
- BONUS – You'd like to blur the running water of the creek behind. Is it possible?
Again, think about what you know about the technical requirements and determine your approach to shooting this image. Don't forget to factor in your exposure mode, your metering mode, your thoughts on ISO, Shutter Speed, and Aperture settings—you know the deal!
Do you think you can create motion blur on the creek in these conditions? What are some issues you might run into trying to do that? These are the types of considerations you want to think about before a photoshoot.
Back to Top
Using White Balance
Before we dive into really fun topics like composition, there is one final technical aspect we need to discuss that's under your creative control: white balance.
Have you ever taken a photo of someone and noticed their skin looks all funny? Maybe way too yellow for example? Or photographed something white but it looks slightly magenta or green or blue? You've had White Balance problems!
There are four related but different terms (White Balance, Color Temperature, Kelvin Temperature, and Color Cast) that come into play when making colors appear natural… making your whites white and your blacks black and all the colors in between. Let's dive into them one by one then put them all together at the end.
All light sources emit a certain color of light called Color Temperature, or sometimes called Kelvin Temperature. (Kelvin is a unit of measurement, like an inch or a pound. Color Temperature and Kelvin Temperature can be used mostly interchangeably.)
You've probably seen Color Temperature in action with your naked eye. For example, have you noticed that standard household lightbulbs (filament style, not CFL) put off a nice warm light, almost yellow at times? Or that office fluorescents give off a sickly green? Even the sun is affected by Color Temperature! You can definitely recognize how warm the light of a sunset looks, even without seeing a red and orange sky. Have you ever noticed how cool and blue a deep shade looks?
Each of these instances falls somewhere on the Kelvin Temperature scale. It can be helpful to learn some of the more common numbers themselves (for example, Noon Daylight Sun = 5500K) but the concept is more important than the numbers here.
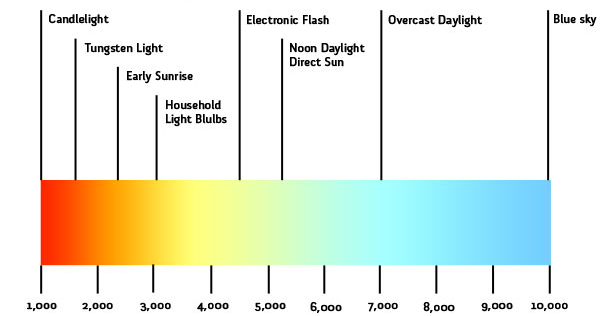
As you can see from the scale above, Color Temperature (measured in Kelvin) falls along a Blue to Yellow spectrum. Credit: LightingDesignLab
Why do all these changing Color Temperatures matter? Because they create Color Casts (our third of the four terms). When super yellow (or green or blue) light falls on a subject, that subject reflects some of that color back to you. The human eye does a good job of neutralizing this effect so that you still see "white" even if you are looking at yellow-white.
Your camera doesn't make that compensation automatically like the eye does. This leads to photos with a color cast. A cast will be super obvious if your image contains whites or blacks, but even an image without grey tones can appear color casted.
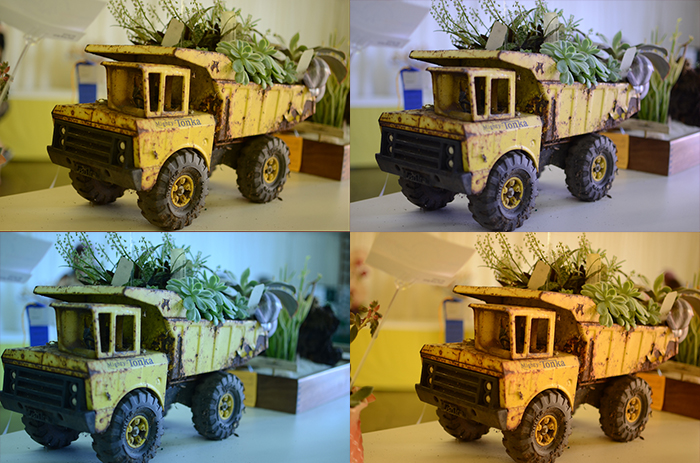
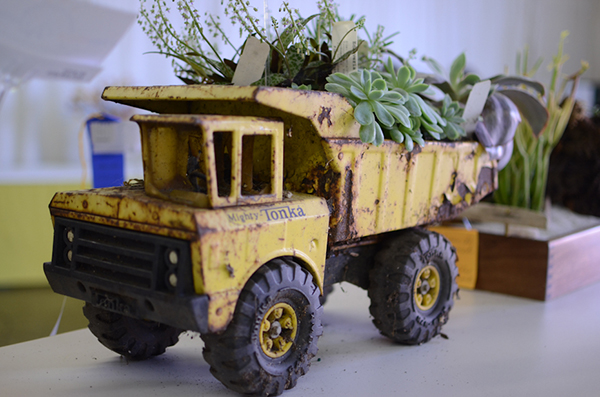
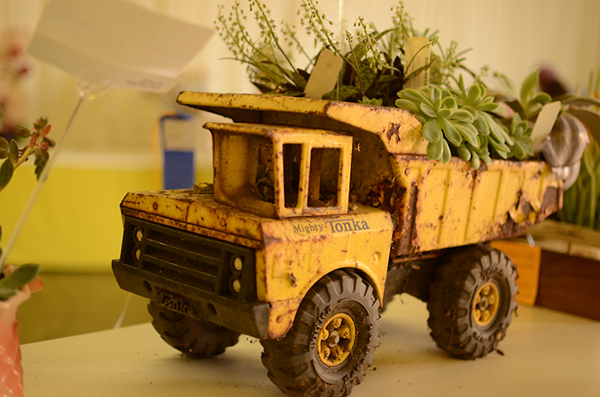
Same truck, different day. Color casts can make this Tonka wonky. Credit: Felicia Kieselhorst
Let's take a closer look at the color cast issues.
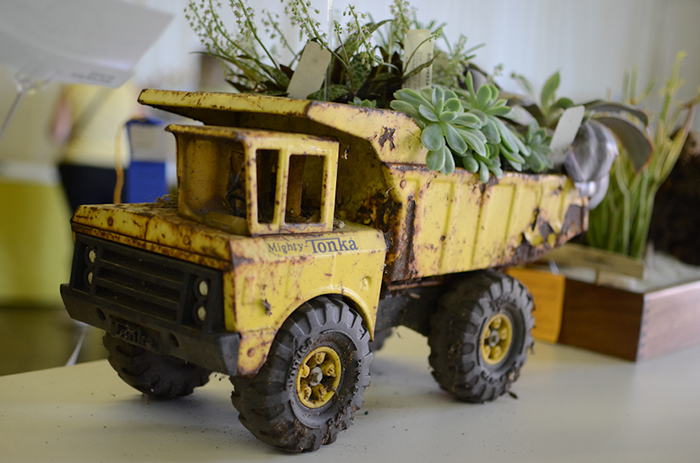
This neutral image (shot on Auto-WB) has no apparent color cast because the white balance setting matches the actual conditions.
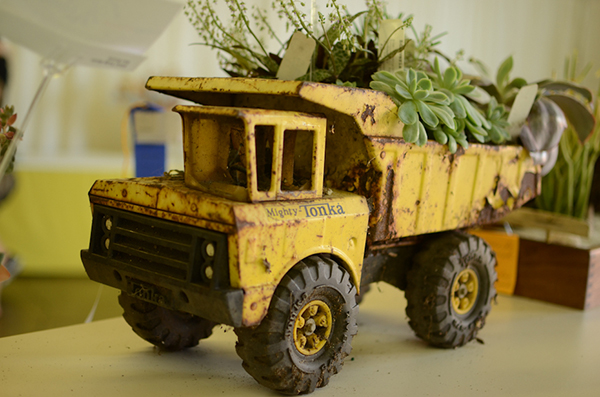
This image was shot on Daylight WB, but the lighting inside the tent was not daylight, so there is a slight color cast to the image.
At first glance, this shot taken on Fluorescent WB seems to be pretty neutral. Closer inspection indicates it isn't quite neutral, with some magenta being especially obvious.

The Tungsten or Incandescent setting is perhaps the worst one here.
The Shade setting is equally not right.
This brings us to our fourth term, and possibly the most important one…White Balance! White Balance (WB) is a setting on your camera that will let you apply a correction similar to the one your eye applies automatically. Setting a proper white balance will let the camera read an image as too yellow but then shoot the image as neutral!
Note that White Balance can be adjusted easily on a RAW photo in post-production, but there are limits to how far one can correct in post. Best practice is to get WB as near to correct as possible in-camera and then do any final tweaks in post-production.
Get your WB as near to correct as possible in-camera and then do any final tweaks in post-production.
You'll find several White Balance options in your camera.
- AWB…Auto White Balance: Exactly as it sounds, your camera makes the choice. Cameras are smart these days, and many times AWB is a perfectly acceptable setting.
- Presets…Sunny, Shady, Tungsten, etc: You should be able to find most lighting conditions listed here (if you can figure out the symbols!). Many are easy to distinguish (a sun icon for sunny temps) but some are more confusing (a house with a triangle coming off it for shade). You can find a list of all the icons in your manual. You'll want to choose whichever preset most closely matches your situation, and possibly make some further adjustment in post-production.
- Temperatures or Custom: You'll likely also be able to set your WB based on a Kelvin number. For example, if the box on your CFL bulb says it is 4700K, you can set your camera to exactly that. Setting your WB by the numbers gives you the ultimate control and can be very important when doing certain types of color-critical work (for example, e-commerce photography) but for other genres (for example portraits) simply choosing sunny, shady, and so on, can be as good and more efficient.
Setting your White Balance is obviously a technical choice, and generally one wants things to be correct. For this reason, we typically set the White Balance to match the lighting conditions under which we are shooting.
However, things get can exciting when you begin to think of White Balance as a creative color choice! Although neutral color is "correct," there are many instances where allowing a color cast can add emotive power to an image or subtle depth to a story. We can change the White Balance setting to affect the mood or overall look of a scene, such as by warming or cooling an image. For example, setting your WB to Cloudy when shooting in sunny conditions can add orange to a scene, which in turn adds some warmth—great when shooting people with fair skin or when shooting a sunset.
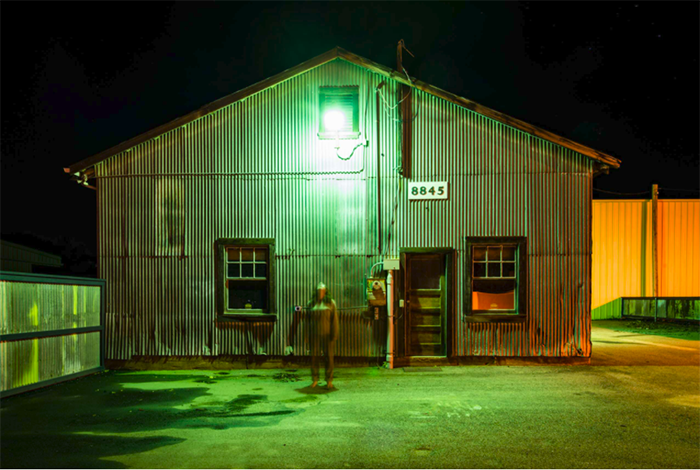
In this creepy scene, I could have easily neutralized the strange green cast, but I felt the color added to the spooky mood of the shot. Credit: Felicia Kieselhorst
When working on your next exercise, think about whether a neutral image or a creative WB choice will be most impactful. While shooting, experiment with the different settings your camera has.
Final Notes on White Balance
CFLs (Compact Fluorescent Light Bulbs) are technically fluorescent, so you might be tempted to shoot them using the Fluorescent WB settings. CFLs are tricksters, though! Most are "daylight balanced" meaning you'd shoot them on the Sunny setting. Some are even "extra warm" or tungsten balanced to more closely match old household bulbs.
Even with great care on your WB settings, you'll sometimes run into troublesome Mixed Lighting
situations. We'll discuss this a bit in Lesson 4 when we dive into lighting (and photo majors will really get into it in the Photo Setup class). For now, the basic points are as follows. It is possible to have two (or three or four) different Color Temperatures in a single image. Your camera can only neutralize one at a time, and so you'll need to confront at least one color-cast in your shot, which you can leave as-is, correct with gels (if using artificial lighting), or adjust in post-production.
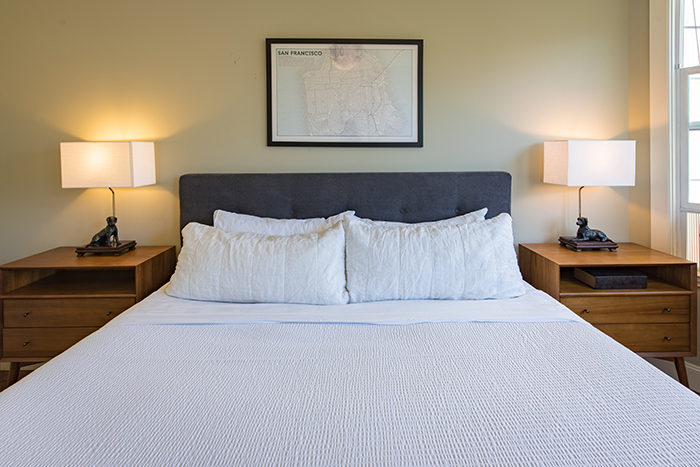
In this image with mixed lighting, the main light source was a large window to the right of the frame, ie. daylight balanced light. The two bedside lamps were turned on (lights should always be on in real eastate photos) and contained normal household bulbs, tungsten balanced. The camera White Balance setting was Daylight, so as a result the majority of the image looks neutral, but look at all the yellow coming off those lamps! If a truly neutral image was required, the lights could be gelled before shooting or the color casts could be corrected in post-production. Credit: Felicia Kieselhorst
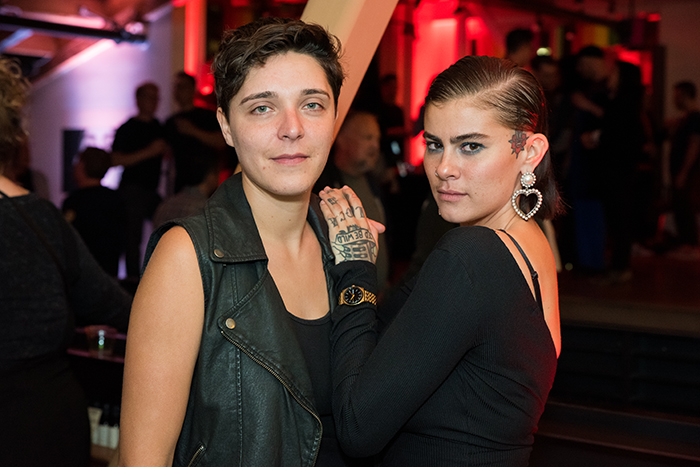
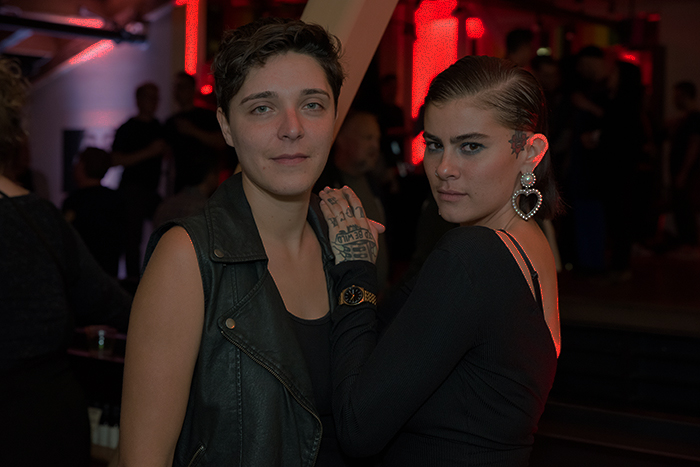
The main light source in this portrait was a speedlight flash (daylight balanced) in the camera's hotshoe. The client paid to have red uplighting adding ambience to the party, so it was important to retain this color cast in the final images. Using the flash to neutralize skin tones in foreground subjects allowed the red to blend into the background, just as it did at the party. Credit: Felicia Kieselhorst
Back to Top
