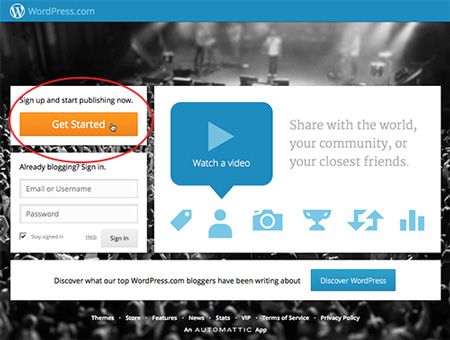
Now that you're familiar with some of the basics of what WordPress has to offer, it's time to break out of the WordPress.com training wheels and move into a full-fledged WordPress.org site. First, let's see how to install it!

Something WordPress is known for is its world famous five minute install. The idea is to get you up and running as quickly as possible; let me tell you, it lives up to the name. There are two ways to do the WordPress install. The first way is through your hosting providers.
Hosts with One Click Install
Due to WordPress's popularity, many hosts have added "one click" WordPress installs to their hosting panel. In most cases, it's as easy as it sounds: go to your host's admin panel, find where the one click installs are, choose WordPress, fill out the short form and you're done.
The form will ask you which directory to install in, and sometimes the title, admin user name, and password. You should get an email after about 10 minutes with the login information.
Some hosts that offer one click installs, as well as instructions, include:
Even if your host is not listed above, there's a good chance it offers one-click WordPress install. Check with them, or Google "[Your Hosting Company] WordPress Install" and see if instructions are already online.
If you run into any problems installing WordPress, such as the common issue of an out-of-date PHP version, contact your server and they should be able to help you through the kinks.
Manually Installing
If you're feeling adventurous (or your host doesn't support one click, or you're using a localhost like XAMPP or MAMP), you can always do a manual install. It's slightly more complicated, since you need to first create the database where WordPress will live. If you feel comfortable creating a PHP database, click here for the manual installation instructions.
Once you've got WordPress installed and working with your Web host, it's time to start combing through the settings.
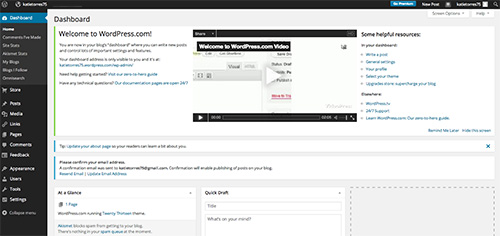
Once you finish the install, you should be taken right to the WordPress admin area. For future reference, that URL is www.your-domain.com/wp-admin/ (or your-domain.com/wordpress-directory/wp-admin/). The information will also be emailed to you when you finish your install.
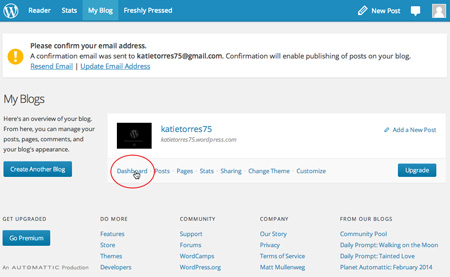
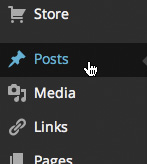
Once you're in the admin area, you'll want to click Settings from the left sidebar.
In Settings, you will be able to do everything from setting the Web site's name and timezone to determining the structure of the links. There are a few things I want to point out in each page.
General Settings
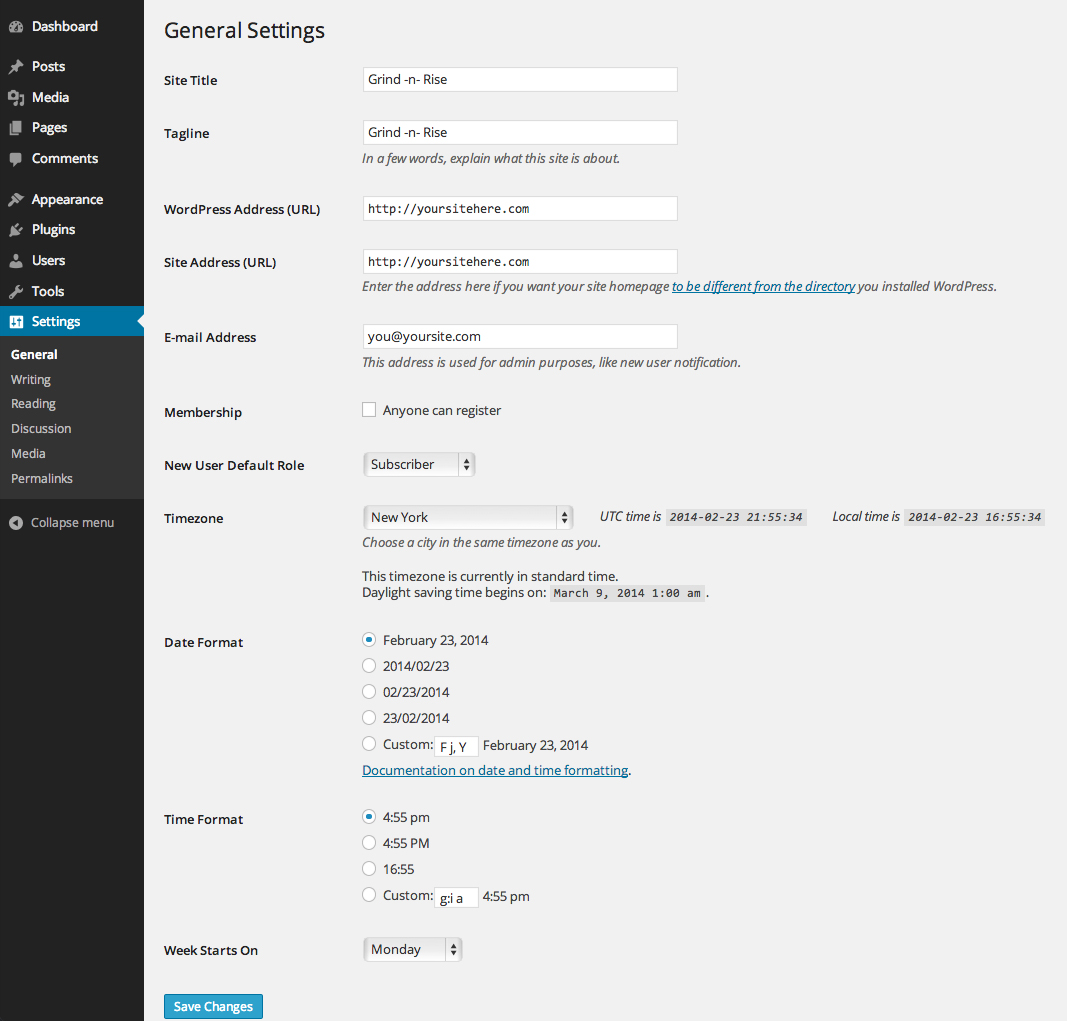
Clicking Settings will take you to the General Settings screen. Here you will be able to set the title and tagline (which are both accessible when developing your theme), as well as URLs and email addresses associated with the site. You will also be able to set the timezone and formatting for date and time.
 |
The General Settings page. Click the image to view a full sized version. |
Of note is a dropdown called "New User Default Role." If you decide to let users create a username and password for your site, this is the default role they'll be given. I recommend you keep it at "Subscriber" as any other role—like we looked at earlier—gives them some sort of control in the admin panel.
Writing
Below the General category in the Settings menu on the left sidebar, you'll find Writing. Click it, and you will be taken to the Writing Settings. Here you can set some defaults for your posts, including Category and Format. You will also be able to configure posting via email, though it's not something I'd recommend, for security reasons.
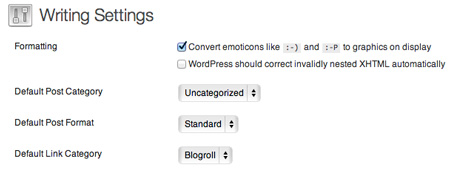 |
From the Writing Settings page, change your default post category and convert emoticons into graphics. |
Reading
Below Writing, of course, is Reading. The Reading Settings are for what the user sees. Most important is the "Front page displays" section. There are two options: your latest posts, which would make your site function more like a blog, or a static page, which allows you to choose a content page to go to whenever a user visits www.your-domain.com. If you want to maintain a blog, you can choose a Posts page as well, though you do not need to.
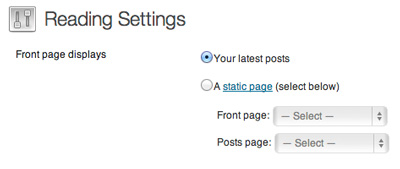 |
Under Reading Settings, choose whether you'd like a front page blog, or a static front page. |
Permalinks
Permalinks are how you get intuitive, easy to understand links. So instead of:
http://www.your-domain.com/?p=1243
You get:
http://www.your-domain.com/2013/07/this-is-a-post/
On the Permalinks page, you can choose exactly how you want your URLs to look. I generally go with "Month and name" but that's completely up to you.
One thing to be aware of is that descriptive permalinks, which contain keywords, will have a major effect on your SEO (search engine optimiziation). Search engines like Google can look at a URL like casabona.org/10-best-websites-ever/ and know some keywords to associate with the page without even crawling it. A URL like casabona.org/?p=234 does no such service.
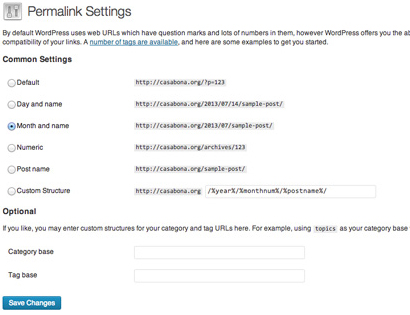 |
The Permalink Settings screen. |
It's worth noting that WordPress allows you to do a lot more with permalinks, but that is a bit more advanced than what we will get into here.
Other Settings
|
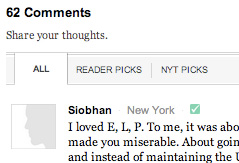
WordPress sites that have large user communities and active comment areas—such as the New York Times—require careful setup in the Discussion Settings area and user moderation. |
There are two other settings screens we haven't discussed yet: Discussion Settings and Media Settings.
Discussion Settings are where you will manage how comments are handled. You can do things like turn them off completely, require commenters to be users, set up automatic email to moderate comments, select how approval works, and set up a comment blacklist for certain terms or URLs.
The Media Settings, meanwhile, are where you can set image sizes, location, and organization.
PHP stands for "PHP: Hypertext Processor." It is a programming language (like Javascript), as opposed to HTML, a markup language. The main difference is that HTML structures data on a page. PHP allows you to apply logic and perform interactive tasks based on a set of criteria.
PHP is a server-side language, meaning our server (or remote computer) does all of the work, the sends the end result to our browsers. You can imagine the process like a translator — the server translates the PHP into a language our computers can understand. Conversely, HTML, CSS, and Javascript are all client-side languages, meaning our computers, specifically a web browser, does all of the processing. As an example, in PHP, the code would be this:
<?php echo 1 + 1; ?>
However, what we would see in the browser is just 2.
Because of this, you can't develop PHP on any computer. The computer needs to be able to understand PHP, much like you can't speak English to someone unless they also speak English. You can accomplish this one of two ways: purchase hosting and work on a server that understands PHP, or set up a local development environment. I usually recommend both.
TIP: If you're looking for good, affordable hosting, I recommend Web Hosting for Students. It's $25 for the year and works very well.
As far as setting up your own local environment both XAMPP and MAMP are excellent tools.
Since PHP has this ability, it's often used to do heavy duty work on websites — pull information from databases, log-in to secure areas, run calculations and display dynamic data.
Every PHP Program begins with <?php and ends with ?>. This tells the server to process everything in between these tags.
<?php
	PHP code lines go here
?>
PHP acts as a partner to HTML. It enables HTML to do things it can't do on its own: interactive tasks. PHP code and HTML code can reside together in a file on your website. For example, here is a plain HTML file:
<html>
  <head><title>Hello World Script</title></head>
  <body>
    <p>Hello World</p>
  </body>
</html>
You can write the same script using PHP code by adding PHP tags within your HTML. Here, we will use a basic echo command to write "Hello World":
<html>
  <head><title>Hello World Script</title></head>
  <body>
    	<p><?php echo "Hello World"; ?></p>
  </body>
</html>
WordPress uses this convention heavily to pull information from a database, determine when a user is logged in, process forms, and much much more.
On top of the opening and closing PHP tags, there are a few other important conventions to know:
 |
|
 |
| |
All PHP files must end in .php Statements (or commands) in PHP end with a semicolon (;). You can add comments (non-functional text) using:
//This will be ignored/* This will be ignored and can be multiple lines. */
|
|
 |
|
 |
One more note before we get into the fun stuff: Dreamweaver has been recommended in other courses, and that will work fine for the WordPress course as well. However, much of the site will not be viewable from within Dreamweaver without going through some level of effort. My recommended workflow is to use Atom and upload your files to your server. This will be covered more in the upcoming lectures.
Variables are a way to store information in order to reference it later. Variables can be used to store, names, numbers, and other important data. All PHP programs, including WordPress, heavily use variables.
All variables must start with a $, followed by an alpha-numeric character string. Here's an example:
$age = 30;
$age is a place holder for that we have stored the number 30 in. We can then use age as if it's the number 30, printing it, or even doing calculations on in like adding, subtracting, etc. If we decide later we want to change it, we can do that too. Notice the variable is assigned a value using an equal sign (=).
Why use variables?
Variables are easier to keep track of, you can change them on the fly, and most importantly, sometimes you don't know certain information until runtime. WordPress, for example, supports multiple people logging into one system; it's impossible to know someone's name before they log in, so WordPress uses a variable to store a user's name once they log in. You might see something like this:
<?php
  $username = get_logged_in_user();
  echo "Hello $username!";
?>
Types of Variables
Computers are very specific about how different types of data are represented. Words are represented differently than numbers are, and further, whole numbers are represented differently than decimal numbers.
Luckily PHP handles most of this for us. We do not need to declare what kind of data our variables are most of the time. This makes PHP a weak-typed. It will figure out how we want to use our variables for us.
That said, there are a few different ways variables can be represented:
|
|
|
| |
Integers: These are whole numbers (ex. 0, 1, 45, 128) Floats: These are numbers with decimal points (ex. 1.0, 2.34, 3.16) Characters: These are single letters, numbers, or symbols (ex. 'A', 'b', '1', '@')
It's worth noting that 1 and '1' are handled differently by a computer: You can do calculations with 1, but not '1'. Usually PHP is smart enough to know the difference and adjust for us. It's also worth noting that capital letters ('A') are considered different from lower case letters ('a').
Strings: These are a collection of characters (ex. 'Hello', 'Joe', 'WordPress') Booleans: A Boolean can have only one of two values: true or false. Arrays: Arrays are collections (or sets) of any of the above variable types.
|
|
|
|
|
While integers, floats, and booleans can be written without the use of quotes (see the example above), strings and characters must be placed in quotes:
<?php
	$name = "Joe";
	$first_letter = 'J';
?>
You'll notice I used both single quotes and double quotes in the example above. There are some nuanced differences to them, but for assignments like these, they can be used interchangeably.
Arrays are a bit different from the rest of our variables. Arrays act as key -> value pairs. Say we wanted a collection of colors. We could store each color in a variable ($color1 = 'red'; $color2 = 'blue';) but that can get cumbersome and hard to manage. Instead, we would use an array:
<?php
	$colors = array( 'red', 'blue', 'green', 'yellow' );
?>
In this example, we have an array of size 4 (there are 4 elements), and we can access any one of these by referencing its key, or index. Indexing starts at 0 for arrays, so an array of size 4 will have indexes 0-3.
<?php
	echo $array[0]; //This will print "red"
	echo $array[3]; //This will print "yellow"
?>
We can also define indexes as strings. Let's look at a slightly more complicated example. Here's an array of information about me:
<?php
	$joe = array('name' => 'Joe Casabona', 'age' => 30,
'profession' => 'Web Developer');
?>
Notice that we are replacing the numeric indexes with more friendly names. Now I can reference information like this:
<?php
	echo $joe['name']; //This will print "Joe Casabona"
	echo $joe['age']; //This will print "30"
?>
WordPress makes heavy use of arrays to return information about posts, pages, and just about anything else.
Control Structures are used in PHP to employ logic to our code. They are what do the decision making. The most common of these control structures is if statements, and they can appear one of two ways:
<?php
if ( condition to check ){
	//code to execute if the condition is true}
}

if ( condition to check ):
	//code to execute if the condition is true
endif;
?>
You will see both of these formats in WordPress code. What it says in plain English is this: "If some condition is true, execute this code." Before we look at a more complete example, let's look at what's referred to as "logical operators" — statements that can either be true or false.
We can compare the equality of 2 values with ==. We use "==" to compare, since "=" is reserved for assignments:
There are a number of other comparisons we can make as well:
We can combine any of these logical operators and check the overall "truthfulness" of a statement:
|
|
|
| |
!= is "not equal"
(true && true) is true ex. "The sky is blue AND the grass is green" (true && false) is false ex. "The sky is blue AND the grass is pink" (false && false) is false ex. "The sky is green AND the grass is pink"
|| is "or"
(true || true) is true ex. "The sun is hot OR snow is cold" (true || false) is false ex. "The sun is hot OR snow is made of candy" (false || false) is false ex. "The sun is cold OR snow is made of candy"
|
|
|
|
|
Now let's look at a concrete example of an if statement:
<?php
	if ( 10 >= 5 ) {
		echo "10 is greater than or equal to 5";
	} else {
		echo "10 is not greater than or equal to 5.";
	}
?>
Along with if statements, we can use loops to repeat code or continually check the condition of a statement.
Loops are a fundamental part of WordPress specifically (as we'll see later in the lectures, the important portion of WordPress code is called "the Loop." We will look at two types of loops: While Loops and Foreach Loops.
While loops will continue to execute until the condition is false. Let's say we wanted to print a list of number from 0 to 10:
<?php
	$i = 0;
while( $i <= 10 ) {
	echo "<p>$i</p>";
	$i = $i + 1;
}
?>
This will print out $i, starting at 0, and each pass through the loop increment $i by 1, until 10 is printed. Once $i is 11, the loop stops executing.
The line $i = $i + 1; is very important here. Without it, the loop will never end.
For each loops are designed specifically for arrays. Let's take our colors example from earlier:
<?php
	foreach( $colors as $color) {
		echo "<p>$color</p>";
	}
?>
This says, "take each color in the array and assign it to the variable $color, one at a time. Then print that color." This loop will end when there are no more elements in the array.
One more note about our conditions. When checking equality, I recommend using "Yoda" conditions; place the variable on the right side of the condition. This will prevent accidental assignments and bugs in your code.
Good:
<?php if( 10 == $i ) { /* do something */ } ?>
Bad:
<?php if( $i == 10 ) { /* do something */ } ?>
They are called Yoda conditions because they read a bit backwards, like Yoda from Star Wars would speak: "If 10, this is."
Functions are reusable snippets of code that can be called multiple times. You can imagine functions as variables for blocks of code. Functions are formatted in PHP like this:
<?php
	function hello_world() {
		echo "Hello World";
	}
?>
Each function starts with the keyword function, followed by the name of the function, then parenthesis — () — and opening curly brace. The function ends with a closing curly brace.
Functions can do one of two things:
We call the above function like this:
<p><?php hello_world(); ?></p>
The result would be:
<p>Hello World</p>
There are several reasons to use functions, but the main one is that if we need to use the code more than once, it would be much easier to put it in a function and call the function. That way if we need to change it, we only need to do so in one place.
If a function were to return a variable, it could be treated as it's own variable or assigned to a separate one. Let's look at a function that returns a boolean:
<?php
	function is_bigger() {
		return 10 >= 5;
	}
?>
This could be used in 2 ways:
<?php
	$bigger = is_bigger();
	if( $bigger ) {
		echo "The function returned true.";
	} else {
		echo "The function returned false.";
	}
?>
or
<?php
	if( is_bigger() ) {
		echo "The function returned true.";
	} else {
		echo "The function returned false.";
	}
?>
Here, the function is treated as a variable. This is a common use in WordPress.
Finally, we can pass variables to functions like so:
<?php
	function is_bigger($a, $b) {
		return $a >= $b;
	}

	$bigger = is_bigger(10, 5);
?>
Notice that we've added 2 variables to our function, and then when we call the function, send 10 and 5. This gives our functions a lot more flexibility, because now we can send any 2 numbers to compare. You will see a lot of these boolean functions in WordPress; they are often used to track what template we are on, what kind of data is being displayed, and much more.
Functions can do more than just return boolean values. Anything that can be stored in a variable can be returned from a function.
While this isn't a comprehensive look at PHP, this should make reading WordPress code a bit easier. As you move through the rest of the lectures, feel free to refer back here to double-check syntax and figure out exactly what our WordPress code is doing.
That about does it for the introduction to WordPress. In Exercise Two, you will be required to install and mess around with WordPress a bit to get familiar with it. In Lecture Three, we will really dig into nuts and bolts and start developing our own theme!

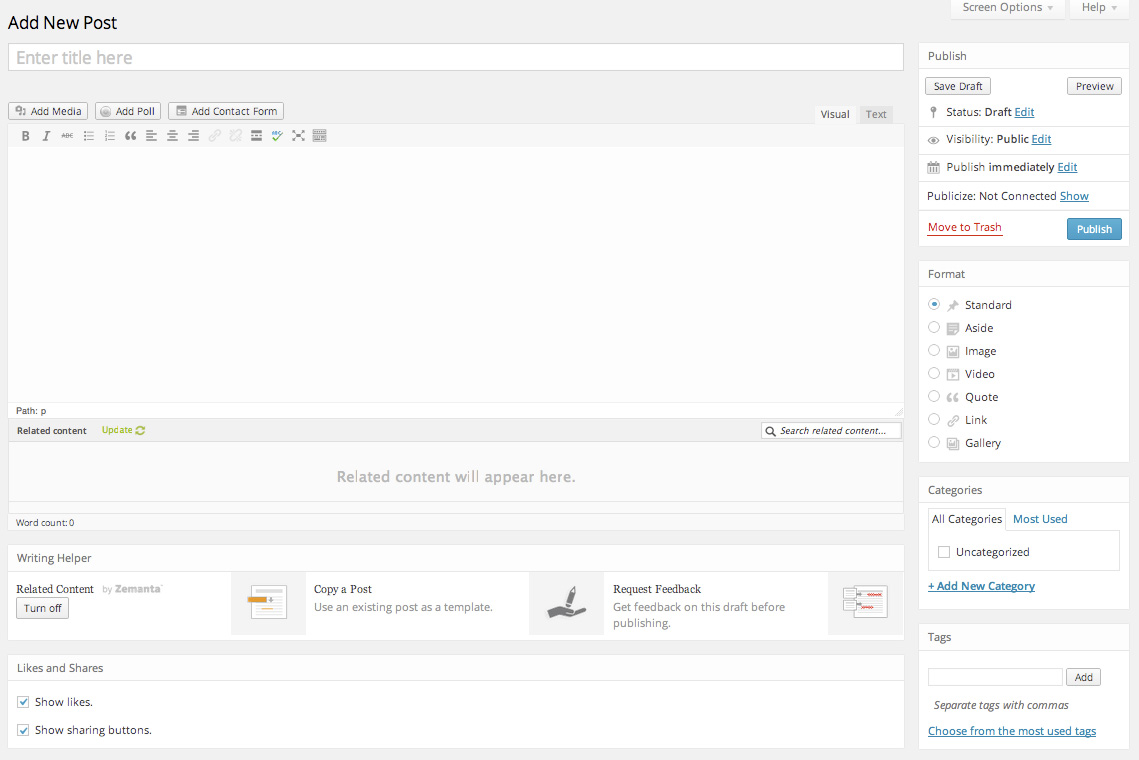
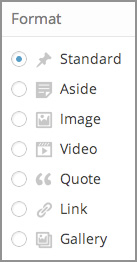 You'll also see several choices for Format on the right side of your Add New Post screen. These are worth talking about in more depth.