Busy Bee. In this lecture, you'll learn to create motion tweens, custom motion paths, nested animations, and use easing and shape tweening.
Now that you have gotten comfortable with creating graphics in Animate, it's time to get moving.
In this lesson, you'll learn how to animate graphics. You'll begin with the basics of motion tweening, learning how to change the position, size, angle, and pace of an animation.
We'll explore how to animate and orient objects along a motion path, animate text and add 3D effects, and add sophistication using easing and nested animations.
Finally we'll examine shape tweening, which can be used animate amorphous contour changes, such as billowing smoke or the flow of water, and talk about how to use shape hints to smooth them out.
In
this lecture, you can expect to:
Learn the origin of the terms keyframe and tween. Learn how to create a motion tween and modify an object's position, size, and rotation, color, and filters. Learn how to animate and orient an object along a path. Learn how to animate text and apply 3D effects. Learn to create complex movement using nested animation. Learn how to create shape tweens and control shape morphing using shape hints.
Keyframes and tweening are both terms that originate in the world of classical animation.
Think about the visual message you wish to convey before setting it to motion.
Your artwork must be converted to a symbol before it can be motion tweened.
In motion tweening, Animate automatically figures out ("interpolates") what the frames in between keyframes should look like.
You can shorten and lengthen tween spans by dragging in the Timeline.
The Free Transform tool allows you to scale and rotate shapes using the bounding box handles. Additional settings at the bottom of the Tools panel let you skew and distort.
Use color effects and filters tastefully. Be sure there is a good reason for your choices.
Understanding Animation
What exactly is animation? Animation is the change of some property of an object over time. That property could be its position (movement), its size (growth), or angle (rotation), just for starters. In Animate, you can animate many different properties of an object.
In the example below, a very talented animator called Nosepilot created a Flash animation that show a range of animation techniques. If you look closely, you'll see characters and objects that are animated by moving, rotating, and changing in shape and size.
Using Animate, you can also control the path of an object as it moves around the Stage and control the way in which it speeds up or slows down, using a technique called easing. You can animate text as well as images, you can apply 3D effects, and you're not limited to one animation at a time. You can combine have several related animations using a technique called nested animation.
Below is an animation that displays all of the animation techniques that you will learn in the rest of this course. Frame-by-frame animation is used to make the traffic cop's arm move up and down. Motion tween is a technique used to make the car go by. Nested animation is a technique used to make the wheels of the car appear to be moving.
NOTE: The techniques you are about to learn are classic techniques from the golden era of Flash animation. They will work perfectly if you are creating a document using ActionScript 3 publish settings to create SWF files that can be played in a Flash player for a desktop browser.
For various reasons, these techniques won't work properly if exporting files to HTML5 Canvas. This means you won't be able to use them to create Web animations, if you want your work to be accessible on a mobile device. (Fear not, though, we'll explore techniques for HTML5 Canvas projects in the next lecture.)
Motion Tweens
As animators, we all have to start somewhere, and there's no better place to begin than motion tweening.
The term "tweening" comes to us from the world of classical animation when animators would draw every single frame of a cartoon by hand. Senior animators would be responsible for drawing the beginning and ending poses of their characters. The beginning and ending poses are the most dramatic parts of a motion (and the most fun to draw) and thus called the "keyframes" of the animation.
Junior animators would come in and draw the in-between frames—the frames between the keyframes. Drawing the in-between frames became known as "in-betweening," or simply "tweening."
Tweening in Animate refers to the smooth transitions that the program creates between keyframes.
Creating a motion tween in Animate is simple. Let's start with an example where we already have a graphic on the Stage.
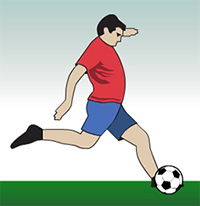
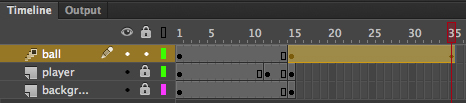
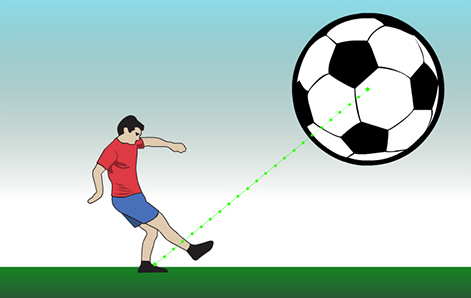
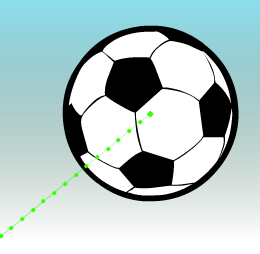
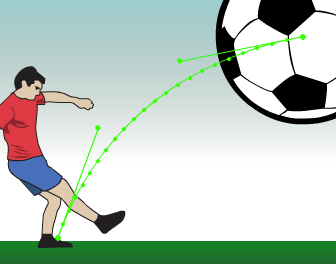
Download this starting FLA (soccer.fla) from the course download area or use your own graphics. The file has a soccer ball and a soccer player.
Take a peek at the Timeline under the Stage and you'll see that the first 15 frames are of the soccer player kicking the ball.
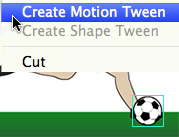
Our job is to animate the ball flying across the Stage after it is kicked by the player. Select the ball on frame 15 only, then right-click (PC) or Control-click (Mac) the selection.
In the menu that appears, choose Create Motion Tween. (You can also choose Insert > Motion Tween from the top menu).
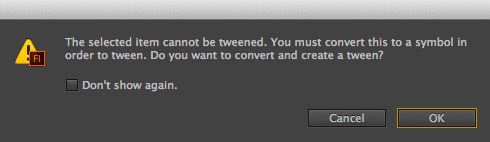
A dialog appears, warning you that your selected object is not a symbol. Animate asks you whether it can convert the current selection to a symbol. Click OK.
Motion tweens require you to use an instance of a symbol. If you were to right-click/Control-click an instance, you would not get the warning dialog.
Animate automatically converts the ball into a movie clip symbol which is stored in your Library panel. A movie clip symbol is just another kind of symbol (we learned about graphic symbols in the previous lecture.) Animate also converts the current layer to a Tween layer so you can animate the instance. Tween layers are special layers reserved for motion tweens, so no drawing is allowed in the layer. Tween layers are distinguished by a special icon in front of the layer name.
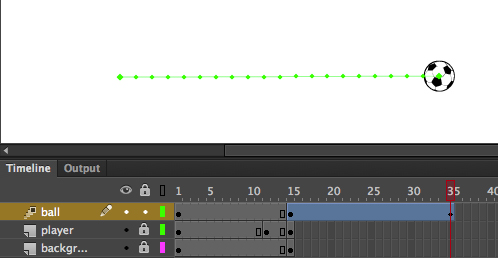
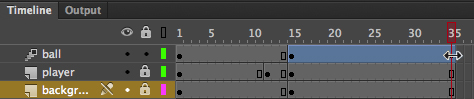
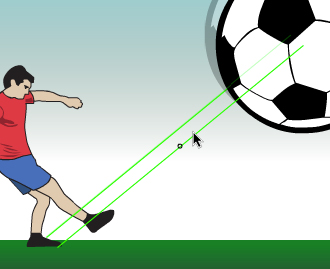
Now go to frame 35 and choose Insert > Timeline > Keyframe. The red vertical line represents your playhead and the current frame that is displayed on the Stage. Move the red playhead by dragging it to the end of the span of frames in the motion tween (called a tween span) at frame 35. Move the instance of the ball to a new location on the far right of the Stage.
There are two indicators that your ball will move across the stage. The diamond in the last frame of the tween span indicates a change in position, and there is a colored, dotted line on the stage.
A small black diamond appears on the Timeline at the end of the tween span. This represents a keyframe at the end of the tween. The change in position is also represented on the Stage by a colored line with dots. Each dot on the line indicates the position of the instance at every frame.
Animate smoothly interpolates the change in position from the first keyframe to the last keyframe. To play your animation, press the Enter or Return key, or choose Control > Play. You can also press the play button from the integrated controller at the bottom of the Timeline.
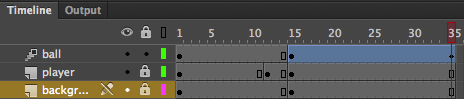
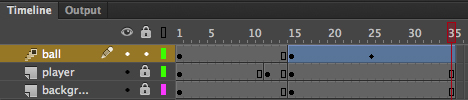
Now there's something not quite right about the animation. The ball animates by moving across the Stage, but the soccer player and the background disappears. The soccer player disappears because the last frame he is on is frame 15, so you need to add additional frames to the layer. To add frames to a layer, select frame 35 in the player layer. Choose Insert > Timeline > Frame (or F5). Do the same for the background layer. Animate adds frames up to the selected frame.
Play your animation again, and the image in the player layer and background layer should now be visible for all 35 frames. (To delete frames, select a frame and choose Edit > Timeline > Remove Frames, or Shift+F5.)
Adjusting a Motion Tween Changing Pacing and Timing
If you want to make the ball move faster or slower, you need to change the number of frames between the beginning and ending keyframes in the tween span. If there are fewer frames in between the beginning keyframe and the ending keyframe, then the ball moves across the Stage in a much quicker time. If there are more frames between the keyframes, then the ball has more time to make the journey.
To shorten the tween span, and thus the frames between the keyframes, simply move your cursor close to the end of the tween span. Your cursor changes to a double-headed arrow, indicating that you can lengthen or shorten the tween span. Click and drag the end of the tween to frame 12. Now the ball moves faster, and the motion tween ends at frame 12. (To lengthen the duration of the tween span, drag the end to the right to increase the number of frames.)
Our document is 24 fps or 24 frames per second. Shortening the tween span from 20 frames to 10 makes the ball cross the stage in half a second.
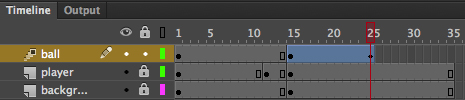
To add more frames so the ball still remains visible for all 35 frames, even after it has stopped, choose frame 35 in the tween layer and choose Insert > Timeline > Frame (or F5), or simply hold down your Shift key and drag the end of the tween span out to frame 35.
Notice that the final position hits in frame 25, then the ball stays in place through frame 35.
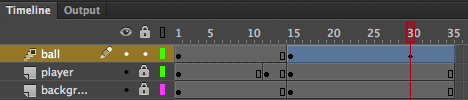
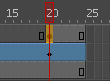
What if you want to move the position of the keyframe, while keeping the total amount of time of the animation the same? You can move the keyframe (the black diamond within a tween span) by holding down your Command key (Mac) or Ctrl key (PC) and selecting the keyframe. Once selected, you can move it within the tween span. In our example, I've moved the ending keyframe to frame 30.
Remember, a frame is just a unit of time, while a keyframe is a special frame that indicates that there's a change on the Stage at that point in time.
Changing Scale and Rotation
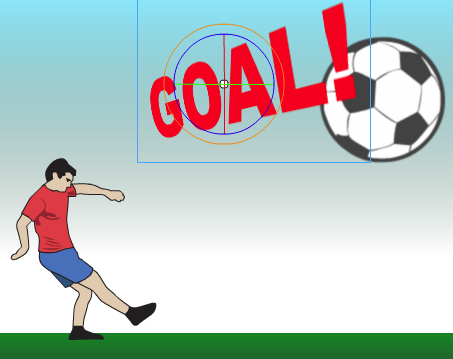
The motion of the ball across the Stage isn't that realistic, because it just slides to the right. To add more realism, we'll rotate the ball as it moves. And to add more excitement, we'll enlarge the ball as it moves so it appears to come toward us.
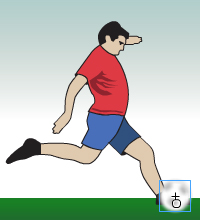
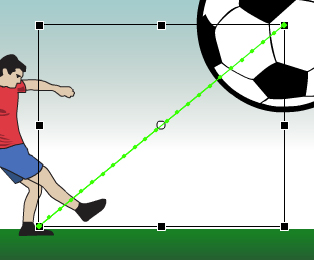
Move your red playhead to the last keyframe (frame 20 if you followed my last example) and select the ball. Choose the Free Transform tool. Control points appear around the soccer ball, allowing you to rotate or scale the graphic. Click and drag the corner control point to rotate the ball just about 90 degrees. Click and drag the corner control point outward to make the ball bigger. Hold down the Shift key to constrain the proportions of the ball so it doesn't become distorted.
Play your animation (Enter or Return key), and you'll see that the ball now moves, rotates, and enlarges all at the same time! There's no need to tell Animate to do any additional tweening, as it automatically interpolates the new changes to the object in the last keyframe.
Changing Color Effect and Filters
Changing an instance's position, scale, and rotation are the core properties of motion tweening. If you want to get a little more sophisticated, you can also tween the color effect and filters.
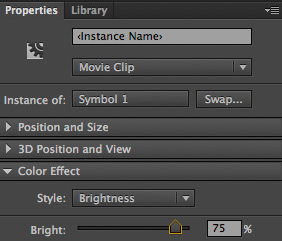
The color effect can change an instance's color, brightness, or transparency. Filters can add bitmap effects such as a blur or a drop shadow. Let's refine the tween of our soccer ball by making it begin with a brighter, blurrier appearance, so it looks as if it is being kicked from a far distance.
Move your red playhead back to frame 1, and select the soccer ball with the Selection tool. In the Properties inspector, under the Color Effect section, choose Brightness in the dropdown menu. Move the slider or enter a numerical value to change the brightness level to 75%.
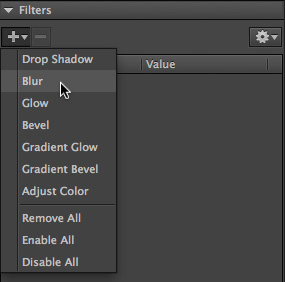
In the Filters section, click the "Add filter" button in the upper left corner of the panel.
In the menu that appears, choose Blur. The Blur filter is added to the Properties inspector, and you can change the amount of blur in the horizontal (Blur X) direction as well as the vertical (Blur Y) direction. If the chain link icon is unbroken, the horizontal and vertical blur are constrained and will change together. Change the blur values to 10 pixels.
Your ball in the first keyframe is now bright and blurry.
Now move your playhead to the last keyframe and select the soccer ball. You'll see that your soccer ball is bright and blurry. In the Properties inspector, change the Brightness level to 0% and the Blur values to 0 pixels. In the last keyframe, your ball should be normal brightness and in sharp focus.
Play your animation (Enter or Return key) to see how much more exciting the motion tween has become; the ball flies into your face! For fun, try exploring the Drop Shadow filter. If you animate the distance of the drop shadow, the ball can really look like it is coming off the page.
The Free Transform tool, the Selection tool, and the Subselection tool can be used to adjust a motion path.
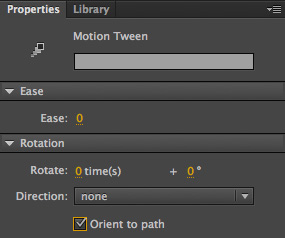
Choose Orient to Path whenever your object has a distinct head that should follow the path first.
You can choose to view and edit only keyframes by specific properties (such Position, Scale, and so on.)
The 3D Rotation tool can be used on any movie clip symbol.
Carefully observe real-life objects in motion to better understand how to ease an animation.
The Motion Editor panel provides detailed, and sometimes complex, easing options. For very basic options, you can use the Ease section of the Properties inspector.
Nested animations must be viewed by testing the movie from the Control menu or Ctrl+Enter (PC)/Command+
Return (Mac).
Break apart text into shapes (Modify > Break Apart) to create shape tweens.
Use a series of keyframes and shape tweens to create complex morphing.
Shape tweens cannot be made on symbols.
Carefully designated shape hints help you control the behavior of your shape tweens.
Working with Motion Paths
So far, the soccer ball moves in a straight line. Surely this soccer player can "bend it like Beckham" and put a little spin on the ball to make it curve?
You can easily change the path of the motion. Choose your Selection tool and click once on the motion path (the colored dotted line on the Stage) to select it. Now click and drag the motion path to move the entire path to a different place on the Stage. This will change both the beginning and ending spots of the tween.
If you want to change the entire scale or rotation of your path, choose the Free Transform tool and select your motion path. The control points appear around the motion path, and you can scale or rotate the path of the motion as desired.
To make the path curved, first make sure your path is not selected. Choose the Selection tool and move it close to the path, but don't click. A curved icon appears next to your cursor indicating that you can edit the path. Click and drag the path to change the curvature.
If you want more precision, choose the Subselection tool, and click and drag the anchor points or the handles of the anchor points on the path.
Orienting Objects Along the Path
Sometimes you will be animating an object that needs to travel with its head oriented along a path. (A soccer ball doesn't have a head or a tail, so the direction in which it travels along its path doesn't really matter.)
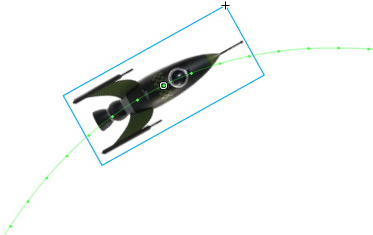
If you were moving a rocket ship or a car around the Stage, it would need to be oriented correctly, otherwise it would just appear to be sliding around. Use the rocket download in your course download area to follow along with this sidenote.
To orient an instance along its path, select the motion tween on the Timeline or the motion path on the Stage. In the Properties inspector, select the Orient to path option.
Flash automatically inserts keyframes for rotation so the object is oriented correctly along its path during the entire course of the motion tween.
Below is the result of orienting an object on a path. Zoom!
Managing Keyframes Property Keyframes
OK, back to our soccer example. So far we have animated the soccer ball by introducing changes in position, scale, rotation, color effect, and filters along a timeline.
What we have created is still a fairly simple motion tween because all of those properties change at the same time. They all begin at frame 1, and they all end at the keyframe in frame 35. Changes in properties are independent of each other, and do not necessarily need to be tied to the same keyframes. You could define one keyframe for position and another keyframe for a color effect.
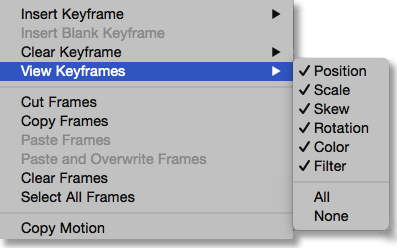
Managing so many different keyframes can be overwhelming. However, there are a few tools in Animate that can help. When you view the tween span, you can choose to view the keyframes of only certain properties. Right-click (PC) or Control-click (Mac) on a tween span in the Timeline, choose View Keyframes, and you can choose just the desired property on the list.
You can also insert a new keyframe that is specific for a property that you want to change. Right-click/Control-click a tween span in a specific frame, and then choose Insert Keyframe and the desired property.
Keyframes are very important for understanding how control the timing of your animations. And timing in animation is everything.
Animating Text
Let's say we wanted to add a title to this exciting animation. But we want the title to only appear close to the very end, when the soccer ball is nearly in our face.
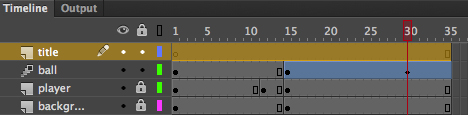
First, we would need to add a new layer for our title. Let's insert a new layer to the top of the layer stack and rename it "title". When we add a new layer, the first frame shows us an empty circle, which represents an empty keyframe.
If you started to add some text in this new layer, we would see it immediately in the first frame. Instead, you need to add another keyframe at the point in time when you want the title to appear.
Select frame 20 of the title layer. Right-click (PC) or Control-click (Mac) and choose Insert Keyframe. A new, empty keyframe (empty circle) appears in frame 20.
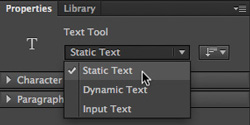
Now, select the Text tool , and in the Properties inspector, choose an interesting font, size, and color. Choose "Static Text" from the dropdown menu at the top of the Properties inspector.
Click the Stage and begin typing your text. When you're finished, exit the Text tool by clicking elsewhere on the Stage or by choosing the Selection tool.
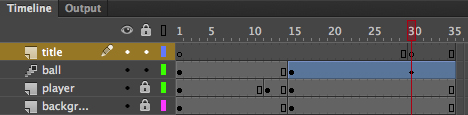
The newly created text appears in the title layer only at frame 35, and is visible until there are no more frames in that layer. So the title layer contains two keyframes: an empty keyframe at frame 1 and a filled keyframe at frame 35.
If you want to move a keyframe around, simply click it to select it. Your cursor will show a box icon to indicate that you can move the selected keyframe. Drag your keyframe to a new position on the Timeline.
Changing Objects in 3D Space
In addition to animating the position, rotation, scale, color effect, and filters applied to an object, you can animate an object in three-dimensional space! For example, you could imitate the opening text crawl that appears at the intro of every Star Wars movie, or you could animate fluttering confetti at a parade by rotating a rectangle in 3D.
Let's animate your title in 3D. First, convert your title to a Movie Clip symbol (Modify > Convert to Symbol). Enter a descriptive name for the symbol and select OK. With the Selection tool, right-click (PC) or Control-click (Mac) the symbol instance on the Stage, and choose Create Motion Tween.
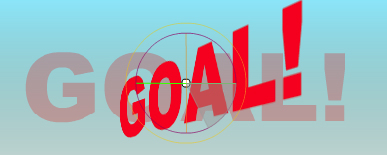
Now choose the 3D Rotation tool and select your text. Colored rings and lines appear over your text, which allow you to rotate the text around three different axes: x, y, and z. The red line represents the x-axis, the green line represents the y-axis, and the blue circle represents the z-axis. The orange circle lets you move the text freely about all the axes at once. Click and drag to explore how the text can rotate in 3D. Rotate the text so that it is severely tilted and only appears as a sliver to the viewer.
Move the playhead to the last frame of the Timeline, and move the text in 3D so that it faces the viewer.
Play your animation (Return or Enter key) to see how the text suddenly appears at frame 35 and rotates in 3D!
Understanding Easing
Easing refers to the way a motion transitions from its beginning value to its ending value. In the most basic sense, you can think of easing as acceleration or deceleration. A car may take a long time to build up speed from a still position, and it may gradually come to a stop. Motion that begins slowly is called an ease-in. Motion that ends gradually is called an ease-out.
You can apply ease-ins and ease-outs by selecting your tween on the Timeline and change the Ease value in the Property inspector. A positive ease is an ease-out and a negative ease is an ease-in.
You can apply more complex eases, and refine your motion tweens in great detail, with an advanced panel called the Motion Editor.
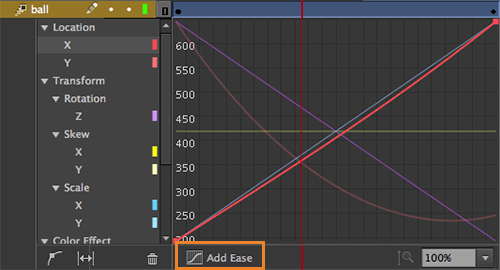
Simply double-click the motion tween span on the Timeline, or right-click/Ctrl-click on the tween on the Timeline and choose Refine Tween. Animate expands your tween to show how the different properties of your object change over time. Choose the property you want to apply an ease to, and click the Add Ease button at the bottom.
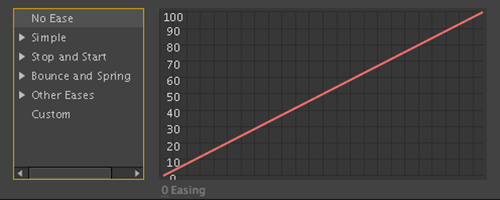
The different eases vary from very simple to complex. While it's beyond the scope of this course to get into all the ways you can manipulate easing with the Motion Editor, be aware that you can accomplish all sorts of complicated motions with this advanced panel. Just click on the Add Ease button below and to the left of the graph to get the following panel.
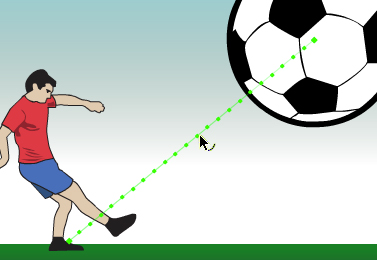
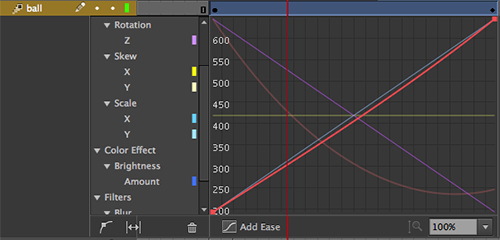
Below is an example of our soccer player kicking the soccer ball with easing added to the ball.
The Motion Editor displays how all the values of your instance's properties are changing in time with graphs. The graphs that connect one keyframe to the next keyframe are usually straight lines, which means that the change from one value to the next proceeds linearly (the same amount of change occurs at every time interval).
Select the motion tween of your soccer ball in the Timeline and click the Motion Editor tab to view how the graphs for your tween appear.
You can expand or collapse any of the categories on the left-hand side by clicking the triangles, and you can change how much of the graphs are visible with the viewing options at the bottom of the Motion Editor.
For this lesson and in your next exercise, it's best to apply simple eases from the Property inspector. When your skills as an animator develop, re-visit the Motion Editor to learn more sophisticated ways of controlling movement.
Nested Animations
As we discussed at the beginning of this lesson, you'll sometimes encounter the challenge of creating animations in which there are internal parts moving within the main object. Think of a car moving along on a road while its wheels turn, or a butterfly flying around while its wings flap. You can approach these kinds of motions using nested animations.
A nested animation is when the instance of your motion tween contains another motion tween. You can use symbols within symbols (like a Russian doll) to create much more complex animations.
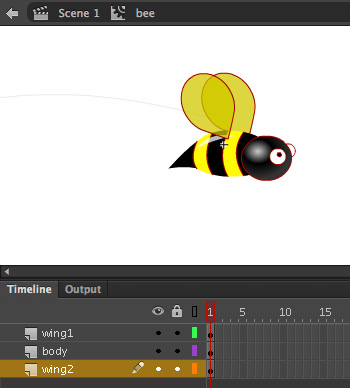
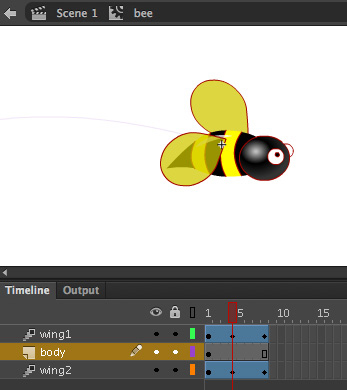
Look at this example of a bee buzzing across the Stage. It's a simple motion tween where the instance of the bee changes position from left to right. You'll add a nested animation of the bee's wings buzzing up and down as it moves.
Download my starting bee file in the course downloads area. In this file, I already have a motion tween set up for the bee flying across the stage, but his wings aren't moving yet.
So let's first edit the symbol of the bee. Recall that you can edit a symbol by double-clicking its icon in the Library panel.
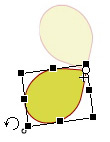
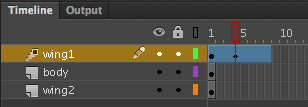
Inside Symbol Editing mode for the bee symbol, note that the bee is separated into three different layers: the top layer contains an instance of a wing symbol, the middle layer contains the body, and the bottom layer contains another instance of a wing symbol.
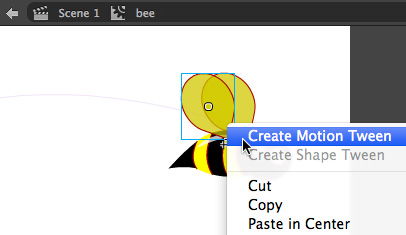
You can create a tween inside the symbol of the bee; the process is exactly the same as if you were creating a tween on the Timeline of Scene 1. Right-click (PC) or Control-click (Mac) on the wing in the top layer and choose Create Motion Tween.
A tween span is created with one second of frames. Drag the end of the span back to frame 8 so the animation will move quickly. Choose the Free Transform tool and select the wing. See the small white circle in the middle of the forearm? That is called the Transformation Point. Move the Transformation Point to the bottom wing joint so you can rotate it around that point. In frame 4, rotate the wing so it points downward.
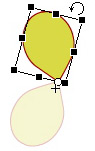
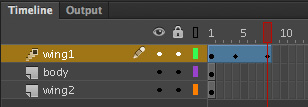
In frame 8, rotate the wing back up so it points upward in the same position as frame 1.
Create a similar motion tween for the second wing in the bottom layer. You might want to reverse the positions of the wings, however, so in frame 1 the wing points downward, in frame 4 the wing points up, and in frame 8 the wing points downward again.
Add enough frames to the body layer so the body is visible during the entire motion tween. Your animation inside the bee symbol is complete! Play your animation (Enter or Return key) and see the flapping of the bee's wings. Return to the main Timeline by clicking Scene 1 above the Stage.
Now, if you play your animation (Enter or Return key), you'll be disappointed because you won't see the nested animation of the wings rotating while the bee moves across the Stage.
Where did your animation go? Your animation is inside a movie clip symbol, and a Movie Clip's Timeline is independent of the Scene 1 Timeline. That means that the animation inside your movie clip will run continuously no matter what's happening on the Scene 1 Timeline. That's a good thing, since you'll want the wings to be buzzing whether the bee is moving or even just standing still in a single keyframe.
To preview a project that has animation inside Movie Clip symbols, you must choose Control > Test Movie > in Animate or using the key command Ctrl+Enter (PC) or Command+Return (Mac). A new window opens that displays the published SWF file, which automatically loops. The bee moves across the Stage at the same time its wings flap. The new window is the exact size as your Stage and shows what your audience would see. When you're finished viewing your preview, you can close the window.
Below is the final version with the wings flapping as the bee flies across the stage.
Get familiar with the menu location and key command for testing a movie. You can use this anytime you like to see your animation at actual speed and with all features in action.
Now that you've learned all about motion tweening and how to modify the tween, animate filters, and add easing to the tween, I'd like to introduce you to yet another useful type of tweening.
Shape Tweening
If you want to animate something whose contours change organically, such as the flicker of a flame or a drop of water, it's very difficult to do with just the Free Transform tool and motion tweening of symbol instances.
In these kinds of animations, you should use shape tweening, a technique that allows you to animate the stroke and fill of shapes. Shape tweening does not require symbols, and it relies on an older approach of animating in which you establish a beginning keyframe and an end keyframe with a shape tween applied to the frames in between.
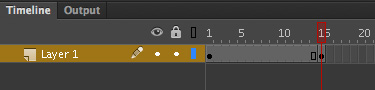
To create a shape tween, first draw the initial shape in a beginning keyframe. In this example, I've drawn an oval with a blue gradient on the Stage in the first keyframe of Layer 1 to represent a drop of water.
Next, select a frame later on the Timeline and right-click (PC) or Control-click (Mac) and choose Insert Keyframe to establish a new keyframe. The new keyframe (filled black circle) contains a copy of the contents of the previous keyframe.
The second keyframe, on frame 15 in my example, is currently a duplicate of the first keyframe.
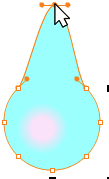
Choose the Subselection tool and change the contours of the oval so it has a point at its top. Move the entire shape lower on the Stage.
You now have two keyframes on the Timeline, each containing a different shape. In any frame in between the two keyframes, right-click (PC) or Control-click (Mac) and choose Create Shape Tween. You can also choose from the top menu, Insert > Shape Tween.
Animate creates a shape tween in between the two keyframes, represented by a green span and a forward pointing arrow on the Timeline. The shapes automatically animate smoothly from the first keyframe to the next, so you see the circle in the first frame slowly turning into the droplet in the last frame.
You can add additional keyframes and insert shape tweens in between the keyframes to continue animating the morphing of the water droplet as it falls and hits the floor. Use any tools necessary to make the shape change, and use the Subselection tool if you really want to get precise.
You can change any of the characteristics associated with shapes: not just the contours of the shape, but the color of the fill (including its gradient or alpha values), and the color and width of its stroke. So, a puff of smoke could change shape and change color from dark gray to a transparent light gray as it dissipates in the sky. However, you can't shape tween the type of gradient—that is, you can't animate a linear gradient to a radial gradient.
On the right is an example of the water drop using shape tweening:
If you want to change the pacing of your shape tween, it's as simple as moving the keyframes closer or farther apart from each other, just as you've done with motion tweens. Select a keyframe and drag it to a new location on the Timeline.
Shape tweens use a different animation model than motion tweens. So many of the features of motion tweens are unavailable for shape tweens. For example, you can't edit (or even see) the path of motion for a shape tween.
Download and study my example of a match and its flame from the course download area. Notice that not only do the contours of the flame shape change, but the way the gradient is applied to the fill and the transparency of the gradient changes. The combination of these techniques help make the flame pulse and flicker and appear more realistic:
You can also combine techniques. The shape tween of the flame is actually inside of a movie clip symbol (remember nested animations from the previous chapter?). I've moved the movie clip instance on the Stage using a motion tween, and the shape tween of the flame continues to animate.
Using Shape Hints
Sometimes Animate gives unpredictable results when you try to tween one shape to another. It can be frustrating when your shape flips and undergoes strange contortions to get from the first shape to the next. It's best if the changes you make are simple. Use multiple keyframes to get from one shape to another rather than try to accomplish the change within a single tween. If that doesn't work, you can also use shape hints to help you refine shape tweens.
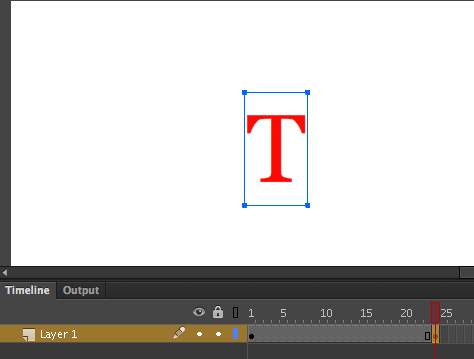
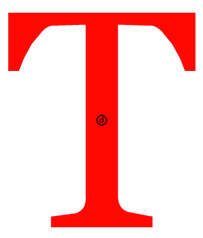
Shape hints are markers that you place on the beginning and end shapes in a shape tween. The markers tell Animate which points on the beginning shape should correspond to the points on the end shapes. Shape hints force Animate to map corresponding points, which can help make the tween proceed in the manner that you want it to. Let's see how shape hints work by creating a shape tween of the letter "I" morphing to the letter "T".
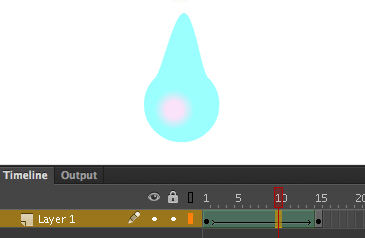
In a new file, select the Text tool, and create a capital letter "I" on the Stage. Use a font style that has a serif, like Georgia or Times New Roman, and a large font size. Select frame 24 on the Timeline, and insert a new keyframe (F6). You should now have letters in two keyframes, one in frame 1, and another in frame 24.
In the keyframe at frame 24, double-click the letter "I" and change it to a "T".
Since shape tweening requires shapes, you must break apart your text. Select the letter "I" in the first keyframe and choose Modify > Break Apart (Command/Ctrl+B). The letter breaks apart into a shape.
Break apart the letter "T" in frame 24 as well.
Right/Control-click a frame between the two keyframes and choose Create Shape Tween. Animate creates a shape tween between your two keyframes. Press Enter/Return to see the animation. The letter "I" morphs to the letter "T", but it goes through some unsightly intermediary shapes in the process!
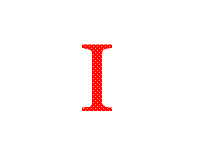
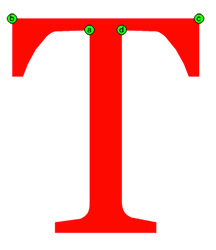
Let's see if shape hints can help. Select the first keyframe. Choose Modify > Shape > Add Shape Hints. A small circled letter "a" appears on the Stage. Make sure that the Snap to Objects option (magnet icon) at the bottom of your Properties inspector is selected. That ensures that, when you move your shape hint, it sticks to the edges of your shape. Move your first shape hint to the inner corner of the letter "I".
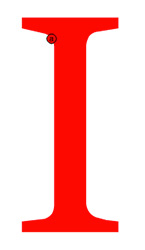
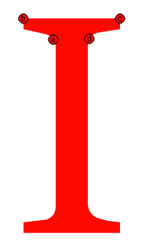
Add three additional shape hints, which appear as a small circled "b", "c", and "d". Move the "b" to the top left corner, the "c" to the top right corner, and the "d" to the other top inner corner.
Now select the last keyframe, which contains corresponding shape hints, though they are all stacked up, so you'll only see the last shape hint, "d".
Move all four shape hints so they are on corresponding corners of the letter "T". Your shape hints will turn color, indicating that they have been placed correctly.
Now press Enter/Return to preview your animation. Voila! The shape hints force Animate to make the transformations to match the corresponding points on the beginning and ending shapes. The letter "I" now elegantly morphs to the letter "T".
Shape hints can be cumbersome to use, but when you're in a bind, a few well-placed hints can sharpen an otherwise messy shape tween.
Learn how to create static and animated mask layers to reveal specific parts of the Stage. Learn how to combine masked layers for sophisticated animation effects. Learn how to create frame-by-frame animation and make your character look like they're talking. Learn how to add basic interactivity using JavaScript Snippets.
Discussion
Share
your thoughts and opinions about motion tweening, managing keyframes, and more, with other students at the Discussion Board.
Exercise
Create a storyboard and record the narration for your animation. Demonstrate your ability to apply the basic animation techniques taught in the lesson.


 Now, select the Text tool
 If you want to move a keyframe around, simply click it to select it. Your cursor will show a box icon to indicate that you can move the selected keyframe. Drag your keyframe to a new position on the Timeline.
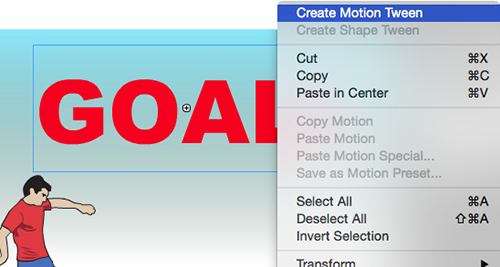
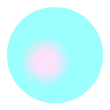 To create a shape tween, first draw the initial shape in a beginning keyframe. In this example, I've drawn an oval with a blue gradient on the Stage in the first keyframe of Layer 1 to represent a drop of water.