OK, let's draw! How do we do that in Animate? Well, it's important to understand how computers display graphics. There are two primary ways to draw with the computer: with vectors or with bitmaps. Vectors represent drawings with mathematical formulas, while bitmaps represent drawings with tiny little colored dots called pixels.
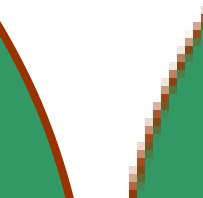 |
| Vector drawings stay smooth when zoomed (left). Bitmaps show quality loss when zoomed (right). |
Animate is a vector-based drawing program. When you draw a circle, for example, Animate remembers the image as a mathematical object of a certain radius, filled with a particular color and outlined in a particular color. When you zoom up on the circle, the program re-renders the curve with the mathematical formula and particular parameters of the circle, so it remains sharp without any loss of resolution.
When you zoom up on a bitmap circle, the pixels are fixed and there isn't enough information to render the curve without looking terrible. We say that vector drawings are "resolution-independent" and bitmaps are "resolution-dependent." This is important to keep in mind because you may be using both vector drawings and bitmap images in Animate, and you should understand the effects and limits of scaling (making the images bigger or smaller).
Drawing: Strokes and Fills
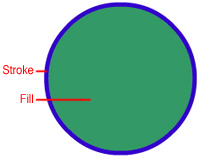 The key to Animate's drawing tools hinges on two important concepts: the stroke and the fill. (If you are an Adobe Illustrator user, these concepts will be familiar to you.)
The stroke is the outline of an object while the fill is the inside color of the object. The stroke and the fill are independent of each other, so you can select, delete, or edit the stroke separately from the fill. When you draw a shape, you'll always select the properties of the stroke and fill first, and then draw the shape on the Stage.

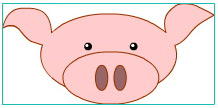
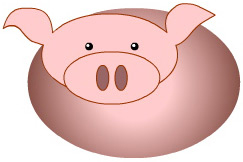
Let's begin by using simple shapes: ovals and rectangles. In this lecture, we'll draw a cute pig to learn to use the various drawing and editing tools.
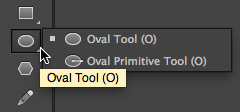 Click the Oval tool from the menu of additional tools. A small triangle at the corner of a tool indicates additional related tools hidden under it.
When you select the Oval tool, more options appear in the Properties inspector and at the bottom of the Tools panel. At the bottom of the Tools panel, make sure that the Object Drawing mode is not selected.  Object Drawing mode is represented by the oval icon just above the magnet icon at the bottom of the Tools panel. If it is light gray, it is not selected, and if it is dark gray and outlined, it is selected.
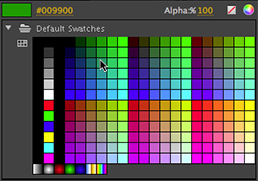
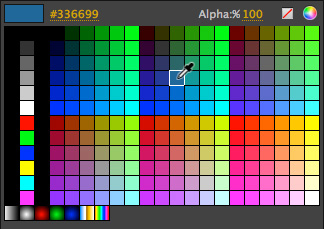
In the Properties inspector, or at the bottom of the Tools panel, let's choose a dark brown color for the stroke and a nice pink color for the fill. For the stroke, click the color chip below the pencil icon. In the color palette that appears, you can choose from the "Web safe" colors or click the color wheel at the top right if you want access to more colors. You can also choose the icon with the diagonal red line if you want no color, or change the transparency of the color by changing the Alpha value. After you choose a stroke color, click the color chip below the paint bucket icon and select a fill color.
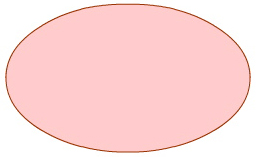
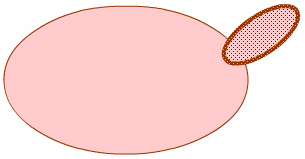
Now click and drag on the Stage to define an oval for your pig's face. Congratulations, you've just created your first shape!
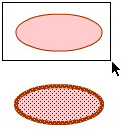 |
| Drag-selecting (top) and the selected shape (bottom). |
Now let's draw a second shape for his ear. Click and draw a smaller, thinner oval off to the side of the face. Choose the Selection tool  (you can access this tool by hitting "V" on your keyboard). To select a shape, drag the Selection tool around it, or double-click the shape. Both the stroke and the fill of the oval become highlighted in dots, indicating that they are selected.
Choose the Free Transform tool  ("Q"). A box with control points appears around the selected oval. The Free Transform tool lets you change the size or rotate a selection. Click and drag the control points to transform the selection; try stretching, squashing, or rotating it (click and drag close, but not over, the corner control points to rotate). Rotate the oval about 45 degrees so the pig's ears will be angled up.
Choose the Selection tool again and drag the small oval over the larger oval and click an empty part of the Stage to deselect it.
 |
 |
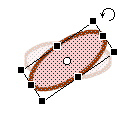
Rotating the ear with the Free Transform tool (left) and moving it into place with the Selection tool (right). |
The small oval will intersect the large oval. If you try to select it again and move it away, you'll see the overlapped portions have disappeared! Animate does this to save memory. The overlapped portions are not visible, so the program deletes them.
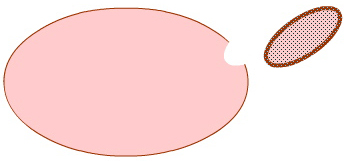
 There are other ways to maintain the integrity of your overlapping shapes, which you'll learn later in this lecture, but this behavior is actually a useful drawing tool. You can punch holes in shapes, or intersect strokes and fills to create new strokes and fills that you can move around and edit. Move the small oval back over the larger oval. Select the stroke that overlaps the pig's face (by clicking on it once with the Selection tool) and press the Delete key. The stroke is deleted, leaving the ear connected to the face with one continuous fill.
Create a second oval, rotate it, and move it over the face for the other ear.
Modifying Shapes
Let's refine the shape of the ears to make them appear more ear-like.
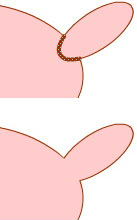
 Choose the Selection tool. Hold down the Alt key (PC) or Option key (Mac) and click and drag to create a new corner point. You can modify the contours of shapes by clicking and dragging on the sides of any shape. Push and pull on the sides until you get just the right curves.
Hey, now is a good time to mention undoing a step. If you're not happy with one of your changes, you can undo it by going to Edit > Undo or by pressing Ctrl+Z (PC) or Command+Z (Mac), same as most other programs you're used to.
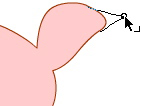
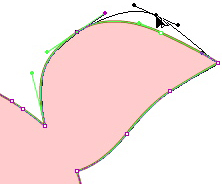
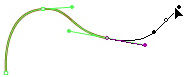
If you want more precision in modifying the ears, choose the Subselection tool  ("A"). This tool allows you to adjust the points that make up the path surrounding a shape. Click any shape once with the Subselection tool and control points around the shape appear. You can move the control points themselves and/or drag the handles of the control points to change the curves. Once you get the hang of it, this is a precise way to modify shapes.
Unhappy with the color of your pig? Modify the fill or stroke color with the Paint Bucket tool or the Ink Bottle tool. The Paint Bucket tool  ("K") changes the fill and the Ink Bottle tool
  ("S") changes the stroke. Simply select a new color for the stroke or fill in the Properties inspector. Then click the fill or the stroke you want to modify.
Using Groups
Groups are a way to keep several shapes together so you can move them as a unit, and prevent them from intersecting overlapping shapes. Group your shapes by selecting them and choosing Modify > Group. A blue rectangle appears around your group, and you can move the whole group as one object.
If you have several groups, you can control how they overlap each other by changing their stacking order. Choose Modify > Arrange, and choose whether you want the group to move forward or behind the other groups.
In this example, I've created a snout for our pig using several ovals, and made a group out of it.
I can move the snout over his face and not worry about having it mess up the face below. Groups help organize your drawing and will make it easier to manage a complex illustration.
To edit a group, double-click it with the Selection tool. The objects on the Stage around it dim, and you'll enter a temporary editing mode for your group. Edit the group as you need, and double-click the Stage to return.
To revert to a group's component parts, choose Modify > Break Apart or Ctrl+B (PC) or Command+B (Mac).
Creating Gradients
Gradients are a way to give a shape more depth and three-dimensionality. Gradients are a blending of one color to another. There are two kinds of gradients: linear gradients, in which the colors blend in a straight line, and radial gradients, in which the colors blend from inside to outside in a circular fashion.
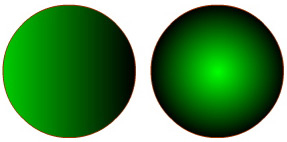 |
Linear gradient (left) and radial gradient (right) |
 |
The pig's face is grouped and selected. |
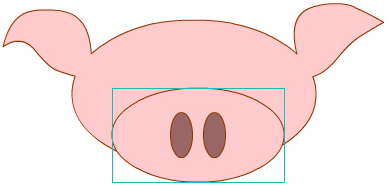
Let's create the pig's body with a radial gradient to make it appear round and plump. Select all the elements of the pig's face (I've added a few additional details to complete it, and you can too) and group it.
Choose the Oval tool and open the Color panel (Window > Color).

Click the Fill option (paint bucket icon) and choose "Radial gradient" from the dropdown menu. The gradient at the bottom of the panel shows how one color blends to the next. The positions of the color pointers determine how quickly or how gradually the colors blend. If the color pointers are close together, the colors blend very quickly. If the color pointers are far apart, the colors blend very gradually. Double-click the color pointer to change the color. Click the gradient to add additional colors. Drag the color pointers off the panel to remove them. For the pig's body, choose a pink color for the inside color and a darker pink for the outer color.
Create a large oval behind the pig's face. The fill of the oval shows a radial gradient from light to dark, with the gradient positioned at the center.
Modifying Gradients
You'll probably want to modify how the gradient appears in the oval. What if you wanted the gradient to be off-center? Or, the gradient to be more spherical than oval? You can use the Gradient Transform tool  ("F"), which is hidden below the Free Transform tool, to make those kinds of modifications to a gradient.
Click your pig's body with the Gradient Transform tool. Circular controls appear on the gradient. You can click and drag on the various controls to move the center, rotate, or scale the gradient. Explore how the different controls affect the way the gradient appears. In my example, I've moved the center of the gradient and expanded it slightly.

Aligning Objects
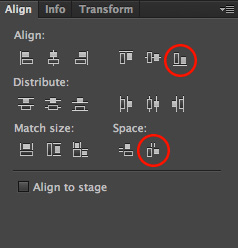
There are various ways in which you can align objects or space them evenly. You can use rulers (View > Rulers) or a grid (View > Grid > Show Grid) to help position objects on the Stage. You can also select an object and change its X and Y position in the Properties inspector. You can also turn to the Align panel (Window > Align), which has various options for vertical and horizontal alignment and distribution.
In the example below, I have the pig's four legs selected. The legs were created with the Rectangle tool with a linear gradient fill, and the hooves were pulled out of the bottom of the rectangle by holding down the Alt/Option key and using the Selection tool. I bisected the leg with the Line tool so I could fill the hoof with a different color than the leg.
Now, I want them all to be at the same baseline and evenly spaced from one another. In the Align panel, I can choose the "Align bottom edge" and "Space evenly horizontally" options, and Animate takes care of the job. If you want to align your selected objects relative to the Stage, select the Align to stage option at the bottom of the Align panel.
Freeform Strokes and Fills
What's a pig without his curly tail? We have one more feature to add to our illustration. For freeform shapes like a spiral tail, you can use the Brush or Pencil tool. The Brush tool  ("B") creates freeform fills and the Pencil tool
  (Shift "Y") creates freeform strokes. If you want to create straight strokes, choose the Line tool
  ("N").
 For the tail, choose the Brush tool. At the bottom of the Tools panel, additional options appear; you can select a different brush shape and a brush size. Keep the brush shape a circle, and experiment what works best for the brush size. Choose a darker pink fill color in the Properties inspector, and draw out your pig's tail. You can apply a stroke to the shape of the tail with the Ink Bottle tool if you want a little more definition.
Select your tail and make it into a group (Modify > Group) if you want to control its overlapping arrangement (Modify > Arrange) with the other parts of the pig. Shapes that are not grouped automatically appear behind all groups.
Select your finished tail and move it in place behind the pig and your pig illustration is done! Make sure to save him. We'll use him again in a moment.
Also, if you want to create your own curves for the tail or any addition to the pig (a hat, perhaps?), and already feel comfortable with other drawing tools, try the Pen tool  ("P"). The Pen tool allows you to create your own points and paths for precision shapes. It takes some practice to use effectively, but it's worth the effort. Click the Stage once with the Pen to start a curve, then click to define the next point. Click and drag to pull out the handles that define the curvature at that point. Continue clicking and pulling until you are back to your first point, them click to close the path. Now, like any other shape, you can add a stroke or fill, transform, modify, or delete as desired.
Dealing with Mistakes
You're bound to make mistakes along the way. Fortunately, Animate makes correcting those mistakes easy. You already know how to undo a step, Edit > Undo or Ctrl(PC)/Command(Mac)+Z. You can undo as many as 100 steps backward, but you can increase the number of steps available in Edit > Preferences (PC) or Animate CC > Preferences (Mac).
The History panel (Window > Other Panels > History) provides a visual way of seeing your steps. You can see the steps that you actually made, and undo them quickly by moving the slider on the left.
Importing Files
Because Animate is truly an application that can blend many forms of multimedia, the program is able to import many types of files, including:
 |
|
 |
| |
Vector files
- Adobe Illustrator (*.ai)
- Scalable Vector Graphics (*.svg)
- Shockwave File (*.swf)
Raster images
- Photoshop image (*.psd)
- JPEG image (*.jpg; *.jpeg)
- Bitmap image (*.bmp)
- GIF image (*.gif)
- PNG image (*.png)
Audio files
- AIFF sound (*.aiff; *.aif; *.aifc)
- WAV sound (*.wav)
- MP3 sound (*.mp3)
- Adobe Sound Document (*.asnd)
- Sun AU (*.sun; *.au)
- Sound Designer II (*.sd2)
- Ogg Vorbis (*.ogg; *.oga)
- Free Lossless Audio Codec (*.flac)
|
|
 |
|
 |
Animate can display both vector drawings and bitmap images. Use can use imported JPEGs or bitmap images to use as a reference to create your vector graphics for the background. To import a bitmap image, choose File > Import > Import to Stage. Select an image from your hard drive and click OK.
Adobe provides millions of roylaty-free images in their stock library, called Adobe Stock. You can pay for them by the photo or through a subscription with a monthly fee. The library also includes videos, graphics, and illustrations. If you choose to purchase a photo, follow the download instructions, import the image into Animate to either trace or use as a rastor image. You can also select the image, chose Modify > Break Apart Ctrl+B (PC), Command+B (Mac) and the photo will be converted to a vector object.
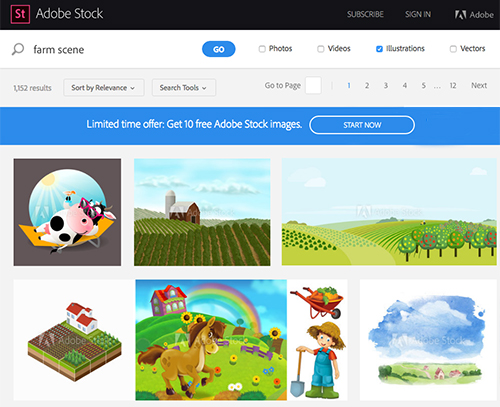
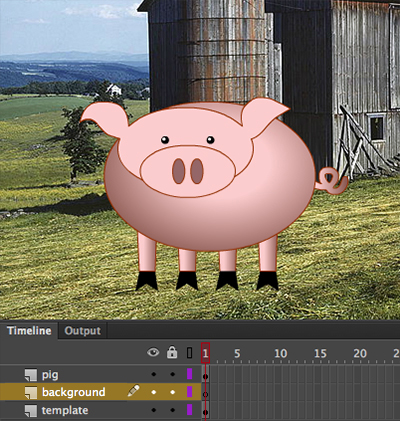
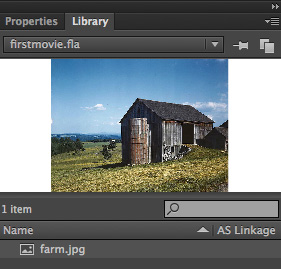
For this lecture, choose the provided file, farm.jpg, which is available in your course downloads. The image of a farm appears on the Stage and in the Library panel. Use the Selection tool to move the farm image around the Stage.
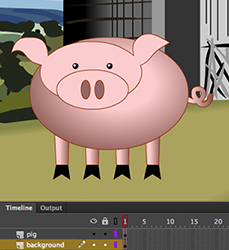
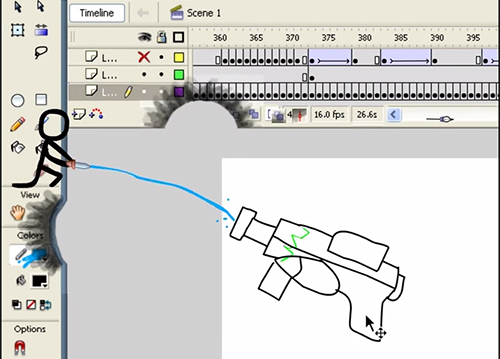
The farm likely covers the entire Stage, obscuring your pig. How could you place the farm behind the pig? Rather than using groups, we'll look at how you can use layers to control the overlapping order of your graphics.
Using Layers
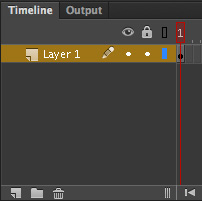
Layers help organize your content and control how your graphics overlap each other. Higher layers overlap the layers below them in the list. So far, you've been using a single layer called "Layer 1" for your graphic, and you've used groups to organize the different parts of the pig. But when you begin combining different elements—the farm background and the pig—it's more helpful to separate them on different layers. Separating your content with layers makes editing the various elements easy. We'll create a new layer and move the farm image to a separate layer by cutting and pasting.
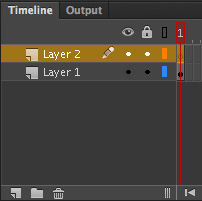
To create a new layer, click the New Layer button at the bottom of the Timeline.
 |
 |
Adding a new layer. |
A new layer appears above the existing one, called Layer 2. Do you notice the small circle to the right of the layers under frame 1? Layer 1 contains a filled circle, which indicates that the layer contains content. The newly created Layer 2 contains an empty circle, which indicates that the layer is empty. The circles are called keyframes, and they are important to show which layers are empty and which layers are not.
Select the farm image. Notice how Layer 1 becomes highlighted, showing you which layer contains the current selection. Choose Edit > Cut or Ctrl+X (PC), Command+X (Mac). Cutting a graphic copies it and deletes it at the same time. Select Layer 2, then choose Edit > Paste in Center. The keyboard shortcut for paste is Ctrl+V (PC), Command+V (Mac). The farm image appears in Layer 2, and the keyframe in Layer 2 becomes filled.
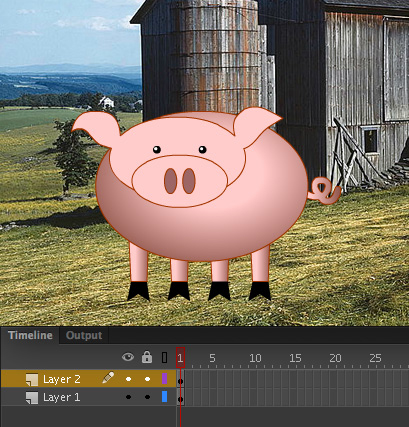
Click the Layer 2 bar in the Timeline and drag it below Layer 1. Your pig is now happily standing in front of a peaceful farm!
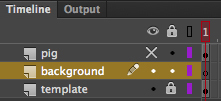
As your project grows in complexity, you'll eventually have many, many layers. Luckily, there are options that you can use to keep track of your layers and their contents. First, you should give more descriptive names to your layers. Double-click a layer name to rename it. Go ahead and rename your layers "pig" for the pig layer and "template" for the layer with the image of the farm. Second, you can hide, lock, or show the layer as outlines with the options above the layers.
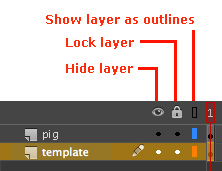
Click a dot below the eye icon to hide the layer. Click a dot below the lock icon to lock the layer so you don't accidentally move objects in that layer. Click a dot below the box icon to view the layer as outlines so you don't get distracted by colors or gradients. To delete a layer, select it and click the Delete button (trash can icon).
Practice Using the Drawing Tools
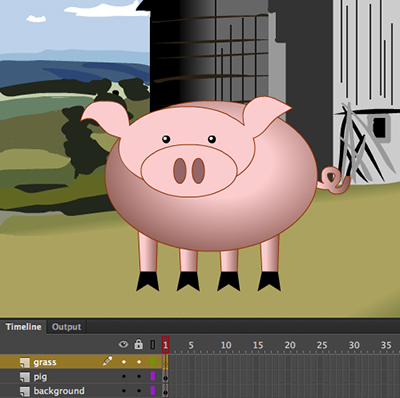
Now that you have been introduced to all of Animate's drawing tools, let's practice using them to recreate the farm image with a vector background. Let's start by creating a new layer called "background".
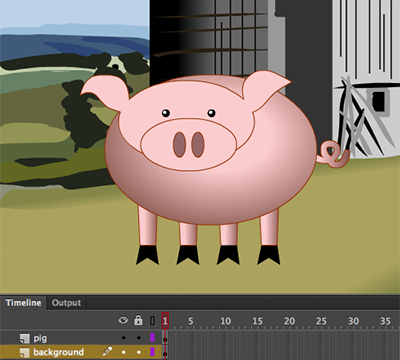
It would be a good idea to lock the template layer and also hide the pig layer in order for us to draw on the background layer. Your timeline should look like the image to the right:
Now let's start drawing. Use the brush tool and practice changing colors using the Color panel or Swatches. Another quick method of choosing colors, especially when using an imported image, is to use the Eyedropper tool  ("i"). Just click on the image with this tool and the color from the image will appear as your Fill Color. Use your own judgment on how detailed you want to be. The idea is to get used to using the drawing tools. But try and use as many as you can.
Also, remember to use the techniques you used drawing the pig, such as grouping, so you can keep several shapes together to prevent them from intersecting overlapping shapes. Use gradients to give a shape more depth and three-dimensionality, and add more layers if you need to.
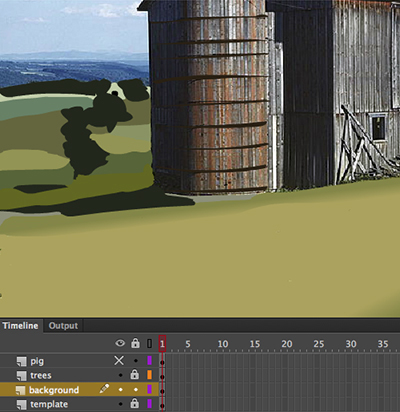
Here is how my drawing is looking. You can see that I used some gradient blends in the grass in the foreground and even created a new layer for the trees. Also, the lines on the silo are grouped so they won't intersect when I draw the wall.
Once you have completed your drawing of the background of the farm you can unhide the layer with the pig. Once you are done, the template layer will have served its purpose, so you can delete it.
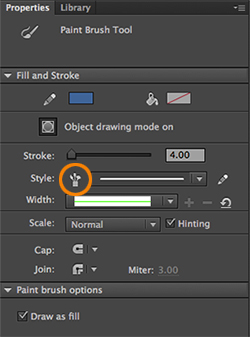
Paint Brush Tool
In addition to the Brush tool, Animate features a relatively new Paint Brush tool  ("y") that allows you to create a variety of stylized brush strokes that are called Art Brushes.
Like the Brush tool, the Paint Brush tool creates freeform vector fills. Art Brush strokes can be applied to existing strokes or select the Paint Brush tool to draw a path with a selected stroke applied to the tool.
You can adjust the attributes of the tool in the Properties inspector, such as selecting the color and the width of the stroke.
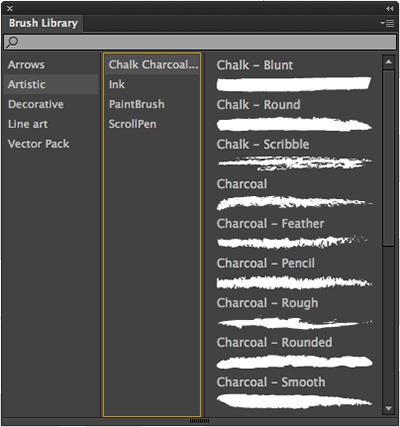
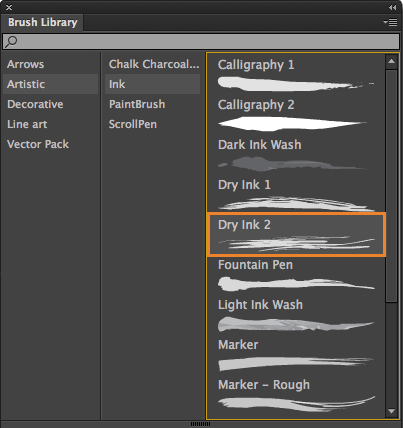
In the Style selection, there are some preset options of strokes available. However, if you select the Brush Library (orange circle) a new panel opens giving you access to the many Art Brushes (below).
On the left you have a main menu and then submenus that you can navigate through to find the right brush stroke that fits your needs. Among the variety of strokes available, there is also a large selection of decorative elements, such as arrows, text dividers, banners, and seals. Double click on the pattern you want to use and it will appear in the Style drop down menu in the Properties inspector. Take some time to explore and draw with the various Art Brushes.
You can use the Art Brushes when using the Pen, Line, Rectangle, and Oval tools. The Pencil tool can only use the default strokes.
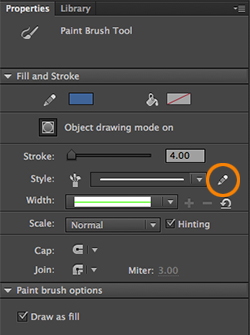
If you click on the Edit stroke style button (orange circle), a new panel called Art Brush Options appears, giving you more control over the appearance of your stroke.
If the Art Brush is applied to a stroke and you want to convert the stroke to a fill, select the stroke on the stage and click Modify > Shape > Convert Line to Fills.
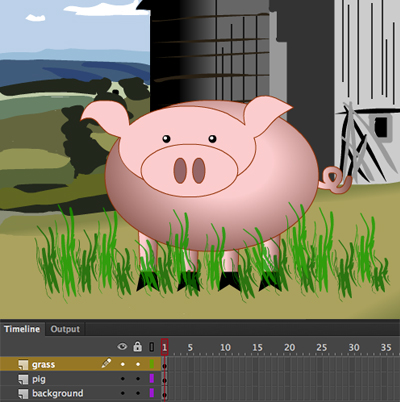
Let's explore the Paint Brush tool by adding some grass in front of our pig standing in front of the barn.
If you still have your "pig standing in front of the barn" project still open, create a new layer and call it "grass". Make sure it is the top layer.
Select the line tool and set the width at 24 pixels. Select a shade of green for the color. Draw a series of lines on your "grass" layer. Select a different shade of green and draw another series of lines.
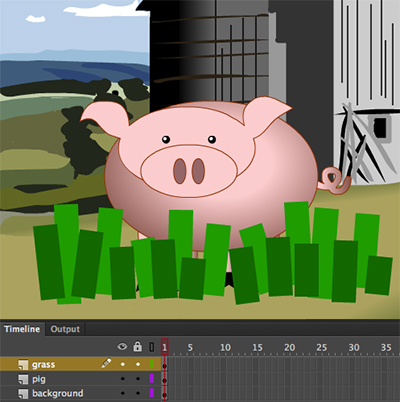
Click on the Brush Library button to the left of the Style pull down menu. Select Artistic > Ink > Dry Ink 2 and double click for it to appear in your Style menu.
Select all the lines that you have drawn for the grass and select the Style pull down menu and click the Dry Ink 2 brush. Now our pig has something to snack on!
Understanding and Using Symbols
Let's wrap up the lesson with a note about the power of symbols in vector artwork. (If you're an Illustrator user, you should be very familiar with this!)
Imagine that you were creating a forest. You could draw a tree and copy and paste that tree until you had enough of them for a forest. However, if you wanted to make a change to the trees, you would have to make that change to every single tree one at a time—not a fun or easy correction.
If your project calls for repeated elements, you should use symbols to create them! Symbols are objects that are stored in your Library panel. Symbols serve as the "master" from which you can make multiple copies, or instances. If you need to make a change to all your instances, you only need to modify the symbol in the Library panel. Let's see how this works.
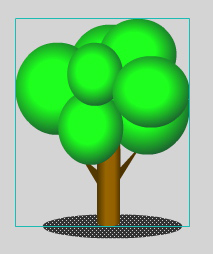 Make a new layer and drag it to the top of your layers. Click the first frame on that layer and draw a tree. You could use basic shapes (like the Rectangle and Oval tools) or try some freehand drawing (with the Pencil, Brush, or Pen). Group the tree (Modify > Group) and make sure the group is selected. In this example, I've also added a semi-transparent shadow below the tree.
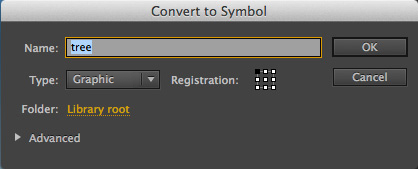
With the tree group and its shadow selected, choose Modify > Convert to Symbol. In the dialog that appears, enter a descriptive name, choose Graphic as the Type, and click OK. (Graphic symbols are the simplest kind of symbol. You'll learn about the other kinds of symbols in later lectures of this course.)
Your new symbol appears in the Library panel, and the selection that remains on the Stage becomes an instance of that symbol. An instance is a single usage of the symbol.
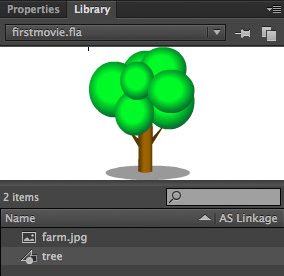
The language is a little misleading: The tree isn't really "converted to a symbol." The selected tree is simply put inside of a symbol. It's useful to think of symbols as containers. Like any container, a symbol can hold different content (graphics or bitmap images, for example), and you can modify a symbol's contents at any time.
Drag a few more tree symbols from the Library panel to the Stage. Now you have multiple instances of the tree. Choose the Free Transform tool to squash or stretch each instance so each one is slightly different from the other.
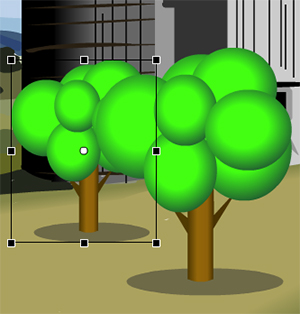
How do you edit a symbol? There are two ways to do so. Double-click the symbol icon for your tree in your Library panel, and you'll enter Symbol Editing mode. Your Stage changes to show the contents of your symbol and the gray horizontal bar above the Stage displays its name. Make your edits as desired. Try adding an extra branch and changing the color of the leaves, for example.
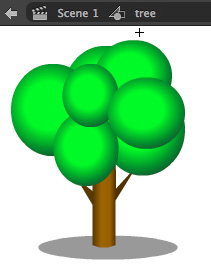
When you want to exit Symbol Editing mode, click the Scene 1 button in the upper left above the Stage and you'll return to the main Stage and Timeline, where all the instances will reflect the change you made to the symbol. Scene 1 is the default name of the main Stage and Timeline.
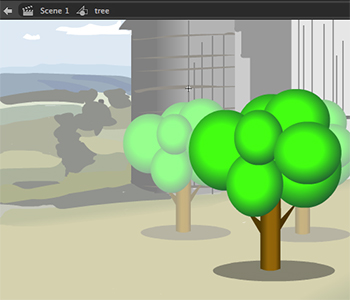
You can also double-click an instance of the symbol on the Stage itself. All the surrounding elements dim, and you'll enter Symbol Editing mode. Seeing the environment helps you make edits in context. This mode of editing is called Editing in Place.
To return to Scene 1, you can double-click the Stage again or click the Scene 1 button above the Stage. You should feel comfortable moving between Symbol Editing mode and Scene 1 because you'll be creating and editing symbols often. Symbols are important not only for repeated elements, but, as you'll see in upcoming lectures, for creating animations and interactivity.
My finished FLA file is available in your course download area if you would like to explore exactly how I created my layers, my pig, my trees, or any other elements of the project.


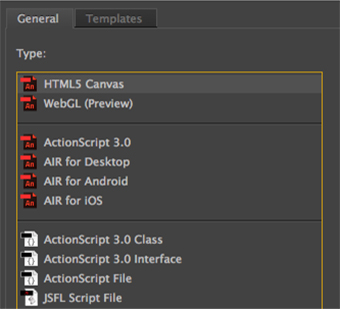 Open a new project in Animate by choosing
  After the new file opens, the first thing you need to do is to save your project. Choose